Build a Linear Console Table
An Easy to Build Console Table with Storage
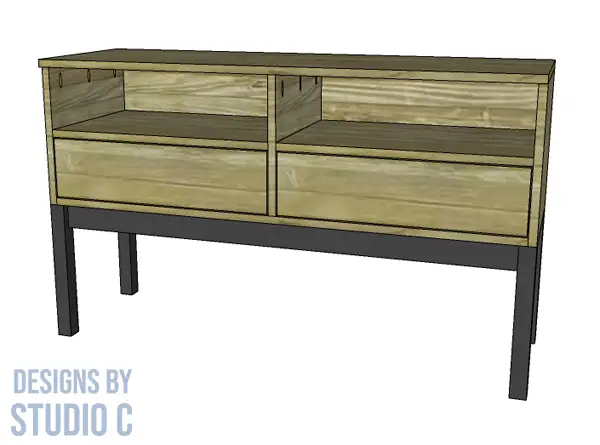
This console table is really cool in that it combines shelving and drawers for storage. The plans to build a Linear console table are super-easy, and the table can be finished however you desire!
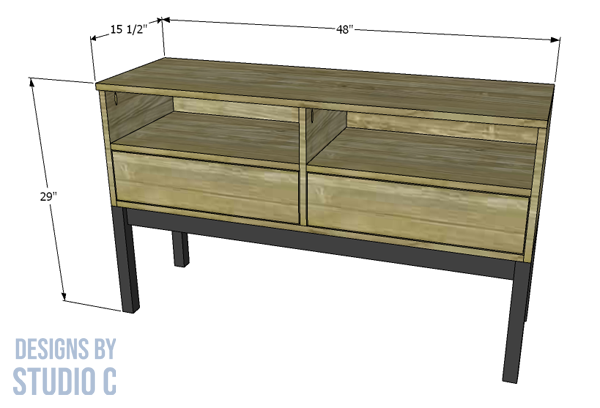
The plans are suitable for all skill levels and can be completed over a couple of weekends!
Materials:
- 1-1/4″ pocket hole screws
- 2″ brad nails
- 2-1/2″ screws
- Edge banding
- 2 – 14″ drawer slides (<– affiliate link!)
- Wood glue
- Sandpaper (80, 120, 220 grits)
- Finishing supplies
Lumber:
- 2 – 1×3 at 6′
- 2 – 1×4 at 8′
- 1 – 2×2 at 8′
- 1 – 4′ x 4′ sheet of 1/4″ plywood
- 1 – 4′ x 8′ sheet of 3/4″ plywood
Cut List:
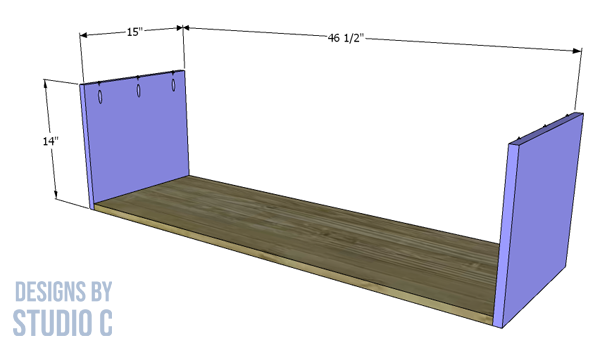
- 2 – 3/4″ plywood at 14″ x 15″ – Sides
- 1 – 3/4″ plywood at 15″ x 46-1/2″ – Bottom
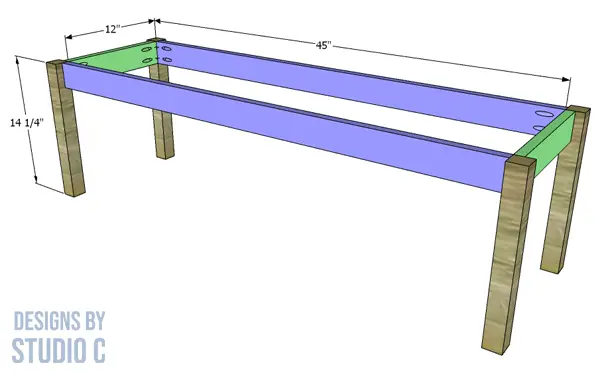
- 4 – 2×2 at 14-1/4″ – Legs
- 2 – 1×3 at 12″ – Base
- 2 – 1×3 at 45″ – Base
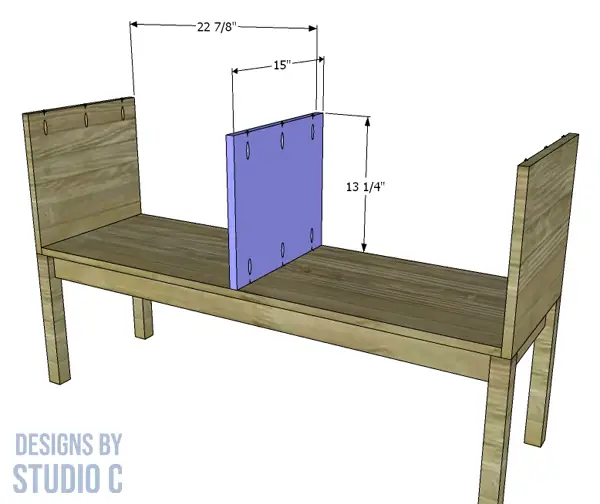
- 1 – 3/4″ plywood at 13-1/4″ x 15″ – Divider
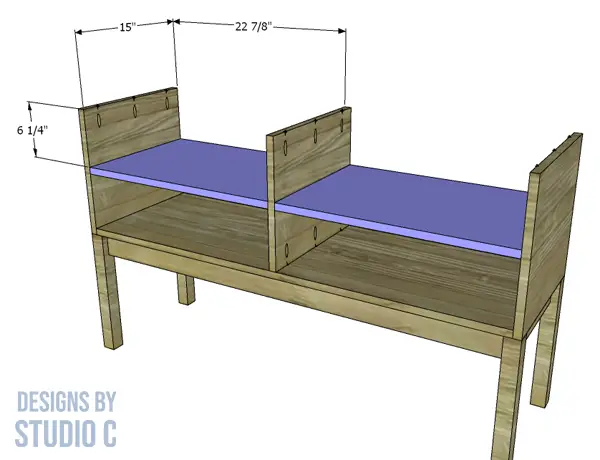
- 2 – 3/4″ plywood at 15″ x 22-7/8″ – Shelves
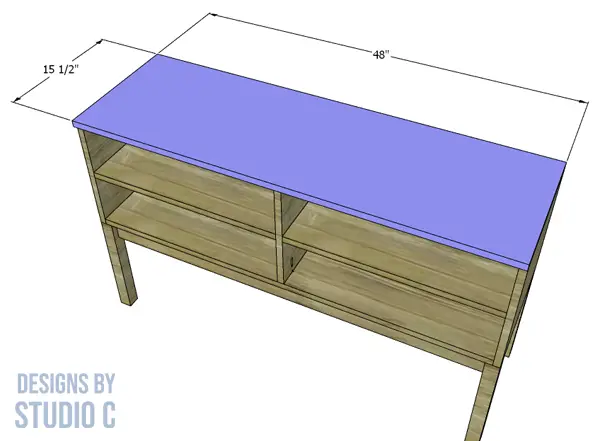
- 1 – 3/4″ plywood at 15-1/2″ x 48″ – Top
- 1 – 1/4″ plywood at 14″ x 47-1/4″ – Back
- 4 – 1×4 at 14″ – Drawer Boxes
- 4 – 1×4 at 20-3/8″ – Drawer Boxes
- 2 – 1/4″ plywood at 14″ x 21-7/8″ – Drawer Box Bottoms
- 2 – 3/4″ plywood at 6″ x 22-5/8″ – Drawer Fronts
Notes About the Project:
- Apply edge banding to the exposed edges of the plywood prior to assembly
- Sand all of the pieces before putting everything together
- Check out this post for an easy way to cut the plywood with less waste
Step One
Cut the pieces for the sides and bottom. With the pocket hole jig set for 3/4″ material, drill pocket holes in the top edge of the sides and each end of the bottom. Secure the sides to the bottom using glue and 1-1/4″ pocket hole screws.
Step Two
Cut the pieces for the legs and the base. Drill pocket holes in each end of the base pieces. Assemble the base as shown in the drawing using glue and 1-1/4″ pocket hole screws.
Step Three
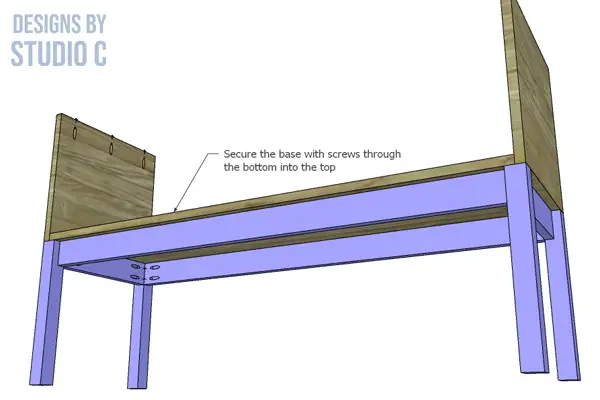
Apply a bead of glue along the top edges of the base. Secure the base to the bottom and sides, outside edges flush, using 2-1/2″ screws through the bottom into the top edges of the base.
Step Four
Cut the piece for the divider. Drill pocket holes in each end of the divider. Secure the divider to the bottom using glue and 1-1/4″ pocket hole screws.
Step Five
Cut the pieces for the shelves and drill pocket holes in each end. Secure the shelves to the sides and divider using glue and 1-1/4″ pocket hole screws.
Step Six
Cut the piece for the top. The top will overhang the front by 1/2″. Secure the top using a close-quarter drill, glue and 1-1/4″pocket hole screws.
Step Seven
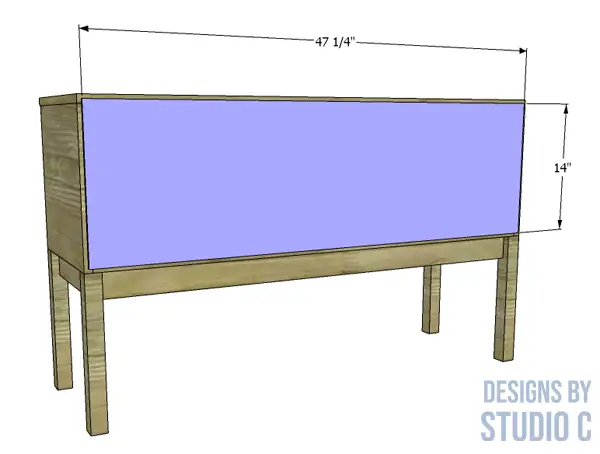
Cut the piece for the back. Secure the back using glue and 2″ brad nails.
Step Eight
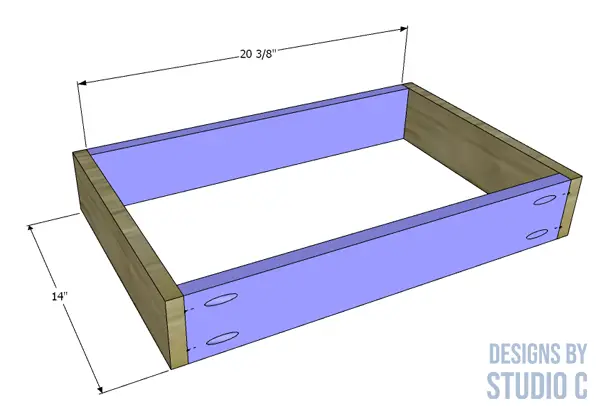
Cut the pieces for the drawer box, and drill pocket holes in each end of the shorter pieces. Assemble the drawer box using glue and 1-1/4″ pocket hole screws.
Step Nine
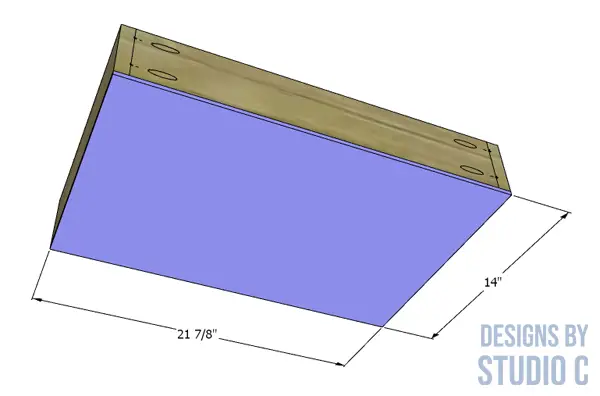
Cut the piece for the drawer box bottom. Secure the bottom to the drawer box using glue and 2″ brad nails.
Step Ten
Install the drawer slides according to the manufacturer’s installation instructions, locating them 3/4″ back from the front edge of the side and divider pieces. For an easy tutorial, click here. Install the drawer and adjust as necessary.
Step Eleven
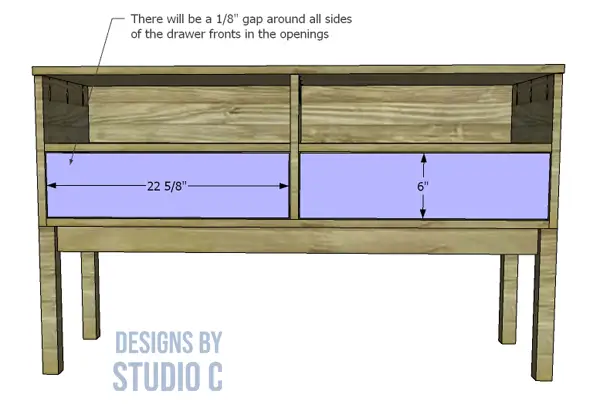
Cut the pieces for the drawer fronts. Apply hot glue to the front of the drawer box and shim the pieces in place with a 1/8″ gap around all sides. Open the drawer and secure the drawer front from the inside using 1-1/4″ screws.
Finish as desired.
Have questions about the plans to build a linear console table? Leave a comment below!

