A Fabulous Chair Plan with a Template for the Back Legs
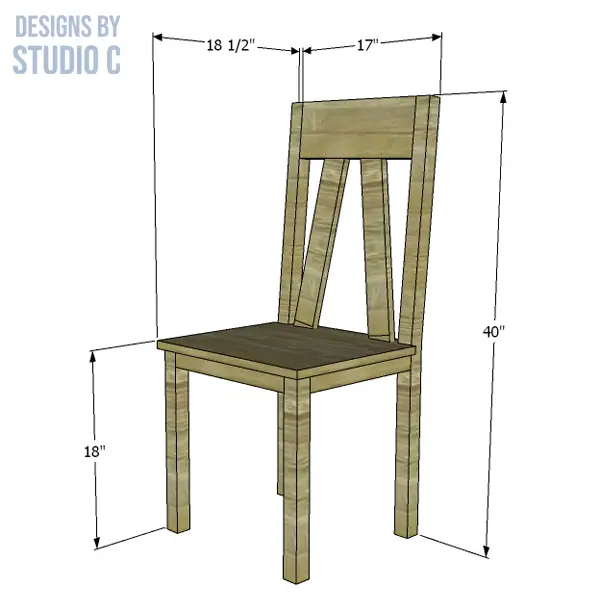
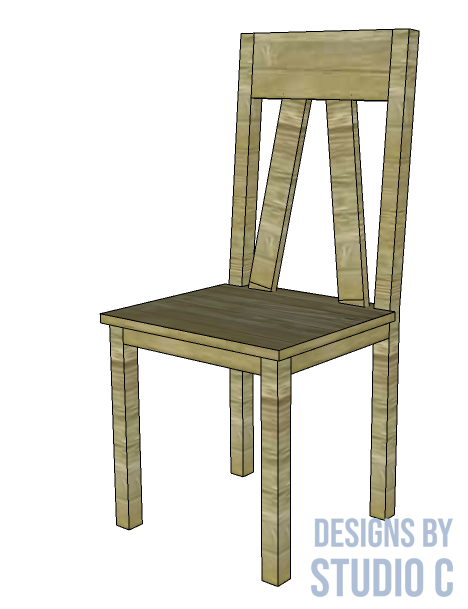
I’ve said it many times before – chairs are my favorite pieces to build! They are so versatile and fun, and the plans to build a Butler side chair are no exception! The back of the chair features angled panels, and the entire project can be completed in a few hours! These DIY wood dining chair plans are suitable for all skill levels!
Materials:
- 1-1/4″ pocket hole screws
- 2-1/2″ pocket hole screws
- 2″ brad nails
- Edge banding, optional (<– affiliate link!)
- Wood glue
- Sandpaper (80, 120, 220 grits)
- Finishing supplies
Lumber:
- 1 – 1×4 at 4′
- Scrap of 1×6 at 14″
- 1 – 2×2 at 8′
- 1 – 2×4 at 8′
- 1 – 2′ x 2′ sheet of 3/4″ plywood
Cut List:
- 2 – 2×4 at 40″ – Back Legs
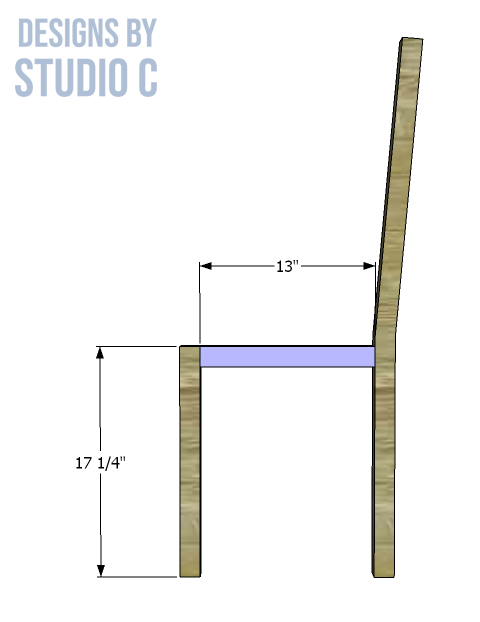
- 2 – 2×2 at 17-1/4″ – Front Legs
- 2 – 2×2 at 13″ – Side Stretchers
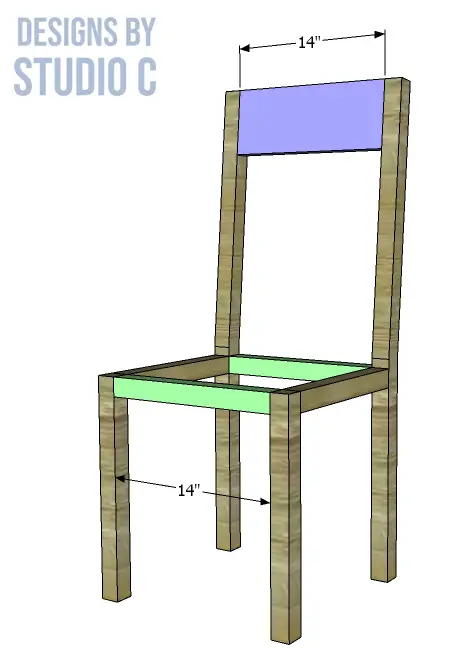
- 2 – 2×2 at 14″ – Front and Back Stretchers
- 1 – 1×6 at 14″ – Upper Back
- 1 – 3/4″ plywood at 16-1/2″ x 18″ – Seat
- 2 – 1×4 at 17″ – Back Panels
Notes About the Project:
- Sand all pieces prior to assembly
- The edge banding will be applied to the exposed edges of the plywood seat
- The link for the back leg template is in Step One
Step One
Cut the pieces of 2×4 for the back legs. Print out the templates, align the registration marks and tape the sheets together. If you plan on making several chairs, secure the paper template to a piece of poster board to make a sturdier template. Trace the template on the 2×4 pieces, stack the pieces then cut out using a jigsaw or a bandsaw.
Step Two
Cut the pieces for the front legs and the side stretchers. With the pocket hole jig (<– affiliate link!) set for 1-1/2″ material, drill pocket holes in each end of the stretchers. Assemble the chair sides as shown, using glue and 2-1/2″ pocket hole screws, noting that there will be a right and a left.
Step Three
Cut the pieces for the front and back stretchers, and the upper back stretcher. Drill pocket holes in each end of the stretchers, then set the pocket hole jig for 3/4″ material to drill pocket holes in each end of the 1×6. Secure the front and back stretchers as shown using glue and 2-1/2″ pocket hole screws. Secure the 1×6 to the top of the back legs using glue and 1-1/4″ pocket hole screws. The front face of the 1×6 will be flush with the front face of the back legs.
Step Four
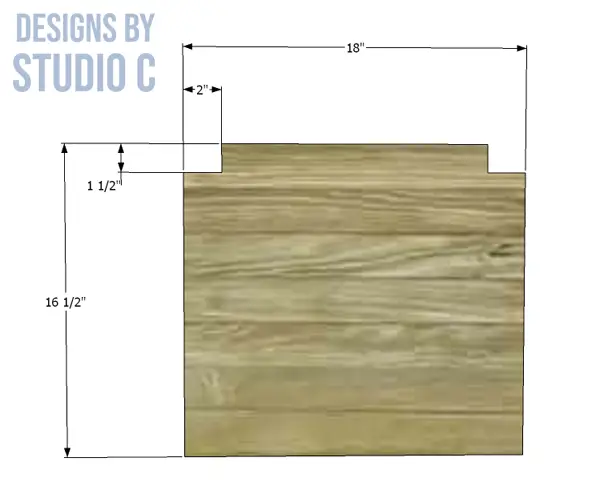
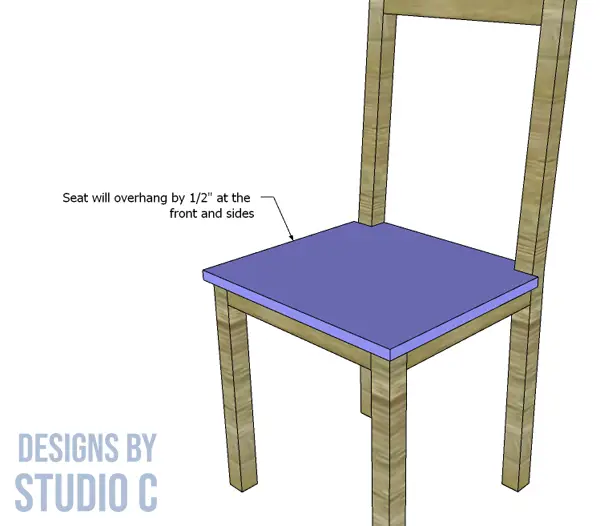
Cut the piece for the seat, and cut the notches using a jigsaw. Secure the seat to the frame using glue and 2″ brad nails with a pneumatic brad nailer (<– affiliate link!) connected to a compressor. The front and sides will overhang by 1/2″.
Step Five
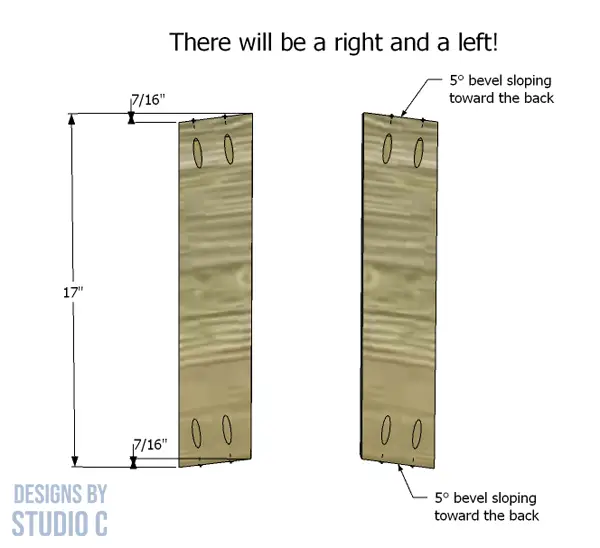
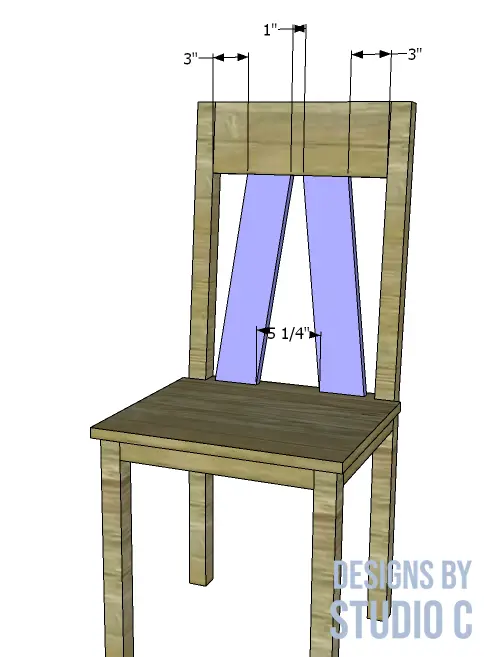
Cut the pieces for the back panel. Cut the angles in the top and bottom as shown, as well as a 5° bevel sloping toward the back at each end. Secure the panels to the seat with 1-1/4″ pocket hole screws but do not fully tighten the screws until the upper portion of the back panels are secured to the 1×6. Once the panels are secure, tighten the screws until they are snug.
Step Six
Fill all of the visible holes and sand when dry, then finish as desired!
Have questions about the how to build wood dining chairs or about the plans to build the Butler side chair? Leave a comment below!
Originally posted 2022-10-11 08:00:24.



Comments are closed.