
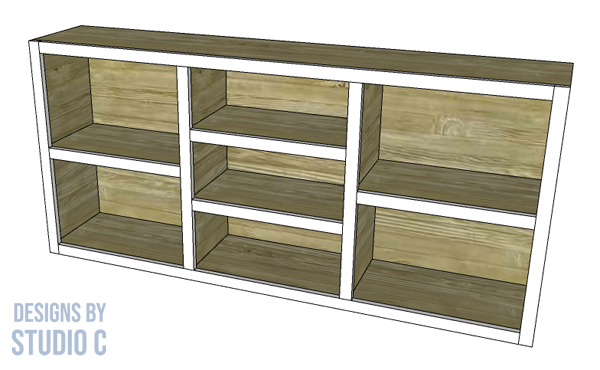
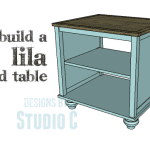
An Easy to Build Cabinet with Off-the-Shelf Boards
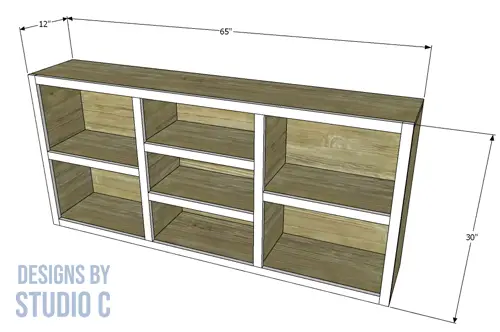
This fabulous cabinet is a super easy project for any skill level. The plans to build an Isabel storage cabinet features off-the-shelf boards (or plywood – your choice!) with a 1×2 face frame that can be finished in a different color.
Materials:
- 1-1/4″ pocket hole screws (<– affiliate link!)
- 1-1/4″ brad nails
- 2″ brad nails
- Wood glue
- Sandpaper (80, 120, 220 grits)
- Finishing supplies
Lumber:
- 4 – 1×2 at 8′
- 4 – 1×12 at 8′
- 1 – 4′ x 8′ sheet of 1/4″ plywood
Cut List:
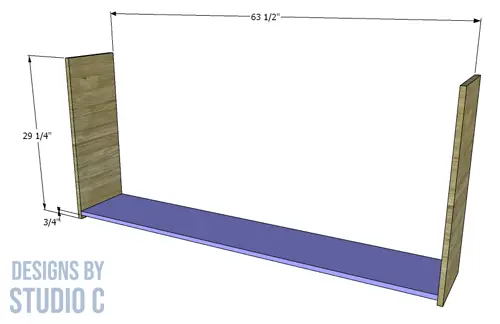
- 2 – 1×12 at 29-1/4″ – Sides
- 1 – 1×12 at 63-1/2″ – Bottom
- 1 – 1×12 at 65″ – Top
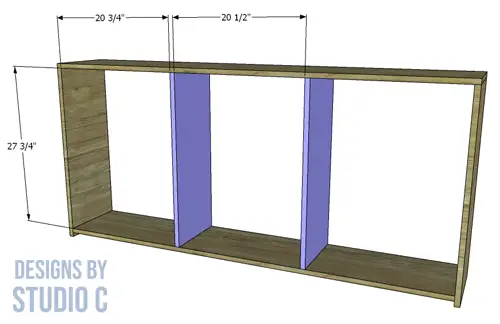
- 2 – 1×12 at 27-3/4″ – Dividers
- 2 – 1×12 at 20-3/4″ – Outer Shelves
- 2 – 1×12 at 20-1/2″ – Center Shelves
- 1 – 1/4″ plywood at 28-1/2″ x 64-1/2″ – Back
- 2 – 1×2 at 62″ – Face Frame
- 2 – 1×2 at 30″ – Face Frame
- 2 – 1×2 at 27″ – Face Frame
- 2 – 1×2 at 19-5/8″ – Face Frame
- 2 – 1×2 at 19-3/4″ – Face Frame
Notes About the Project:
- Sand all pieces prior to assembly.
- Pay close attention to the directions for the face frame!
- The face frame pieces and the cabinet can be finished separately before putting them together.
Step One
Cut the pieces for the sides and the bottom. Set the pocket hole jig for 3/4″ material and drill pocket holes in each end of the bottom. Secure the bottom to the sides using glue and 1-1/4″ pocket hole screws.
Step Two
Cut the piece for the top. Secure the top to the sides using glue and 2″ brad nails.

Step Three
Cut the pieces for the dividers and drill pocket holes in each end. Secure the dividers to the top and bottom using glue and 1-1/4″ pocket hole screws.
Step Four
Cut the pieces for the outer shelves and drill pocket holes in each end. Secure the shelves to the sides and dividers using glue and 1-1/4″ pocket hole screws.
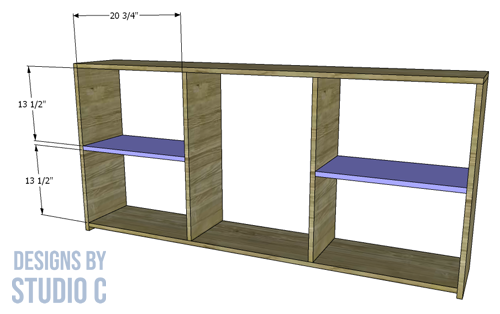
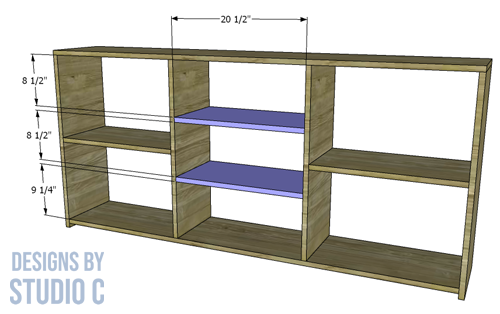
Step Five
Cut the pieces for the center shelves and drill pocket holes in each end. Secure the shelves to the dividers using glue and 1-1/4″ pocket hole screws.
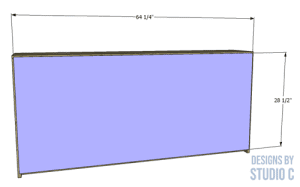
Step Six
Cut the piece for the back. Center the back piece on the cabinet and secure in place using 1-1/4″ brad nails.
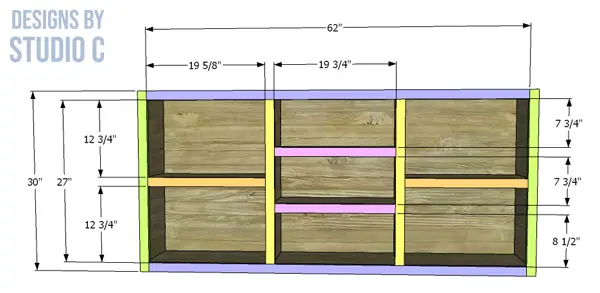
Step Seven
Cut the pieces for the face frame. Beginning with the top and bottom pieces (in blue on the drawing), secure them to the top and bottom of the cabinet using glue and 2″ brad nails. The top piece will be flush with the top of the cabinet while the top edge of the bottom will be flush with the bottom of the cabinet. Next, install the outer side pieces (in green on the drawing) which will be flush with the sides of the cabinet. Then, install the frame piece for the outer shelves (in orange on the drawing) with the top edge flush with the top face of the shelf. The next pieces to install are the divider pieces (in yellow on the drawing), which are centered over the edge of the dividers. Finally, install the frame pieces over the center shelves (in purple on the drawing) with the top face flush with the shelves.
Have questions about the plans to build an Isabel storage cabinet? Leave a comment below!


Comments are closed.