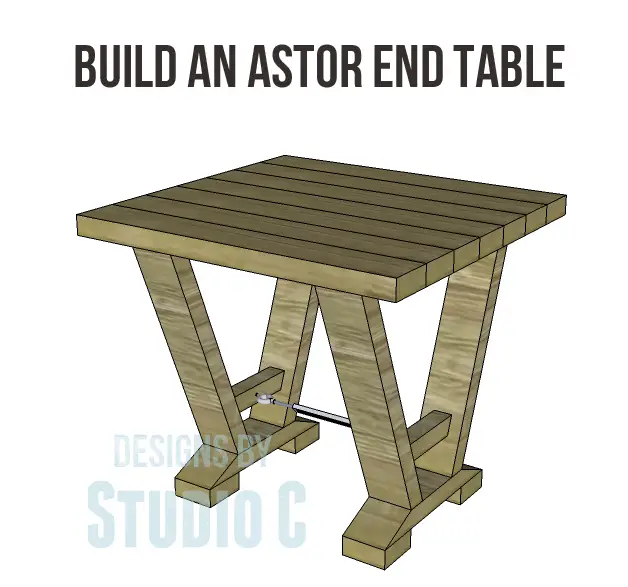
Build an Industrial Style Table with the Astor End Table Plans
Like the rustic industrial look? The Astor End Table Plans are for you! Super simple in construction (and very inexpensive, too!), this table will add that just right look to your decor! With a dark stain and a clear coat, this table will be stunning!
Materials:
- 2-1/2” pocket hole screws (<– affiliate link!)
- 2-1/2″ screws
- 1-1/4″ brad nails
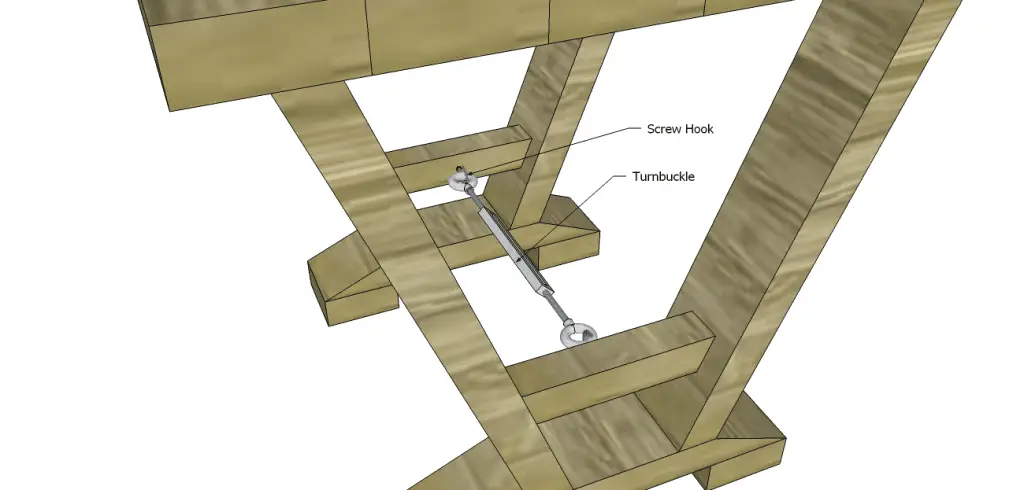
- 2 screw hooks, about 2″ long
- 1 turnbuckle (eye to eye, to fit hook to hook)
- Wood glue
- Sandpaper (100, 150, 220 grits)
- Finishing supplies (primer & paint, or stain, sealer)
Lumber:
- Scraps of 2×2 at 7-1/2″ each
- 4 – 2×4 at 8′
Cut List:
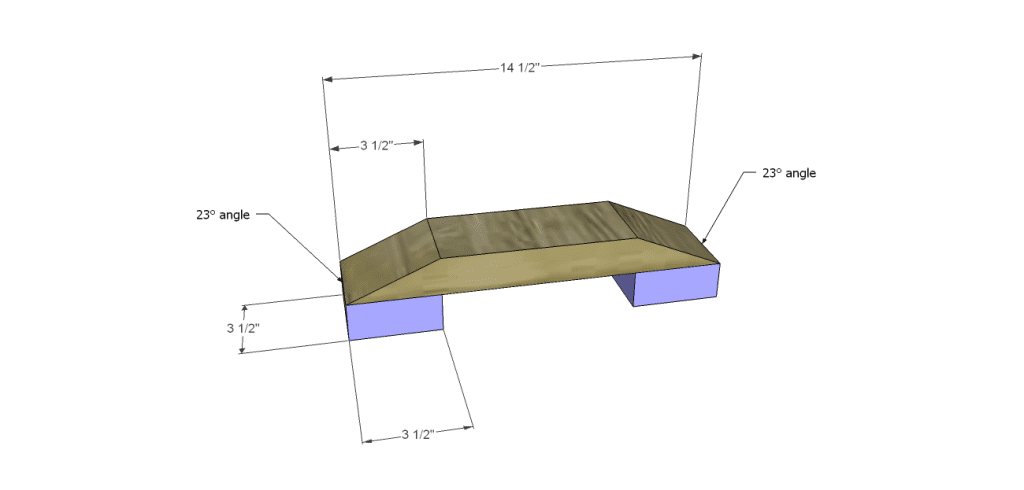
- 2 – 2×4 at 14-1/2″ – Base
- 4 – 2×4 at 3-1/2″ – Base Feet
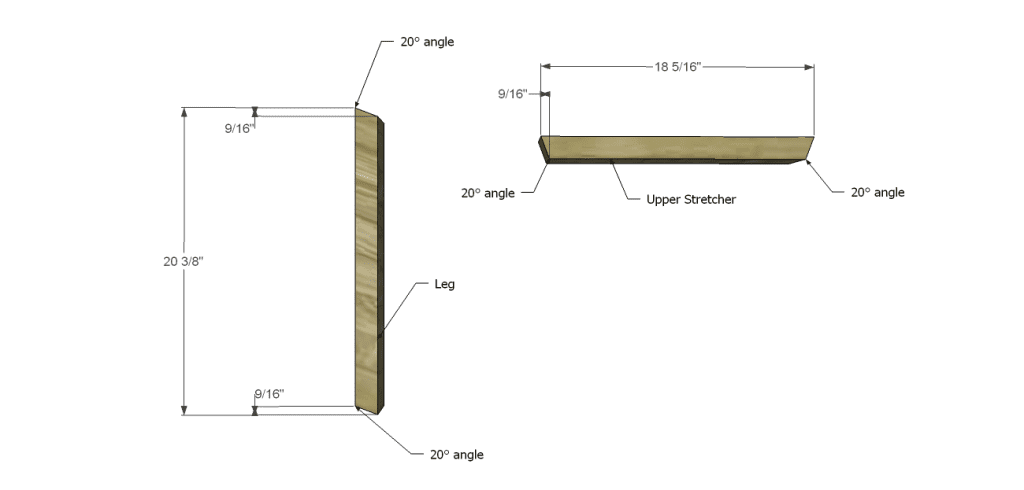
- 4 – 2×4 at 20-3/8″ – Legs
- 2 – 2×4 at 18-5/16″ – Upper Stretcher
- 2 – 2×2 at 7-1/2″ – Lower Stretcher
- 7 – 2×4 at 26″ – Top
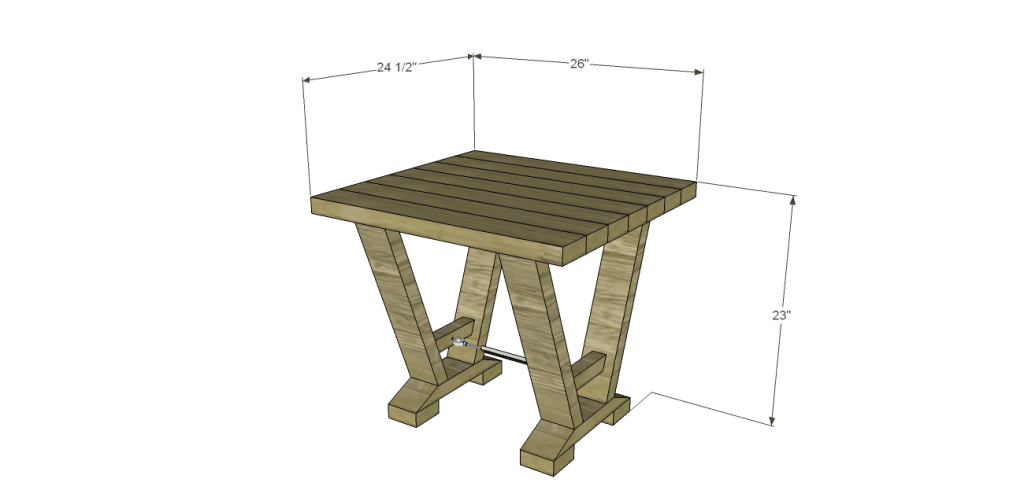
Notes:
The measurement in inches as well as degrees has been included for the angles.
Step One
Cut the pieces for the base and the feet. Cut the angles in each base piece at 23°. Secure the feet to the bottom of the base using glue and 1-1/4″ brad nails through the angles into the feet.
Step Two
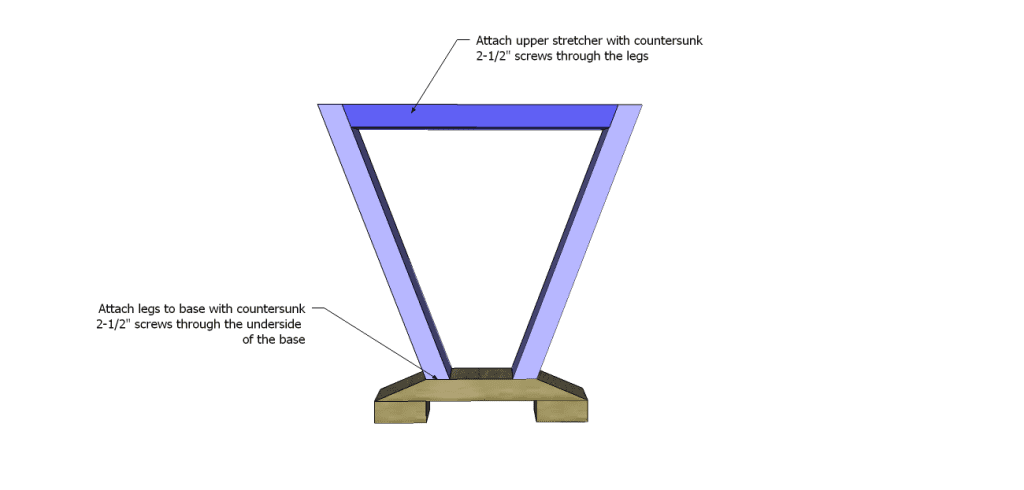
Cut the pieces for the legs and the upper stretchers. Cut the angles in each piece as shown at 20°. Secure the legs to the upper stretchers using glue and countersunk 2-1/2″ screws.
Attach the leg/stretcher assembly to each base using glue and countersunk 2-1/2″ screws.
Step Three
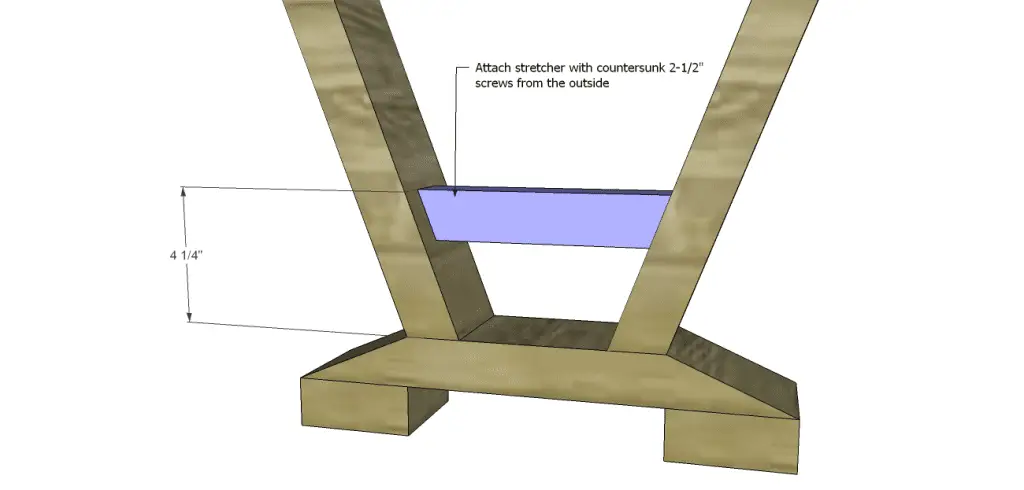
Cut the pieces for the lower stretchers. Cut the angles at 20°, the position in the center of the legs at the dimension shown. Secure to the legs using glue and countersunk 2-1/2″ screws from the outside of the legs.
Step Four
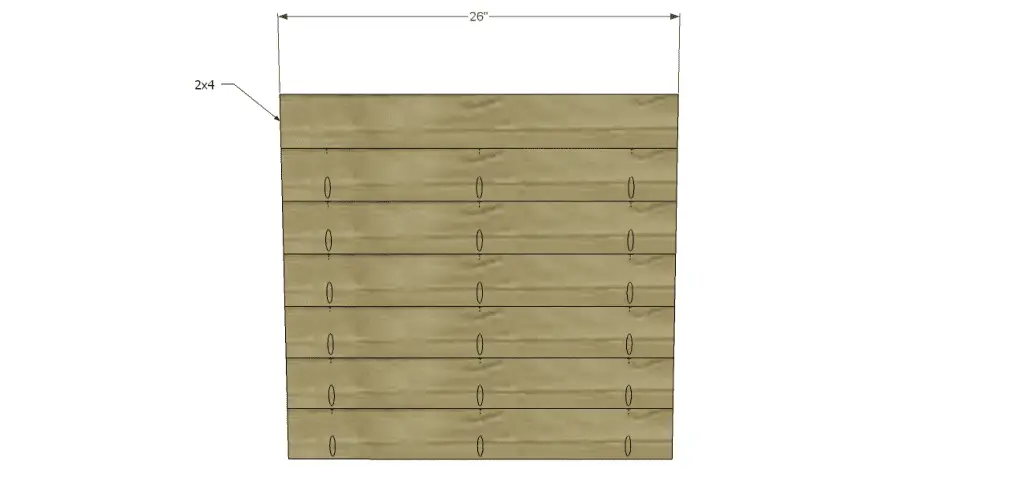
Cut the pieces for the top. With the pocket hole jig (<– affiliate link!) set for 1-1/2″ material, drill pocket holes in the pieces as shown. Assemble the top using glue and 2-1/2″ pocket hole screws.
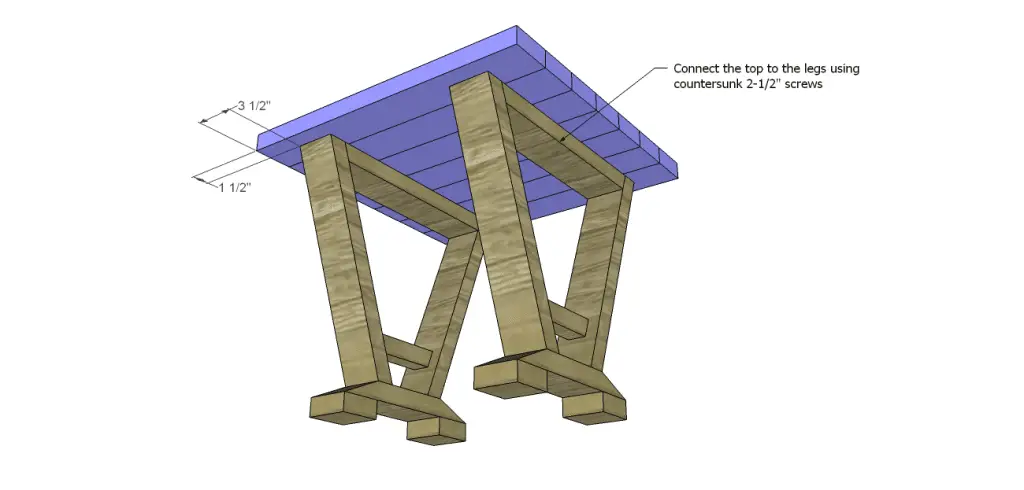
Spread glue on the top of the legs and upper stretchers. Position the top so that the sides over hang by 3-1/2″, and the front and back over hang by 1-1/2″. Secure in place using countersunk 2-1/2″ screws through the bottom of the upper stretchers in to the bottom of the table top.
Step Five
To install the screw hooks and turnbuckle, pre-drill a hole in the center of each lower stretcher facing to the inside. Install the screw hooks. Loosen the eye bolts on the turnbuckle, then hook each eye bolt over the hook. Adjust the turnbuckle as necessary. The turnbuckle is mainly for looks and doesn’t need to be tightened. It just adds to the industrial look!
Finish as desired.
The Astor End Table plans are suitable for all skill levels. Interested in sharing photos of your finished build using my plans? Contact me at cher {at} designsbystudioc {dot} com!
Originally posted 2014-02-10 08:00:03.

21 Comments
The how-to pictures are great! I think I could totally make this. I love how rustic this can look in the end. Hmm…I might go with a white and maybe some glaze to finish it off.
Thank you so much! If you do build it, I would love to see the finished project! Thanks for stopping by!
You make it sound so easy, I may just have to build this! I think I’d finish it a bit to be my new sewing table….perfect size, and I love that it’s budget-friendly!
Thank you so much! I really like this table and may add it to my “to build” list! Thank you for stopping by!
I love how your plans are so easy to follow. Hubby and I have plans to build a new entryway table and hopefully, an extra large dining table, but an end table may be a better starting point! 🙂
Thank you very much, I appreciate it! I am horribly addicted to woodworking and it sounds like you are on your way to being addicted, as well!
Looks great! Stopping by with SITS comment love!
Thank you very much for stopping by – I really appreciate it!
I love this little table. It would work fabulously in our backyard. You are so talented in what you do! #sitsblogging
Thank you so much! This would be a great table for the outdoors… I wanted to build it but really had no place to put it – thank you for the idea!!
I found your blog from the SITS Comment Love Tribe and I am loving what I have found. What an amazing DIY site. I am working on my twin boys nursery and I think I will be searching your site for some must do projects. Thanks!
Thank you so much!! I am horribly addicted to it and love that I am able to do it! I also take requests for plans so if you can’t find what you are looking for, let me know and I can help! Thank you for stopping by!
Hi: I popped over from the Comment Love Tribe – what a great resource for us DIYers. I don’t do much with the hammer and nails, but I know someone who does. I’ll be stopping bookmarking your site for ideas.
Thank you so much, I really appreciate it! I’m glad you stopped by!
Stopping over from the SITS Girls….I just have to say that you’re amazing! As much as I love to DIY, i can’t even start to think about constructing things with actual pieces of wood. I like your site and will be checking back to see all your projects.
Thank you very much! You can do it, I swear! It is really easier than you think. If you ever want to try and need help, let me know! Thank you for stopping by!
Wow, this looks awesome! I could never create things like this our of wood so bravo to you, Cher, this is great!
What great instructions and explanations! I wish I had more time to do things like this, I think I would love it!
We’ve been looking for a masculine style end table for my husband’s man cave and I’m thinking these might be just the project. Thanks for sharing! #SITSBlogging
Thank you so much! If you build it, I would love to see photos! I’m glad you stopped by!