
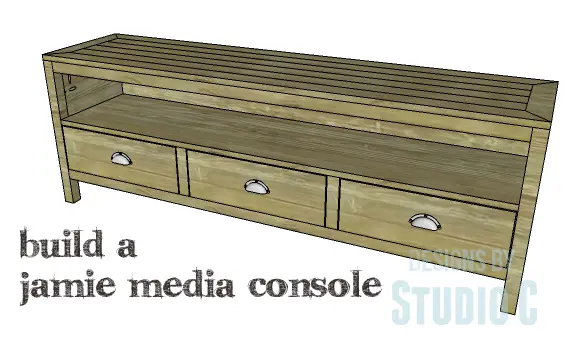
A Media Console with Simple Lines and Lots of Storage!
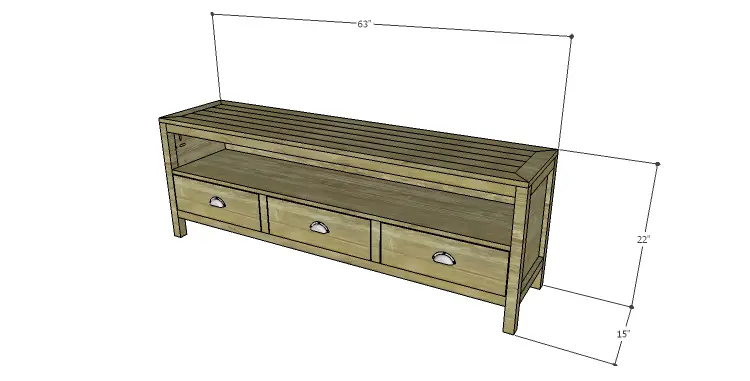
Hey there! If you’re looking for a media console that’s simple yet spacious, you’re in luck! The Jamie Media Console DIY plans are just what you need. It comes with a planked top and a mitered frame, plus three drawers and a big open shelf for all your storage needs. And the best part? It won’t break the bank and you can finish it in just one weekend!
Materials:
- 1-1/4″ pocket hole screws (<– affiliate link!)
- 2-1/2″ pocket hole screws
- 2″ brad nails
- Edge banding, optional (<– affiliate link!)
- Wood glue
- Sandpaper (100, 150, 220 grits)
- Finishing supplies (primer & paint, or stain, sealer)
- Paste wax
Lumber:
- 4 – 1×3 at 6′
- 2 – 1×3 at 8′
- 2 – 1×8 at 6′
- 6 – 2×2 at 8′
- 1 – 4′ x 8′ sheet of 3/4″ plywood
Cut List:
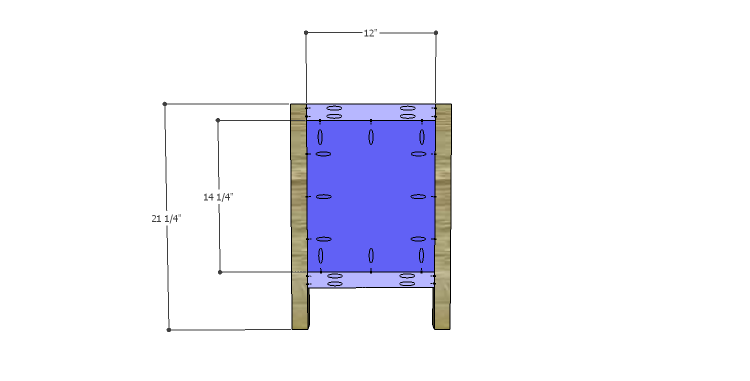
- 4 – 2×2 at 21-1/4″ – Legs
- 4 – 2×2 at 12″ – Side Framing
- 2 – 3/4″ plywood at 12″ x 14-1/4″ – Side Panels
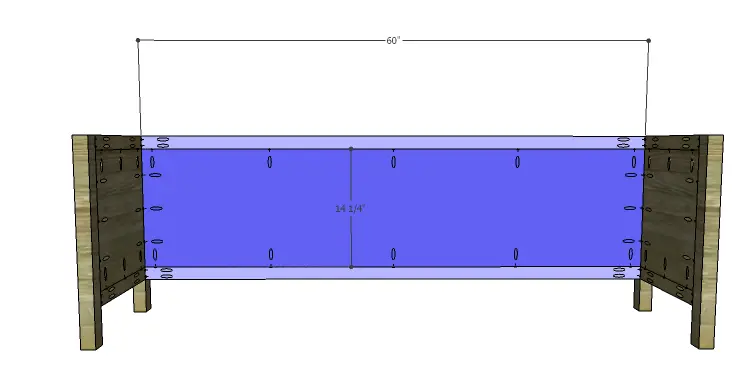
- 4 – 2×2 at 60″ – Back Framing & Front Stretchers
- 1 – 3/4″ plywood at 14-1/4″ x 60″ – Back
- 1 – 3/4″ plywood at 12″ x 60″ – Bottom
- 2 – 2×2 at 6-3/4″ – Drawer Dividers
- 2 – 2×2 at 12″ – Drawer Spacers
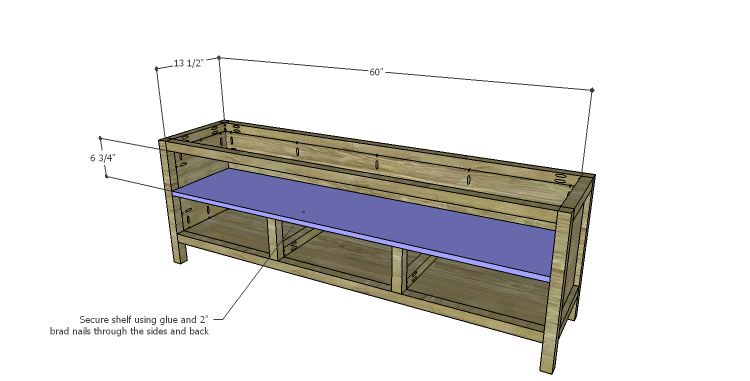
- 1 – 3/4″ plywood at 13-1/2″ x 60″ – Shelf
- 4 – 1×3 at 58″ – Top Center Planks
- 2 – 1×3 at 15″ – Top Frame
- 2 – 1×3 at 63″ – Top Frame
- 3 – 3/4″ plywood at 12″ x 17-1/4″ – Drawer Bottoms
- 6 – 1×8 (ripped to 6-5/8″ wide) at 12″ – Drawer Sides
- 6 – 1×8 (ripped to 6-5/8″ wide) at 18-3/4″ – Drawer Front & Back
Step One
Cut the pieces for the legs, side frames, and side panels. With the pocket hole jig set for 1-1/2″ material, drill pocket holes in each end of the framing pieces. Secure the framing pieces to the legs using glue and 2-1/2″ pocket hole screws.
Set the pocket hole jig for 3/4″ material and drill pocket holes in all four edges of each panel. Secure the panel to the legs and side framing using glue and 1-1/4″ pocket hole screws. The inside face of the panels will be flush with the inside faces of the legs and side framing.
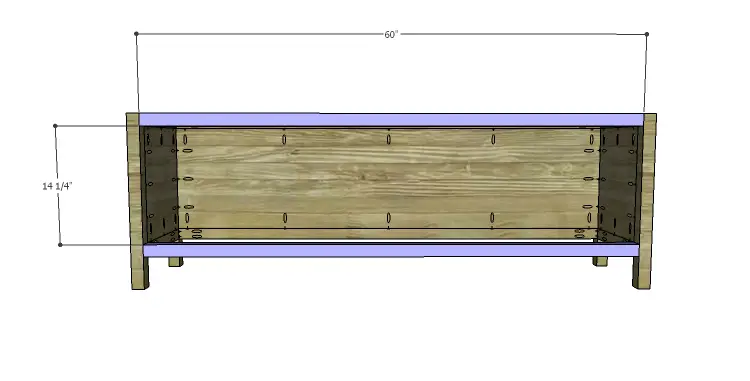
Step Two
Cut the pieces for the back framing, front stretchers, and back panel. Set the pocket hole jig for 1-1/2″ material and drill pocket holes in each end of the back framing and front stretchers. Secure the back framing to the legs using glue and 2-1/2″ pocket hole screws.
Set the pocket hole jig for 3/4″ material and drill pocket holes in all four edges of the back panel. Secure the panel to the legs and back framing using glue and 1-1/4″ pocket hole screws. The inside face of the panel will be flush with the inside faces of the legs and back framing.
Secure the front stretchers to the legs as shown using glue and 2-1/2″ pocket hole screws.
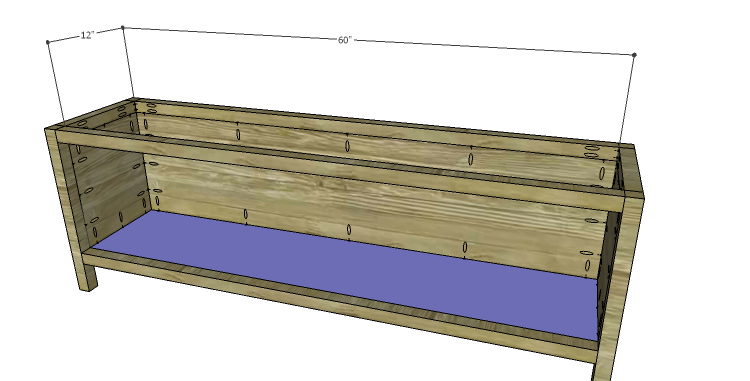
Step Three
Cut the piece for the bottom and drill pocket holes in all four edges. Secure the bottom to the lower side framing, the lower back framing, and the lower front stretcher using glue and 1-1/4″ pocket hole screws. The top face of the bottom will be flush with the top face of the front stretcher.
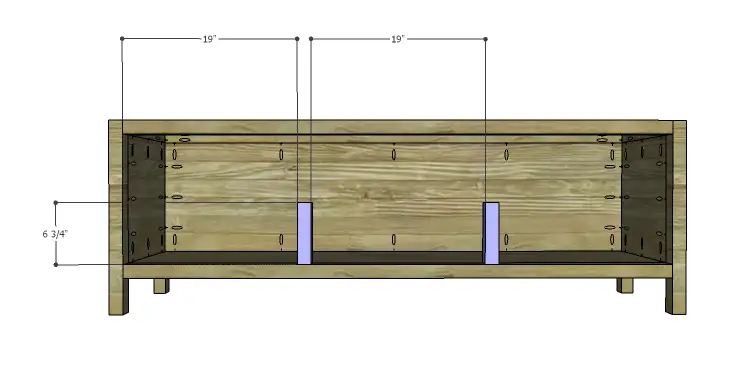
Step Four
Cut the pieces for the drawer dividers and the drawer spacers. Set the pocket hole jig for 1-1/2″ material and drill pocket holes in one end only of each piece. Secure the dividers to the lower front stretcher as shown using glue and 2-1/2″ pocket hole screws.
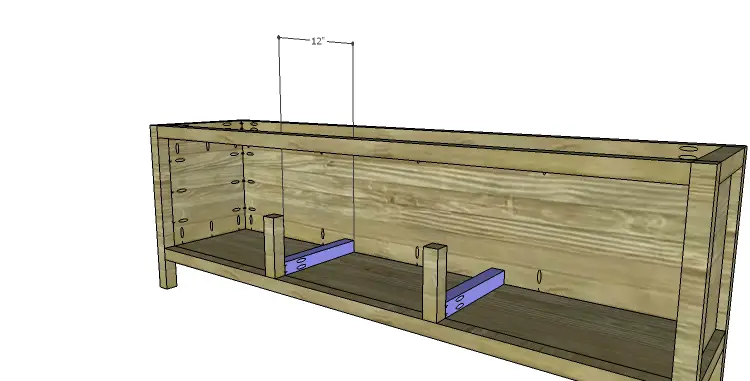
Secure the drawer spacers to the drawer dividers using glue and 2-1/2″ pocket hole screws. Add a few brad nails through the back panel into the back end of the drawer spacer to further secure it in place.
Step Five
Cut the piece for the shelf. Apply edge banding to the front edge, if desired. Position the shelf on the dividers, and secure in place using glue and 2″ brad nails through the side and back panels. Add a few brad nails through the shelf into the tops of the dividers.
Step Six
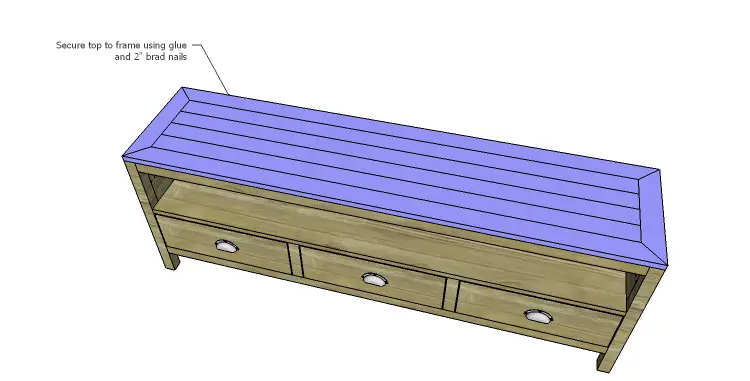
Cut the pieces for the top. Cut 45° miters in each end of the top frame pieces. Set the pocket hole jig for 3/4″ material and drill pocket holes in the center boards as well as the mitered ends of the top side frame. Assemble the center panel using glue and 1-1/4″ pocket hole screws.
Assemble the frame using glue and 1-1/4″ pocket hole screws. Insert the top panel into the frame, then secure the panel to the frame using glue and 1-1/4″ pocket hole screws.
Secure the top to the cabinet frame using glue and 2″ brad nails.

Step Seven
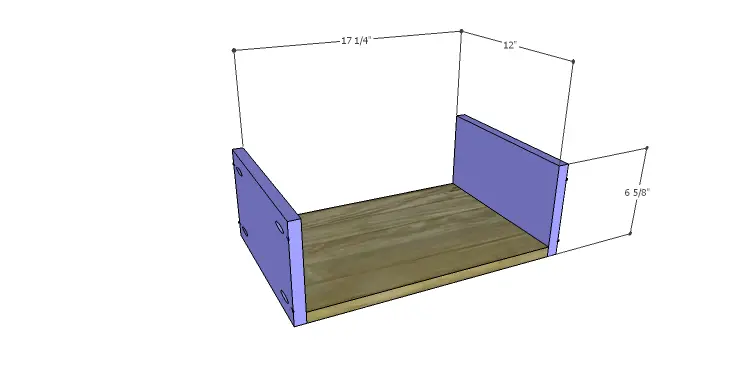
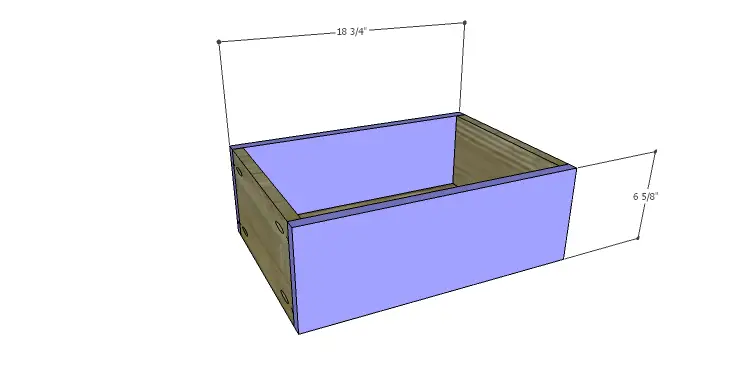
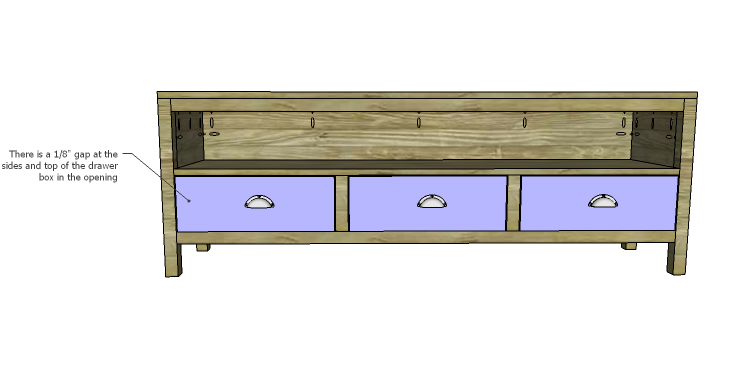
Cut the pieces for the drawer boxes. Drill pocket holes in all four edges of the bottom as well as each end of the sides. Assemble the drawer boxes as shown using glue and 1-1/4” pocket hole screws.
There will be a 1/8″ gap at the sides and top of the drawers in the opening.
Finish as desired. Apply a coat of paste wax to the bottom of the drawers to help them slide smoothly in the openings.
I love this media console and since I am in the market for a new stand, I may add this one to the “to build” list. Here are a few other great options similar to the DIY plans to build a Jamie Media Console:
This is a plan that is also suitable for beginners. Have any questions about the DIY plans to build a Jamie Media Console? Leave a comment below or contact me at cher {at} designsbystudioc {dot} com!
Originally posted 2014-10-22 08:00:34.


9 Comments
Cher — Just found this web site and liking what I see so for. The plans for the Media Console is what I was looking for but the size is just a bit bigger that what I have room for the width. I have 4 ft in width to work with and that would be a tight fit, so 47″ total width would give me 1/2″ on each side for a comfortable fit.. the height and depth are a good size. I a looking for a cabinet like this one but with all drawers that will hold VHS and DVD/Blue Ray. The cabinet would fit under a flat panel TV that is attached to the wall. Do have any plans / projects that would help me out.
Hi, Pat! This plan would be an easy one to modify… The front and back stretchers, the back, the bottom, the top center planks, the shelf and the longer top frame pieces will all be shortened by 16″. (The width will stay the same) This leaves two options for the drawers – there can be three narrower drawers or two wider drawers. If three drawers are desired, the drawer front and back, and the drawer bottom length will be shortened by 5-5/16″ each. The drawer dividers will be spaced at approximately 13-11/16″. If two drawers are desired, the drawer divider (one instead of two) will be spaced 21-1/4″. The drawer front and back, and drawer bottom will be lengthened by approximately 2-1/4″.
Otherwise, if you enter “media cabinet” , “media stand” or “media console” in the search terms at the top of the page (under the header), it will bring up all of the other plans for media stands. Hope this helps! 🙂
I see on the cut list it only calls for 2 drawers but the pictures shows 3. Is that just a typo?
Hello, there! It was a typo and has been corrected! Thanks for letting me know!
https://uploads.disquscdn.com/images/fa2235305180d139b01ae94613aa4e4b5ea65da234f85e7fd4ed03206d68dc31.jpg
Just finished the build and your plans were perfect!
ABSOLUTELY BEAUTIFUL!! Thank you so much for using the plans!
I am about to build this design but i expanded the length of it and plan on making it a floating unit on the wall. I have figured out how i am going to mount it but i am trying to decided how i can hide a power strip in this unit with it being flush to the wall.
What a great idea, Justin! Good luck with your project!