Build a Pacific Kitchen Island
Free Furniture Plans to Build a Pacific Kitchen Island
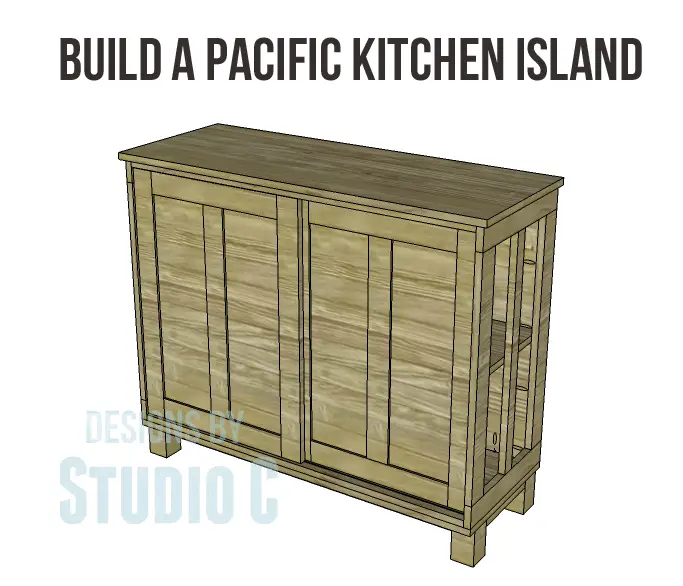
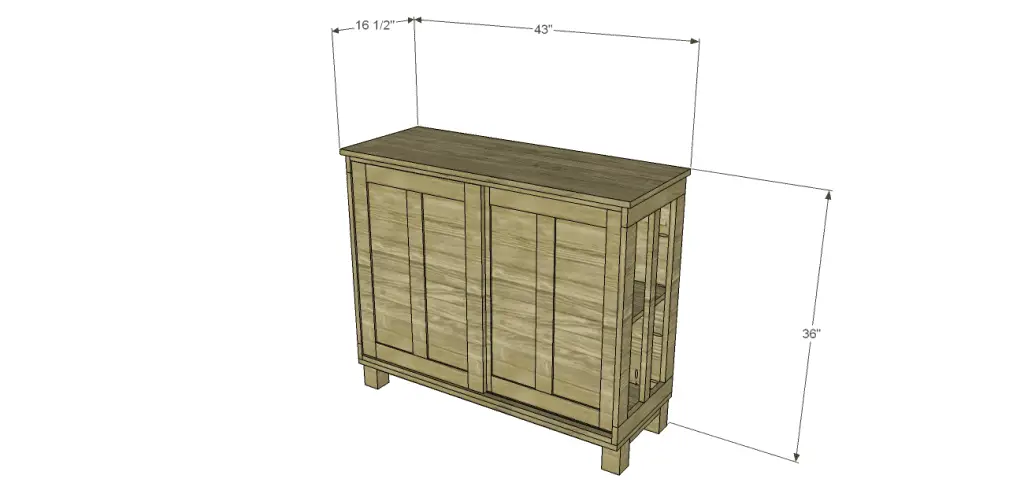
A kitchen island is definitely a luxury – one I couldn’t live without! What if you have a small space in the kitchen? These free furniture plans to build a Pacific Kitchen Island are for you! Narrow in depth yet with just enough prep room on top, this counter-height island features sliding doors with a shelf inside to store appliances!
Materials:
- 1″ pocket hole screws
- 1-1/4” pocket hole screws
- 1-1/4” brad nails
- Sliding cabinet door hardware
- Edge banding, optional
- Wood glue
- Sandpaper (100, 150, 220 grits)
- Finishing supplies (primer & paint, or stain, sealer)
Lumber:
- 1 – 1×2 at 6′
- 6 – 1×3 at 8′
- 1 – 2′ x 2′ sheet of 1/4″ plywood
- 1 – 2′ x 4′ sheet of 1/2″ plywood
- 1 full sheet of 3/4″ plywood
Cut List:
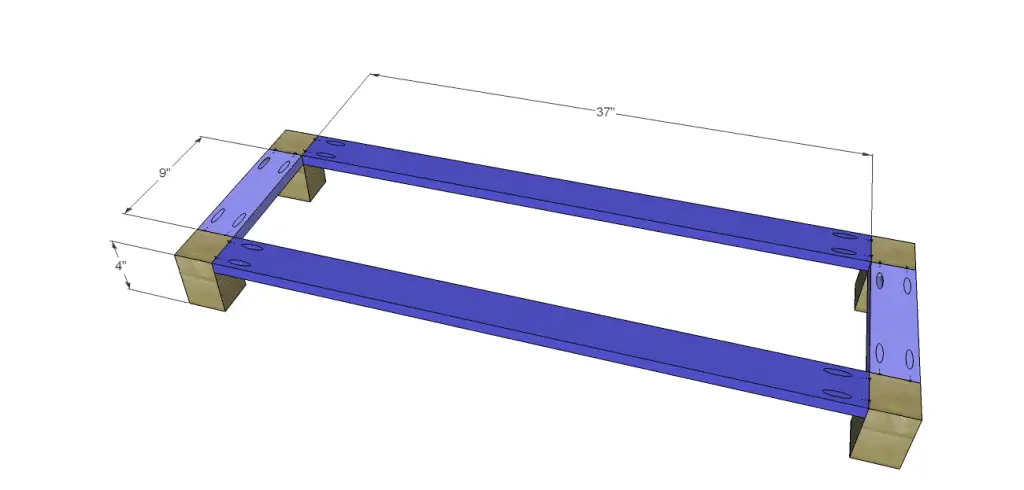
- 4 – 3 x 3 posts at 4″ – Base Legs
- 2 – 1×3 at 9″ – Base Frame
- 2 – 1×3 at 37″ – Base Frame
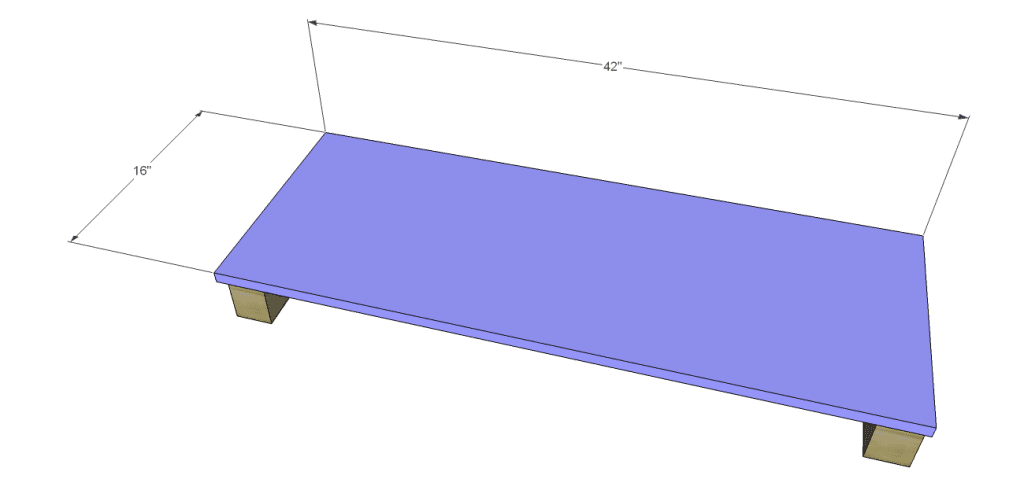
- 1 – 3/4″ plywood at 16″ x 42″ – Bottom
- 4 – 1×3 at 16″ – Side Frames
- 4 – 1×3 at 25-1/2″ – Side Frames
- 2 – 1×2 at 25-1/2″ – Side Frames
- 1 – 3/4″ plywood at 30-1/2″ x 40-1/2″ – Back
- 2 – 1×3 at 40-1/2 – Door Tracks
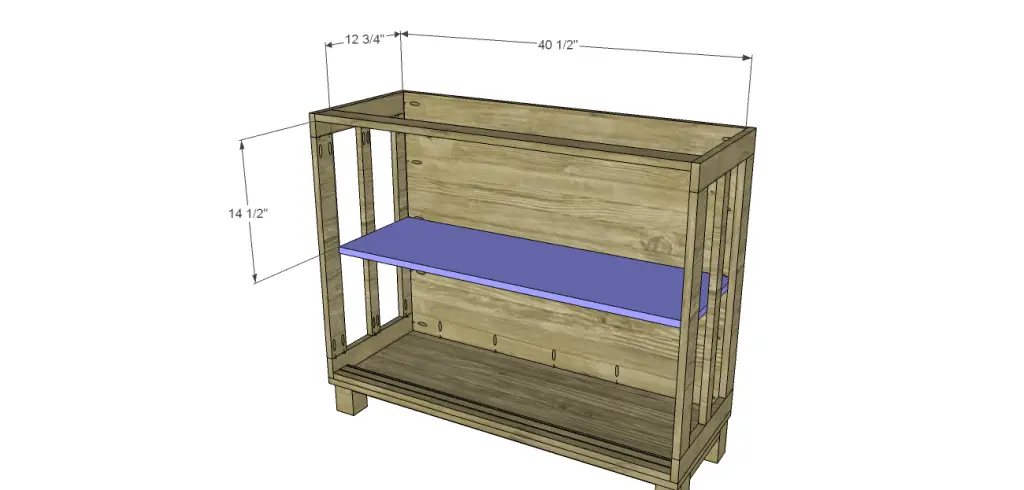
- 1 – 3/4″ plywood at 12-3/4″ x 40-1/2″ – Shelf
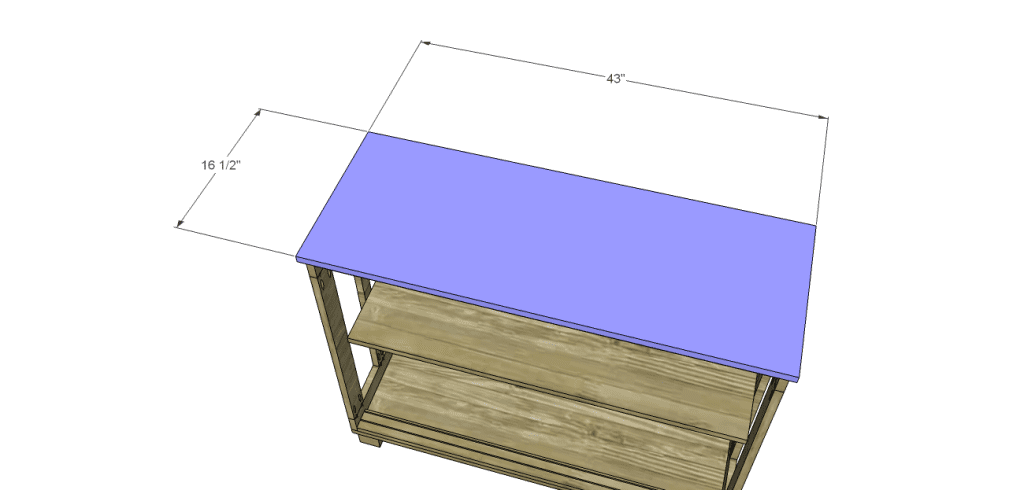
- 1 – 3/4″ plywood at 16-1/2″ x 43-1/2″ – Top
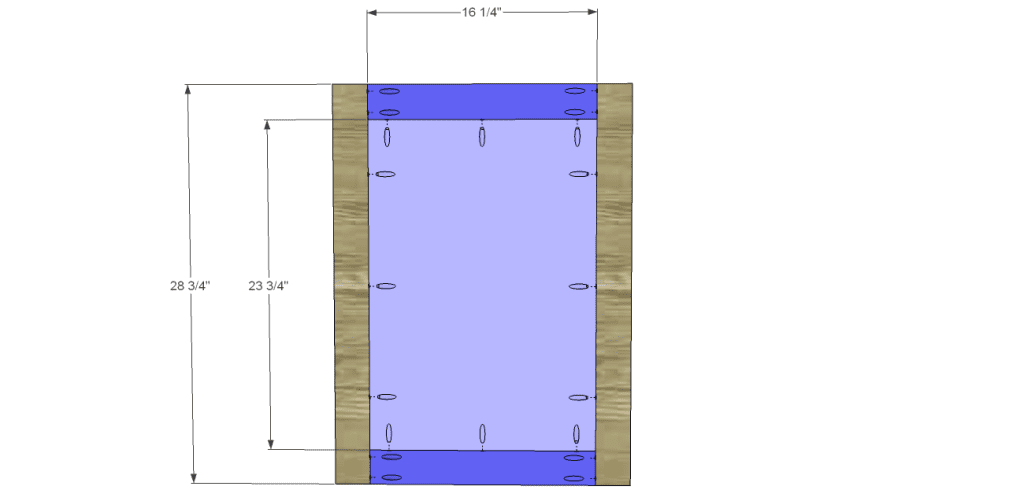
- 4 – 1×3 at 16-1/4″ – Door Frame
- 4 – 1×3 at 28-3/4″ – Door Frames
- 2 – 1/2″ plywood at 16-1/4″ x 23-3/4″ – Door Panel
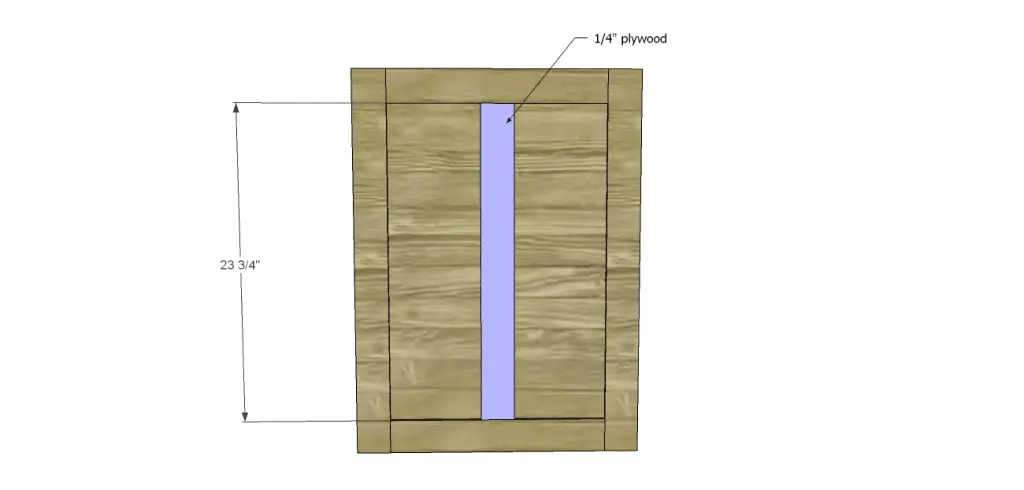
- 2 – 1/4″ plywood at 2-1/2″ x 23-3/4″ – Door Panel
Notes:
Edge banding will be applied to the exposed edges of the plywood prior to assembly.
Step One
Cut the pieces for the base. With the pocket hole jig set for 3/4″ material, drill pocket holes in each end of the frame pieces. Secure to the legs using glue and 1-1/4″ pocket hole screws.
Step Two
Cut the piece for the bottom. The bottom piece will over hang the base by 1″ at the front and the back. Spread glue on the base frame and legs, then secure the bottom using 1-1/4″ brad nails.
Step Three
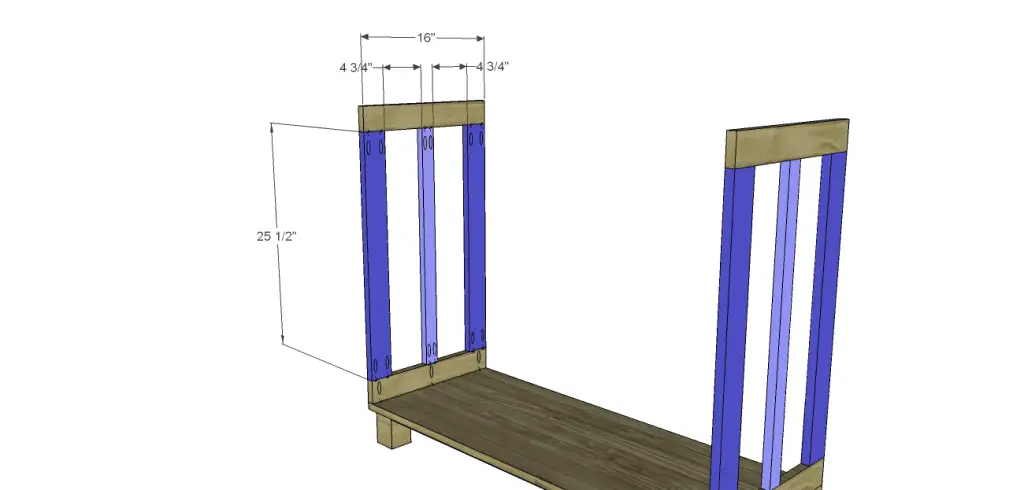
Cut the pieces for the side frames. Drill pocket holes in each end of the longer frame pieces as well as one long edge of each bottom horizontal piece . Assemble the frame as shown using glue and 1-1/4″ pocket hole screws. Secure the frame to the bottom piece using glue and 1-1/4″ pocket hole screws.
Step Four
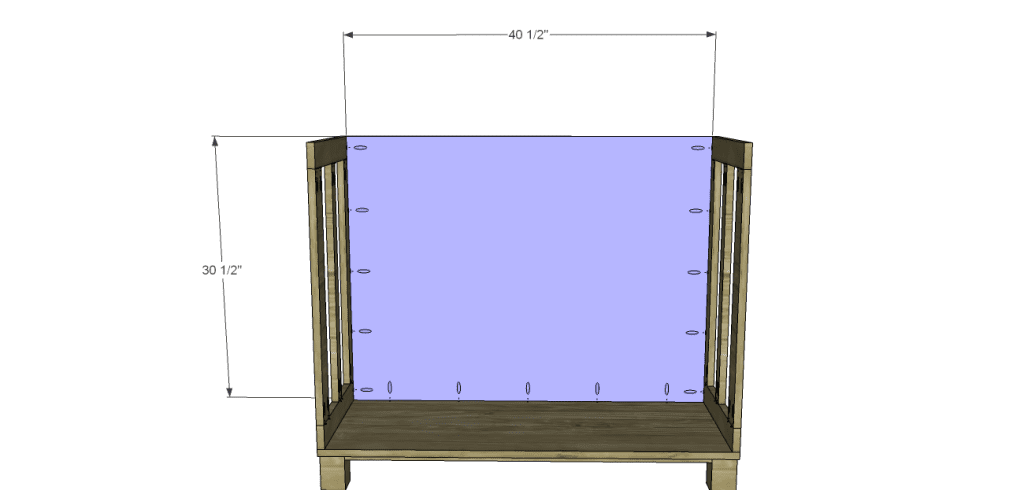
Cut the piece for the back and drill pocket holes in the side edges as well as the bottom edge. Secure to the bottom and sides using glue and 1-1/4″ pocket hole screws.
Step Five
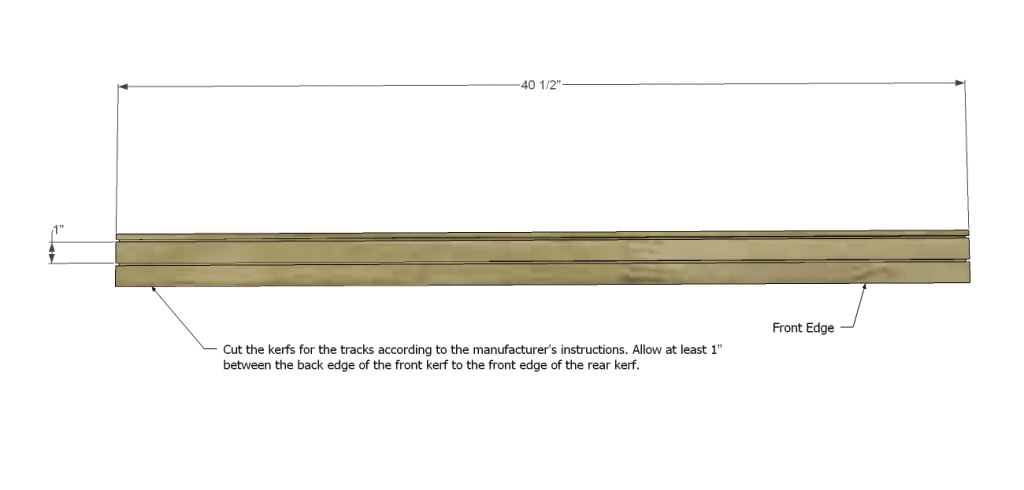
Cut the pieces for the door tracks. The grooves for the slide hardware will be cut to the depth and width according to the manufacturer’s instructions. The front groove will be located at least 3/4″ to 1″ back from the front edge. The rear groove will be located 1″ from the front groove.
It will be easy to cut the groove on the table saw. Set the height of the blade as specified by the manufacturer’s instructions for the depth of the groove. Set the fence at 3/4″ to 1″ away from the blade and run the board through the saw. The blade will cut the groove at the specified depth. Reset the rip fence at 1-7/8″ to 2-1/8″ from the blade to cut the second groove. This measurement will allow for the groove already cut, as well as the 1″ space between the grooves. Make a pass through the saw.
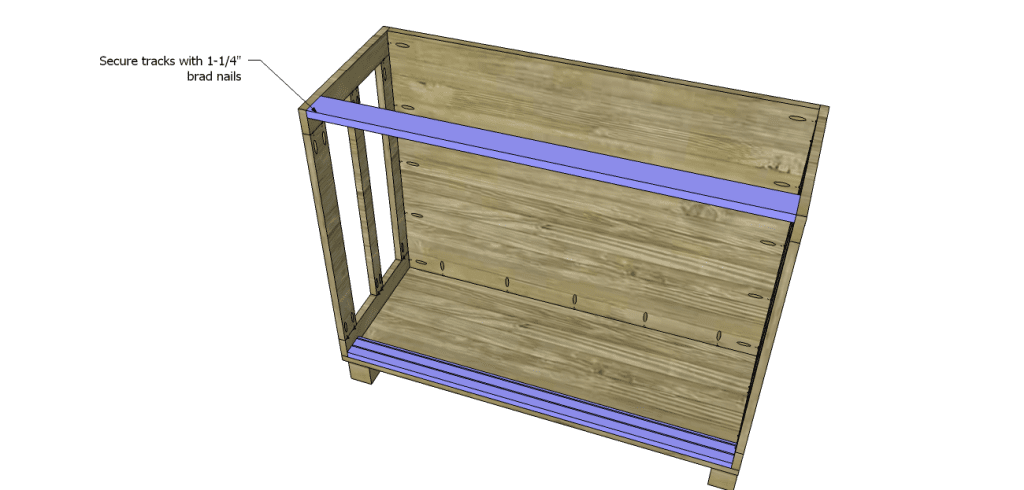
Position the pieces as shown, then secure using glue and 1-1/4″ brad nails.
Step Six
Cut the piece for the shelf. Drill pocket holes along the back edge as well as two pocket holes in each side so the shelf can be secured to the center 1×2 piece of the side frame. Secure using glue and 1-1/4″ pocket hole screws. (For extra security, metal shelf brackets can be added to the underside of the shelf.)
Step Seven
Cut the piece for the top. Spread glue on the top edges of the back, side frames, and top track. Position the top so that 1/2″ overhangs the front and sides. Secure using 1-1/4″ brad nails.
Step Eight
Cut the pieces for the doors. Set the pocket hole jig for 1/2″ material and drill pocket holes in all four edges of the center panel. Reset the pocket hole jig for 3/4″ material and drill pocket holes in each end of the frame pieces as shown. Secure the panels to the shorter frame pieces using glue and 1″ pocket hole screws. The back face of the panel will be flush with the back face of the frame pieces.
Secure the panel assembly to the longer frame pieces using glue and pocket hole screws – 1″ pocket hole screws through the panel and 1-1/4″ pocket hole screws through the frame pieces.
Cut the piece for the 1/4″ trim piece. Position in the center front of the door panel securing with glue. Clamp until dry.
Install the sliding door hardware according to the manufacturer’s instructions. The doors will have a 1/8″ gap between the top and bottom, and the tracks.
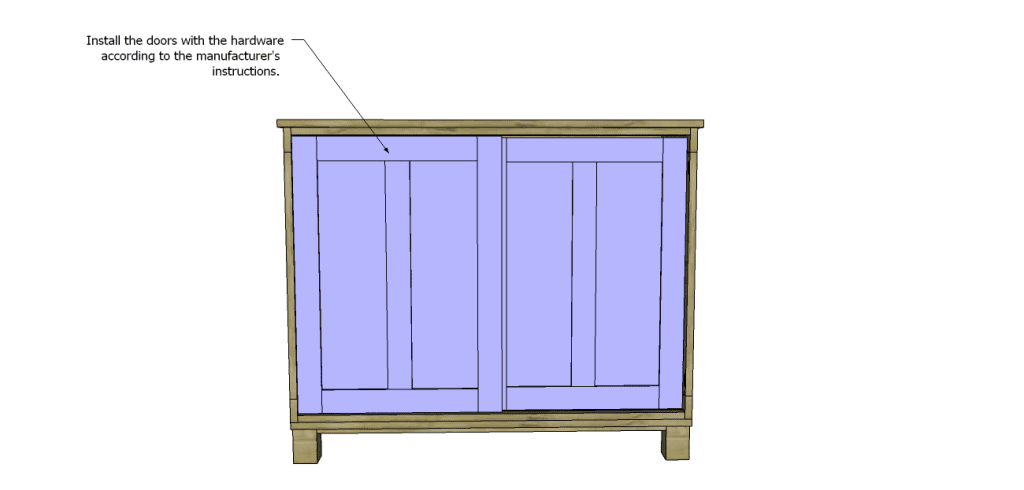
Finish as desired.
These free furniture plans to build a Pacific Kitchen Island are very simple to construct. Decorative punched aluminum can be added to the side frame openings, if desired – just omit the pocket holes to secure the shelf to the sides and add metal shelf brackets under the shelf. Need help with the plans? Contact me at cher {at} designsbystudioc {dot} com!
Disclaimer:
This post contains links to sites of which I am an affiliate. What that means is if the link is clicked and a purchase is made, I will get a commission of that sale. Rest assured I would only direct my readers to sites I shop at myself!
Originally posted 2014-01-20 08:00:45.

I already have a kitchen island that I couldn’t live without. But this is a wonderful idea for those that don’t. You’re full of bright ideas Cher.
I have one that I put wheels on to make it movable, makes it great for moving nearer the stove or counter when I need that extra room.
I love this idea! I have a stationary island in my kitchen, though, I still need more counter space. It’s unfortunate.
[…] a counter-height island which features sliding doors with a shelf inside. Finished measurements are 16 1/2 inches wide x 43 […]