Free Furniture Plans to Build the Sundown Retreat Sideboard
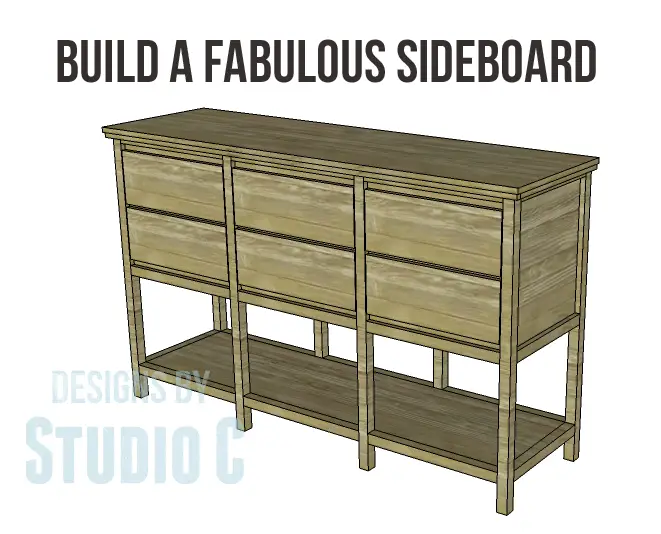
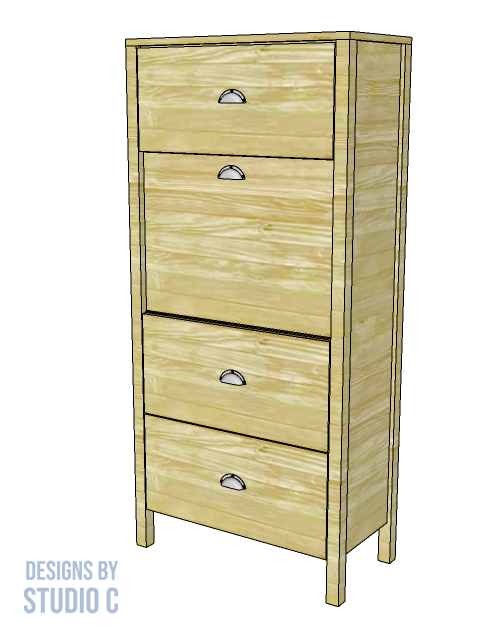
Need more storage? Try the free furniture plans to build the Sundown Retreat Sideboard – a fantastic piece of furniture featuring six drawers and a roomy shelf. This is the perfect piece for additional storage plus it will look fabulous with any decor!
Materials:
- 1-1/4″ pocket hole screws
- 2-1/2″ pocket hole screws
- 1-1/4″ screws
- 1-1/4″ brad nails
- Edge banding, optional
- 6 sets of 16″ drawer slides (<– affiliate link!)
- 6 cabinet pulls
- Wood glue
- Sandpaper (100, 150, 220 grits)
- Finishing supplies (primer & paint, or stain, sealer)
Lumber:
- 3 – 1×2 at 6′
- 3 – 1×6 at 8′
- 10 – 2×2 at 8′ (or 5 – 2×4 cut in half)
- 2 – sheets of 3/4″ plywood
- 2 pieces of decorative trim, 3/4″ wide
Cut List:
- 8 – 2×2 at 41-1/4″ – Legs
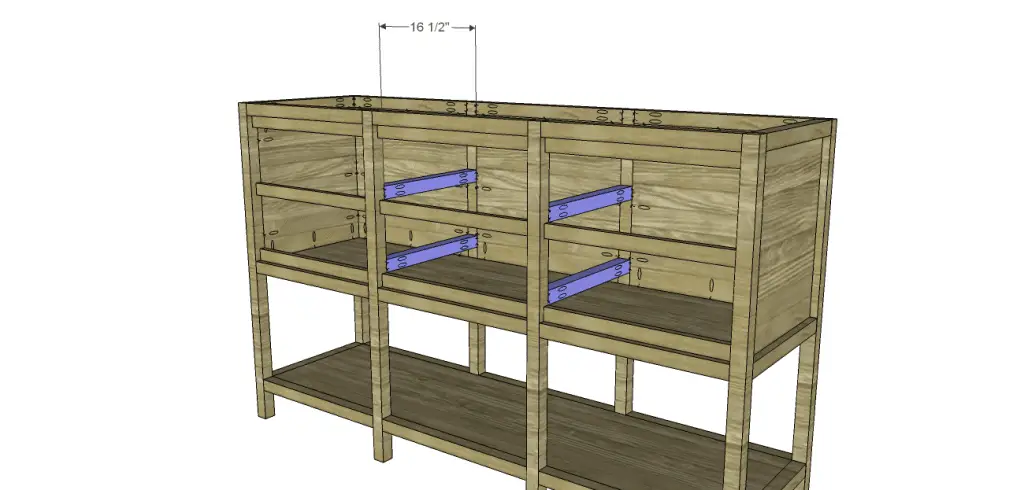
- 10 – 2×2 at 16-1/2″ – Side Frames & Slide Supports
- 2 – 3/4″ plywood at 16-1/2″ x 18-3/8″ – Side Panels
- 12 – 2×2 at 20″ – Stretchers
- 6 – 2×2 at 20-3/4″ – Stretchers
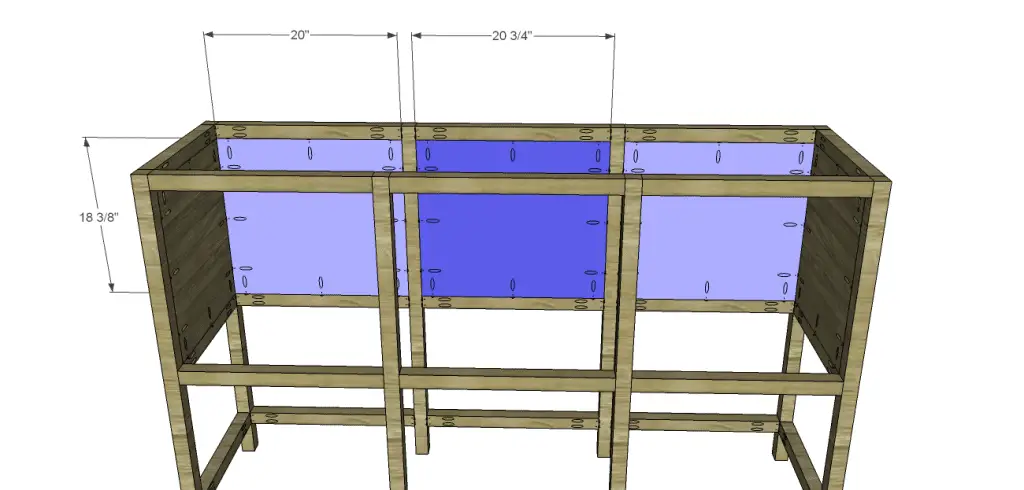
- 2 – 3/4″ plywood at 18-3/8″ x 20″ – Back Panels
- 1 – 3/4″ plywood at 18-3/8″ x 20-3/4″ – Center Back Panel
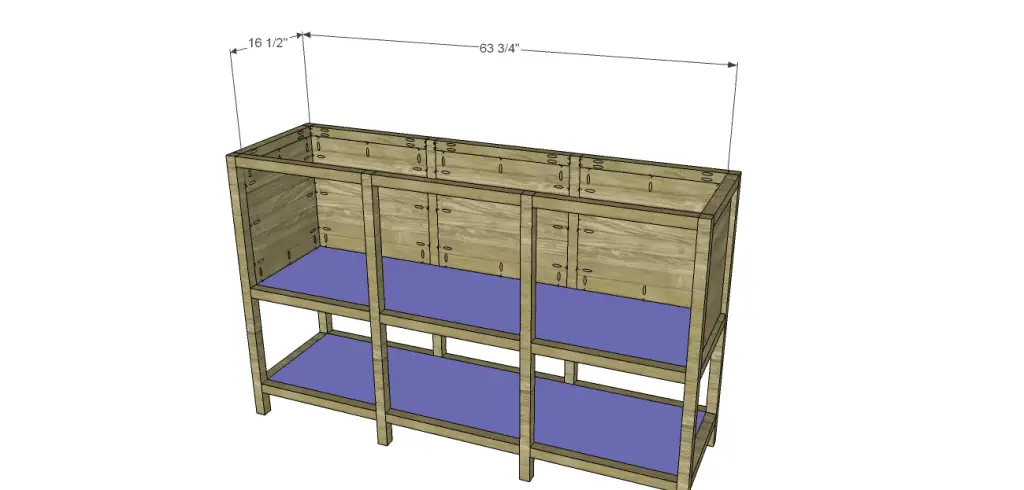
- 2 – 3/4″ plywood at 16-1/2″ x 63-3/4″ – Bottom & Shelf
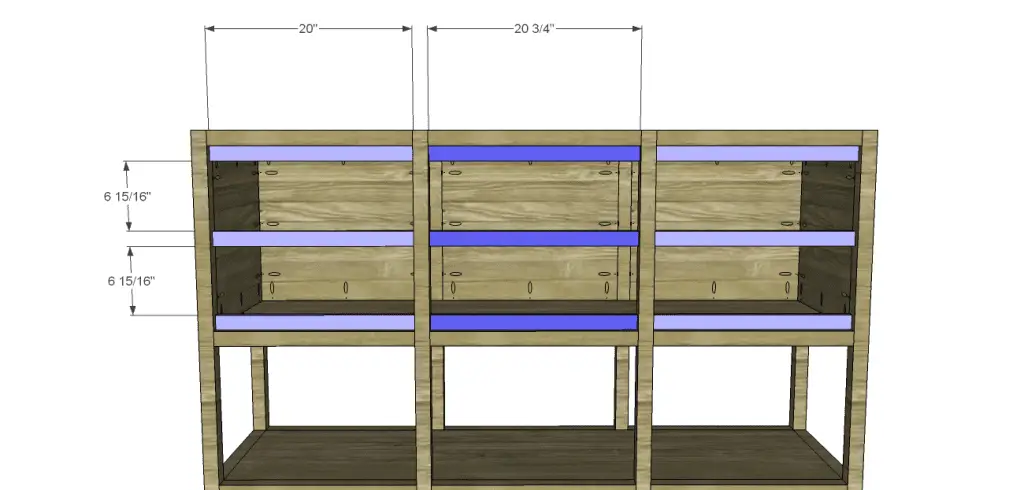
- 6 – 1×2 at 20″ – Front Stretchers
- 3 – 1×2 at 20-3/4″ – Front Stretchers
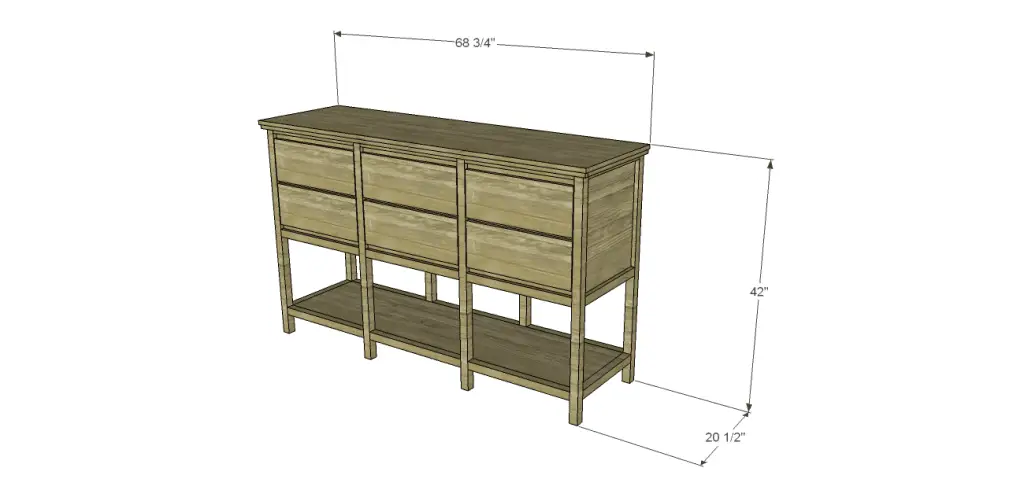
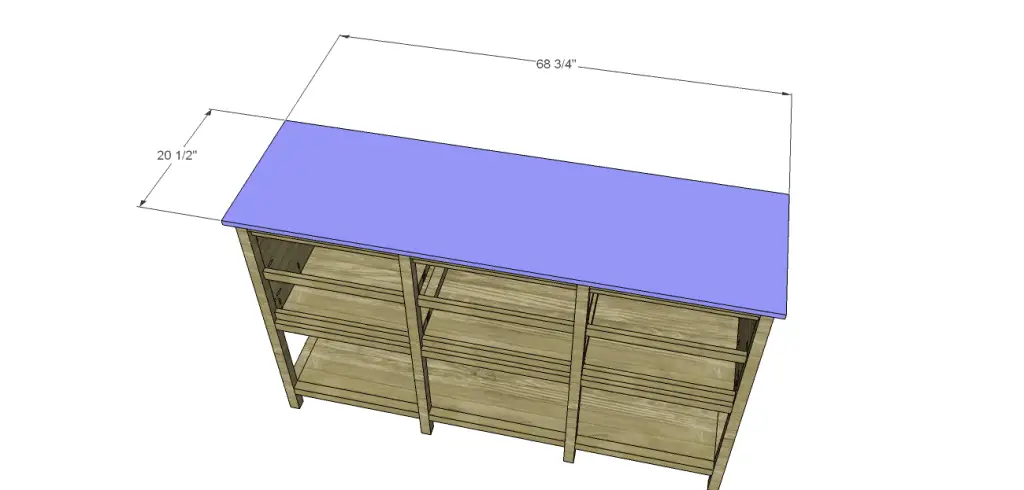
- 1 – 3/4″ plywood at 20-1/2″ x 68-3/4″ – Top
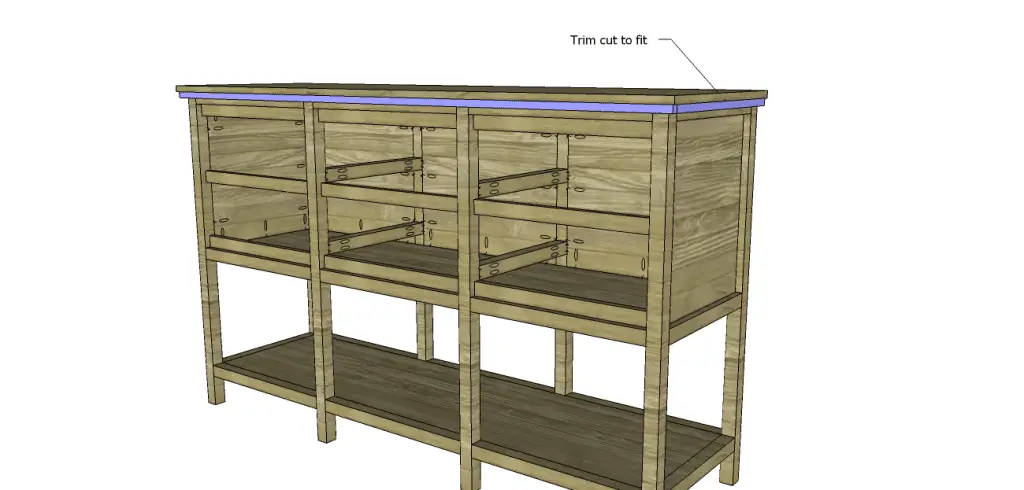
- Trim cut to fit under top
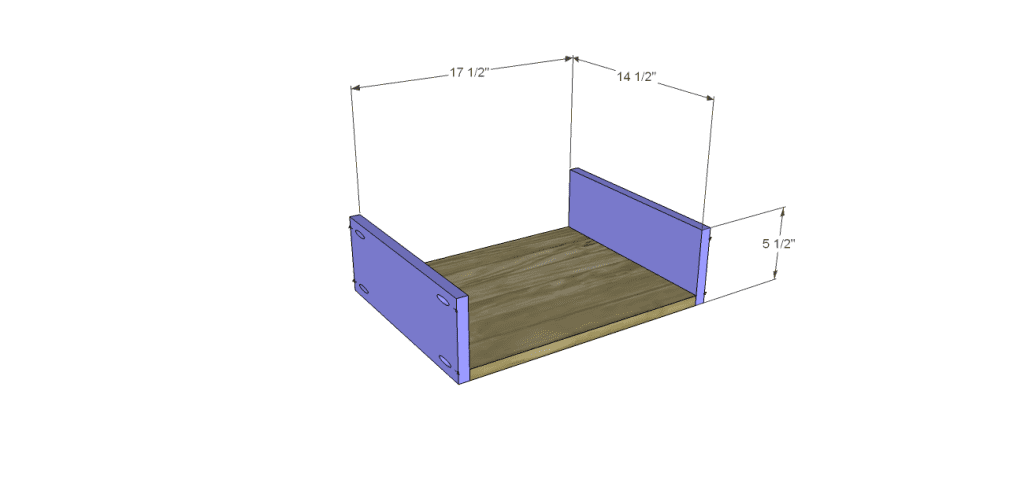
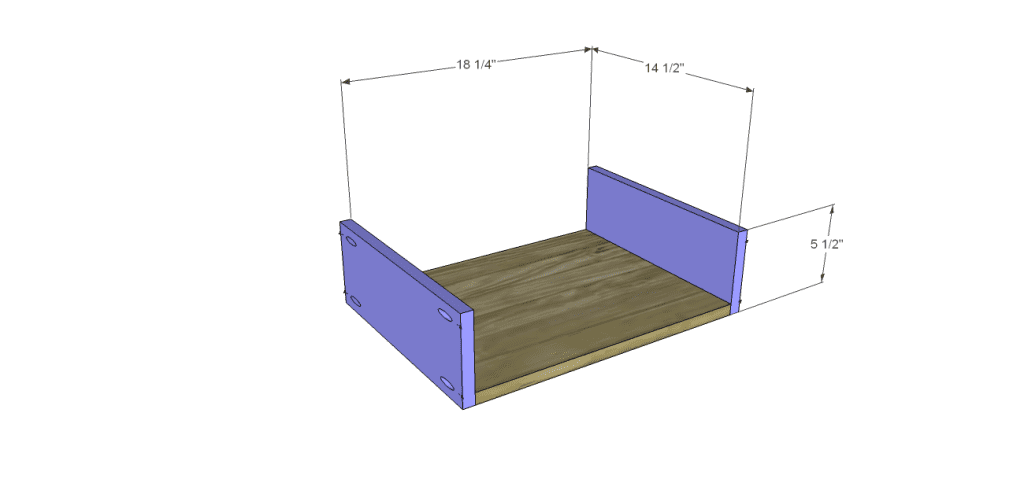
- 4 – 3/4″ plywood at 14-1/2″ x 17-1/2″ – Drawer Box Bottoms
- 2 – 3/4″ plywood at 14-1/2″ x 18-1/4″ – Center Drawer Box Bottoms
- 12 – 1×6 at 14-1/2″ – Drawer Box Sides
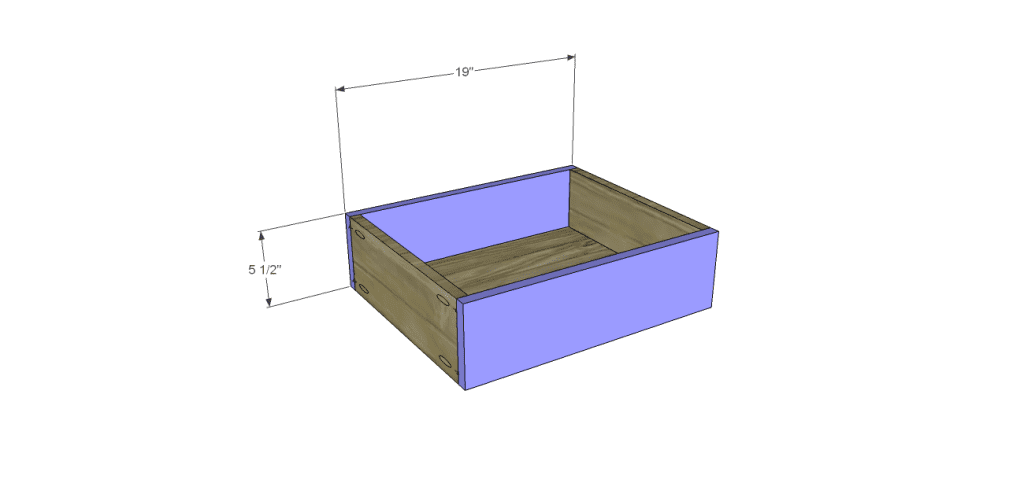
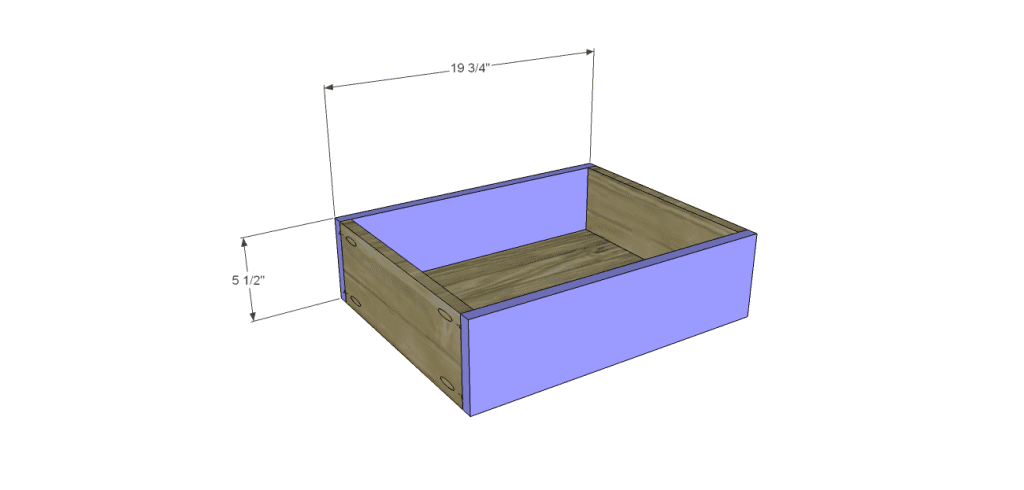
- 8 – 1×6 at 19″ – Drawer Box Front & Back
- 4 1×6 at 19-3/4″ – Center Drawer Box Front & Back
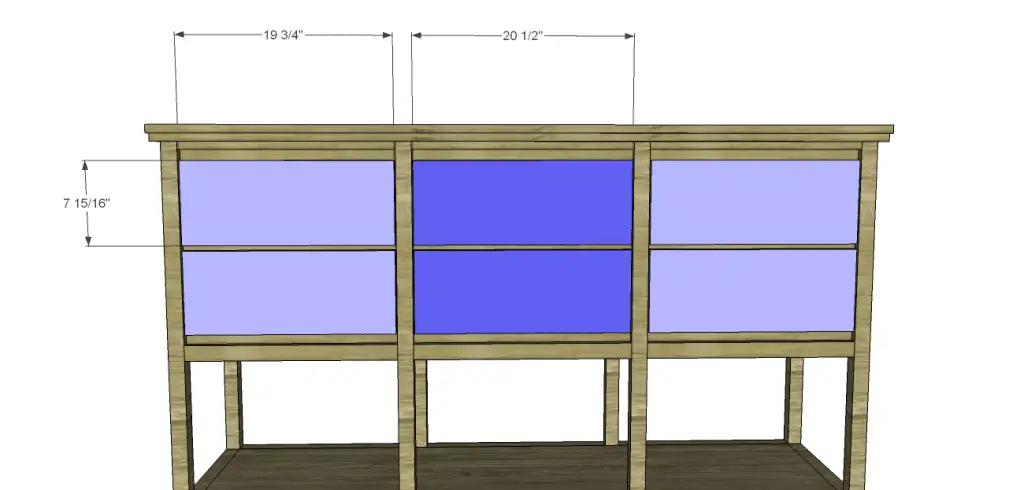
- 4 – 3/4″ plywood at 7-15/16″ x 19-3/4″ – Drawer Fronts
- 2 – 3/4″ plywood at 7-15/16″ x 20-1/2″ – Center Drawer Fronts
Notes:
Edge banding will be applied to the exposed edges of the plywood prior to assembly.
Step One
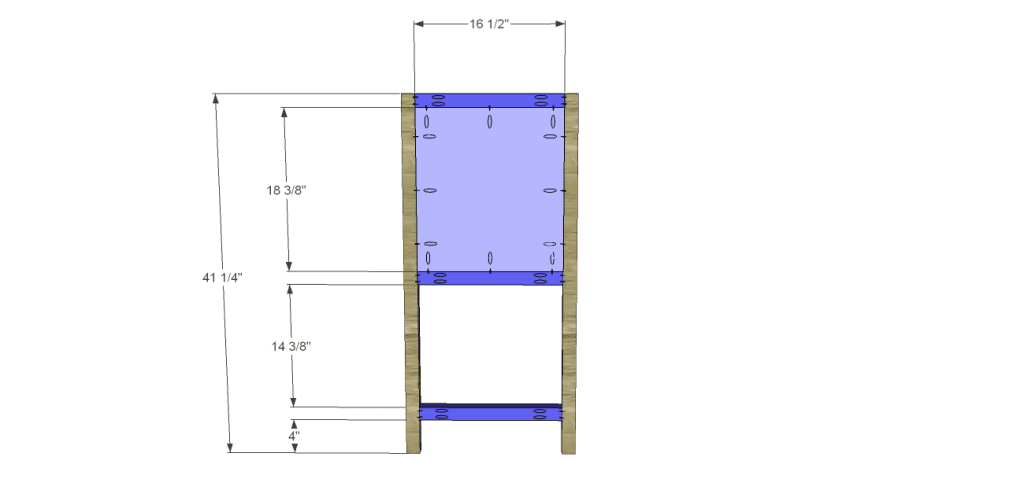
Cut the pieces for the legs, side frames, and side panels. With the pocket hole jig set for 1-1/2″ material, drill pocket holes in each end of the frame pieces. Reset the pocket hole jig for 3/4″ material and drill pocket holes in all four edges of each panel. Secure the frame pieces to the panels using glue and 1-1/4″ pocket hole screws. The back face of the panel will be flush with the inside face of the frame pieces. Attach the side assembly to the legs using glue and pocket hole screws – 1-1/4″ pocket hole screws through the panels into the legs and 2-1/2″ pocket hole screws through the frame pieces.
Step Two
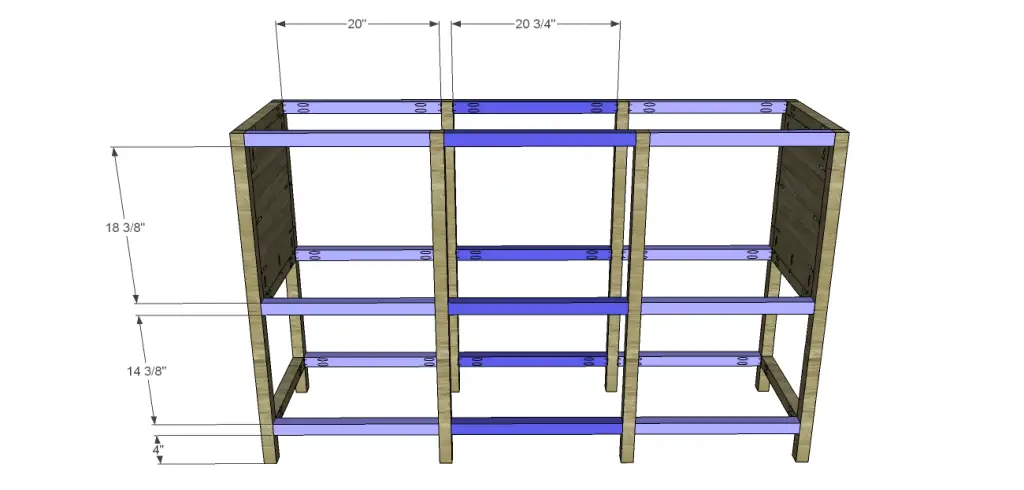
Cut the pieces for the stretchers and the remaining legs. Set the pocket hole jig for 1-1/2″ material and drill pocket holes in each end of the stretchers. Assemble the sideboard frame as shown using glue and 2-1/2″ pocket hole screws.
Step Three
Cut the pieces for the back panel. Set the pocket hole jig for 3/4″ material and drill pocket holes in all four edges. Insert the panels into the back frames and secure using glue and 1-1/4″ pocket hole screws. The back face of each panel will be flush with the back face of the legs and stretchers.
Step Four
Cut the pieces for the bottom and shelf, then drill pocket holes in all four edges. Secure to the cabinet frame as shown using glue and 1-1/4″ pocket hole screws. The top face of the bottom and shelf will be flush with the top face of the stretchers.
Step Five
Cut the pieces for the 1×2 front stretchers and drill pocket holes in each end. Secure to the front legs as shown using glue and 1-1/4″ pocket hole screws.
Step Six
Cut the pieces for the drawer slide spacers. Set the pocket hole jig for 1-1/2″ material and drill pocket holes in each end. Secure to the middle legs using glue and 2-1/2″ pocket hole screws locating the bottom edge of the spacers flush with the top edge of the 1×2 stretchers.
Step Seven
Cut the piece for the top. Spread glue along the top of the stretchers, legs, and sides then position the top so that the front and sides overhang by 1″. Secure in place using 1-1/4″ brad nails.
Step Eight
Cut the pieces for the trim. No measurement has been given because the lengths will depend on the type of trim chosen. Install the side pieces first, then install the front. Secure using glue and 1-1/4″ brad nails.
Step Nine
Cut the pieces for the drawer boxes. Drill pocket holes in all four edges of the bottom as well as each end of the sides. Assemble the drawer box as shown using glue and 1-1/4” pocket hole screws. Install the drawer slides according to the manufacturer’s installation instructions, locating them ¾” back from the front edge of the legs. Take a look at this easy tutorial on installing drawer slides. Make any necessary adjustments.
Step Ten
Cut the pieces for the drawer fronts. Mark the position for the drawer pulls and drill the holes. There will be a 1/8” gap at the sides of the fronts with 1/2″ between them. Drive screws through the holes for the drawer pulls into the drawer box to temporarily hold the drawer front in place. Open the drawer, and secure the drawer front using countersunk 1-1/4” screws from the inside. Remove the screws from the holes for the drawer pull then finish drilling the holes. Install the drawer pull. This easy tutorial on installing drawer fronts will be helpful!
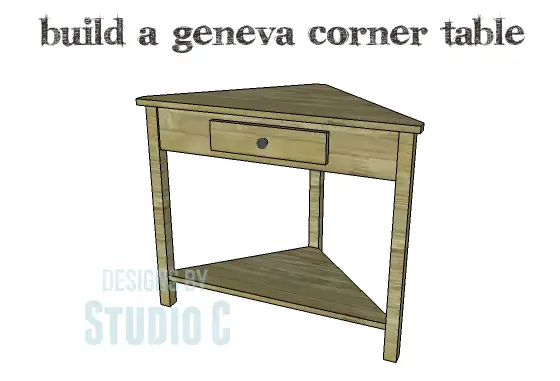
Finish as desired! What do you think of these free plans to build the Sunrise Retreat Sideboard? Will you build it? If so, share it with me at cher {at} designsbystudioc {dot} com!


15 Comments
I could really use this Cher. Useful + pretty. Just up my alley.
Thank you, Elle! I’m glad you stopped by!
Would be perfect in my son’s room for his TV set and ALL his video game, hidden out of view!
That would be the ultimate, Lindy – not having to look at video game stuff! I know how that is!
You’ve done it again! I love this, Cher! Thanks for sharing!
Thank you, Jessica, for stopping by!!
I want so much storage that you wont believe. I can never have enough haha. Fab idea Cher!
Me either, Vinma! Mostly because I need to get rid of stuff but I don’t think that will happen!
I am partial to chests of drawers, Cher. I have two. I used a table I had as a child as a sideboard for a long time – it had convenient drawers and was slim … just ideal. Until my Mom gifted it to a child who needed it more 🙂 This one looks great. Seriously, sometimes I feel like spending all day at the workshop. I find woodworking fascinating!
I am partial to everything related to woodworking and building things! Maybe someday we will build something together!
You know what I like about this? The drawers seem deep. People never make drawers deep enough.
That is my complaint, too, Tammy! Of course, others may tell me to just get rid of most of my stuff but I don’t listen!
Not so easy to build a sideboard. You have did it wonderfully, really. And thanks very much for share those info-graphics here that reveal the procedure of building a sideboard with ease.
Thank you very much, I really appreciate the positive feedback! Have a great day!
Pingback: Sideboard – Free Woodworking Plan.com