DIY Country Storage Cabinet Plans
Step-by-Step Woodworking Plans to Make Your Own Country Storage Cabinet
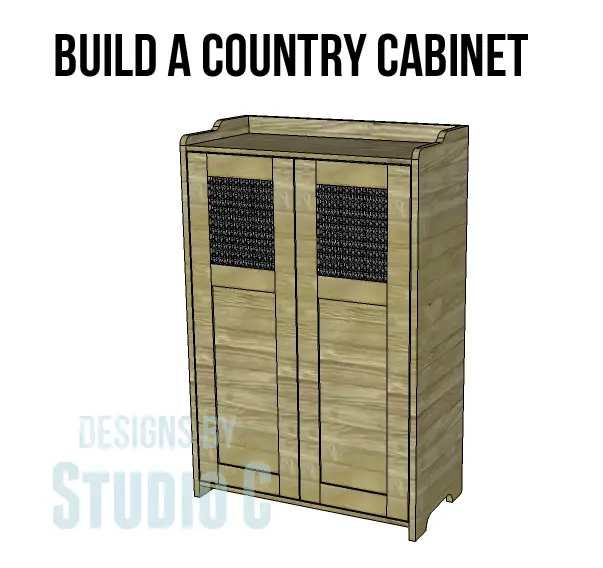
If you’re looking to create a beautiful and unique piece of furniture for your country-style kitchen, these country storage cabinet plans are perfect! This charming little cabinet has wire mesh on the doors as well as plenty of shelves for all your storage needs. With this easy to follow plan you’ll be able to have a one-of-a-kind piece that will add a touch of rustic charm and character to any room!
Materials:
- 1″ pocket hole screws
- 1-1/4″ pocket hole screws
- Edge banding
- Punched aluminum or expanded metal for the door panels (approximately 12″ x 12″ each)
- Turn buttons to secure the metal panels
- 2 sets of non-mortise hinges
- 2 cabinet pulls
- Wood glue
- Sandpaper (100, 150, 220 grits)
- Finishing supplies (primer & paint, or stain, sealer)
Lumber:
- 3 – 1×3 at 6′
- 1 – 2′ x 2′ sheet of 1/2″ plywood
- 1 – half sheet of 3/4″ plywood
- 1 – full sheet of 3/4″ plywood
Cut List:
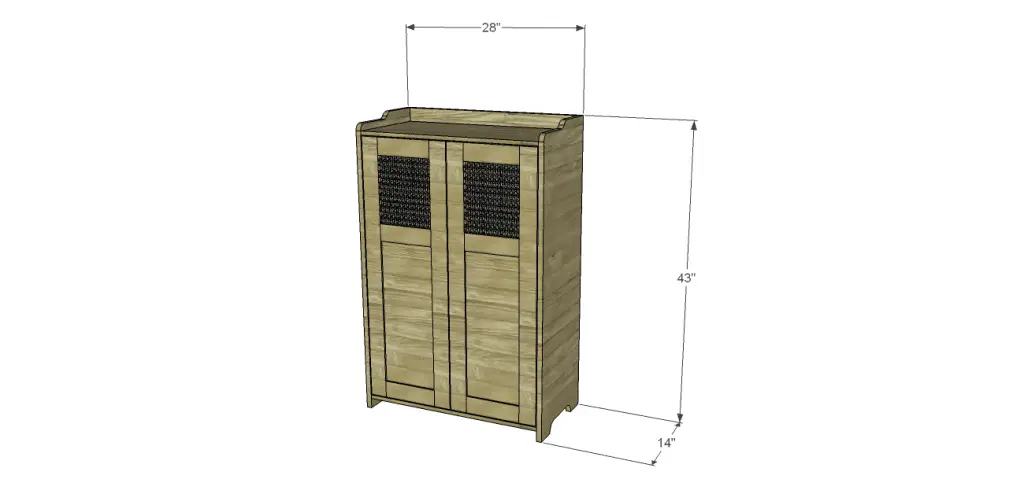
- 2 – 3/4″ plywood at 14″ x 43″ – Sides
- 1 – 3/4″ plywood at 14″ x 26-1/2″ – Bottom
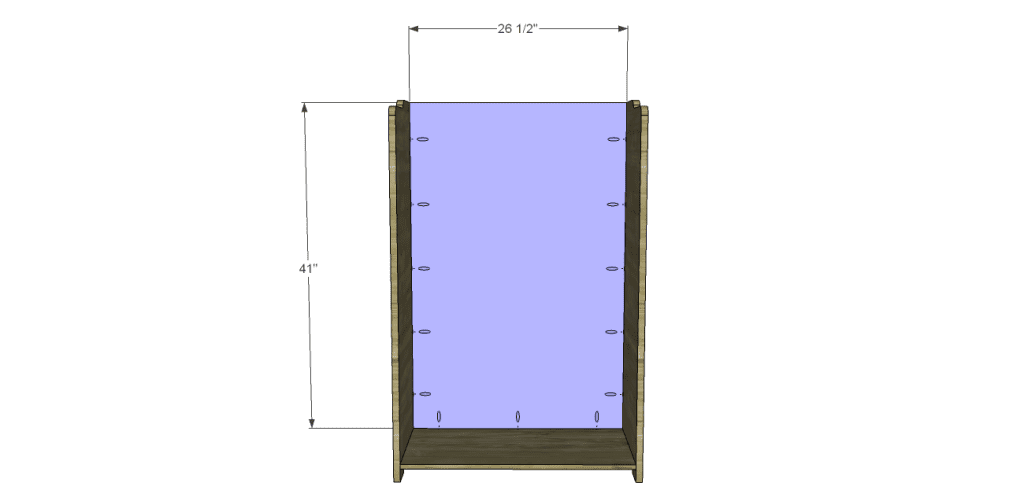
- 1 – 3/4″ plywood at 26-1/2″ x 41″ – Back
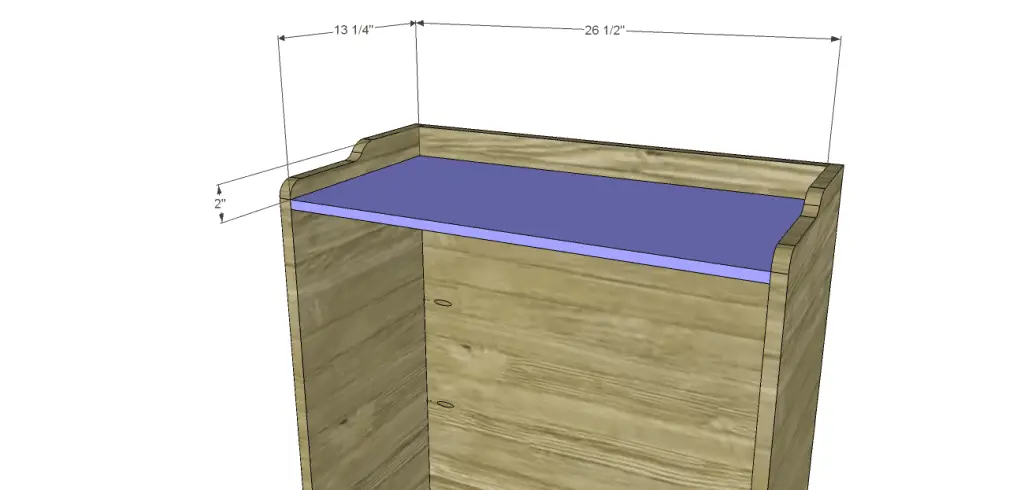
- 1 – 3/4″ plywood at 13-1/4″ x 26-1/2″ – Top
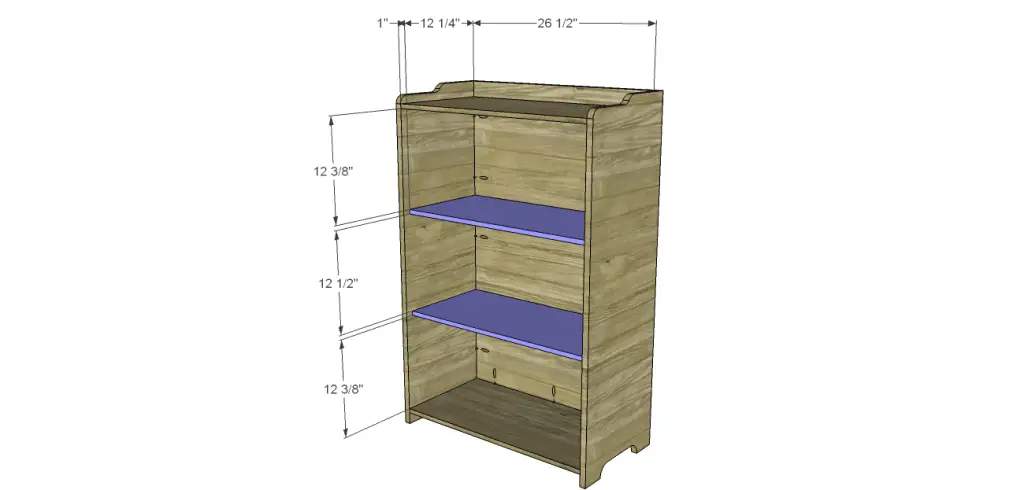
- 2 – 3/4″ plywood at 12-1/4″ x 26-1/2″ – Shelves
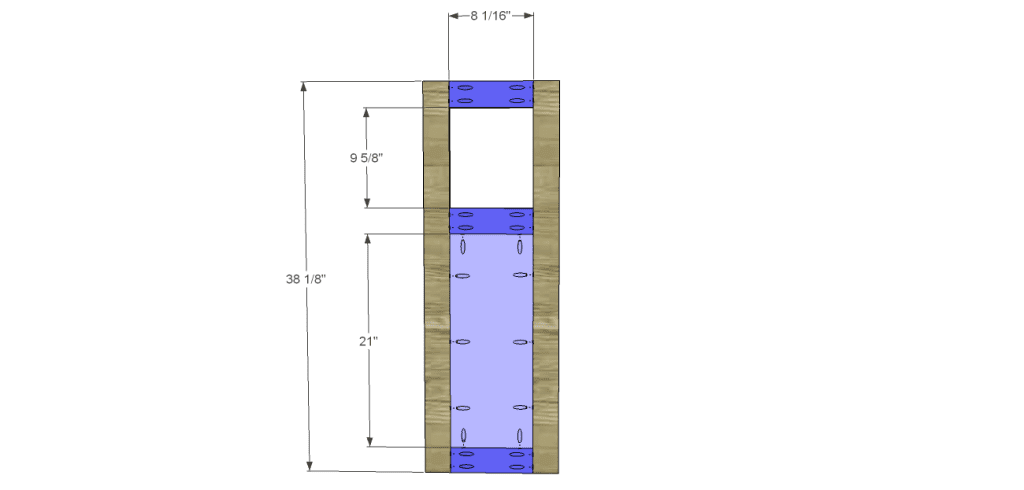
- 6 – 1×3 at 8-1/16″ – Door Rails
- 4 – 1×3 at 38-1/8″ – Door Stiles
- 2 – 1/2″ plywood at 8-1/16″ x 21″ – Door Panels
Notes:
Edge banding will be applied to the exposed edges of the plywood prior to assembly.
Step One
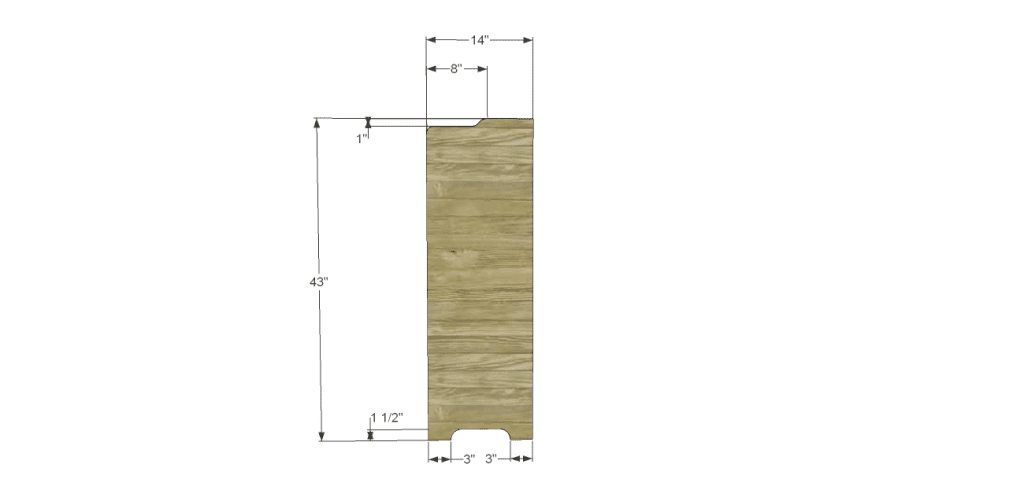
Cut the pieces for the sides. Cut the curves in the top and bottom as desired (maintaining the dimensions shown) using a jigsaw.
Step Two
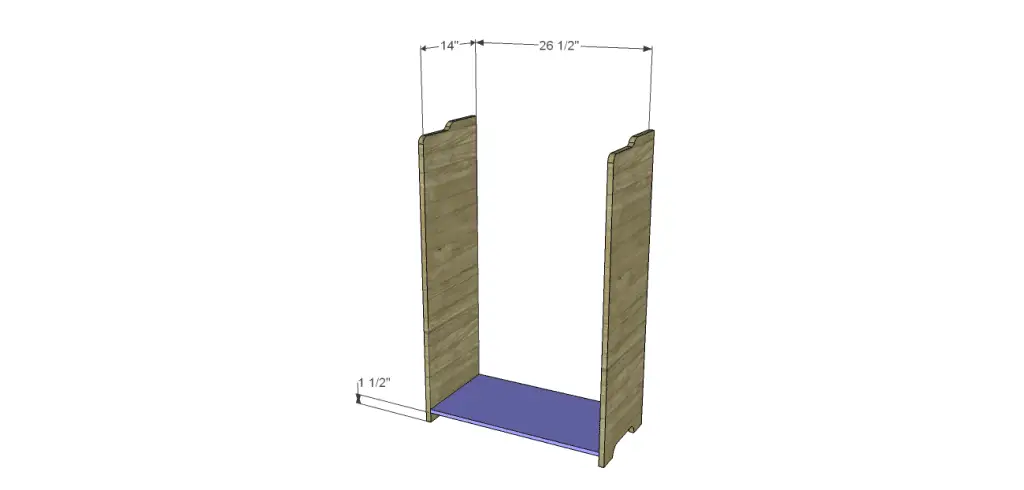
Cut the piece for the bottom. With the pocket hole jig set for 3/4″ material, drill pocket holes at each end of the bottom. Secure tot he sides using glue and 1-1/4″ pocket hole screws.
Step Three
Cut the piece for the back and drill pocket holes in each side edge as well as the bottom edge. Secure to the bottom and sides using glue and 1-1/4″ pocket hole screws.
Step Four
Cut the piece for the top. Drill pocket holes into the side and back edges. Secure to the sides and back using glue and 1-1/4″ pocket hole screws.
Step Five
Cut the pieces for the shelves and drill pocket holes into the side and back edges. Position them as shown (locating them 1″ back from the front edge of the cabinet) then secure using glue and 1-1/4″ pocket hole screws.
Step Six
Cut the pieces for the door frames and panels. Drill pocket holes in each end of the shorter frame pieces. Set the pocket hole jig for 1/2″ material and drill pocket holes in all four edges of the panel. Secure two of the door frame rails to the panels using glue and 1″ pocket hole screws positioning the pieces so that the back face of the panel is flush with the back face of the rails. Assemble the frame as shown using glue and pocket hole screws – 1″ pocket hole screws through the panel into the frame and 1-1/4″ pocket hole screws through the frame pieces.
Step Seven
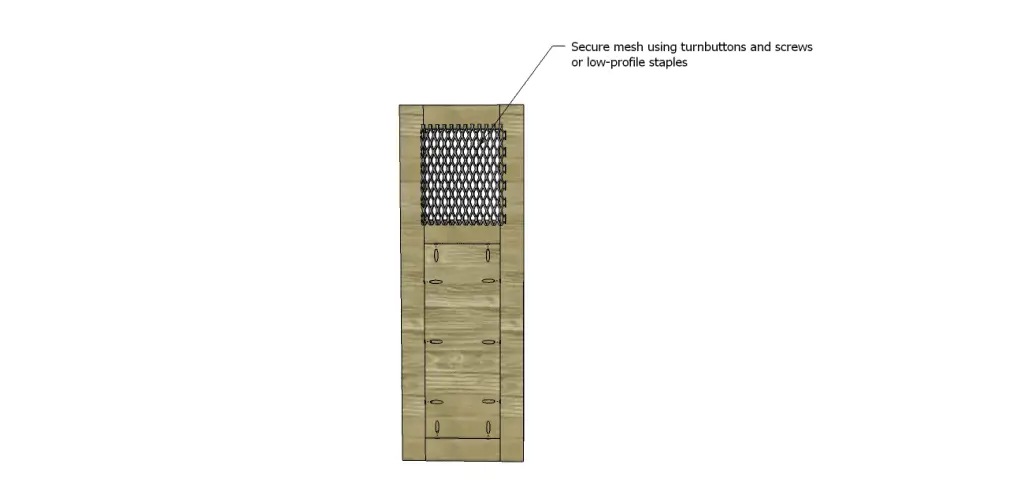
Cut the pieces of metal to cover the openings in the upper portion of the doors. Install turnbuttons to secure the metal in place.
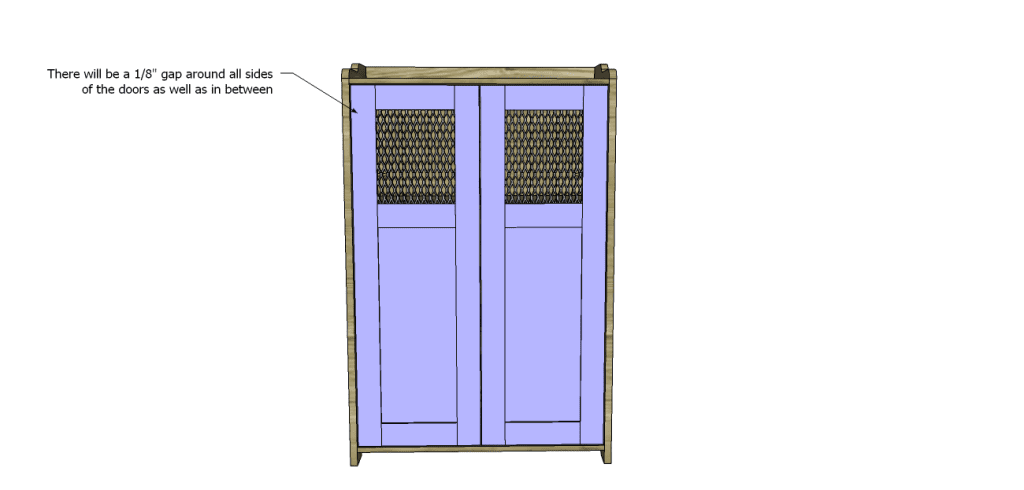
Install the hinges on the doors then install the doors in the opening. There will be a 1/8″ gap around all sides of the doors as well as in between.
Finish as desired.
The country storage cabinet plans are an excellent choice for beginners – fast, easy, and inexpensive! Have a request for a plan? Contact me at cher {at} designsbystudioc {dot} com!
Originally posted 2013-12-20 08:00:25.
