Easy Plans to Build a Wood Wine Gift Box Perfect for Holiday Gift-Giving!
It is not too early to think about the holidays… This easy to build wine bottle gift box is perfect for sharing a bottle of your favorite wine, champagne, or sparkling soda complete with a couple of glasses, as well as a bit of cheese and a few crackers. It would also work well to transport a bottle and glasses on a romantic picnic! The stemware holder can be omitted and the box could hold three bottles of wine or champagne, or maybe even a few special hot sauces. I am planning on building a couple out of oak Purebond plywood using the glue resist technique on the front for a special touch!

Materials:
- 1-1/4″ brad nails
- 3/4″ hole saw or paddle bit (<– affiliate link!)
- 1 set of hinges
- 1 drawer pull or utility handle
- 1 small hasp lock
- Wood glue
- Sandpaper (100, 150, 220 grits)
- Finishing supplies (primer & paint or stain, sealer)
Lumber:
- 1 quarter sheet of 1/2″ plywood (2′ x 4′)
Cut List:
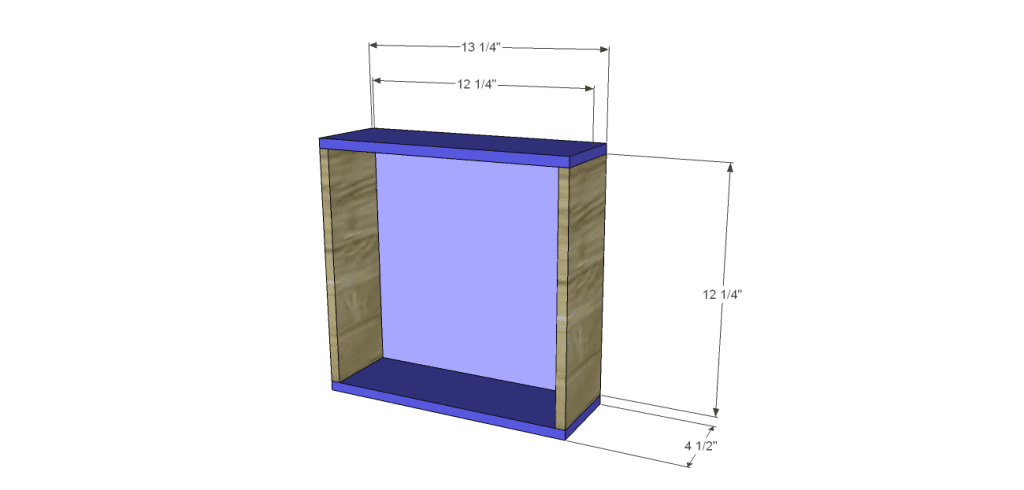
- 2 – 1/2″ plywood at 4-1/2″ x 12-1/4″ – Box Sides
- 2 – 1/2″ plywood at 4-1/2″ x 13-1/4″ – Box Top & Bottom
- 2 – 1/2″ plywood at 12-1/4″ x 12-1/4″ – Box & Lid Panel
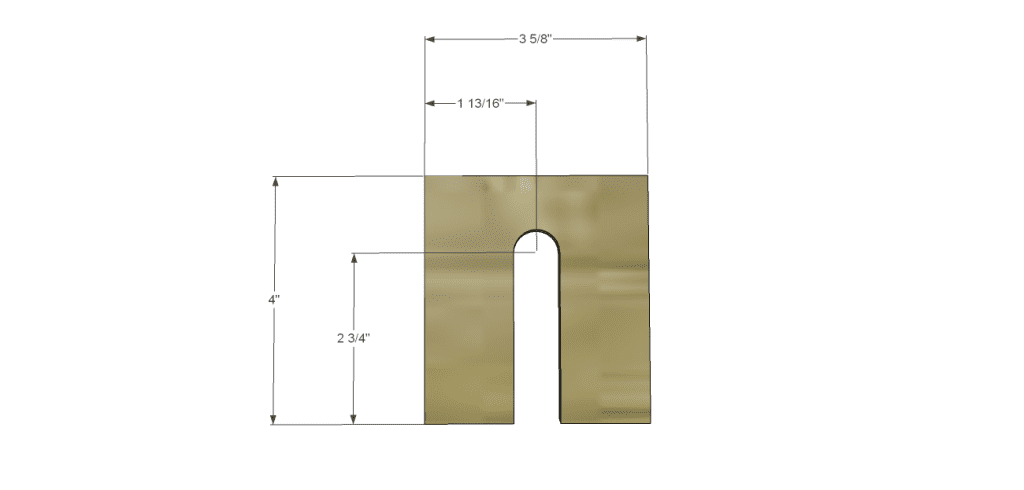
- 4 – 1/2″ plywood at 3-5/8″ x 4″ – Stemware Holder & Shelf
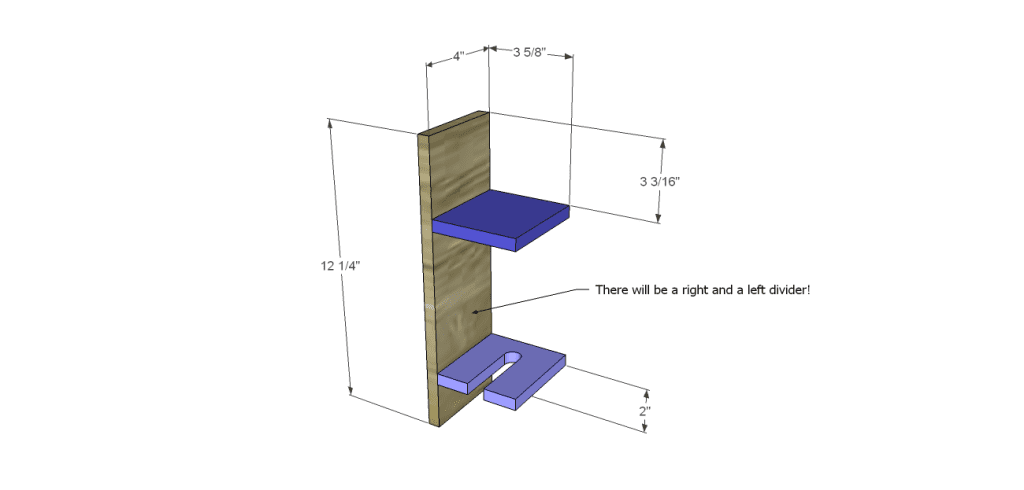
- 2 – 1/2″ plywood at 4″ x 12-1/4″ – Dividers
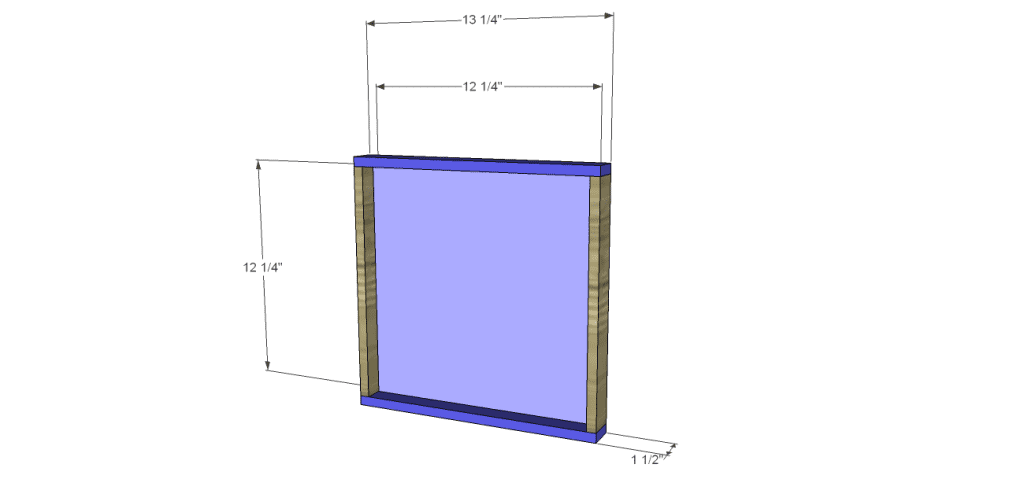
- 2 – 1/2″ plywood at 1-1/2″ x 12-1/4″ – Lid Sides
- 2 – 1/2″ plywood at 1-1/2″ x 13-1/4″ – Lid Top & Bottom
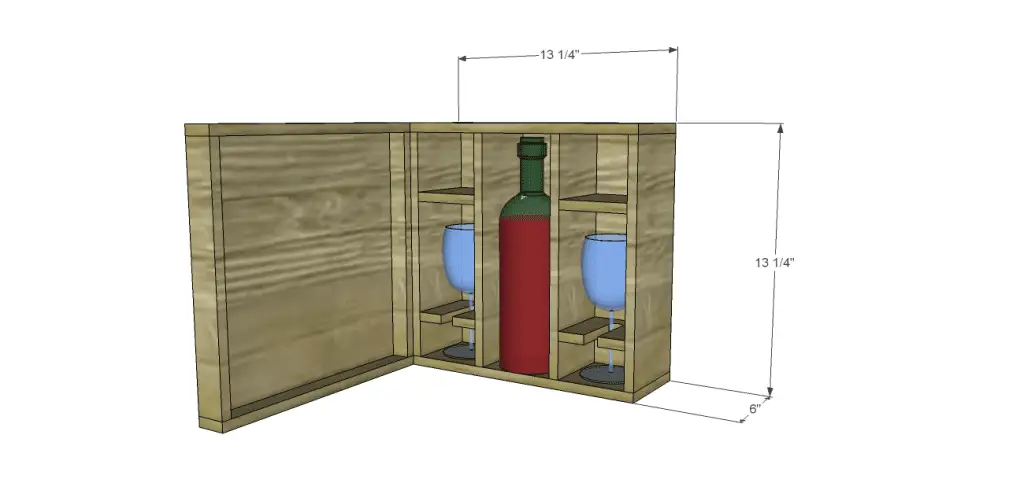
Notes:
Sand each piece thoroughly before assembly.
Step One
Cut the pieces for the box. Use glue and 1-1/4″ brad nails to attach the box sides to the panel, then secure the top and bottom.
Step Two
Cut the pieces for the stemware holder. Make a mark as indicated on the pieces. Cut a 3/4″ hole using a hole saw or a paddle bit. Draw a line from the outside edge of the circle to the bottom of the piece (on each side of the circle) to cut the notch for the stemware holder. Cut the lines using a jigsaw, then sand smooth.
Step Three
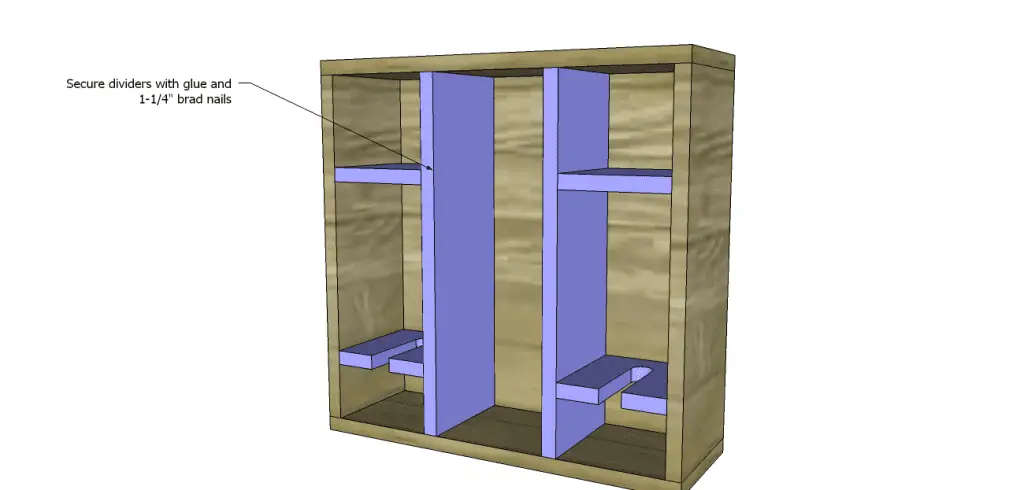
Cut the pieces for the shelves and the dividers. Secure the shelves and the stemware holders to the dividers as shown using glue and 1-1/4″ brad nails. Note that there will be a right and a left piece. Secure the pieces in the box using glue and 1-1/4″ brad nails.
Step Four
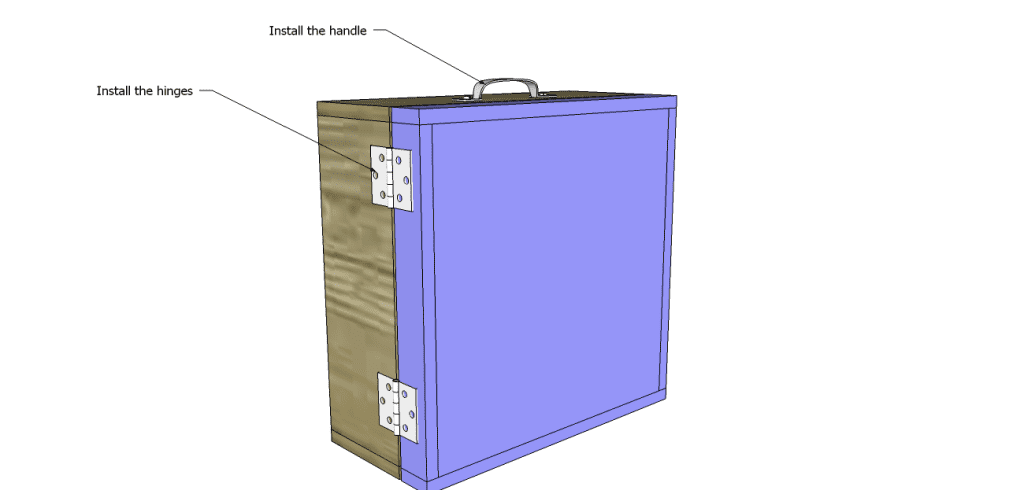
Cut the pieces for the lid. Assemble the lid in the same manner as the box. Finish as desired then install the hinges, the handle, and the hasp lock.
How excited will your family and friends be when you show off your DIY skills to build this wine bottle gift box? It is the perfect project for all skill levels!
Originally posted 2013-09-27 08:00:25.




1 Comment
Pingback: Wine Bottle Gift Box – Free Woodworking Plan.com