Building a Large Sideboard Cabinet – Woodworking Project with Detailed Plans
Got a lot of pallet wood and not sure what to do with it? Well, let me show you! The free plans to build a World Market inspired Garner sideboard features planked side panels, doors, drawer fronts, and top which is perfect for pallet wood plus the cubbies and drawers will keep everything organized!
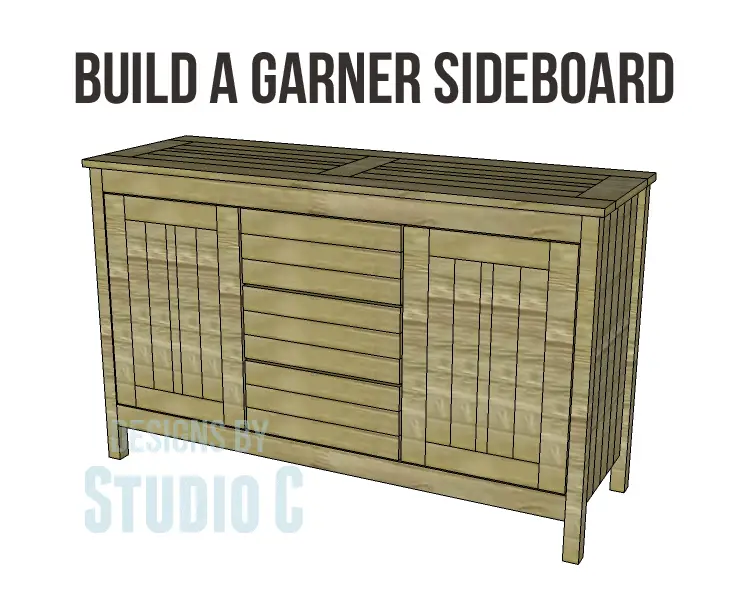
Materials:
- 1-1/4″ pocket hole screws
- 1-1/2″ brad nails
- 1-1/4″ screws
- Edge banding for plywood (<– affiliate link!)
- 2 sets of non-mortise hinges (<– affiliate link!)
- 3 sets of 14″ drawer slides (<– affiliate link!)
- 5 cabinet pulls
- Finishing supplies
Lumber:
- 2 – 1×2 at 8′
- 12 – 1×3 at 8′
- 2 – 1×4 at 8′
- 2 – 1×6 at 8′
- 1 sheet of 3/4″ plywood
Cut List:
- 4 – 2×2 at 32-1/4″ – Legs
- 12 – 1×3 at 28-1/4″ – Side Panels
- 1 – 3/4″ plywood at 28-1/4″ x 50″ – Back
- 2 – 1×3 at 50″ – Front Stretchers
- 1 – 3/4″ plywood at 15-3/4″ x 50″ – Bottom
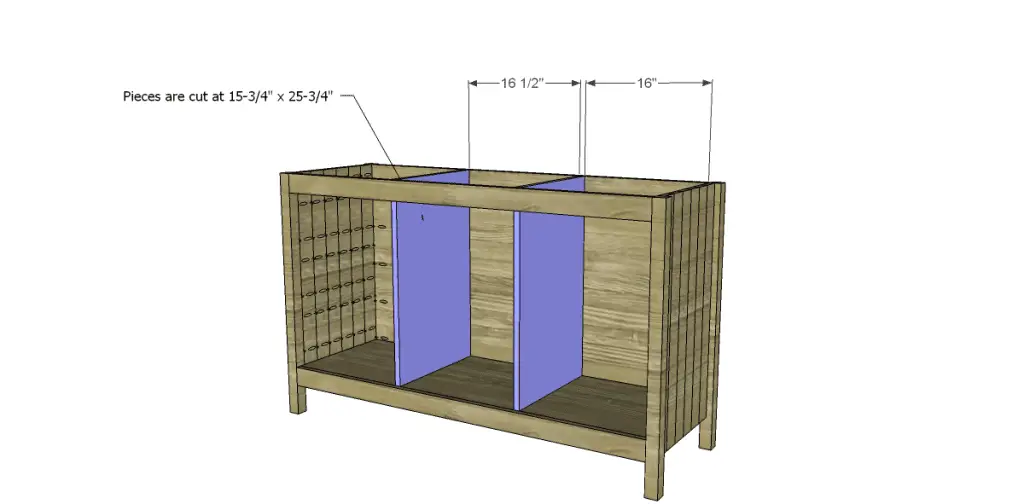
- 2 – 3/4″ plywood at 15-3/4″ x 25-3/4″ – Dividers
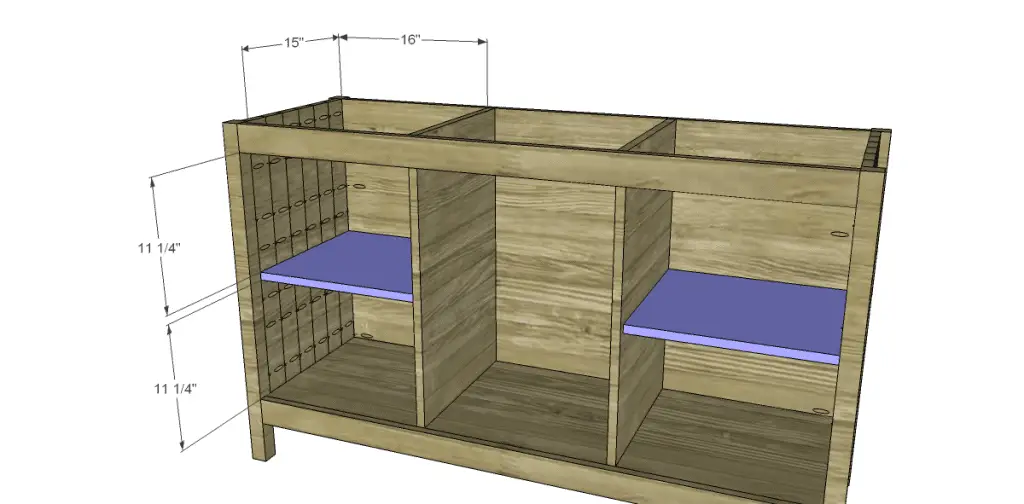
- 2 – 3/4″ plywood at 15″ x 16″ – Shelves
- 2 – 1×2 at 16-1/2″ – Drawer Dividers
- 2 – 1×4 at 54″ – Top
- 3 – 1×4 at 11-1/2″ – Top
- 8 – 1×3 at 21-3/4″ – Top
- 2 – 1×2 at 21-3/4″ – Top
- 3 – 3/4″ plywood at 12-1/2″ x 14″ – Drawer Bottoms
- 6 – 1×6 at 12-1/2″ – Drawer Sides
- 6 – 1×6 at 15-1/2″ – Drawer Front & Back
- 9 – 1×3 at 17″ – Drawer Fronts
- 4 – 1×3 at 23″ – Door Frame
- 4 – 1×3 at 11-1/8″ – Door Frame
- 8 – 1×3 at 18″ – Door Panels
- 2 – 1×2 (ripped to 1-1/8″ wide) at 18″ – Door Panel
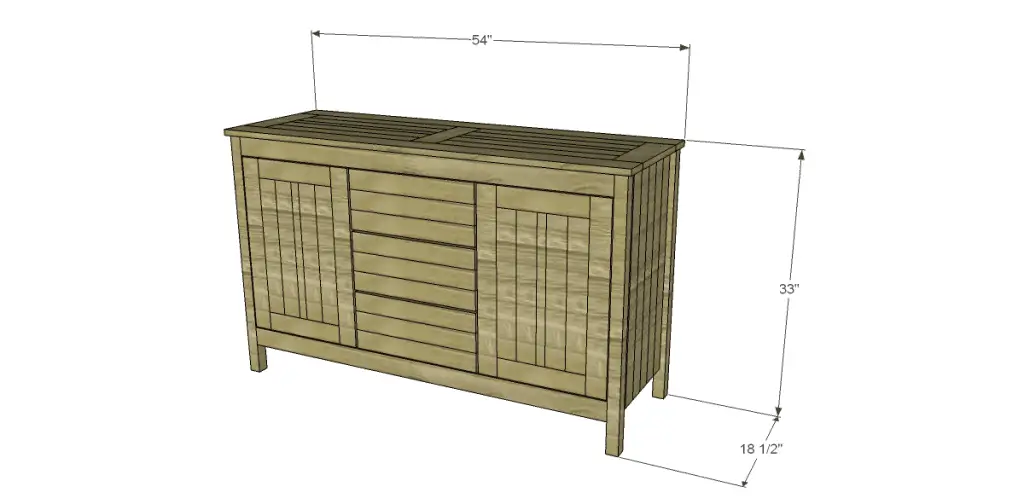
Step One
Edge banding will be applied to the exposed edges of the plywood before assembly.
Cut the pieces for the legs and side panels. The panels can be assembled by edge gluing the planks or by drilling pocket holes and using 1-1/4″ pocket hole screws to join them. Drill pocket holes along each outer board to attach the panels to the legs and secure using glue and 1-1/4″ pocket hole screws. The back face of the panels will be flush with the inside face of the legs.
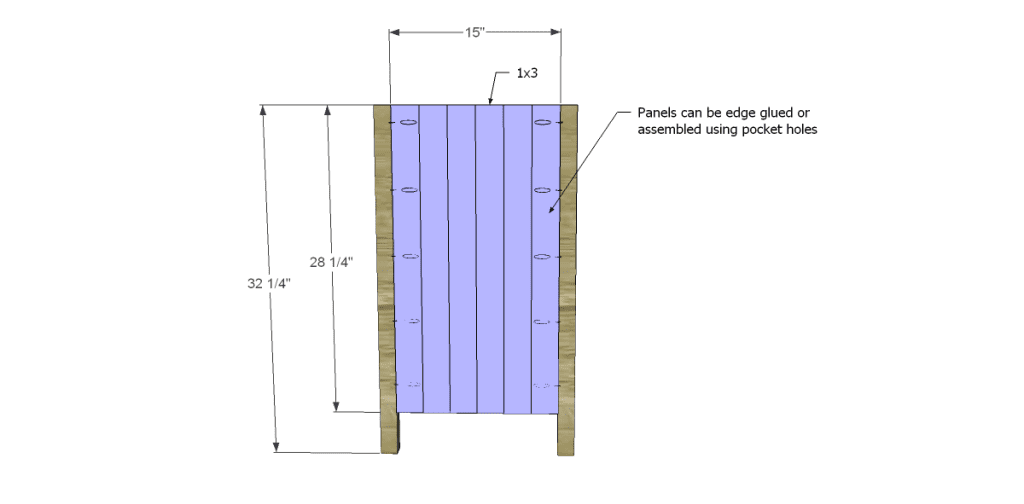
Step Two
Cut the piece for the back and drill pocket holes in each of the shorter edges. Attach tot he legs using glue and 1-1/4″ pocket hole screws. The back face of the panel will be flush with the inside face of the legs.
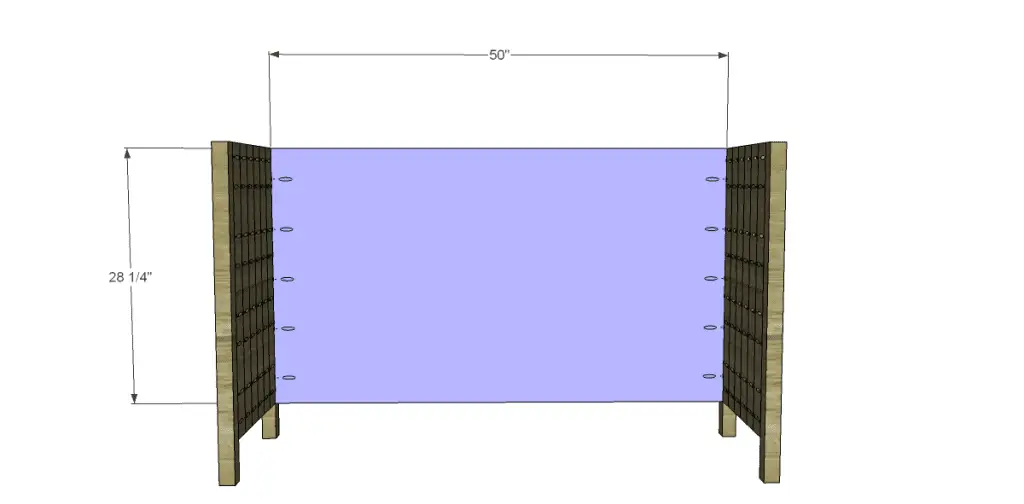
Step Three
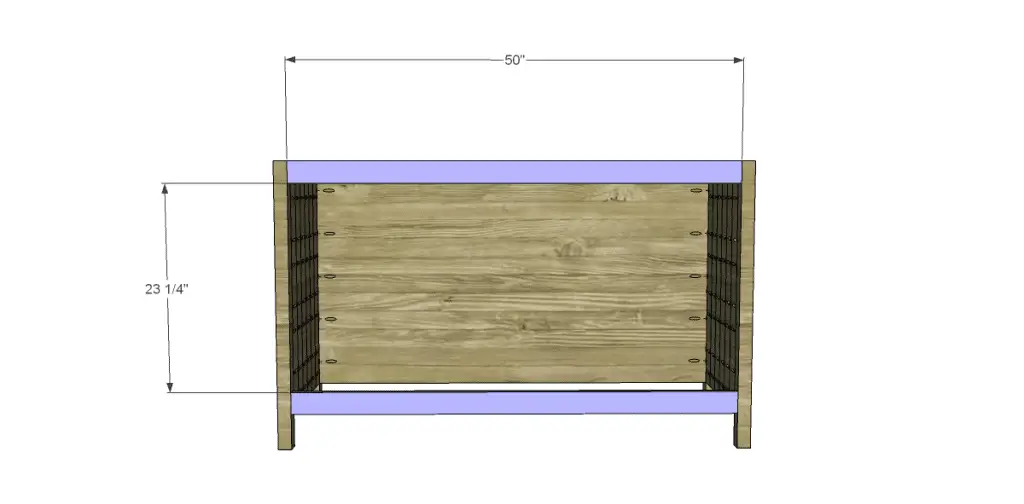
Cut the pieces for the front stretchers and drill pocket holes in each end. Attach to the legs as shown using glue and 1-1/4″ pocket hole screws.
Step Four
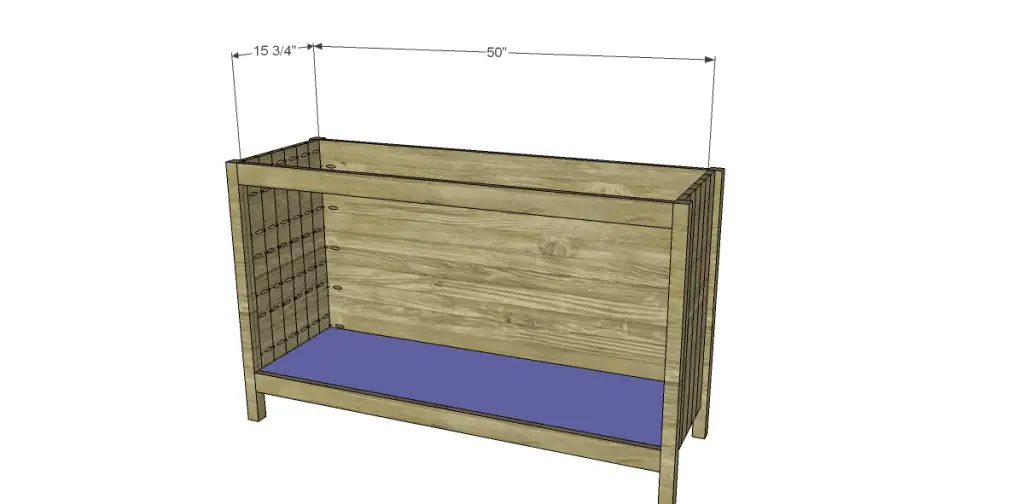
Cut the piece for the bottom and drill pocket holes in all four edges. Attach to the sides, back, and front stretcher using glue and 1-1/4″ pocket hole screws. The top of the piece will be flush with the top of the lower stretcher.
>
Step Five
Cut the pieces for the dividers and drill pocket holes in one shorter edge and one longer edge of each piece, as well as at the top front where the divider will be secured to the stretcher. For a more professional look, create a right and a left piece so the pocket holes will be hidden where the drawers will be located. Secure to the back, bottom, and upper front stretcher using glue and 1-1/4″ pocket hole screws.
Step Six
Cut the pieces for the shelves and drill pocket holes in the side and back edges only. Attach to the divider, side panel, and back using glue and 1-1/4″ pocket hole screws.
Step Seven
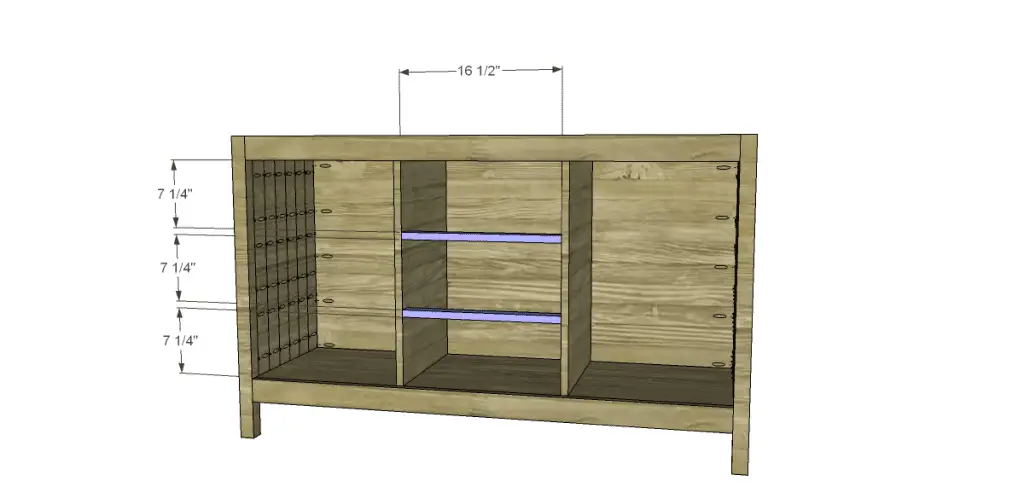
Cut the pieces for the drawer dividers and drill pocket holes in each end. Position as shown and secure with glue and 1-1/4″ pocket hole screws. Orient the pocket holes so they are facing down.
Step Eight
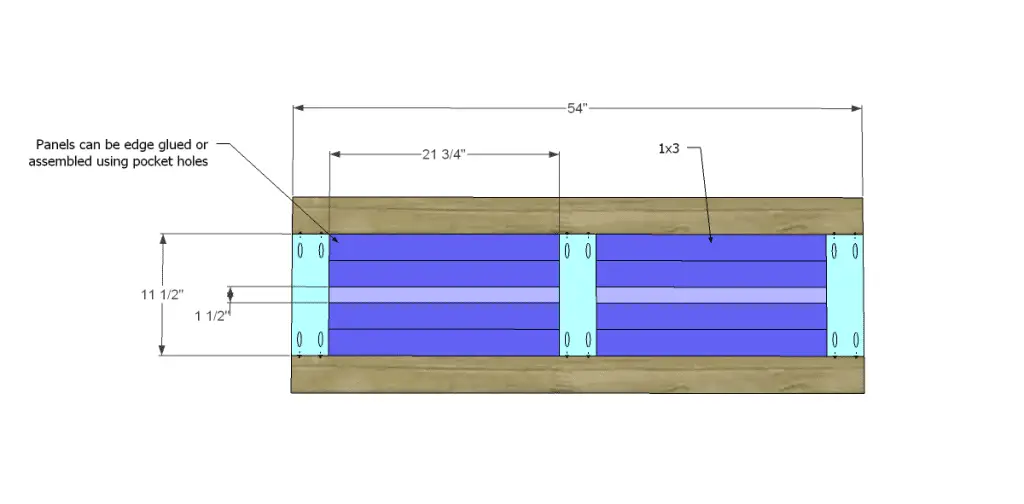
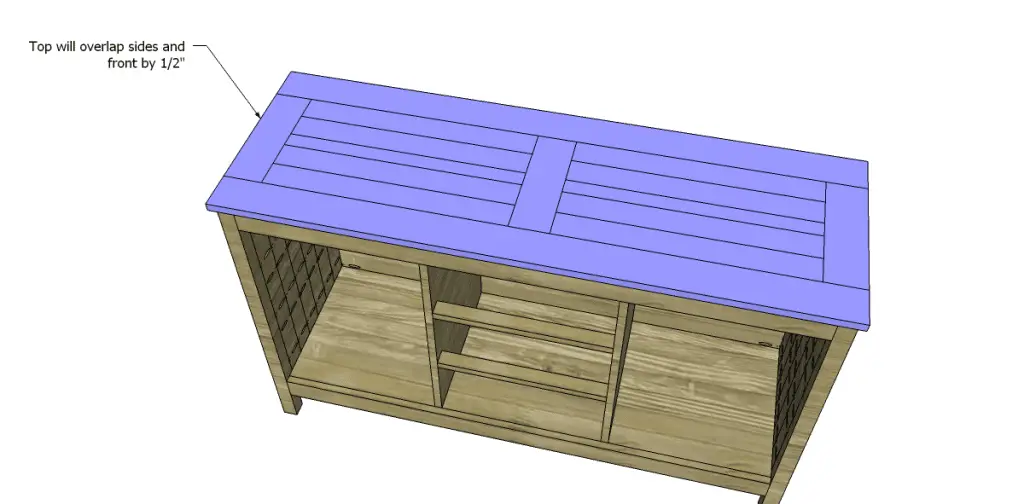
Cut the pieces for the top and drill pocket holes as shown. Assemble using glue and 1-1/4″ pocket holes. The top will overlap the sides and front by 1/2″. Position the the top and secure using glue and 1-1/4″ brad nails.
Step Nine
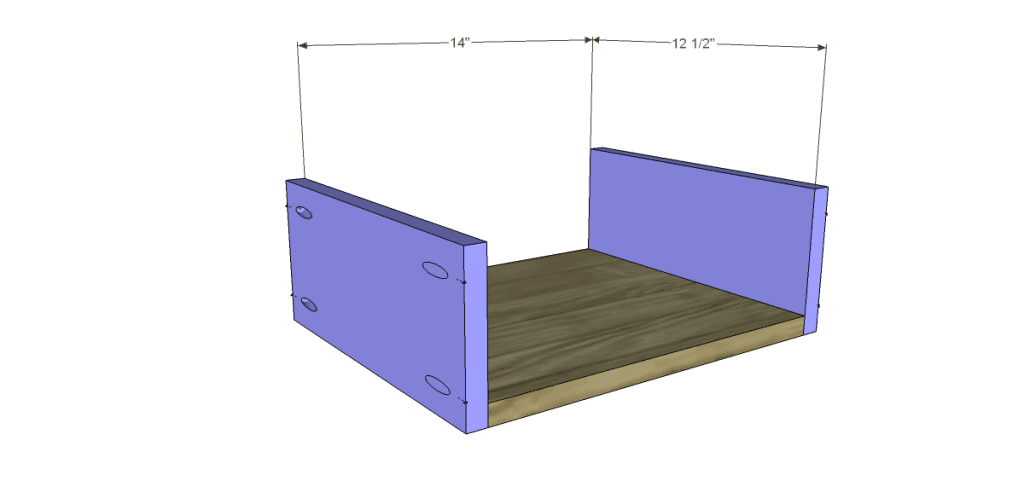
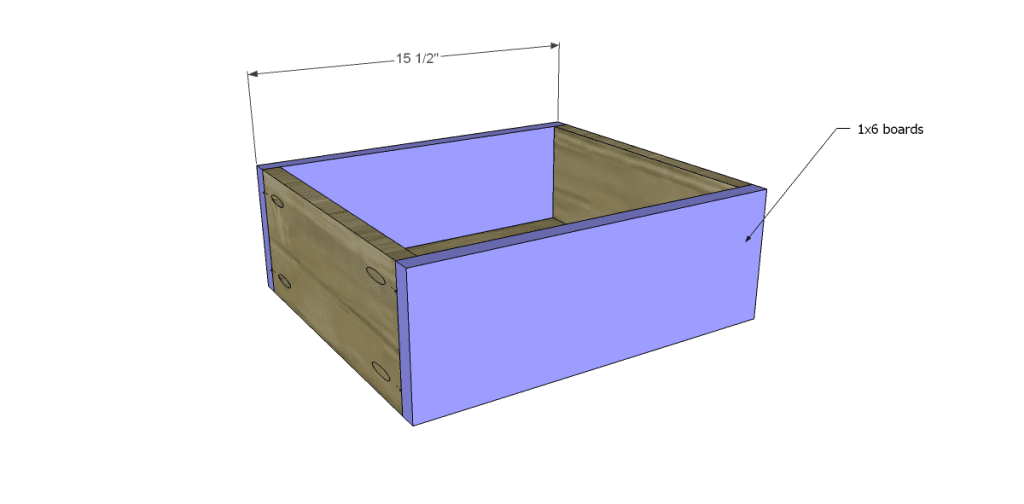
Cut the pieces for the drawer boxes and drill pocket holes in each end of the sides, as well as all four edges of the bottom. Assemble as shown using glue and 1-1/4″ pocket hole screws. The drawer front will be constructed and attached separately.
Install the drawer slides according to the manufacturer’s instructions. This easy tutorial on installing drawer slides will be helpful. Make any necessary adjustments and install the drawer boxes.
Step Ten
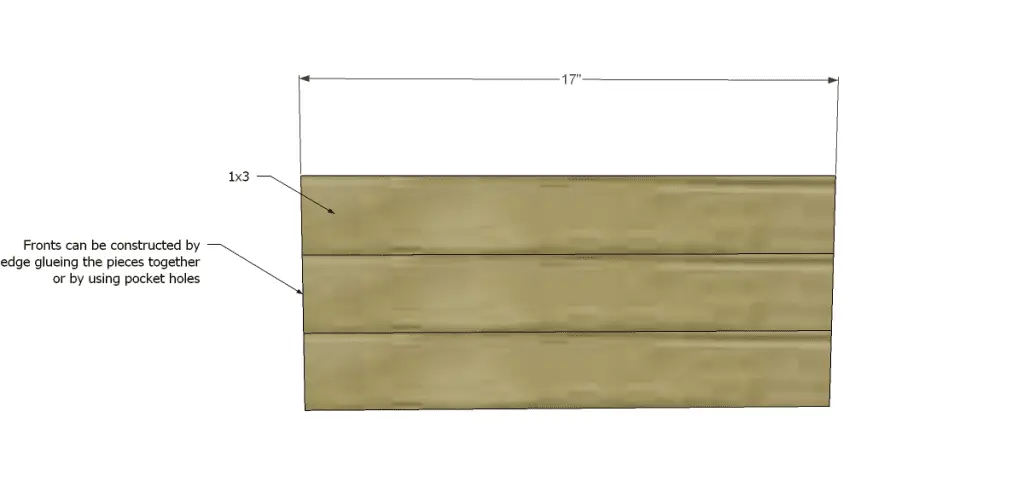
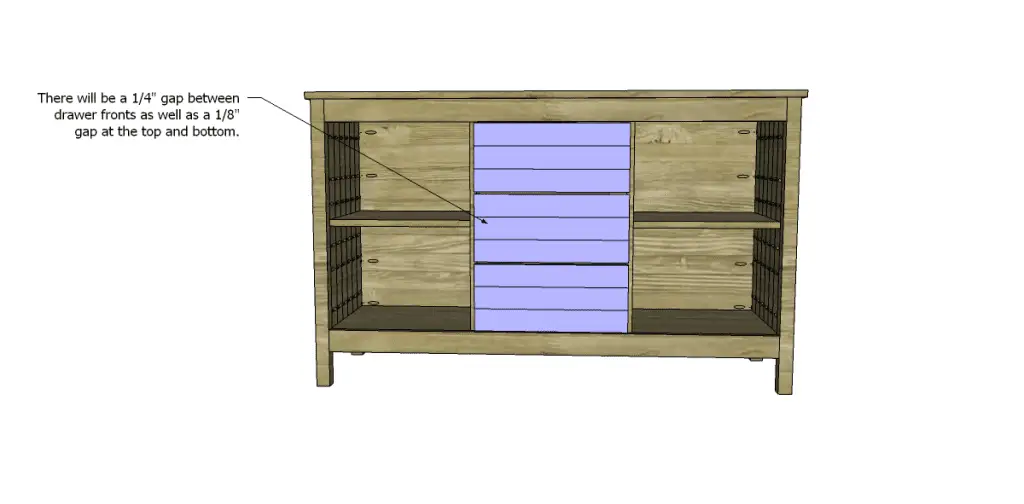
Cut the pieces for the drawer fronts. Assemble the drawer fronts by edge gluing the pieces together or by using pocket hole screws. Mark the location for the handles or knobs and drill holes for the screws. The front will overlap the dividers by 1/4″ and there will be a 1/4″ gap between the drawer fronts except at the top of the upper front and the bottom of the lower front where there will be a 1/8″ gap. Position the drawer front on each of the drawer boxes and drive a screw through each hole for the cabinet pull into the drawer box. Open the drawer, and secure the front to the box using 1-1/4″ countersunk screws from the inside. Remove the screws in the holes for the cabinet pulls, and finish drilling out the holes. Install the cabinet pulls.
Step Eleven
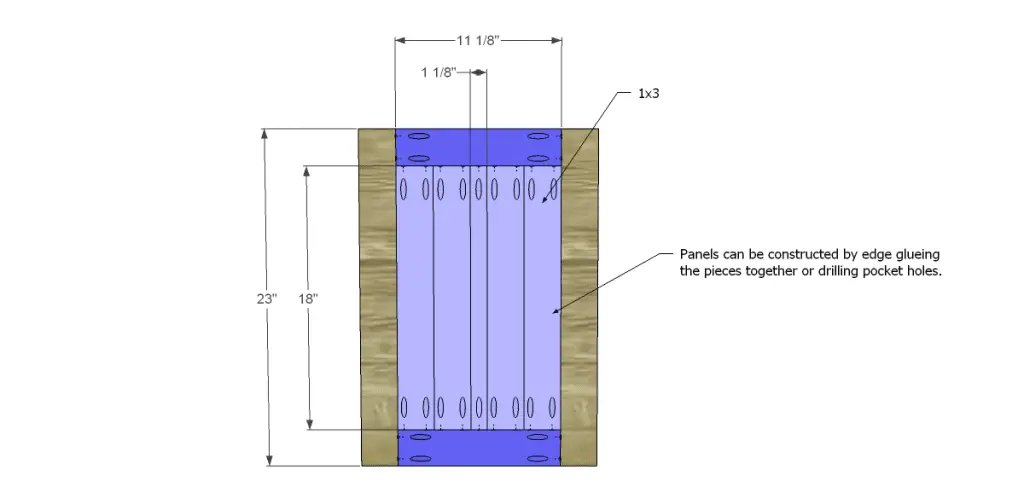
Cut the pieces for the doors and drill pocket holes as shown. Assemble as shown by edge gluing the pieces together or by using pocket hole screws. Install the hinges, then install the doors. The doors will overlap the dividers by 1/4″.
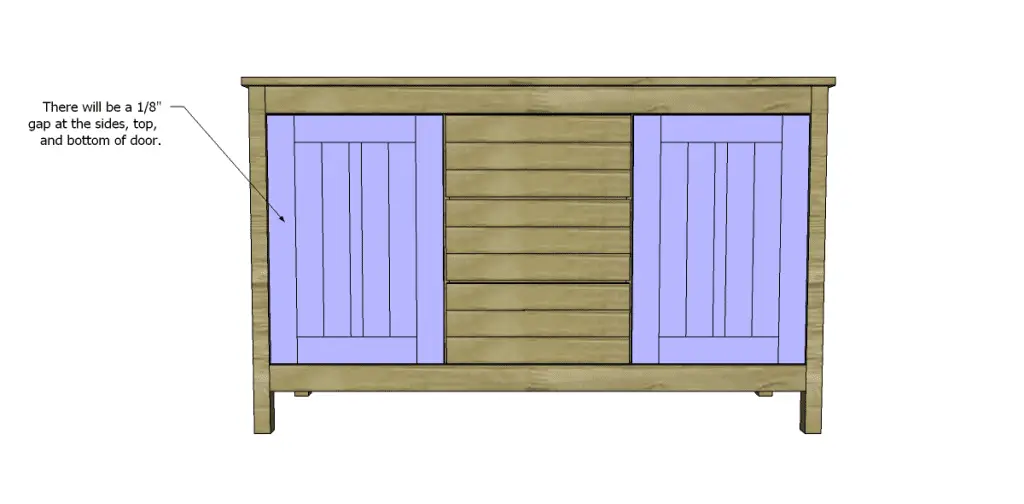 Finish as desired!
The free plans to build a World Market inspired Garner sideboard would also be great constructed out of new wood with an old finish! Got a project you’ve completed using my plans? Share photos with me at cher {at} designsbystudioc {dot} com or designsbystudioc {at} gmail {dot} com. I would love to feature your work on DbSC!
Originally posted 2013-04-16 08:00:14.

1 Comment
Pingback: Sideboard – Free Woodworking Plan.com