An Easy to Build End Table with the Right Amount of Storage!
I really like this easy to build DIY end table – it can be built in reverse for a matched pair! The free plans to build a Harrison end table features a drawer and a shelf on the bottom, with legs on one side and a solid panel on the other.
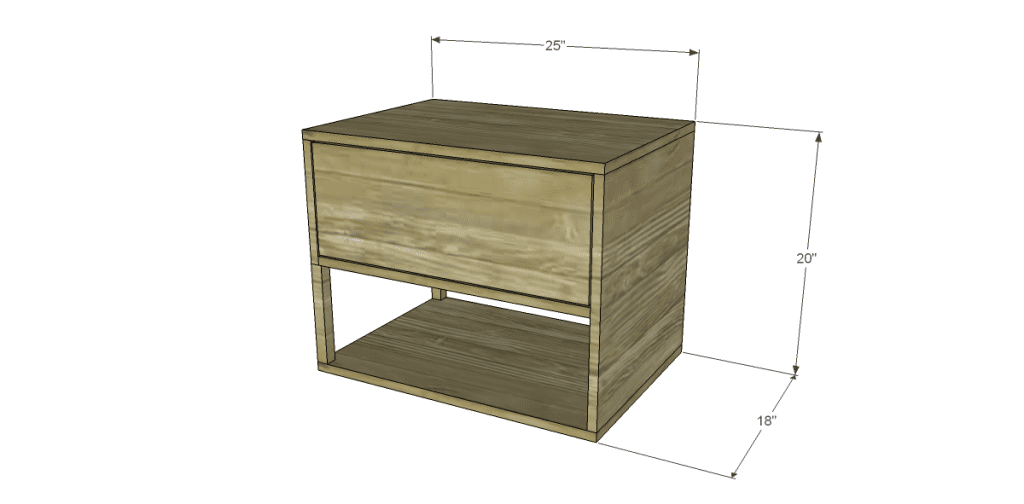
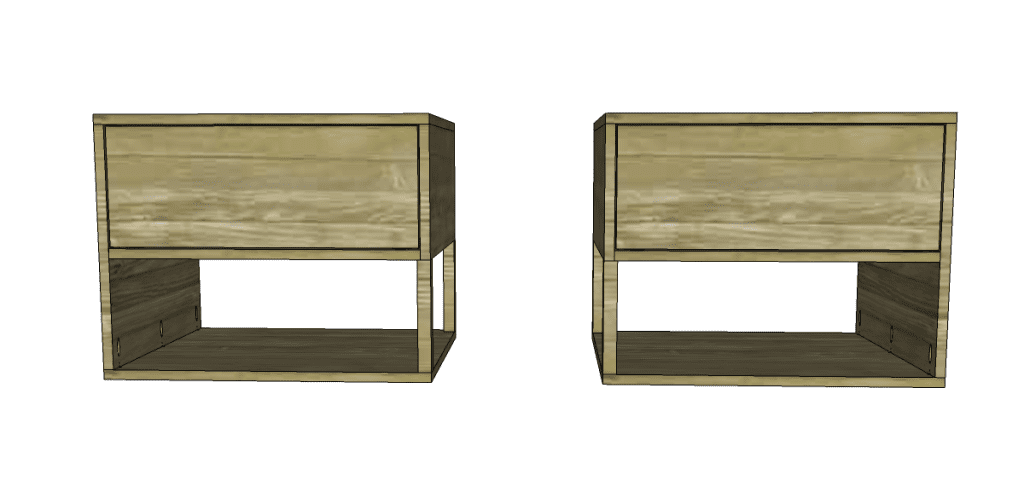
Materials:
- 1-1/4″ pocket hole screws
- 1-1/4″ screws
- Edge banding for plywood , optional
- One set of 16″ drawer slides (per table)
- Drawer pull
- Finishing supplies
Lumber:
- One 1″ square dowel at 3′
- Half sheet of 3/4″ plywood
Cut list:
- 2 – 3/4″ plywood at 18″ x 25″ – Base & Top
- 2 – 1″ dowel rods at 8-1/2″ – Legs
- 1 – 3/4″ plywood at 10″ x 18″ – Side
- 1 – 3/4″ plywood at 18″ x 18-1/2″ – Side
- 1 – 3/4″plywood at 18″ x 23-1/2″ – Shelf
- 1 – 3/4″ plywood at 9-1/4″ x 23-1/2″ – Back
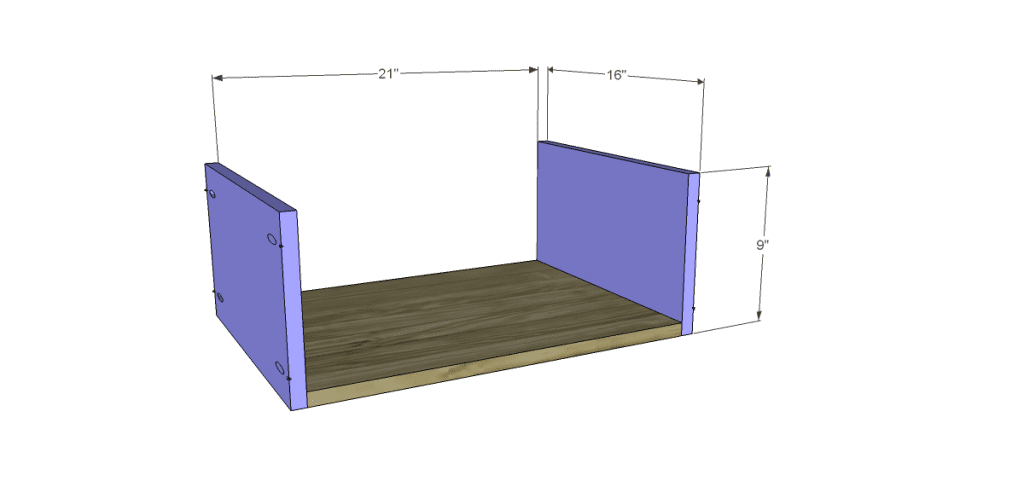
- 1 – 3/4″ plywood at 16″ x 21″ – Drawer Bottom
- 2 – 3/4″ plywood at 9″ x 16″ – Drawer Sides
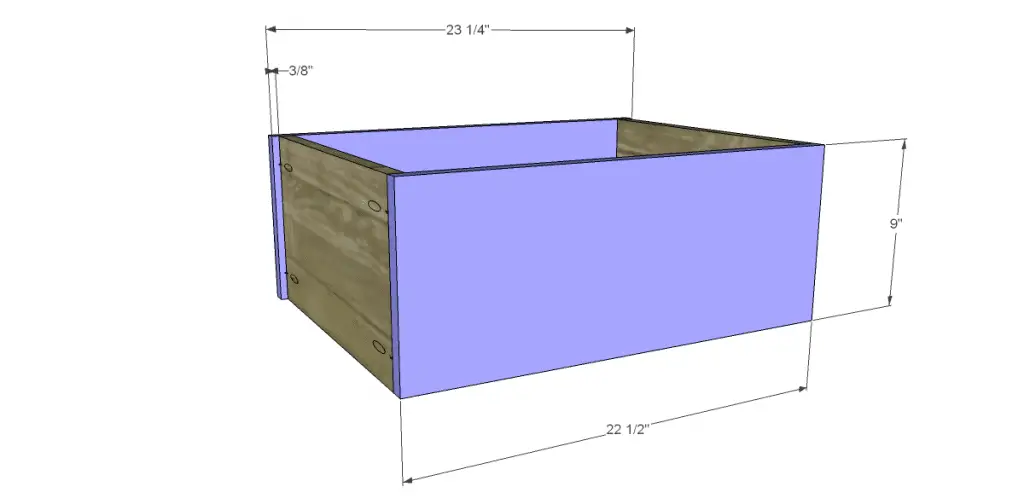
- 1 – 3/4″ plywood at 9″ x 22-1/2″ – Drawer Back
- 1 – 3/4″ plywood at 9″ x 23-1/4″ – Drawer Front
Notes about the project:
- If using edge banding, it will be applied to the exposed edges of the plywood before assembly
- Sand all of the pieces before putting everything together to make finishing easier
Step One
Cut the pieces for the base, legs, and sides. Drill pocket holes as shown in the shorter side, and drill pocket holes in the top and bottom edges of the larger side. Attach the dowels to the shorter side using glue and 1-1/4″ pocket hole screws. The dowels will be flush with the outside face of the side piece. Attach the base using countersunk 1-1/4″ screws through the base into the dowels. Attach the larger side to the base using glue and 1-1/4″ pocket hole screws.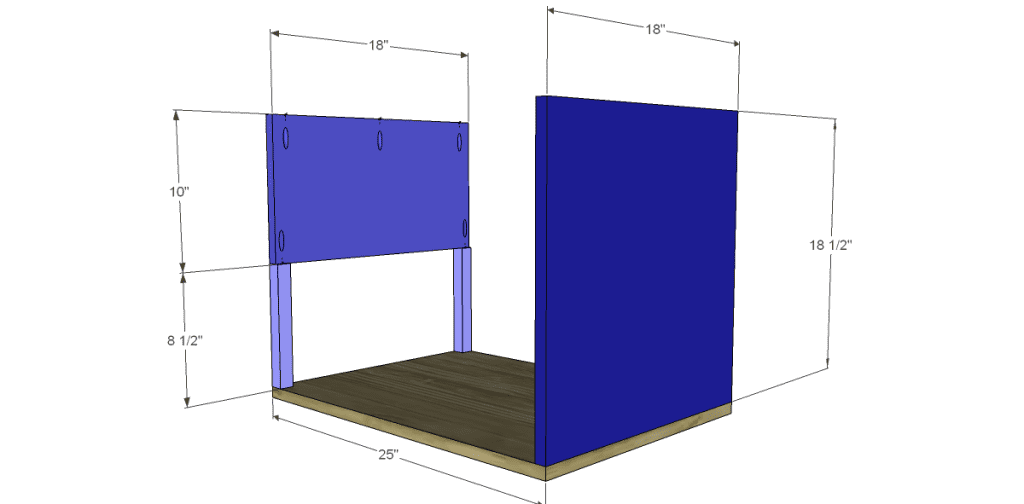
Step Two
Cut the piece for the shelf and drill pocket holes as shown. Position the shelf so the pocket holes face up (and will be hidden by the drawer) and secure using glue and 1-1/4″ pocket hole screws.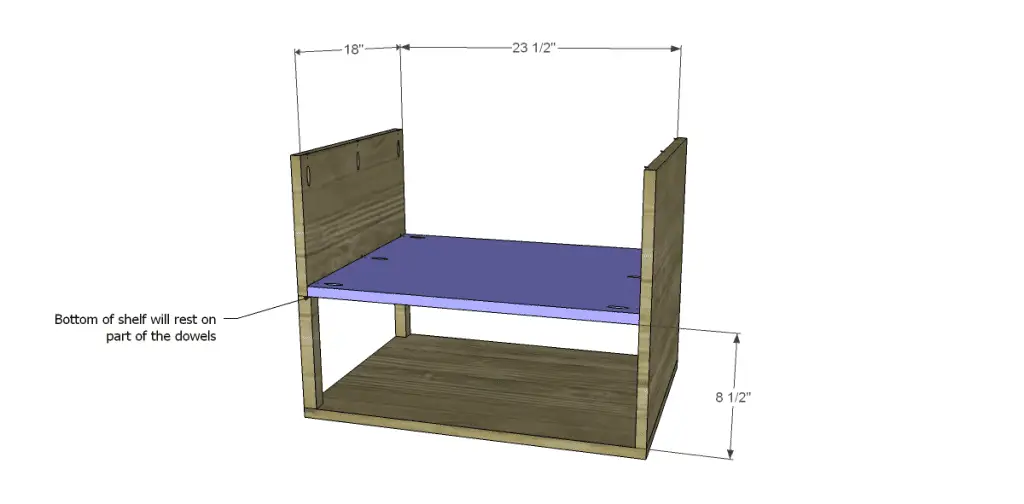
Step Three
Cut the piece for the back and drill pocket holes as shown. Position inside the cabinet and secure using glue and 1-1/4″ pocket hole screws.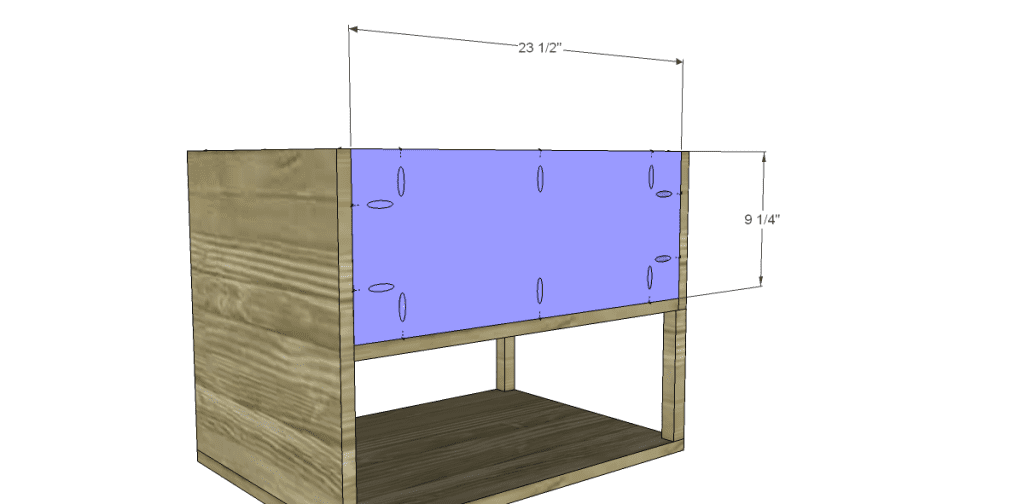
Step Four
Cut the piece for the top. Attach using glue and 1-1/4″ pocket hole screws through the holes in the sides and back into the bottom of the piece. 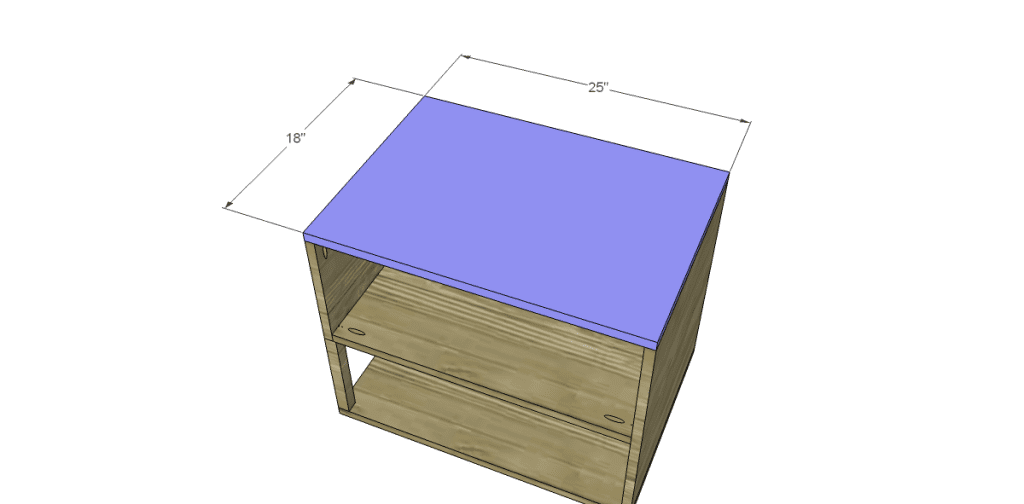
Step Five
Cut the pieces for the drawers. Drill pocket holes in each end of the side pieces as well as all four edges of the bottom. Assemble as shown using glue and 1-1/4″ pocket hole screws. The fronts will overlap the drawer box by 3/8″ on each side. Install the drawer slides according to the manufacturer’s instructions. This tutorial on installing drawer slides makes installation easy! Make any necessary adjustments.
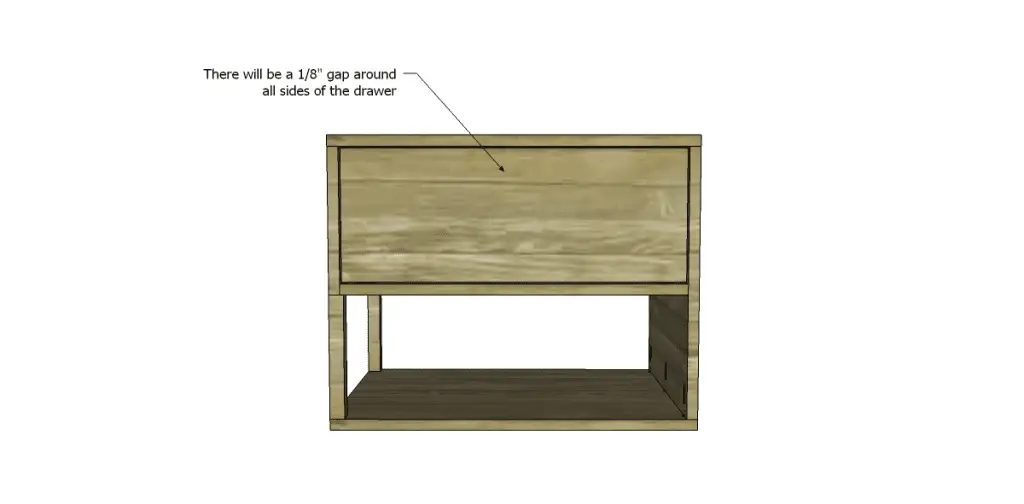
Finish as desired!
Have questions about the free plans to build a One Kings Lane inspired Harrison end table? Leave a comment below!
Originally posted 2013-02-27 08:00:37.


1 Comment
Pingback: Harrison End Table – Free Woodworking Plan.com