An Easy to Build Cabinet for Storage
I’ve been meaning to organize my tools in the laundry room for quite some time… In all honesty, I just didn’t want to tackle that mess! Buying a new washer and dryer forced me to restore order to my tool collection! I’m sharing the plans to build a custom tool cabinet in case you need a little organization, too!
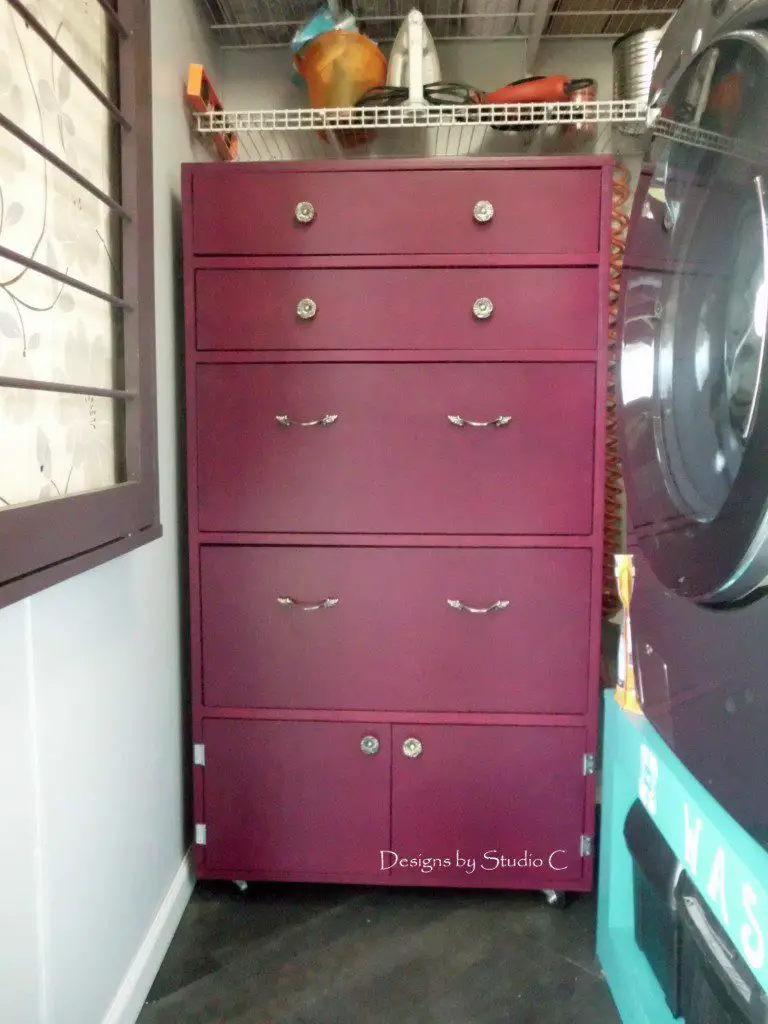
This is my girly answer to the Craftsman Tool chest! I created this chest to organize my stuff and painted it a wild shade of fuschia (Berry Brown Valspar – Satin) because – well – because I can! It features two narrow drawers, two deeper drawers, and a cubby with doors in addition to casters which will make it easier to move it around as needed. The cabinet can be customized to fit your needs – taller, deeper, etc.!
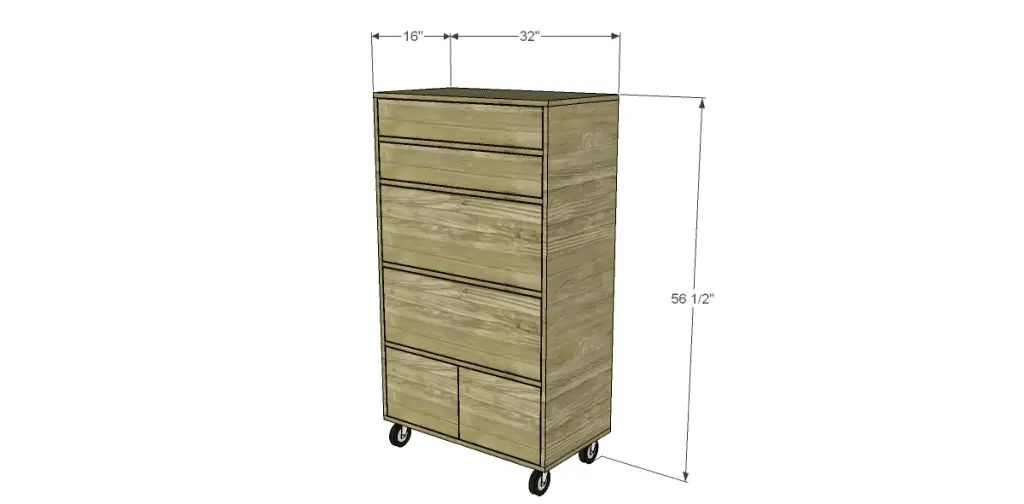
Materials:
- 1-1/4″ pocket hole screws
- Four sets of 14″ drawer slides
- Six cabinet knobs or pulls
- Two sets of hinges
- Four 4″ casters
- Edge banding for exposed edges of plywood, if desired
- Finishing Supplies
Lumber:
- Two sheets of plywood (I used Purebond plywood – the best!!)
- 2 – 1×2 at 6′
Cut List:
- 2 – 3/4″ plywood at 16″ x 51″ – Sides
- 1 – 3/4″ plywood at 30-1/2″ x 51″ – Back
- 2 – 3/4″ plywood at 16″ x 32″ – Top & Bottom
- 4 – 1×2 at 30-1/2″ – Stretchers
- 4 – 3/4″ plywood at 13-1/4″ x 28″ – Drawer Bottoms
- 4 – 3/4″ plywood at 4-1/2″ x 13-1/4″ – Small Drawer Sides
- 2 – 3/4″ plywood at 4-1/2″ x 29-1/2″ – Small Drawer Backs
- 2 – 3/4″ plywood at 5-1/2″ x 30-1/4″ – Small Drawer Fronts
- 4 – 3/4″ plywood at 11″ x 13-1/4″ – Large Drawer Sides
- 2 – 3/4″ plywood at 11″ x 29-1/2″ – Large Drawer Backs
- 2 – 3/4″ plywood at 12″ x 30-1/4″ – Large Drawer Fronts
- 2 – 3/4″ plywood at 11-3/4″ x 15-1/16″ – Doors
Click on the drawings to enlarge them!
Step One
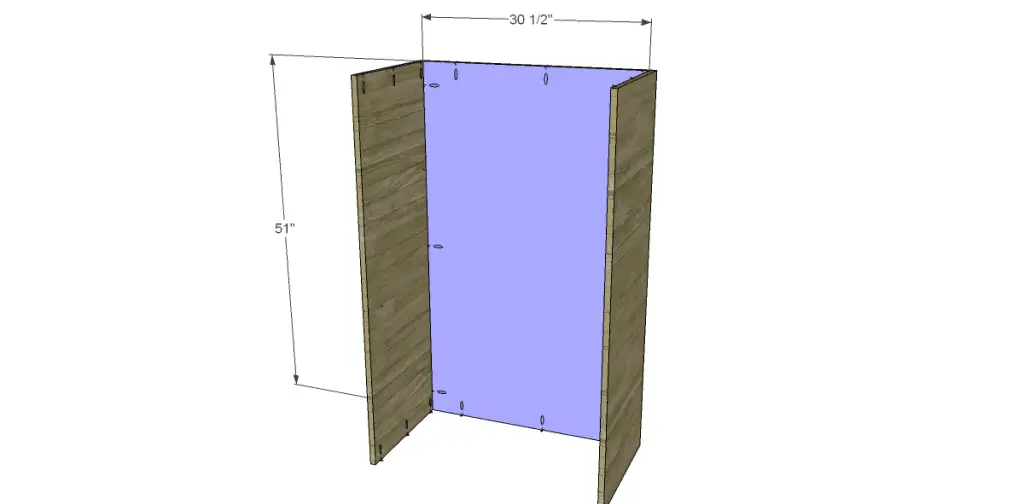
Cut the pieces for the sides and drill pocket holes in each of the shorter ends. Cut the piece for the back and drill pocket holes in all four edges. Attach the sides to the back using glue and 1-1/4″ pocket hole screws.
Step Two
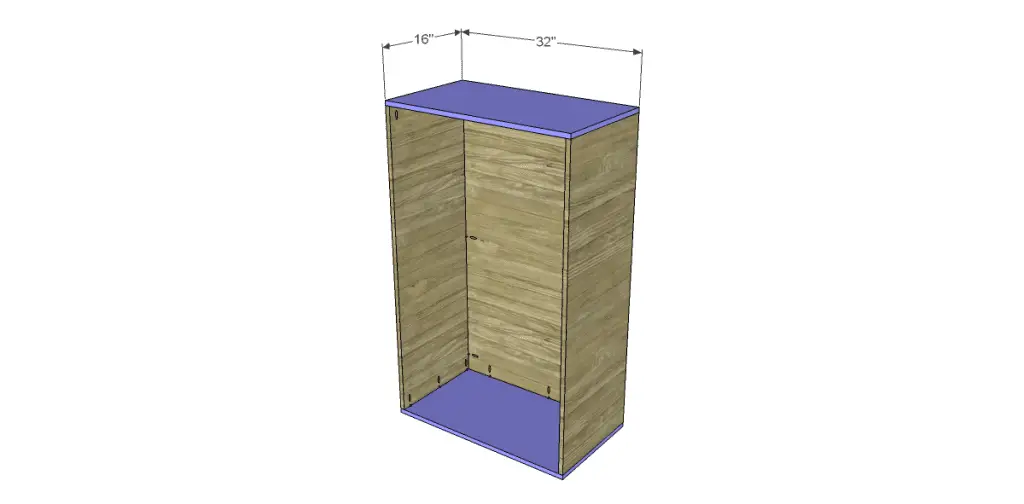
Cut the pieces for the top and bottom. Attach to the sides and back using glue and 1-1/4″ pocket hole screws.
Step Three
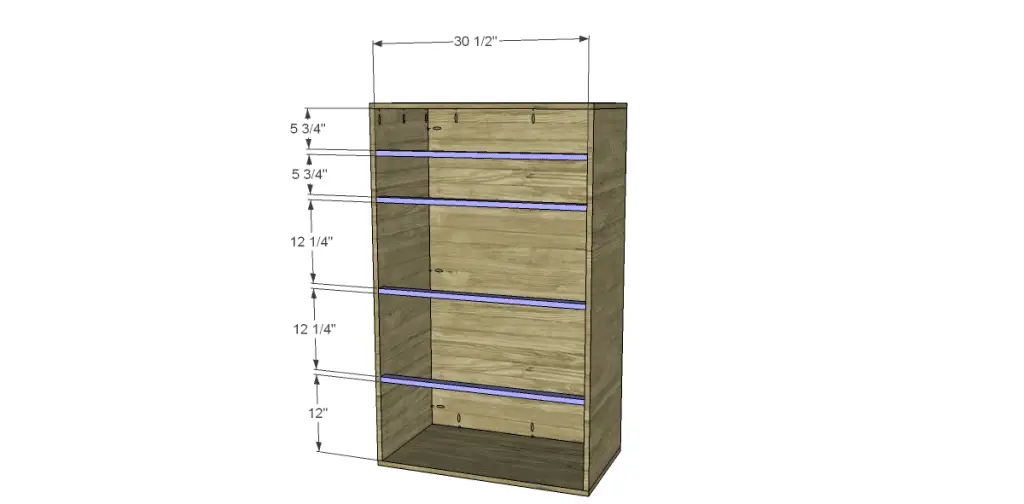
Cut the pieces for the stretchers and drill pocket holes at each end. Attach to the sides at the spacing shown using glue and 1-1/4″ pocket hole screws.
Step Four
Cut the pieces for the drawers. Drill pocket holes in all four edges of the bottoms as well as each end of the side pieces. Attach the sides to the bottoms using glue and 1-1/4″ pocket hole screws. Attach the front and the back in the same manner. Keep in mind, the fronts will be 3/8″ longer than the drawer boxes on each side.
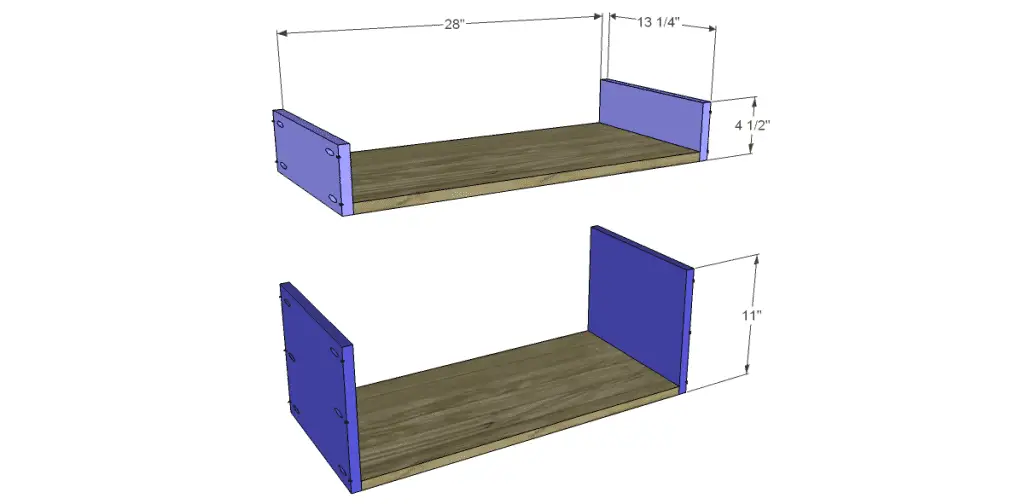
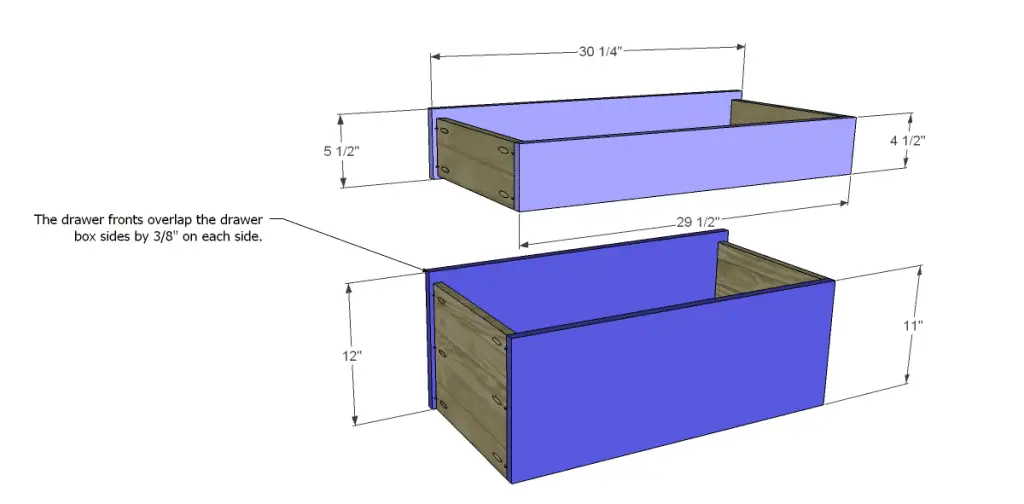
Install the drawer slides according to the manufacturer’s instructions. They will be set back 3/4″ from the front edge of the cabinet. This easy tutorial on installing drawer slides will come in handy! Make any necessary adjustments.
Step Five
Cut the pieces for the doors. Install the hinges according to the manufacturer’s instructions and make any necessary adjustments. Install the cabinet hardware.
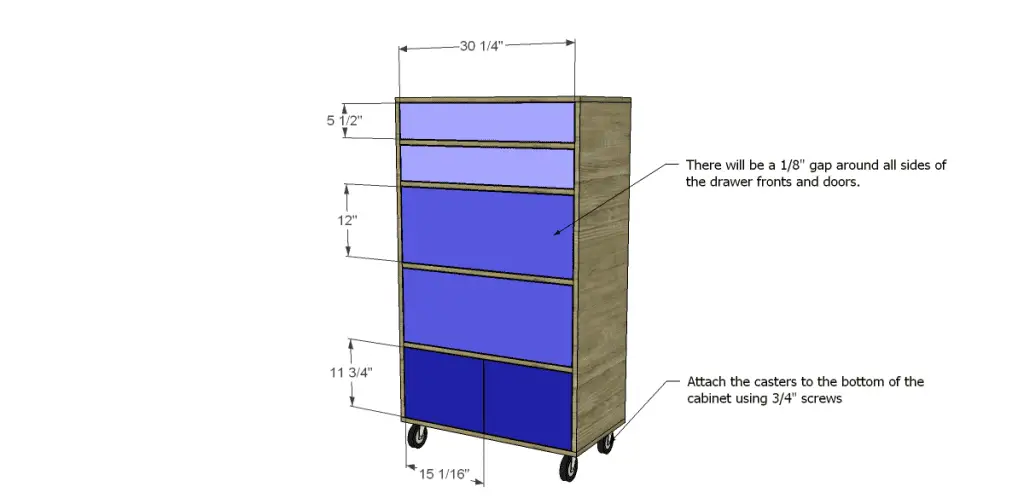
Have any questions about the free plans to build a custom tool cabinet? Leave a comment below!
Originally posted 2012-12-10 08:00:28.


3 Comments
Love it, love the color! Can’t wait to start on it. Thanks for the plans!
Awesome! when you build it, would you please share pictures so I can feature you on DbSC? Thanks for stopping by!
Pingback: Tool Cabinet – Free Woodworking Plan.com