Build a Fabulous Piece for Entertaining!
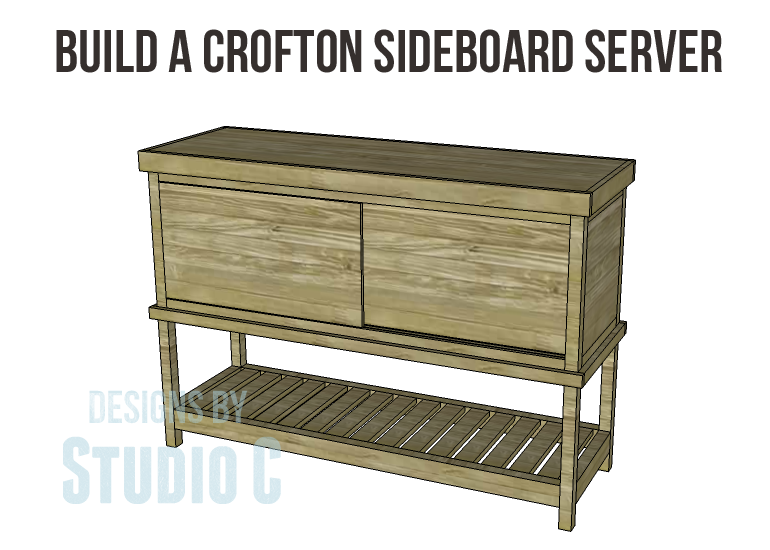
This is another one of those pieces that I envision in a weathered finish… The Crofton Sideboard Server Plans are a very easy build featuring a slatted lower shelf and a cubby with sliding doors. It is the perfect piece to be used as a bar or to store linens!
Materials:
- 1-1/4″ pocket hole screws
- 2-1/2″ pocket hole screws
- 1-1/4″ brad nails
- Edge banding, optional (<– affiliate link!)
- 2 sets of sliding door hardware
- 2 – Cabinet pulls
- Wood glue
- Sandpaper (100, 150, 220 grits)
- Finishing supplies (primer & paint, or stain, sealer)
Lumber:
- 2 – 1×2 at 6′
- 4 – 1×3 at 8′
- 3 – 2×2 at 8′
- 3 – 2×4 at 8′
- Half sheet of 1/2″ plywood
- 1 sheet of 3/4″ plywood
Cut List:
- 4 – 2×2 at 39-1/4″ – Legs
- 2 – 2×4 (ripped to 3″ wide) at 15″ – Side Frames
- 2 – 2×4 (ripped to 2-3/4″ wide) at 15″ – Side Frames
- 2 – 2×2 at 15″ – Side Frames
- 2 – 3/4″ plywood at 15″ x 15-3/8″ – Side Panels
- 2 – 2×4 (ripped to 3″ wide) at 53″ – Front & Back Upper Stretchers
- 2 – 2×4 (ripped to 2-3/4″ wide) at 53″ – Front & Back Middle Stretchers
- 2 – 2×2 at 53″ – Front & Back Lower Stretcher
- 1 – 3/4″ plywood at 15-3/8″ x 53″ – Back Panel
- 15 – 1×3 at 15″ – Shelf Slats
- 1 – 3/4″ plywood at 15″ x 53″ – Shelf
- 2 – 1/2″ plywood at 15-1/8″ x 28″ – Doors
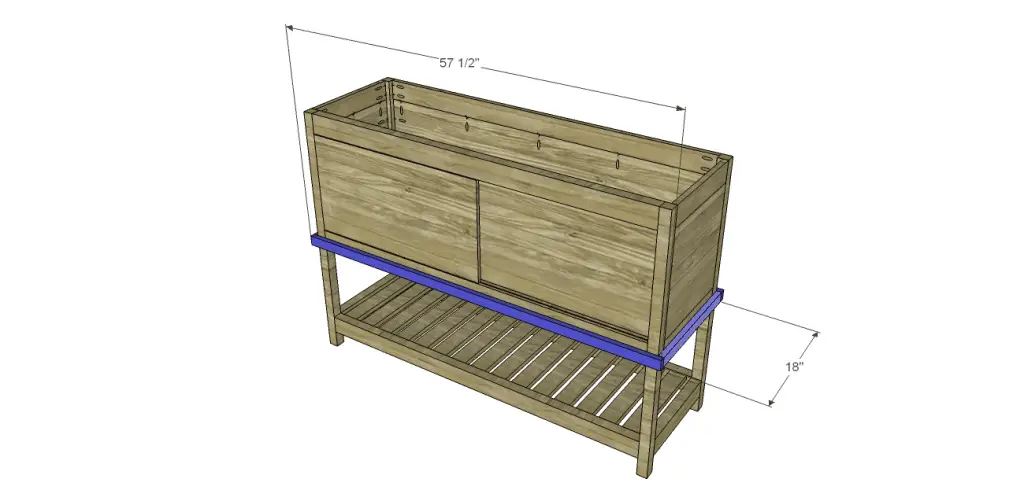
- 2 – 1×2 at 18″ – Lower Trim
- 2 – 1×2 at 57-1/2″ – Lower Trim
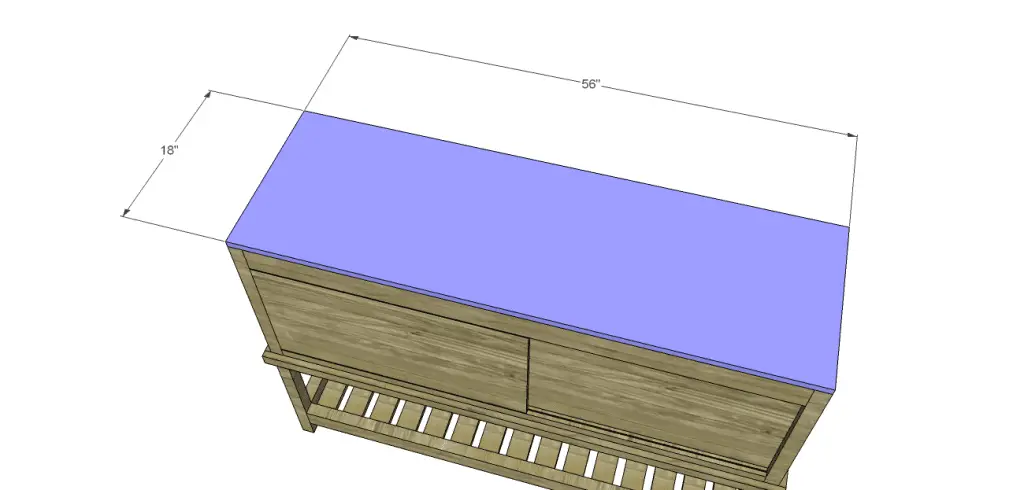
- 1 – 3/4″ plywood at 18″ x 56″ – Top
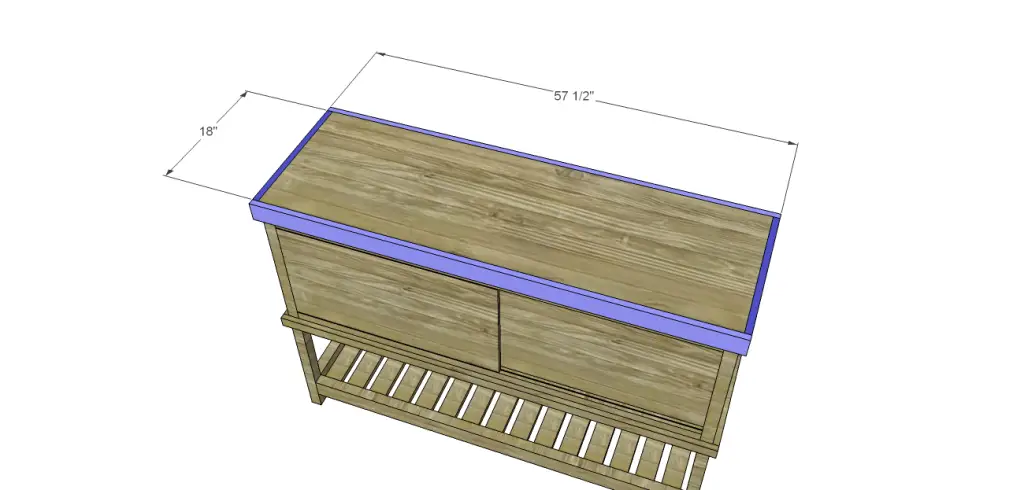
- 2 – 1×3 at 18″ – Top Trim
- 2 – 1×3 at 57-1/2″ – Top Trim
Step One
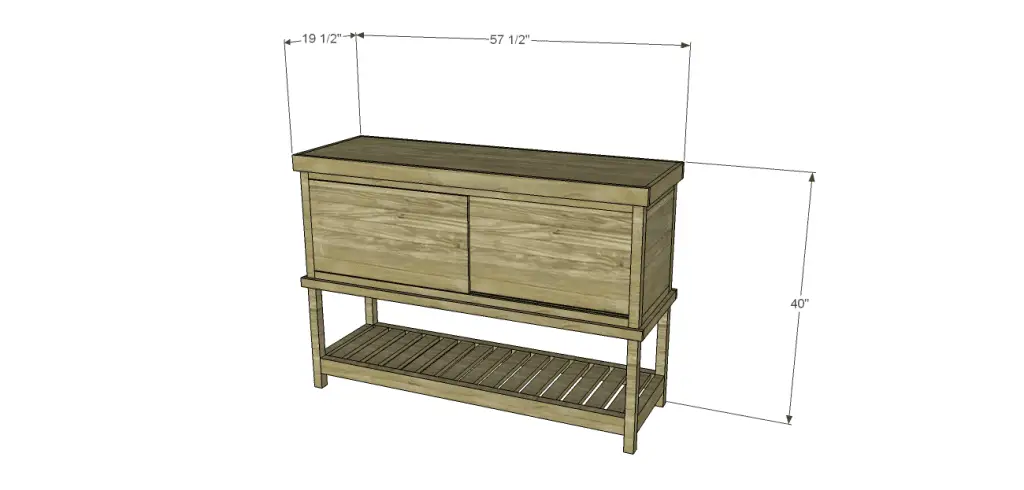
Cut the pieces for the legs, side frames, and side panels. With the pocket hole jig set for 1-1/2″ material, drill pocket holes in each end of the frame pieces. Secure the pieces to the legs as shown using glue and 2-1/2″ pocket hole screws.
Set the pocket hole jig for 3/4″ material, and drill pocket holes in all four edges of the panels. Secure to the legs and side frames using glue and 1-1/4″ pocket hole screws. The outside face of the panels will be flush with the outside face of the frame pieces.
Step Two
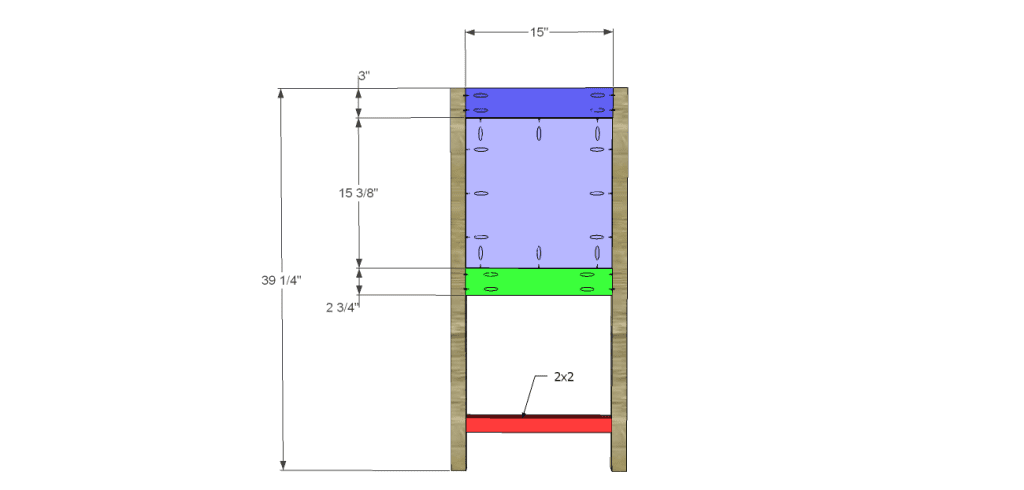
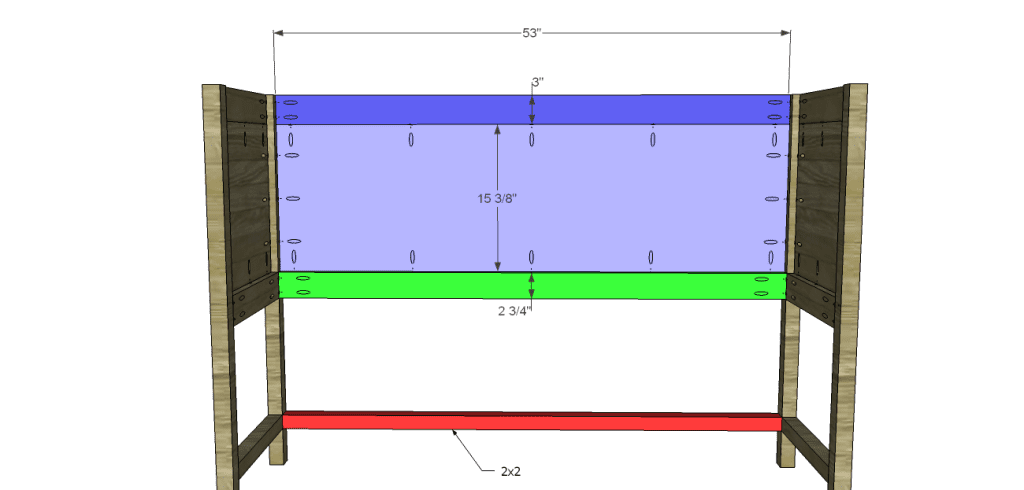
Cut the pieces for the back frame and panel. Set the pocket hole jig for 1-1/2″ material and drill pocket holes in each end of the frame pieces. Secure the pieces to the legs as shown using glue and 2-1/2″ pocket hole screws.
Set the pocket hole jig for 3/4″ material, and drill pocket holes in all four edges of the panel. Secure to the legs and side frames using glue and 1-1/4″ pocket hole screws. The outside face of the panel will be flush with the outside face of the frame pieces.
Step Three
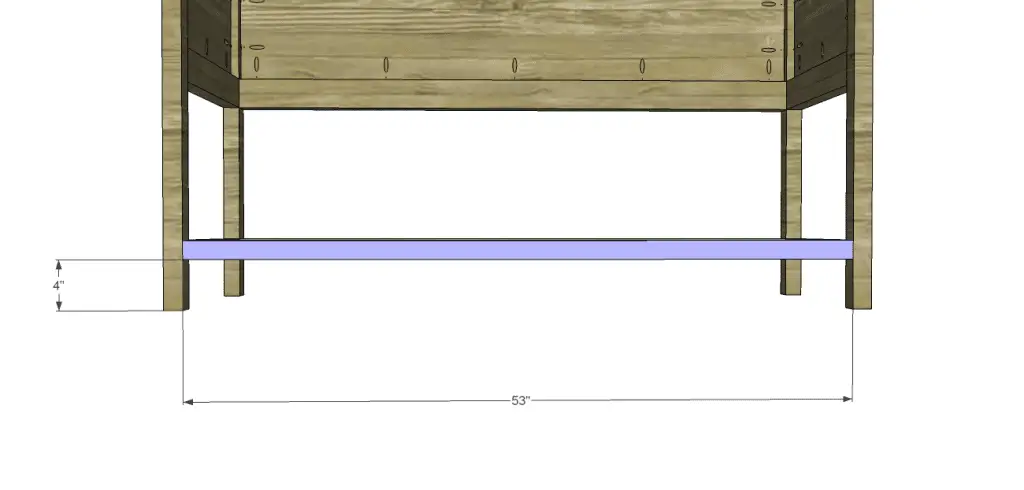
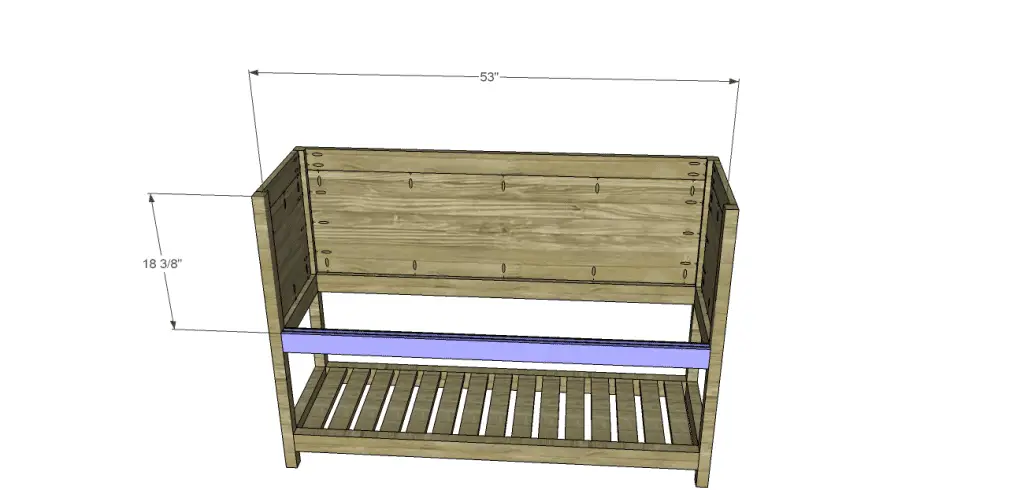
Cut the pieces for the lower front stretcher. Set the pocket hole jig for 1-1/2″ material and drill pocket holes in each end of the 2×2 piece. Secure the 2×2 piece to the legs as shown using glue and 2-1/2″ pocket hole screws.
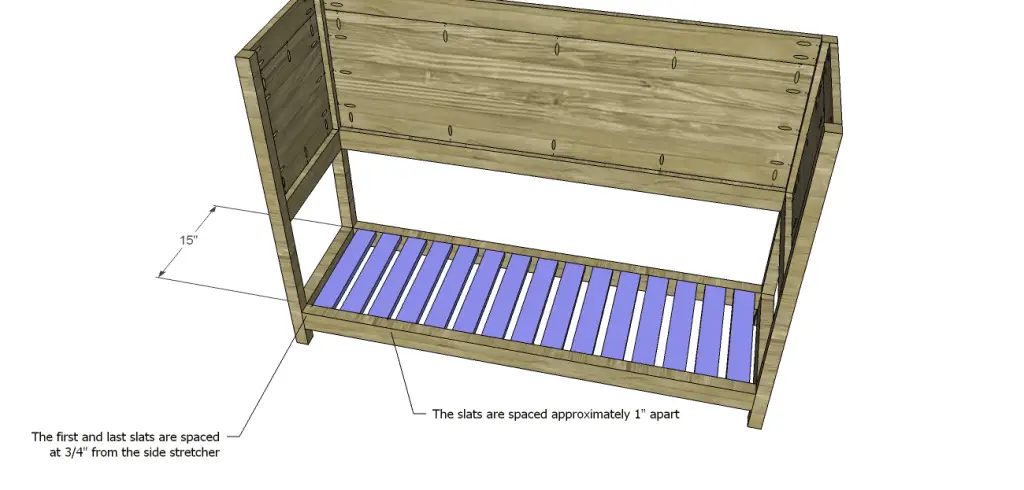
Cut the pieces for the slats. Set the pocket hole jig for 3/4″ material, and drill pocket holes in each end. Secure to the lower stretchers using glue and 1-1/4″ pocket hole screws.
 Step Four
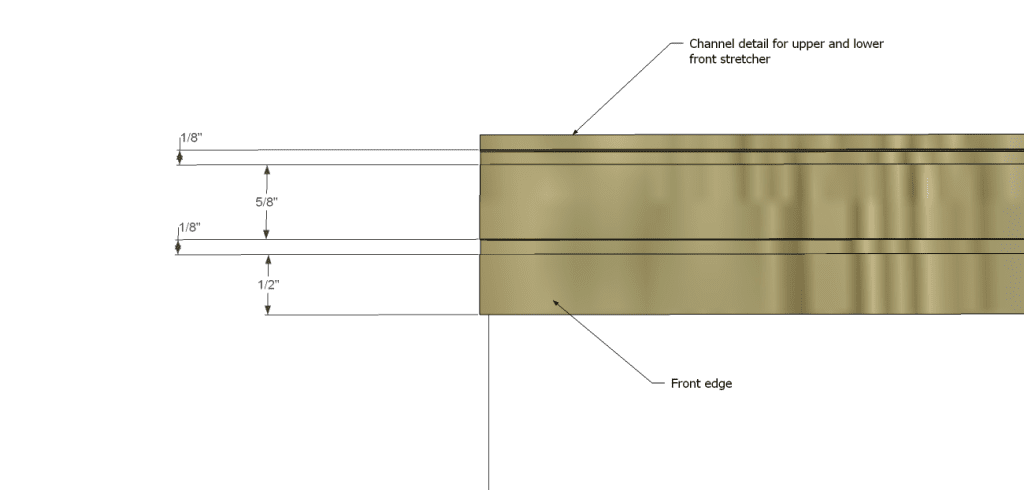
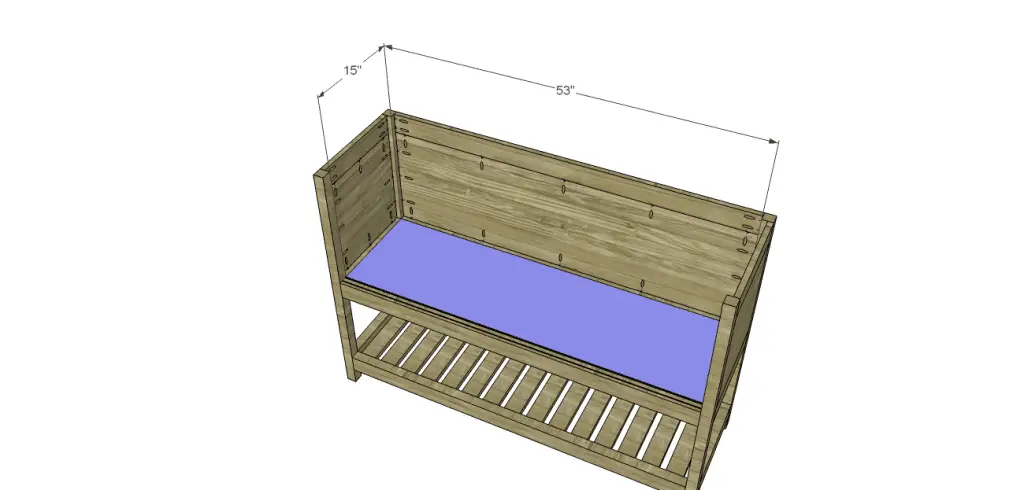
Cut the pieces for the middle and upper front stretchers. To cut the tracks for the sliding door hardware, set the depth of the table saw blade according to the depth indicated for the hardware in the instructions. Cut kerfs in each board as indicated in the drawings using the table saw. Note that there will be a top (the 3″ piece) and a bottom (2-3/4″ piece). Set the pocket hole jig for 1-1/2″ material and drill pocket holes in each end of each piece. Secure the middle stretcher (the 2-3/4″ board) using glue and 2-1/2″ pocket hole screws. Set the other board aside.
Cut the piece for the shelf. Set the pocket hole jig for 3/4″ material, and drill pocket holes in all four edges of the shelf. Secure the shelf to the middle stretchers using glue and 1-1/4″ pocket hole screws.
 Step Five
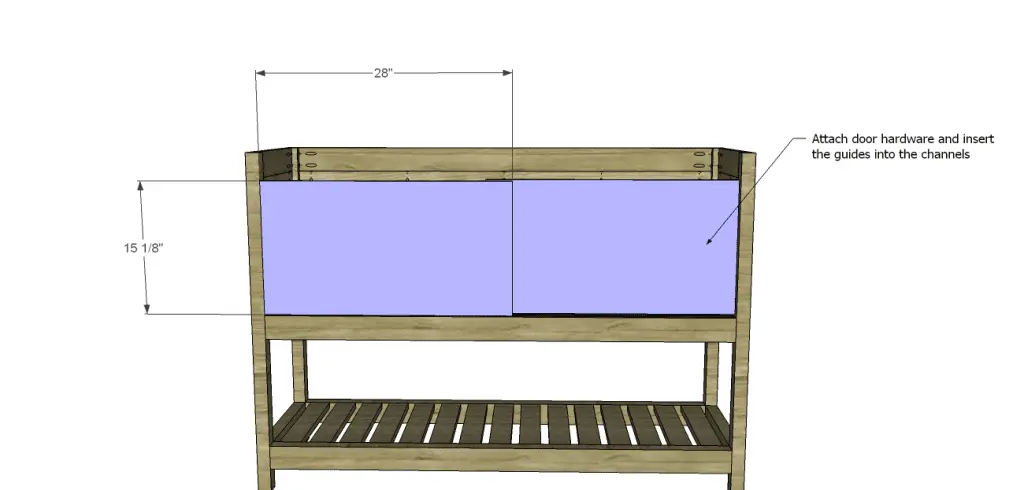
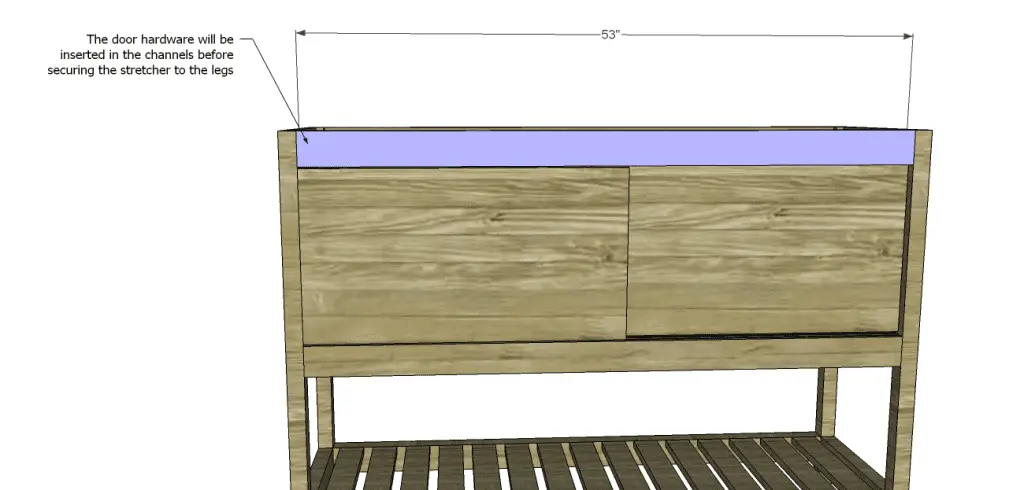
Cut the pieces for the doors. To help the doors slide smoothly, apply a coat of paste wax to the bottom edge of the doors. Install the sliding door hardware to the back of the door according to the manufacturer’s instructions. Insert the doors with the hardware seated in each track.
Position the upper stretcher as shown, with the hardware in the track. Secure the upper stretcher in place using glue and 2-1/2″ pocket hole screws.
 Step Six
Cut the pieces for the lower trim. Install the side pieces first using glue and 1-1/4″ brad nails, positioning the pieces so that the bottom is flush with the bottom of the middle stretchers, then install the front and back.
Step Seven
Cut the piece for the top. Secure in place using glue and 1-1/4″ brad nails.
Cut the pieces for the top trim. Install the side pieces first using glue and 1-1/4″ brad nails, positioning the pieces so that the bottom is flush with the bottom of the middle stretchers, then install the front and back.
 Finish as desired!
This cabinet would also be great in a bath area to store towels! Have any questions about the Crofton sideboard server plans? Let me know at cher {at} designsbystudioc {dot} com!
This post contains an affiliate link – what this means is that if the link is clicked and a purchase is made, I will receive a commission.
Originally posted 2014-05-16 08:00:26.

