A Custom Cabinet Build
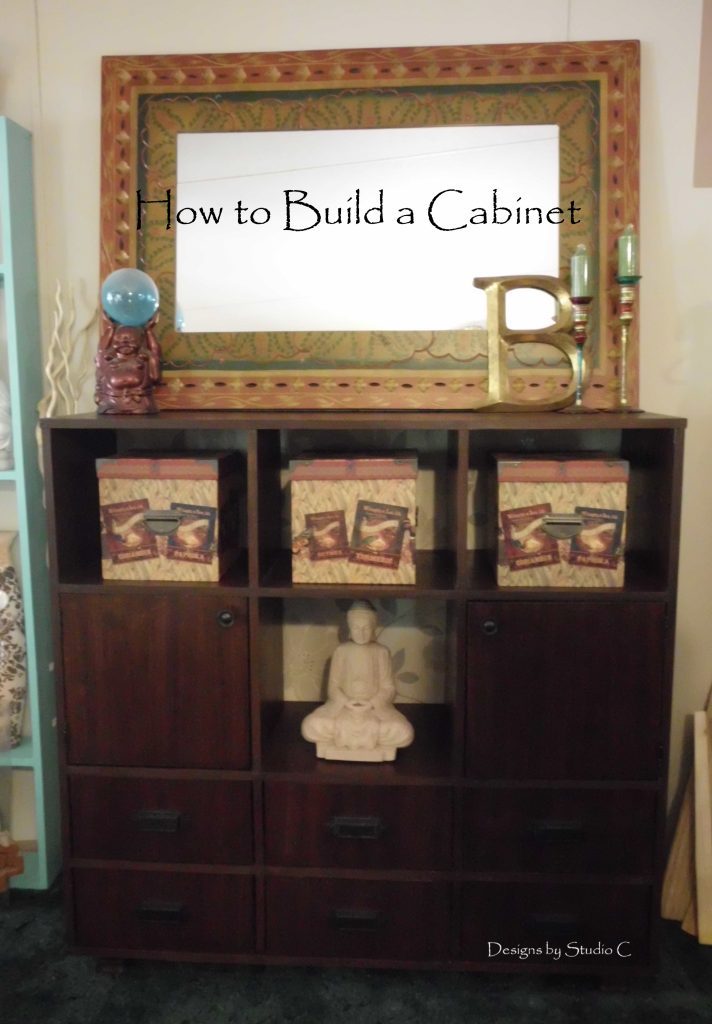
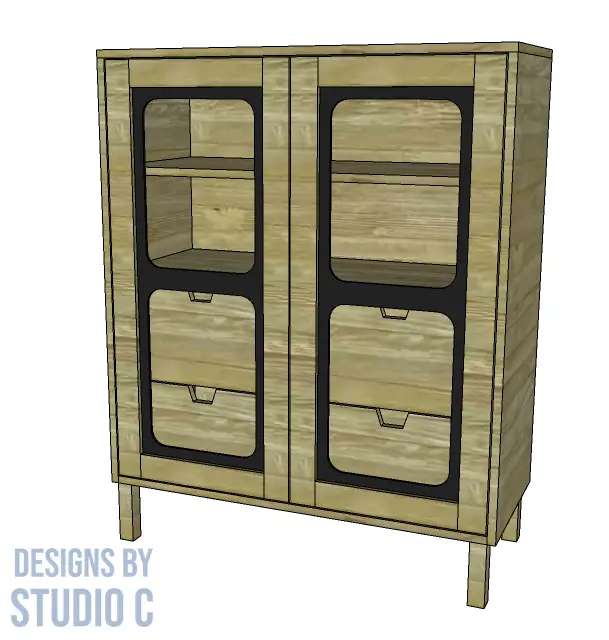
I’ve always wanted to build a custom cabinet for my front room using walnut plywood. Once I was able to source the plywood, I created the plans to build the cabinet with six cubbies (two have doors) and six drawers. The cabinet was a super-easy build and was a furniture piece I was really proud to own!
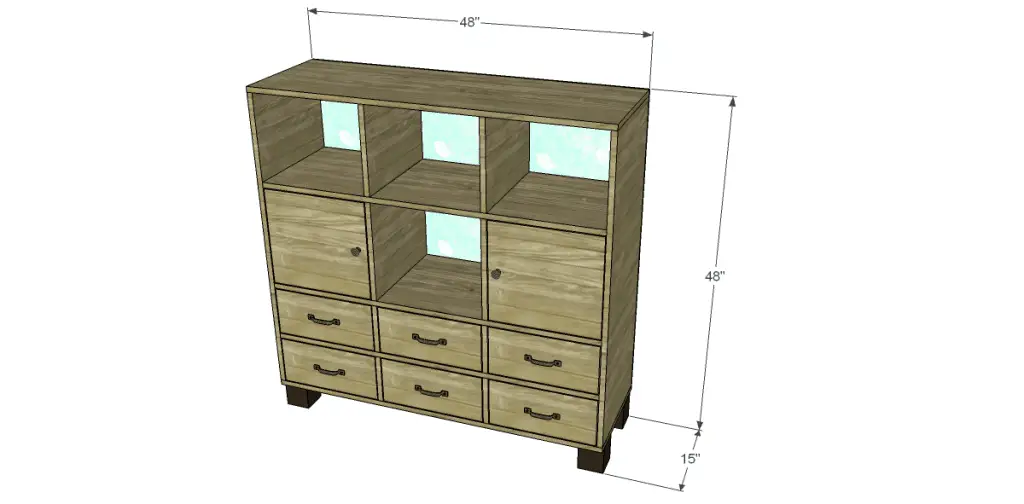
Materials:
- Two sheets of 3/4″ plywood
- Scrap of 2×4 measuring the same height as the furniture legs
- Four 1×6 at 8′
- One sheet of 1/4″ plywood
Other Materials:
- Edge banding for exposed edges of plywood (<– affiliate link!)
- Four furniture legs with attachment plates (I used 4″ legs)
- Six sets of 14″ drawer slides
- Six drawer pulls
- Two sets of partial wrap around hinges
- Two cabinet pulls
- Wallpaper for the back
- Finishing Supplies (stain or paint & sealer)
Tools:
- Kreg jig with 1-1/4″ & 2″ pocket hole screws
- Drill
- Brad nailer with 1-1/4″ brads
- Right angle guide with clamps (or whatever you have on hand)
- Sander & sandpaper
Cut List:
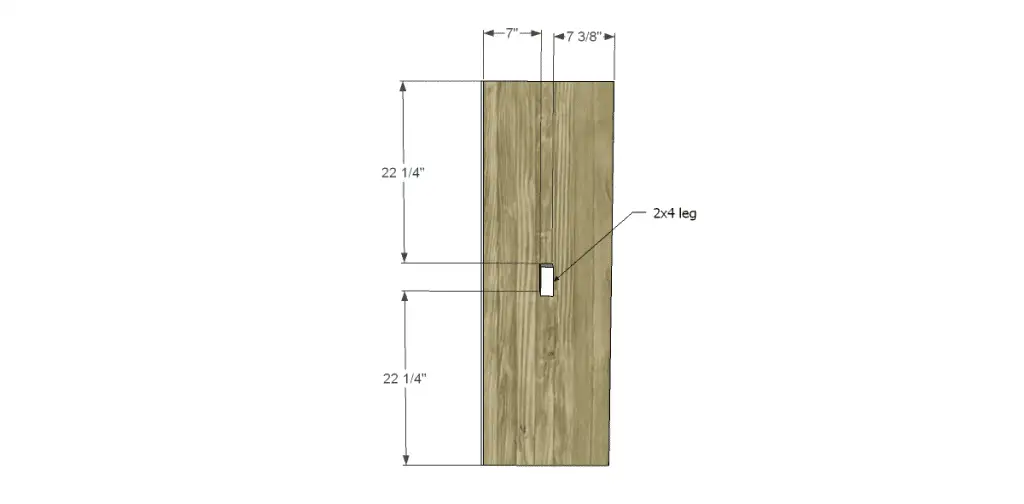
- One 2×4 at xx” (the same height as the furniture legs)- Center Support Leg
- Four 3/4″ plywood at 7-1/8″ x 15″ – Drawer Dividers
- Two 3/4″ plywood at 15″ x 48″ – Bottom & Top
- Two 3/4″ plywood at 15″ x 42-1/2″ – Sides
- Three 3/4″ plywood at 15″ x 46-1/2″ – Shelves
- Two 3/4″ plywood at 14″ x 15″ – Middle Dividers
- Two 3/4″ plywood at 12″ x 15″ – Upper Dividers
- One 1/4″ plywood at 44″ x 48″ – Back
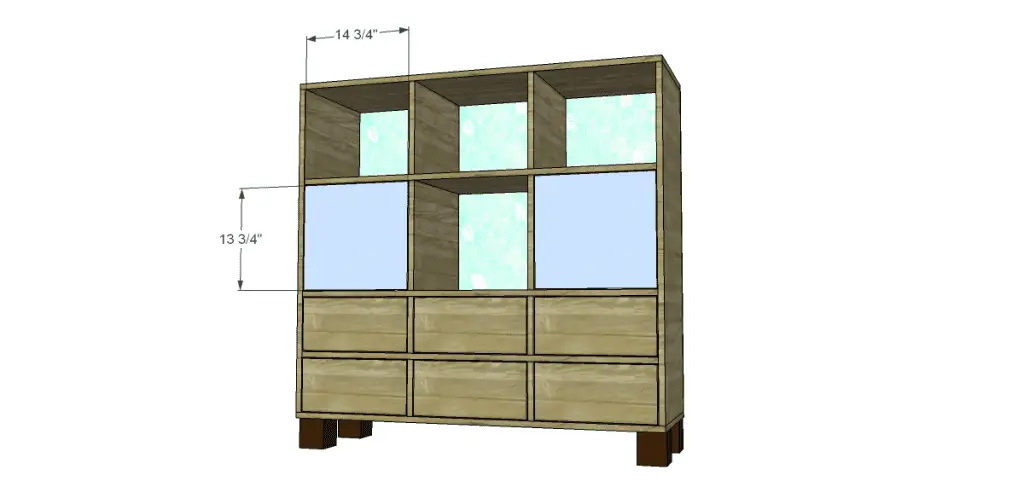
- Two 3/4″ plywood at 13-3/4″ x 14-3/4″ – Doors
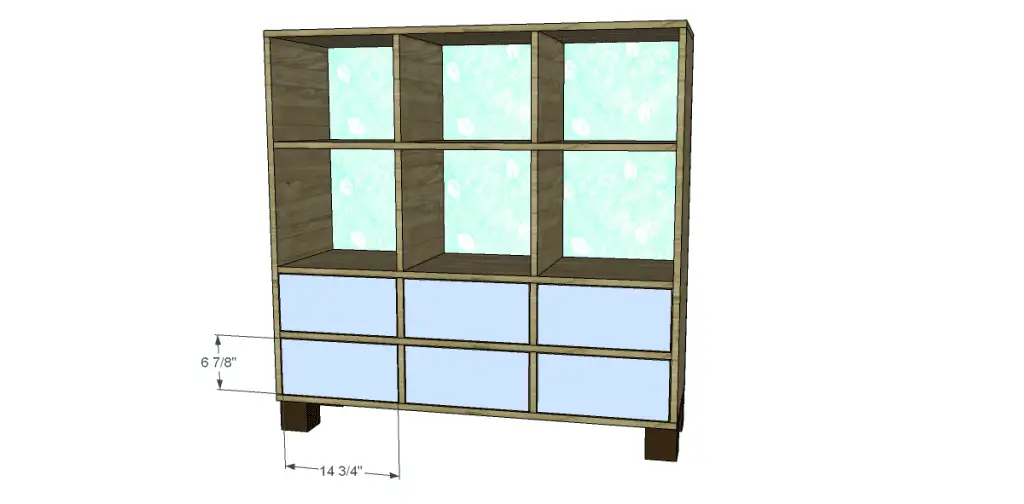
- Six 3/4″ plywood at 6-7/8″ x 14-3/4″ – Drawer Fronts
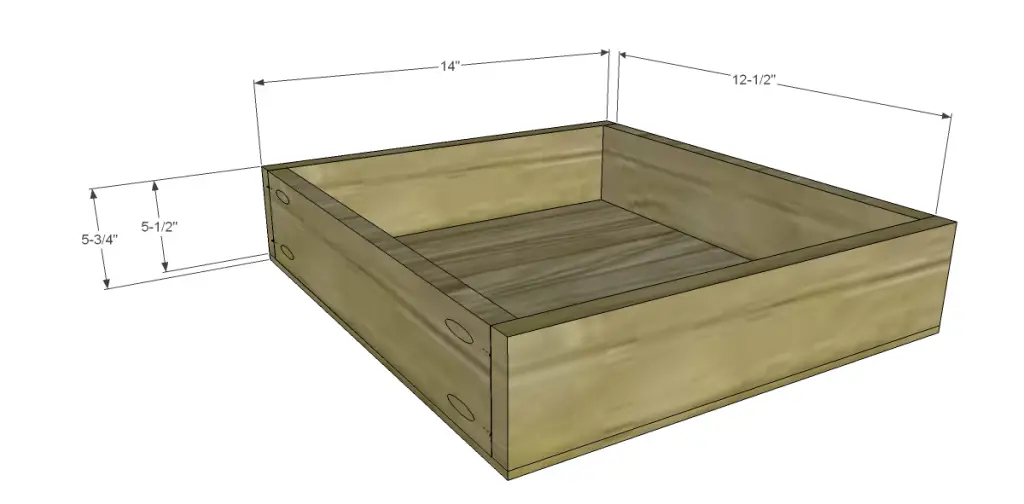
- Twelve 1×6 at 12-1/2″ – Drawer Boxes
- Twelve 1×6 at 14″ – Drawer Boxes
- Six 1/4″ plywood at 14″ x 14″ – Drawer Bottoms
Notes About the Project:
- Edge banding should be applied to all exposed edges of the plywood before assembly. See my tutorial on how to apply edge banding.
- Sand all pieces prior to assembly
Step One
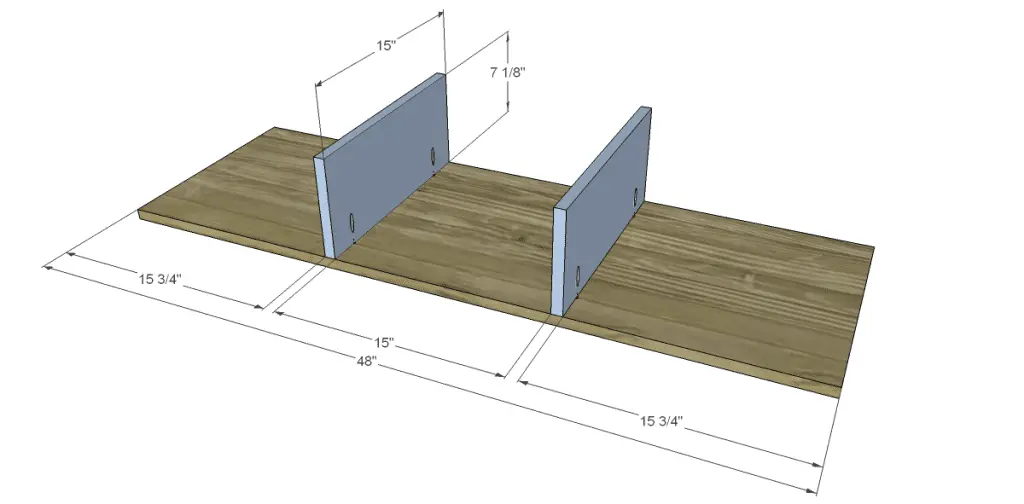
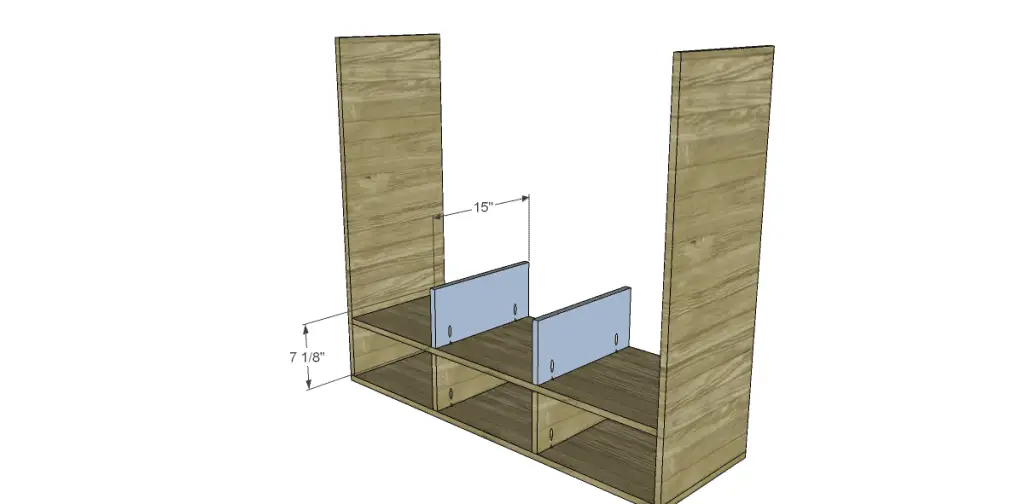
Cut the pieces for the bottom and the drawer dividers. Set the Kreg jig for 3/4″ material and drill pockets in the bottom edge of the divider pieces. Attach to the bottom as shown using glue and 1-1/4″ pocket hole screws.
Step Two
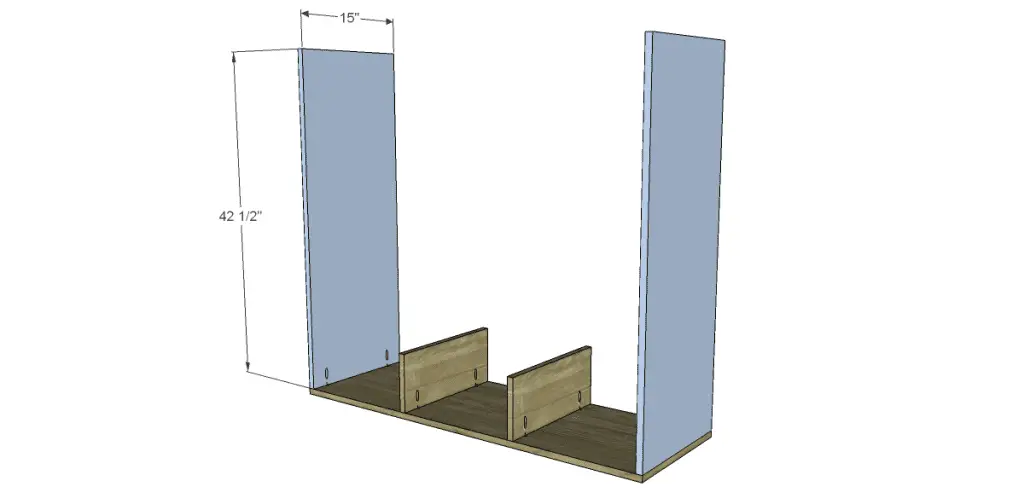
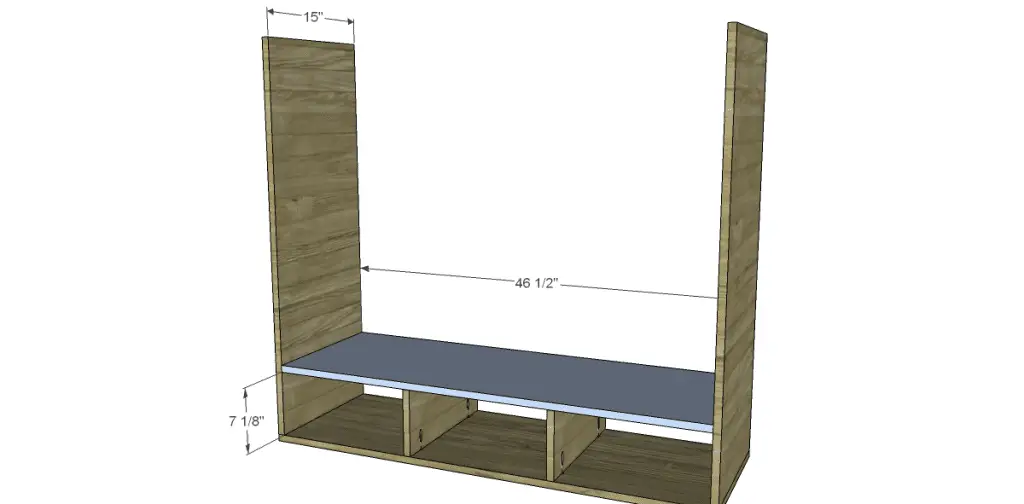
Cut the pieces for the sides. Drill pocket holes in the bottom of the panels and attach to the bottom as shown using glue and 1-1/4″ pocket hole screws.
Step Three
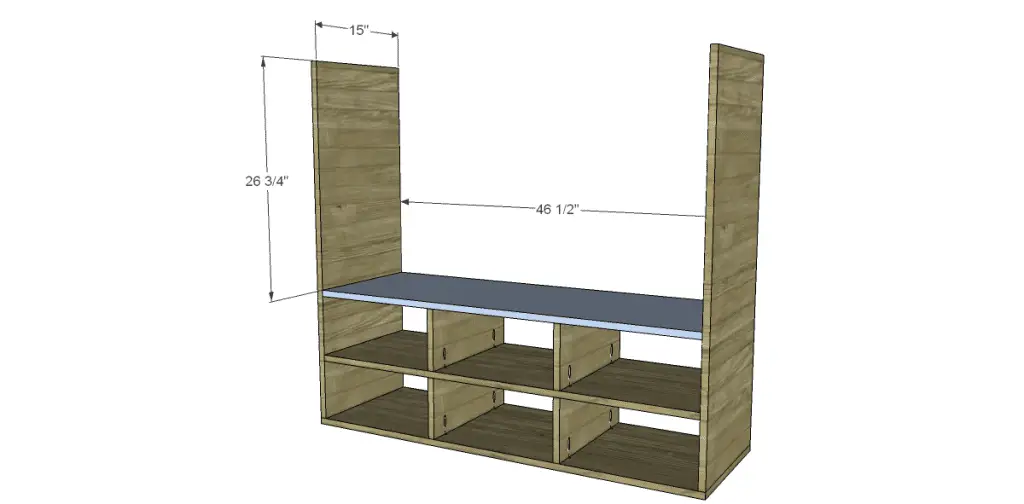
Cut the pieces for the shelves. Drill pocket holes in each end of the shelves. Attach one shelf as shown using glue and 1-1/4″ pocket hole screws. Attach the next set of drawer dividers, as well as the next shelf.
Step Four
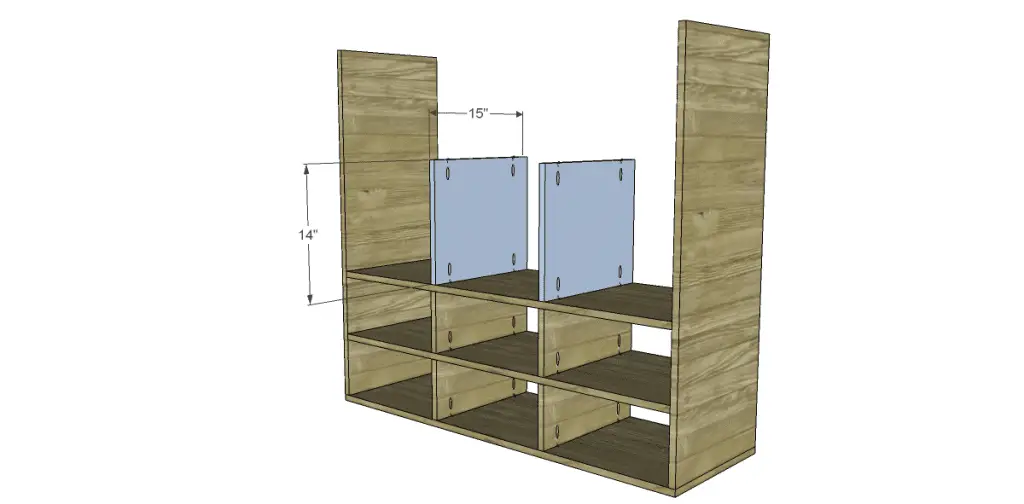
Cut the pieces for the middle dividers. Drill pocket holes in each end and attach using glue and 1-1/4″ pocket hole screws. Attach the last shelf in the same manner as the previous two.
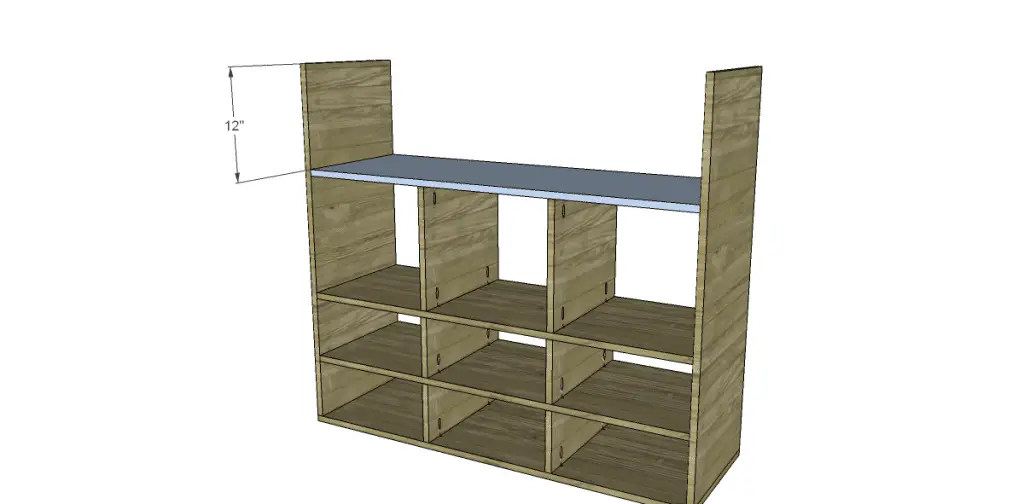
Step Five
Cut the pieces for the upper dividers. Drill pocket holes in the bottom edge only and attach using glue and 1-1/4″ pocket hole screws.
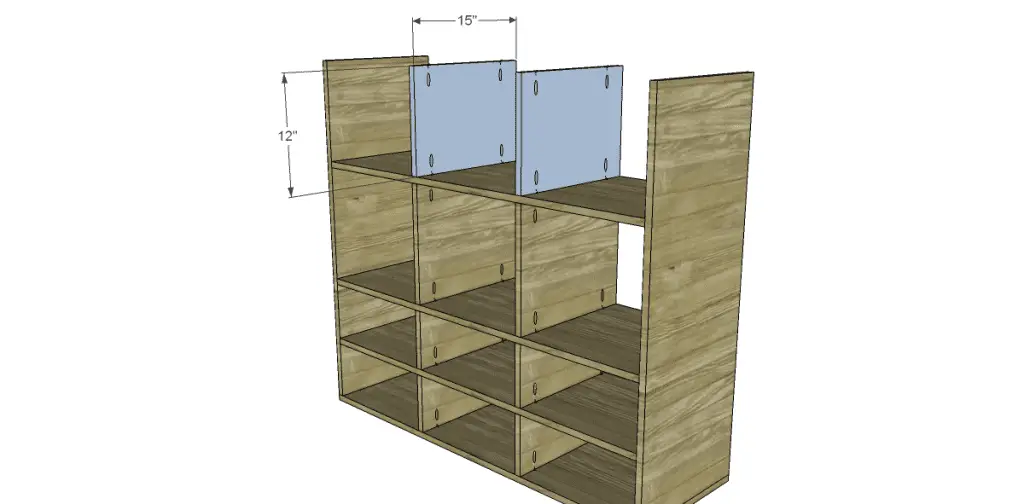
Step Six
Cut the piece for the top. Attach using glue and 1-1/4″ brad nails through the top into the dividers and the sides.
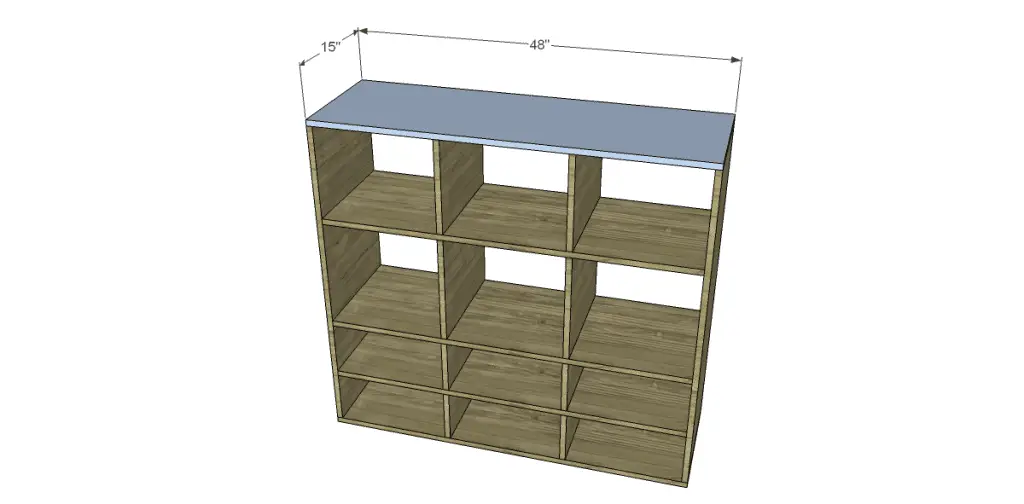
Step Seven
Cut the piece for the back (cover with wallpaper if desired) and attach using glue and 1-1/4″ brad nails.
Attach the legs and hardware according to the manufacturer’s instructions.
Set the Kreg jig for 1-1/2″ material and drill pocket holes in one end of the 2×4 leg support. Attach to the center bottom using glue and 2″ pocket hole screws.
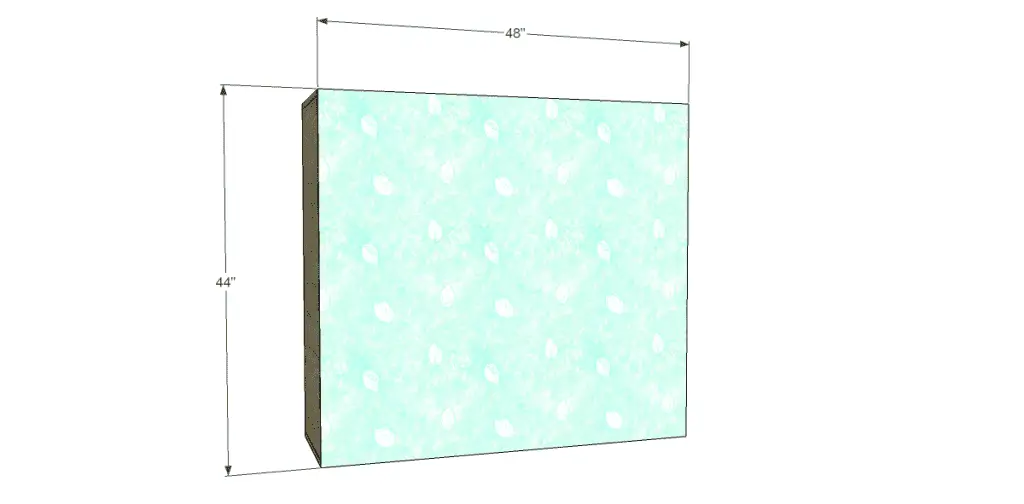
Step Eight
Cut the pieces for the drawer boxes. Drill pocket holes in each end of the shorter pieces and assemble as shown using glue and 1-1/4″ pocket hole screws.
Cut the pieces for the bottoms and attach using glue and 1-1/4″ brad nails. Attach the drawer slides (check out this easy tutorial on installing drawer slides). Make any necessary adjustments to the hardware.
Step Nine
Cut the pieces for the drawer fronts (See my easy tutorial on installing drawer fronts).
Step Ten
Cut the pieces for the doors. There will be a 1/8″ gap around all sides of the doors. Attach the hinges and the handles, then install the doors.
Finish as desired. I used a dark stain on mine with a matte polyurethane top coat.
Have questions about the plans to build a cabinet? Leave a comment below!
Originally posted 2012-08-17 08:00:00.

4 Comments
oww good information provides here..its helpful to who starts newly make the cabinets.
Thank you for stopping by!
I’m kind of bad at wood working but man, you are impressive! So great that you can do this, and your site is really beautifully laid out. Thanks! #sitsblogging
Thank you so much, I really appreciate it! I’m glad you stopped by!