
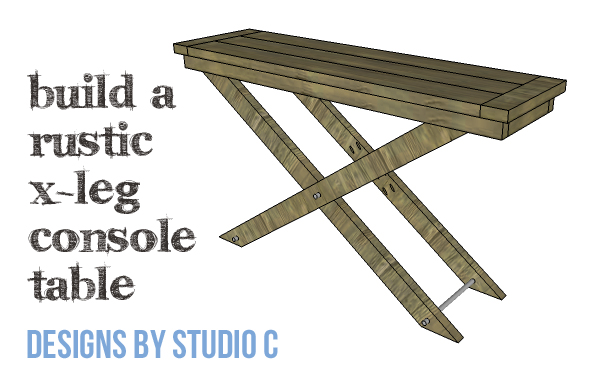
Furniture Plans to Build a Rustic X-Leg Console Table
An Easy to Build Rustic Console Table with X-Legs
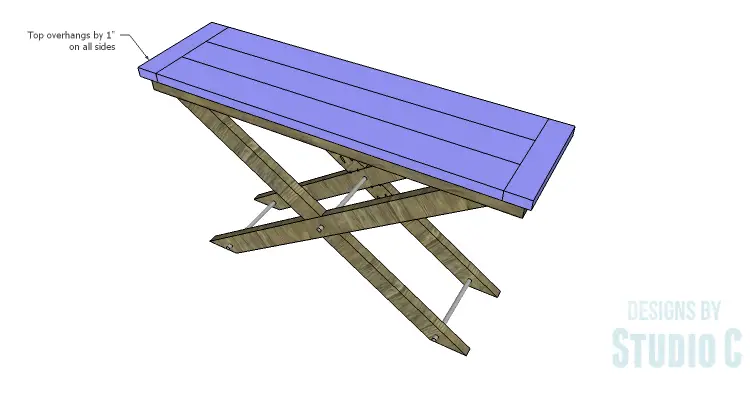
This fabulous console table is a super-quick and easy build! The DIY furniture plans to build a Rustic X-Leg Console Table feature a planked 2x top and x-legs with metal bars connecting them. The table is easy to build and uses off the shelf lumber, as well as threaded rods.
The furniture plans to build a Rustic X-Leg Console Table are an excellent choice for all skill levels! Here are a few other projects using off the shelf lumber…
Materials:
- 2-1/2″ pocket hole screws
- 3/4″ threaded rod with 12 nuts and 12 washers
- Wood glue
- Sandpaper (100, 150, 220 grits)
- Finishing supplies (primer & paint, or stain, sealer)
Lumber:
- 2 – 2×3 at 8′
- 1 – 2×4 at 4′
- 2 – 2×4 at 8′
- 3 – 2×6 at 6′
Cut List:
- 2 – 2×4 at 58-1/8″ – Legs
- 2 – 2×4 at 27-9/16″ – Legs
- 2 – 2×4 at 28-1/16″ – Legs
- 2 – 2×3 at 58″ – Top Frame
- 3 – 2×3 at 11-1/2″ – Top Frame
- 3 – 2×6 at 53″ – Top
- 2 – 2×3 at 16-1/2″ – Top
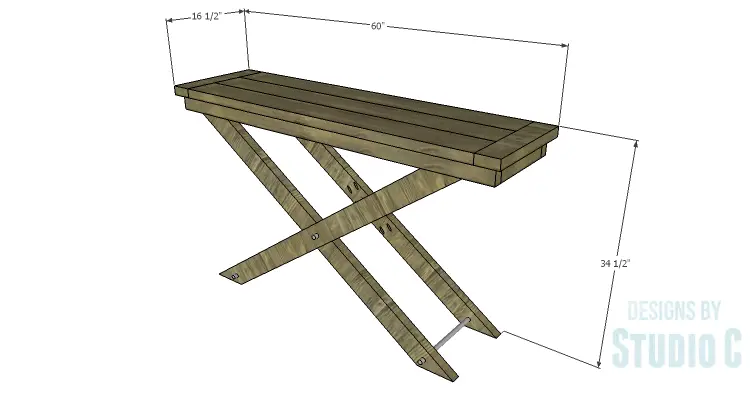
Click on the drawings for a larger view.
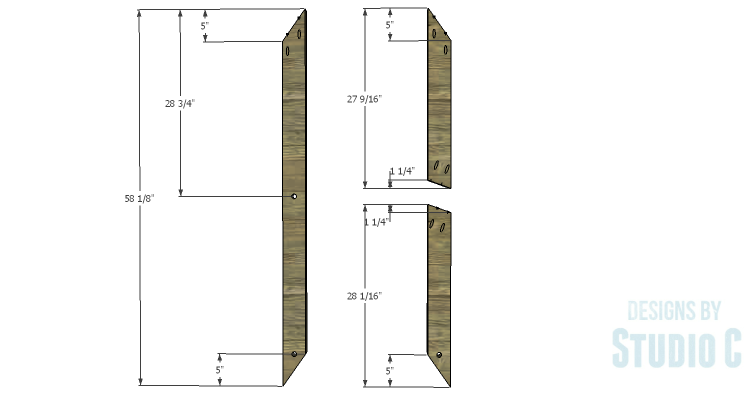
Step One
Cut the pieces for the legs. Mark the position of the holes as shown, then use a paddle bit or a hole saw to cut the holes.
To cut the angles, measure from the top of one side and make a mark at the dimension indicated. Draw a diagonal line from the opposite edge at the top to the mark. Cut the angle with a jigsaw, a miter saw or a bandsaw.
With the pocket hole jig set for 1-1/2″, drill pocket holes in the pieces as shown. Assemble the legs using glue and 2-1/2″ pocket hole screws.
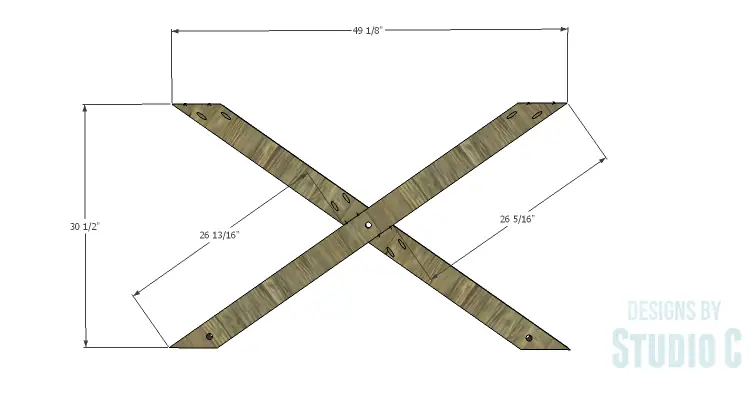
Step Two
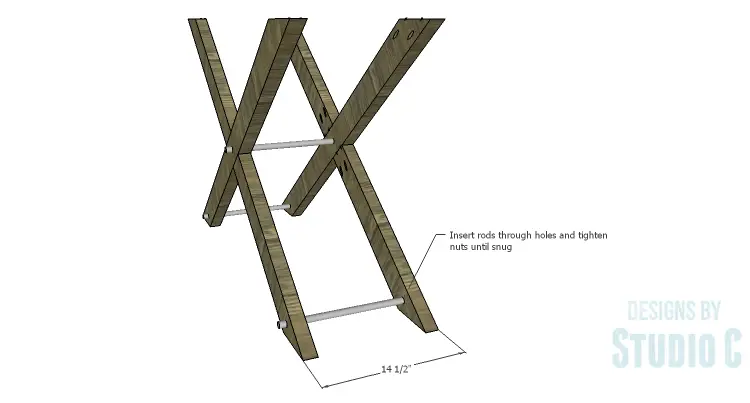
Cut the pieces of threaded rod to 16″ lengths. Each piece will have a nut and a washer on each side of the leg. Tighten the nuts against the washers on the legs until they are snug.
Step Three
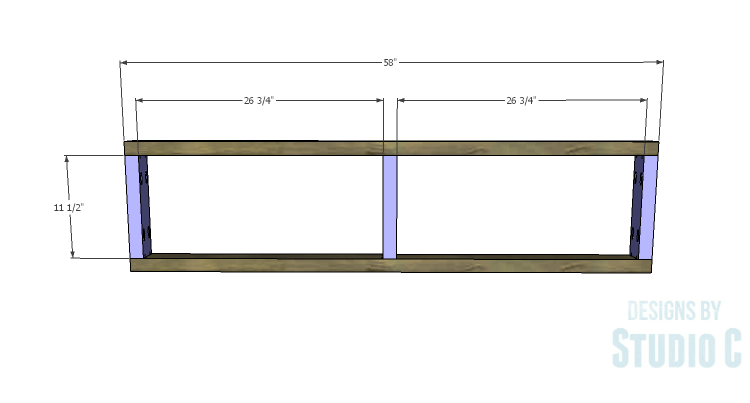
Cut the pieces for the top frame. Drill pocket holes in each end of the shorter pieces. Also drill pocket holes in one long edge of each piece to attach the top. (The pocket holes are NOT shown in the drawings.)
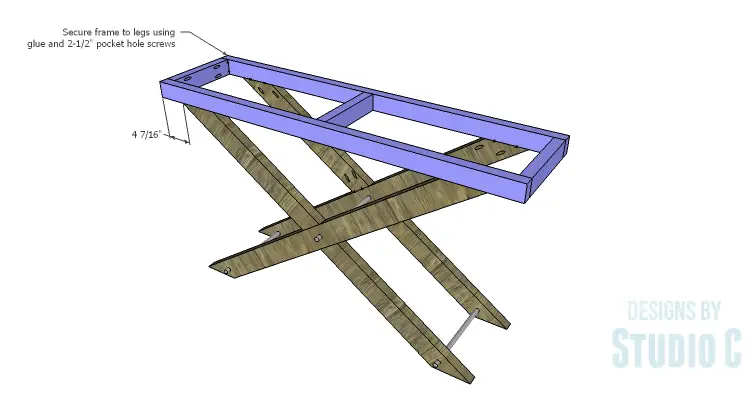
Secure the legs to the frame using glue and 2-1/2″ pocket hole screws.
Step Four
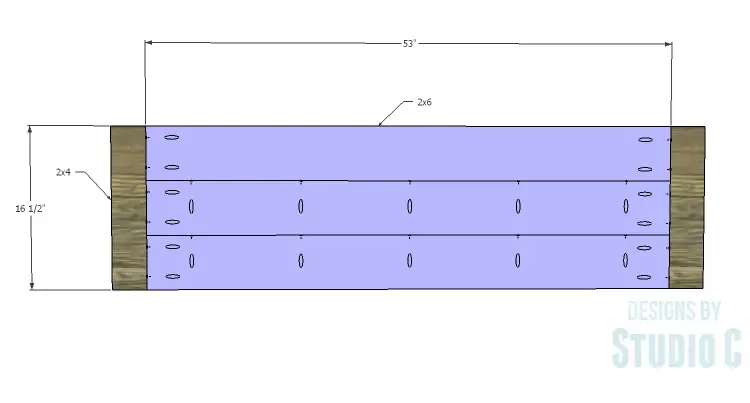
Cut the pieces for the top. Drill pocket holes in the 2×6 pieces as shown. Assemble the top using glue and 2-1/2″ pocket hole screws.
Lay the top face down on a flat surface, then position the base frame on the underside. Secure the frame using glue and 2-1/2″ pocket hole screws.
Finish as desired.
This table would work well in an entryway, a dining room, or behind a sofa. Have any questions about the DIY furniture plans to build a Rustic X-Leg Console Table? Leave a comment below!
Originally posted 2015-10-07 08:00:10.