
DIY Plans to Build a Griffith Dining Table
A Large Dining Table That Will Be the Star of the Next Dinner Party!
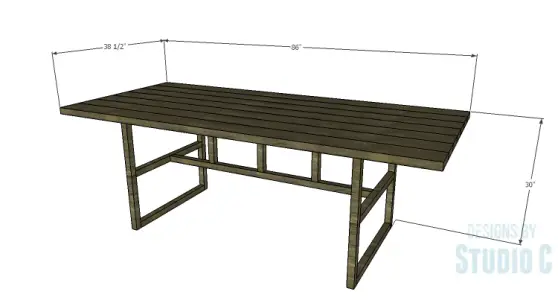
The inspiration for this dining table actually has a metal frame. I drew the plans for this table with a wood frame which will be just as sturdy. The DIY plans to build a Griffith Dining Table feature a planked top and 2×2 framing which can be painted with a metallic paint to resemble metal. This is a fabulously easy plan that can be completed in a weekend!

Materials:
- 2-1/2″ pocket hole screws (<– affiliate link!)
- 2″ screws
- 2-1/2″ screws
- Wood glue
- Sandpaper (100, 150, 220 grits)
- Finishing supplies (primer & paint, or stain, sealer)
Lumber:
- 1 – 1×2 – 6′
- 8 – 2×2 at 8′
- 7 – 2×6 at 8′
Cut List:
- 7- 2×6 at 86″ – Top Planks
- 2 – 1×2 at 32″ – Top Supports
- 4 – 2×2 at 28-1/2″ – Legs
- 6 – 2×2 at 27″ – Side Framing
- 4 – 2×2 at 54″ – Stretchers & Center Framing
- 3 – 2×2 at 12″ – Center Framing
- 6 – 2×2 at 12-3/4″ – Top Support Framing
Click on the drawings for a larger view!
Step One
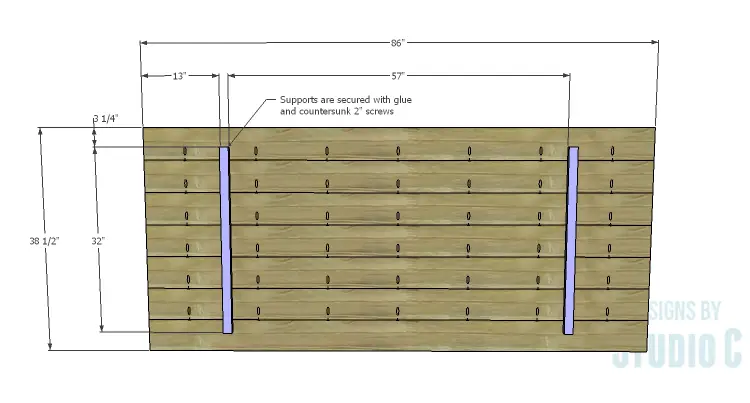
Cut the pieces for the top planks and the top supports. With the pocket hole jig set for 1-1/2″ material, drill pocket holes in one long edge of each piece, except one. Assemble the top with the planks side by side using glue and 2-1/2″ pocket hole screws.
Secure the top supports to the underside of the planks using glue and countersunk 2″ screws.
Step Two
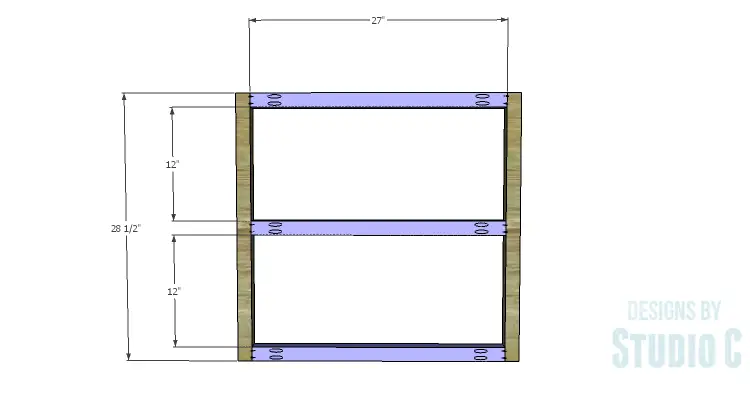
Cut the pieces for the side framing. Drill pocket holes in each end of the shorter (27″) pieces. Assemble the side leg assemblies using glue and 2-1/2″ pocket hole screws.
Step Three
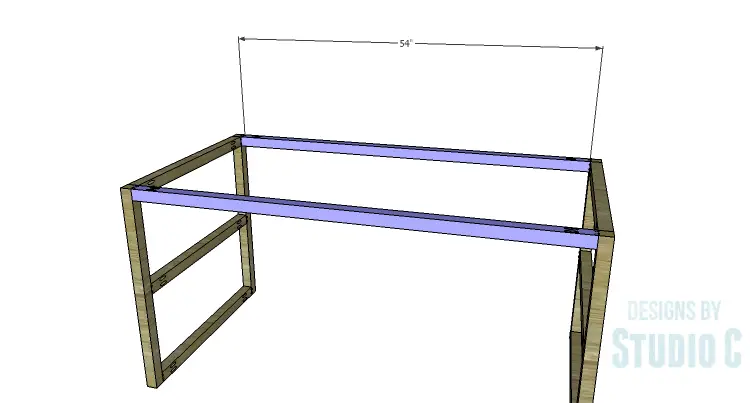
Cut the pieces for the stretchers and drill pocket holes in each end. Secure the stretchers to the top portion of the legs using glue and 2-1/2″ pocket hole screws.
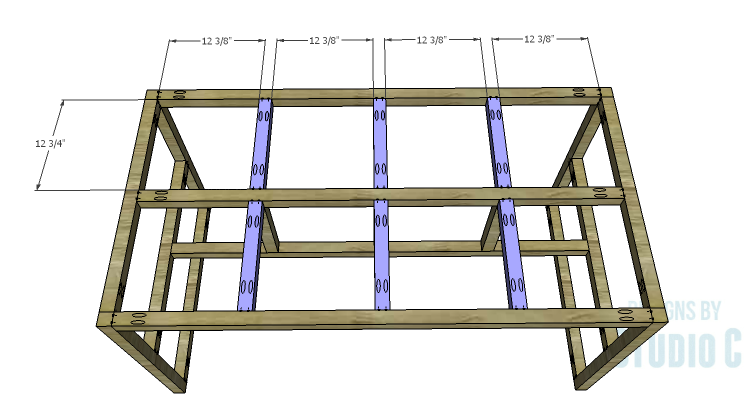
Step Four
Cut the pieces for the center framing and drill pocket holes in each end of each piece. Secure the shorter pieces to the longer pieces using glue and 2-1/2″ pocket hole screws. Orient the pocket holes toward the inside so they are somewhat hidden.
Secure the center framing to the upper and center side framing pieces using glue and 2-1/2″ pocket hole screws.

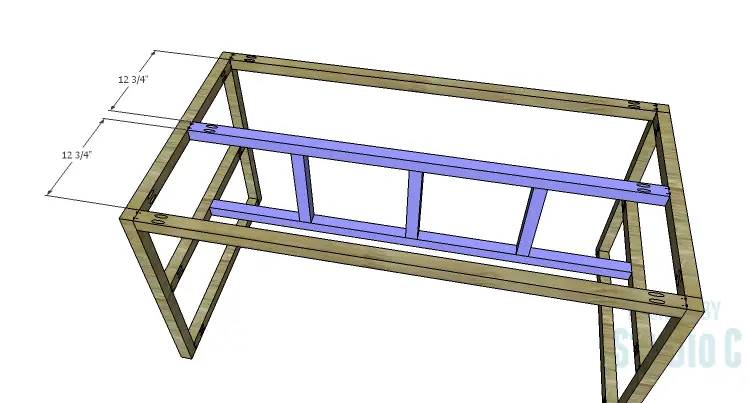
Step Five
Cut the pieces for the top support framing and drill pocket holes in each end of each piece. Secure the supports to the stretchers and the center framing using glue and 2-1/2″ pocket hole screws.
Finish the top and frame before joining them, especially if they are going to be painted or stained different colors.
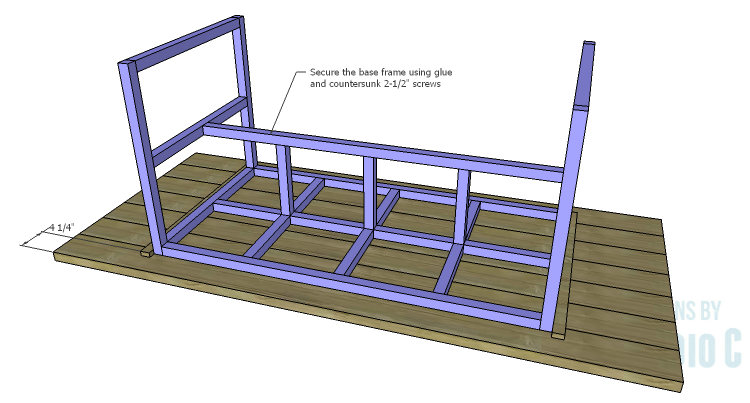
Step Six
Place the top on a flat surface, top side down. Position the frame on the underside of the top. The frame should fit between the top supports, and will be positioned 4-1/4″ back from the side edges. Secure the frame to the top using countersunk 2-1/2″ screws. Do not use glue as the table may have to be disassembled one day to be moved!
This fabulous table would fit perfectly with any decor or style, and will be a huge hit at the next dinner party. Trust me, the 2×2 framing is very sturdy and will look fabulous in a metallic finish! Have any questions about the DIY plans to build a Griffith Dining Table? Leave a comment below!
Originally posted 2015-04-13 08:00:48.
[…] this modern planked-top dining table using these free step-by-step […]