An Easy to Build Coffee Table with a Creative Base
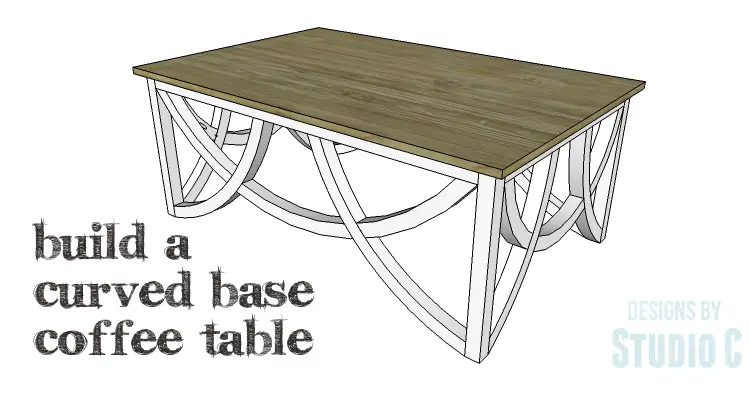
This coffee table has a really unique base… The DIY plans to build a Curved Base Coffee Table feature curved accents between the legs. Templates are included for the curved pieces and although this project may take a little longer than a weekend to complete, the style is well worth it!
Materials:
- 2-1/2″ pocket hole screws (<– affiliate link!)
- 1-1/4″ brad nails
- Edge banding, optional
- Wood glue
- Sandpaper (100, 150, 220 grits)
- Finishing supplies (primer & paint, or stain, sealer)
Lumber:
- 3 – 2×2 at 8′
- 2 – 2×4 at 8′
- 2 – 2×6 at 8′
- 1 – 4′ x 4′ sheet of 3/4″ plywood
Cut List:
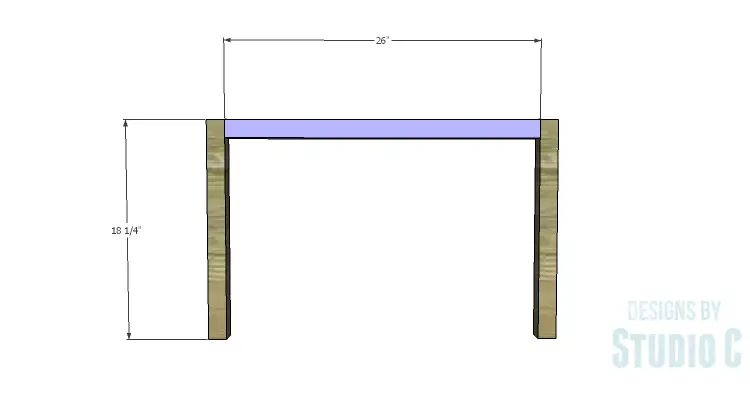
- 4 – 2×2 at 18-1/4″ – Legs
- 2 – 2×2 at 26″ – Side Stretchers
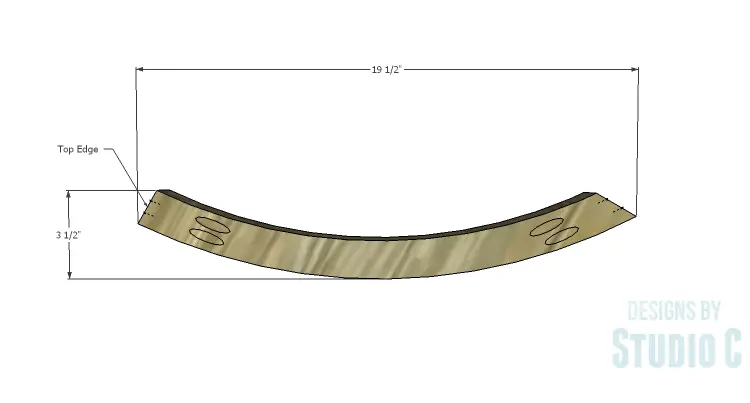
- 4 – 2×6 at 19-1/2″ – Side Piece #1
- 4 – 2×4 at 10-5/16″ – Side Piece #2
- 2 – 2×4 at 11-13/16″ – Side Piece #3
- 2 – 2×2 at 43″ – Front & Back Stretchers
- 1 – 2×2 at 26″ – Center Support
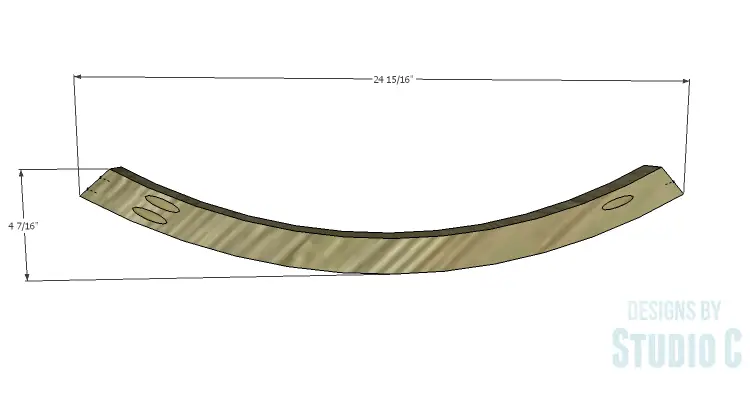
- 4 – 2×6 at 24-15/16″ – Front & Back Piece #1
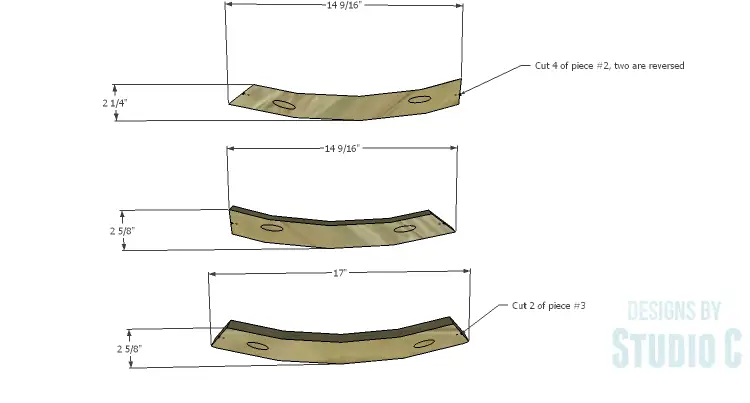
- 4 – 2×4 at 14-9/16″ – Front & Back Piece #2
- 2 – 2×4 at 17″ – Front & Back #3
- 1 – 3/4″ plywood at 31″ x 48″ – Top
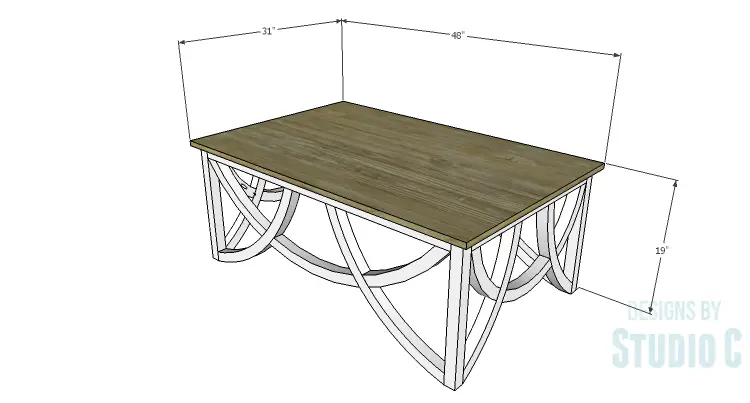
Click on the drawings for a larger view!
Step One
Cut the pieces for the legs and the side stretchers. With the pocket hole jig set for 1-1/2″ material, drill pocket holes in each end of the stretchers. Secure the stretchers to the legs using glue and 2-1/2″ pocket hole screws.
Step Two
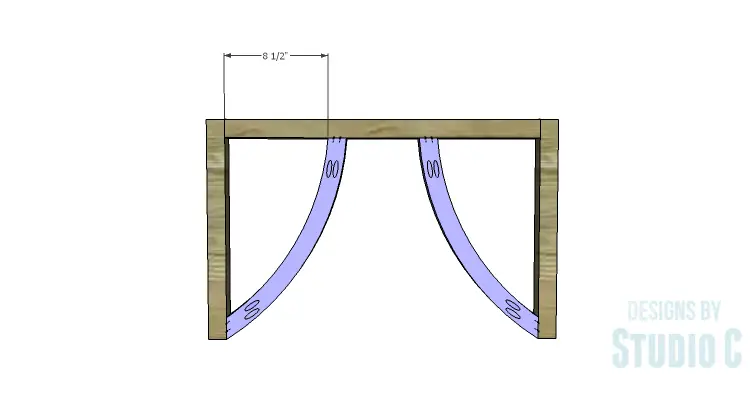
Cut the pieces to length for side piece #1. Print the templates and align the sheets at the registration marks. Tape the sheets together, then cut out the template. Trace the template in the lumber and cut out the pieces using a jigsaw or a bandsaw. Clamp all of the pieces together, then sand thoroughly. Drill a pocket hole (or two) at each end and secure to the legs as shown using glue and 2-1/2″ pocket hole screws.
Step Three
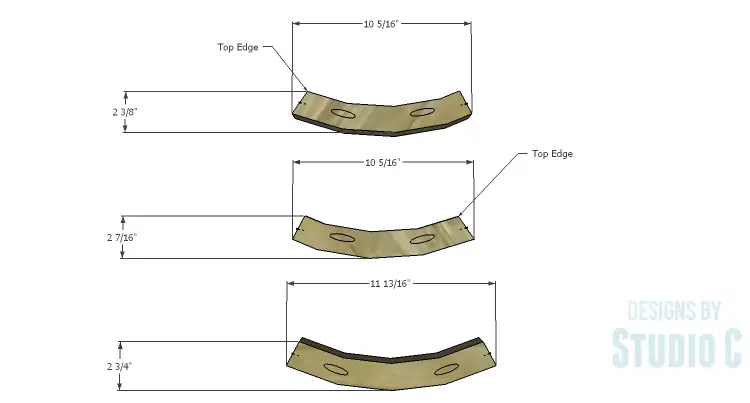
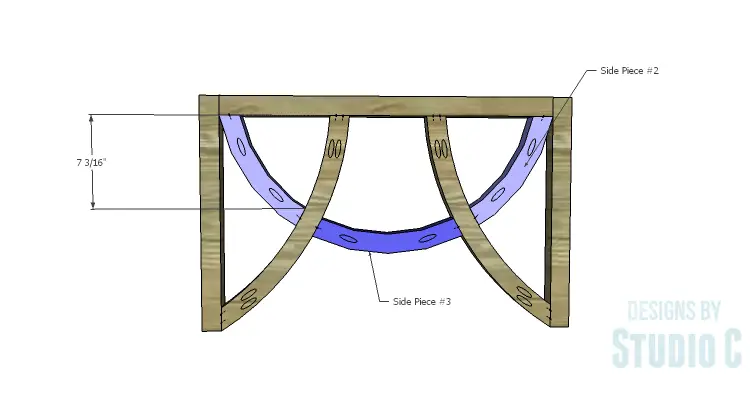
Cut the pieces to length for side pieces #2 and #3. Print the templates (#2 and #3) and align the sheets at the registration marks. Tape the sheets together, then cut out the template. Trace the template in the lumber and cut out the pieces using a jigsaw or a bandsaw. Clamp like pieces together and sand. Drill a pocket hole (or two) at each end and secure to the legs as shown using glue and 2-1/2″ pocket hole screws.
Step Four
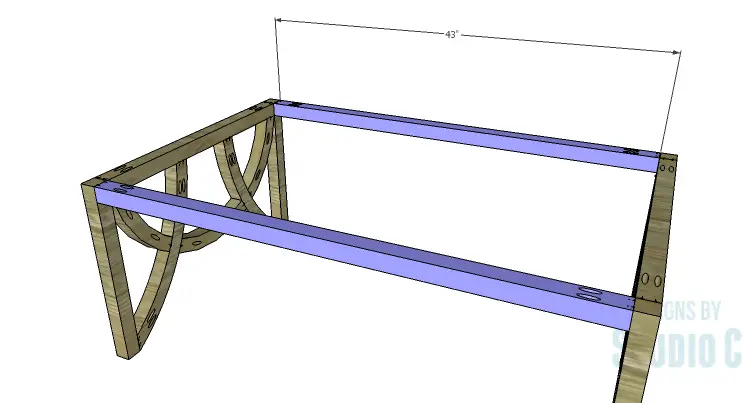
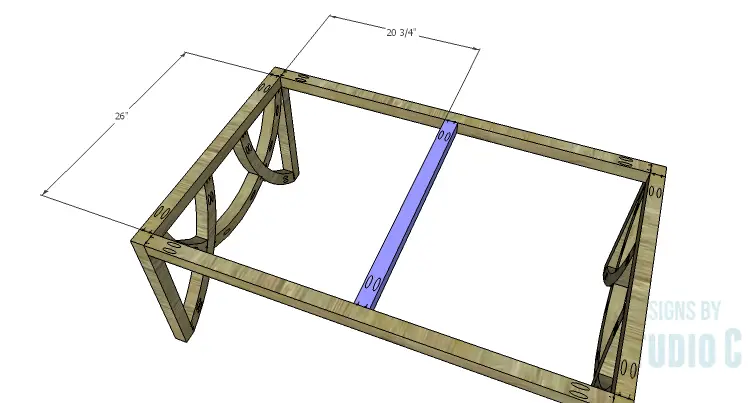
Cut the pieces for the front and back stretchers, and the center support. Drill pocket holes in each end of each piece. Secure the stretchers to the legs as shown using glue and 2-1/2″ pocket hole screws.
Secure the center support to the front and back stretchers using glue and 2-1/2″ pocket hole screws.
Step Five
Cut the pieces to length for front and back piece #1. Print the templates and align the sheets at the registration marks. Tape the sheets together, then cut out the template. Trace the template in the lumber and cut out the pieces using a jigsaw or a bandsaw. Clamp all of the pieces together, then sand thoroughly. Drill a pocket hole (or two) at each end and secure to the legs as shown using glue and 2-1/2″ pocket hole screws.
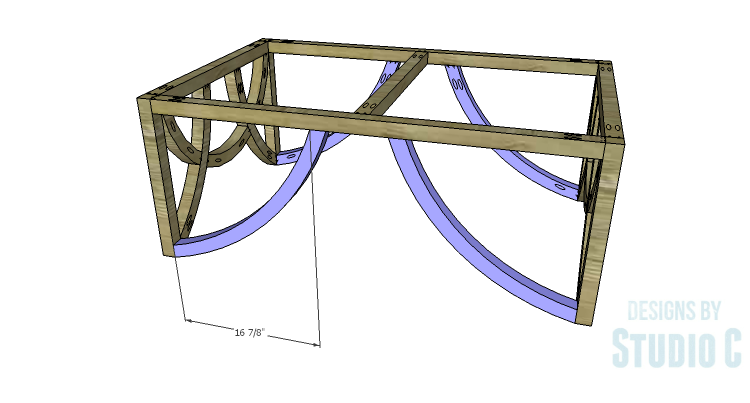
Step Six
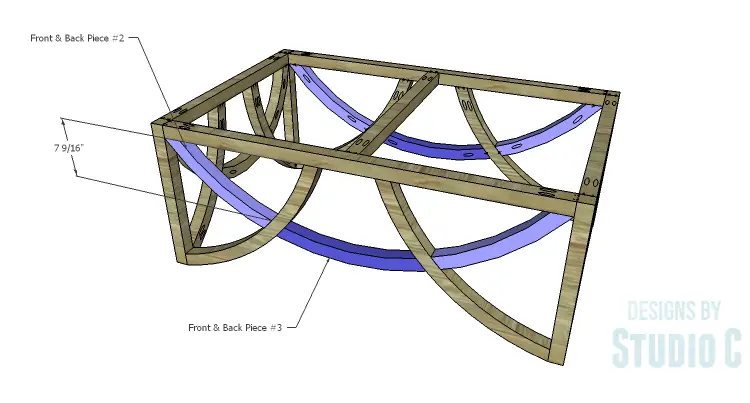
Cut the pieces to length for front and back pieces #2 and #3. Print the templates (#2 and #3) and align the sheets at the registration marks. Tape the sheets together, then cut out the template. Trace the template in the lumber and cut out the pieces using a jigsaw or a bandsaw. Clamp like pieces together and sand. Drill a pocket hole (or two) at each end and secure to the legs as shown using glue and 2-1/2″ pocket hole screws.
Step Seven
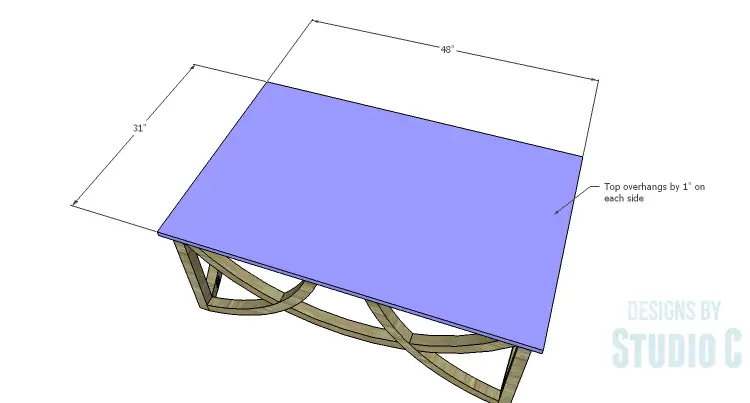
Cut the piece for the top. Apply edge banding to all sides, then sand thoroughly. The top will overhang on all sides by 1″. Secure the top in place using glue and 1-1/4″ brad nails.
Finish as desired.
For finishing purposes, it may be easier to fill the pocket holes in the base before attaching the top. The base can also be finished in a different color. Have any questions about the DIY plans to build a Curved Base Coffee Table? Leave a comment below!
Originally posted 2015-07-06 08:00:06.


Comments are closed.