
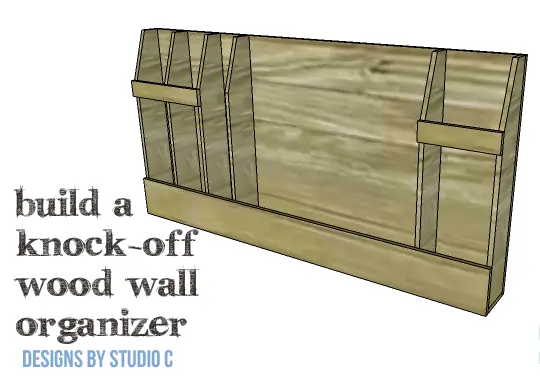
DIY Knock-Off Wood Wall Organizer
A Fabulous Knock-Off Organizer
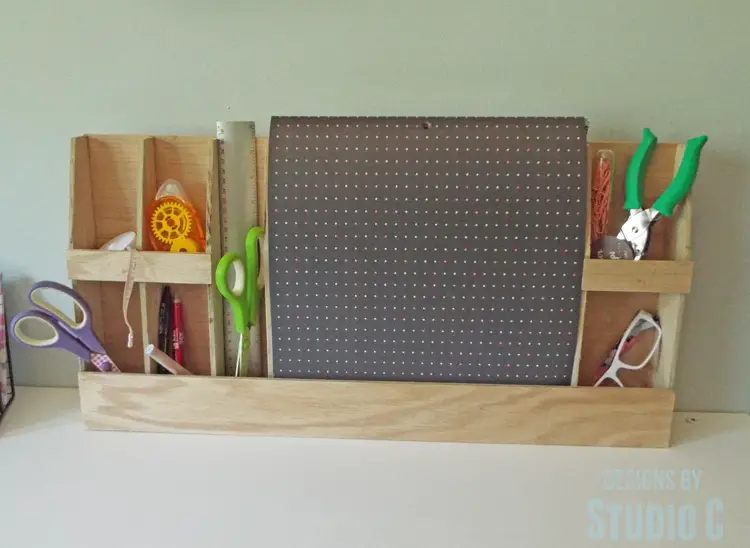
Hey there! So, I stumbled upon this amazing organizer in a catalog and immediately thought it would be perfect for sorting out my massive collection of craft supplies. The original one was made of paper, most likely chipboard, and was pretty affordable. However, it only came in one pattern and color, which didn’t quite match my craft room decor.
But fear not! I found a fantastic DIY alternative that you’ll love. This knock-off wood wall organizer is crafted using 1/4″ plywood and a super fast-drying adhesive like DAP® Weldwood Instant Adhesive. It’s seriously that simple – no need for any additional fasteners, except maybe to secure it to the wall. And even then, you could totally use something like 3M Command Strips.
The best part? This project is a breeze and can be completed in just a few hours! So, get ready to have a beautifully organized craft room that perfectly matches your style. Let’s do this!
Materials:
- DAP® Weldwood Instant Adhesive (<– affiliate link!)
- Sandpaper (150, 220 grits)
Tools Needed:
- Table saw
- Jigsaw
- Sander
Lumber:
- 1 – 2′ x 2′ sheet of 1/4″ plywood
Cut List:
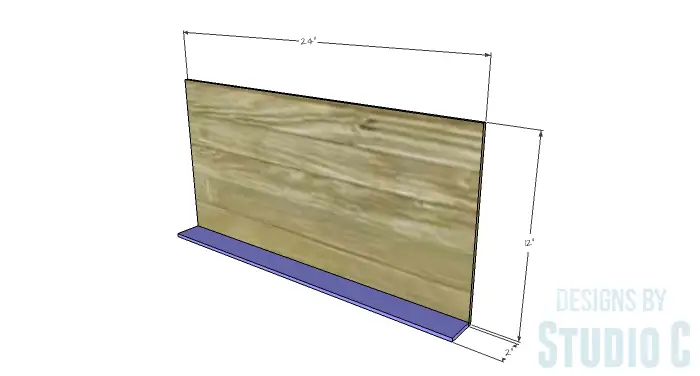
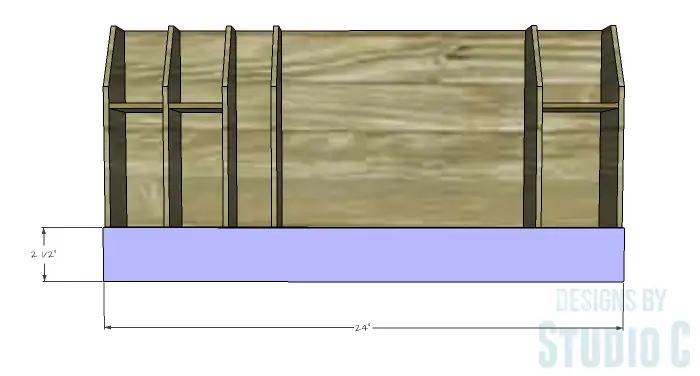
- 1 – 1/4″ plywood at 12″ x 24″ – Base/Back
- 1 – 1/4″ plywood at 2″ x 24″ – Bottom
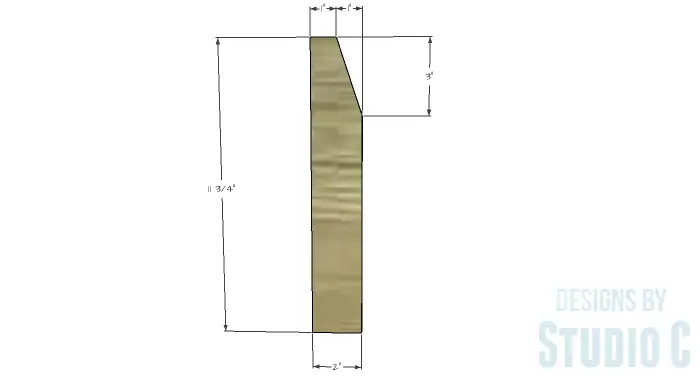
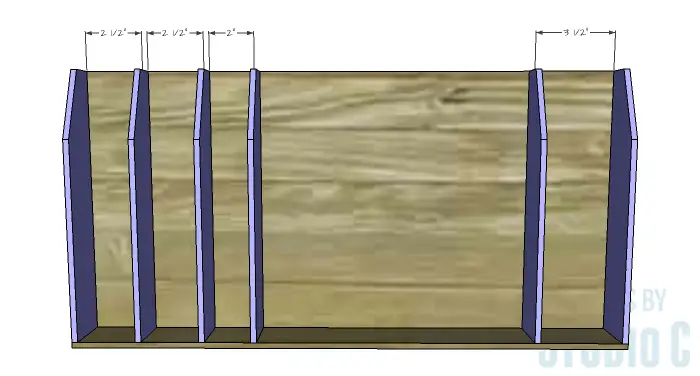
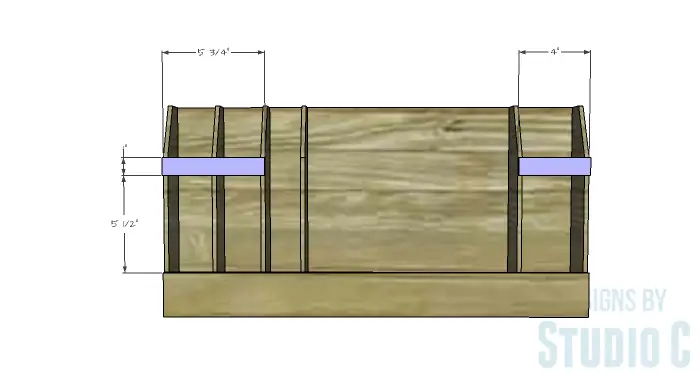
- 6 – 1/4″ plywood at 2″ x 11-3/4″ – Dividers
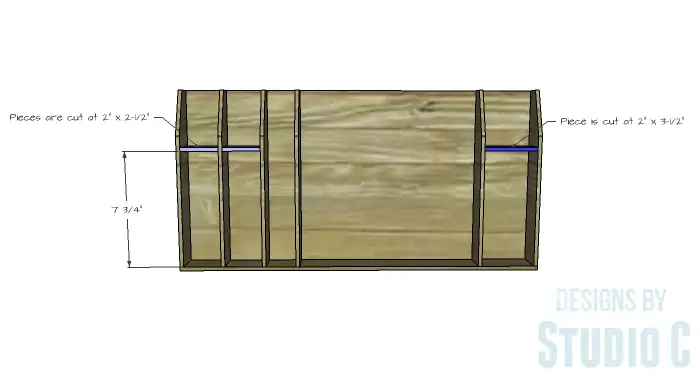
- 2 – 1/4″ plywood at 2″ x 2-1/2″ – Shelves
- 1 – 1/4″ plywood at 2″ x 3-1/2″ – Shelf
- 1 – 1/4″ plywood at 2-1/2″ x 24″ – Lower Front
- 1 – 1/4″ plywood at 1″ x 4″ – Upper Front
- 1 – 1/4″ plywood at 1″ x 5-3/4″ – Upper Front
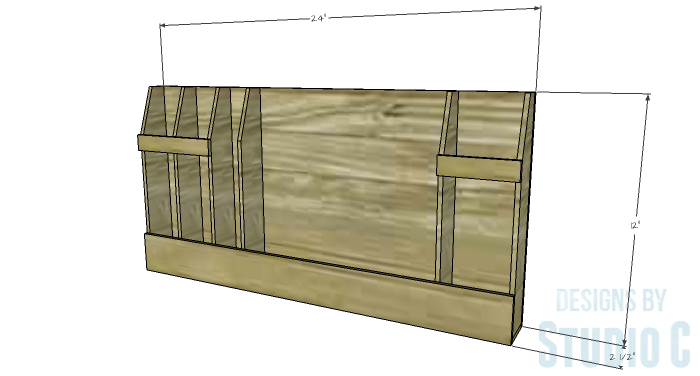
Click on the drawings for a larger view!
Notes about the project:
Measure the thickness of the plywood to make sure it actually measures 1/4″. If not, length adjustments will have to be made to the upper fronts only.
Use extreme caution when ripping narrow pieces on the table saw! As an alternative, craft boards in 1/4″ widths can be purchased from any home improvement store.
Sand each piece thoroughly prior to assembly – it makes finishing easier!
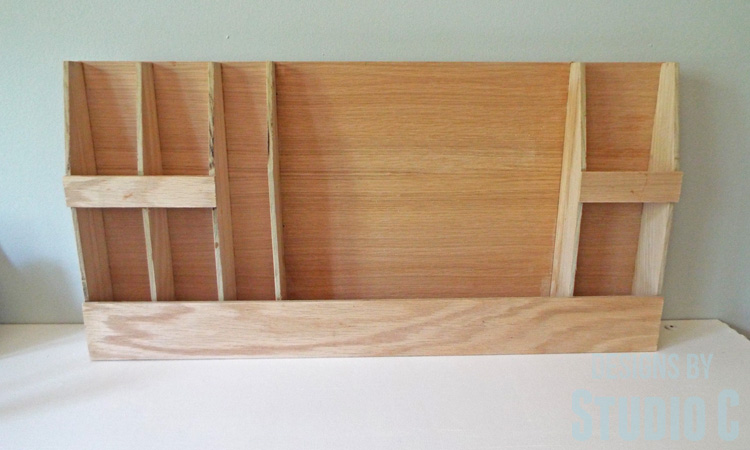
Step One
Cut the pieces for the base and the bottom. Apply a thin bead of adhesive on the lower edge of the base/back piece and position the bottom flush with the lower edge.
Step Two
Cut the divider pieces. The pieces can be stacked and clamped together, then the angle can be cut with a jigsaw. Apply a thin bead of adhesive on the back edge and the lower edge of the dividers, and position on the back/base and bottom as shown in the drawing.
Step Three
Cut the pieces for the shelves. Apply a thin bead of adhesive on the back edge and the side edges of the shelf pieces. Position the shelves as shown in the drawing.
Step Four
Cut the piece for the lower front and apply adhesive along the front edges of the dividers as well as the bottom. Position the lower front with the side edges and lower edges flush with the sides and bottom.
Step Five
Cut the pieces for the upper front. Apply adhesive to the dividers and the front of the shelves, then position the upper front pieces.
Finish the organizer as desired.
I haven’t exactly decided how to finish the organizer yet because there are so many options! Have any questions about the DIY knock-off wood wall organizer? Leave a comment below!
Originally posted 2016-08-22 08:00:40.
