
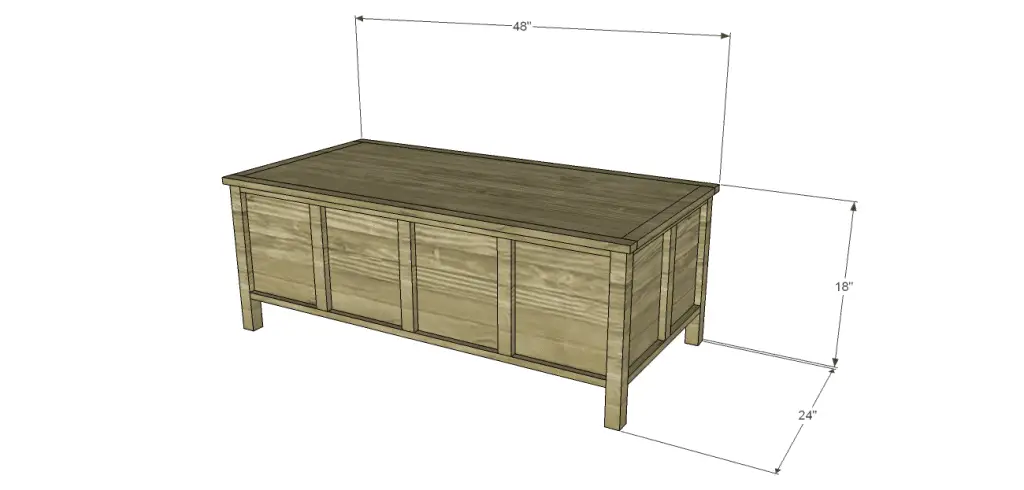
The Perfect Plans to Build a Trunk Style Coffee Table with Plenty of Storage!
Hey there! If you’re looking for an awesome storage solution, then these trunk style coffee table plans are perfect for you! They’re great for hiding away blankets, extra pillows, books, or even a bunch of yarn and unfinished knitting projects (just like me!). Made with a plywood top and panels, as well as vertical trim pieces, this trunk can be customized with a variety of finishes to suit your style. And the best part? You can add a decorative edge on the top to give it an elegant touch. How cool is that?

Materials:
- 1-1/4″ pocket hole screws
- 1-1/4″ brad nails
- 1 set of hinges or 1 continuous hinge (<– affiliate link!)
- Decorative hasp lock, optional (<– affiliate link!)
- Sandpaper (100, 150, 220 grits)
- Finishing supplies (primer & paint or stain, sealer)
Lumber:
- 6 – 1×2 at 6′
- 1 – 1×2 at 8′ or 1 – 8′ piece of decorative trim
- 1 – 2×2 at 8′
- 1 quarter sheet of 3/4″ plywood (2′ x 4′)
- 1 sheet of 3/4″ plywood
Cut List:
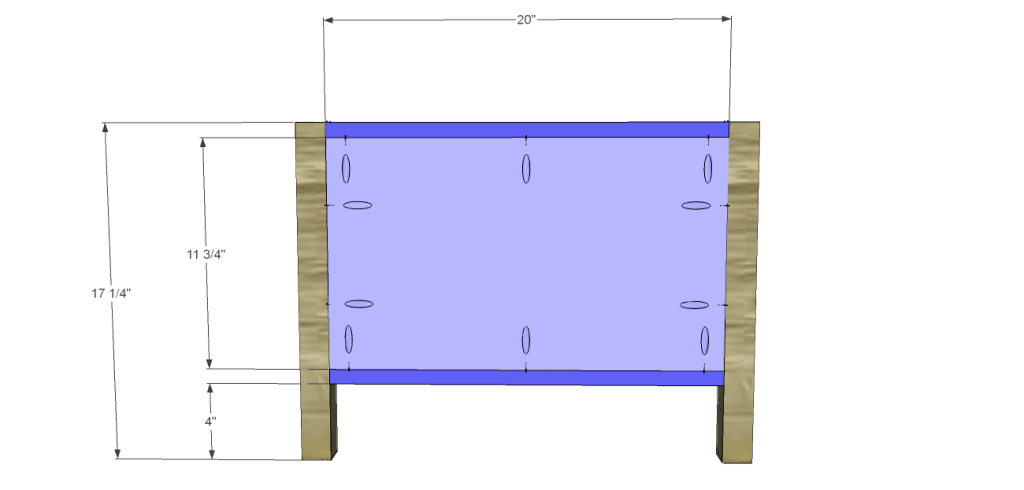
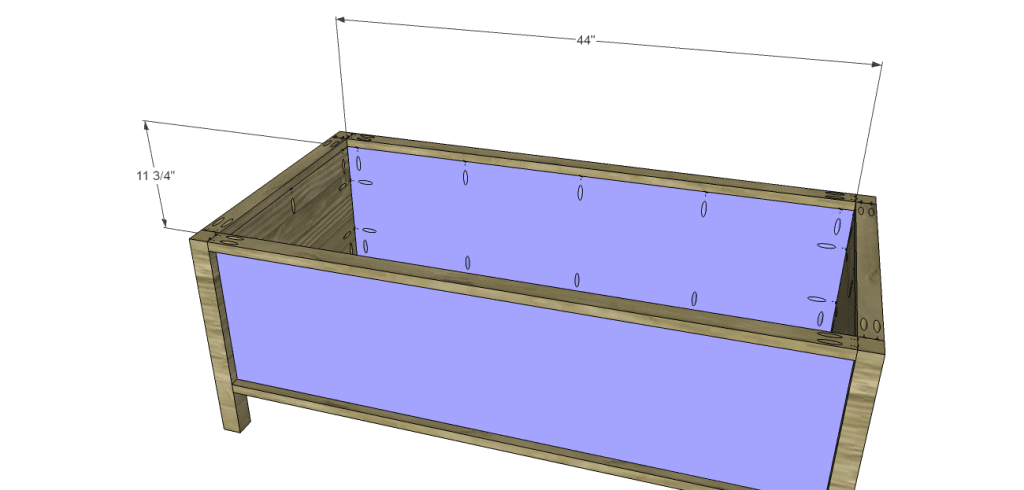
- 4 – 2×2 at 17-1/4″ – Legs
- 4 – 1×2 at 20″ – End Frames
- 2 – 3/4″ plywood at 11-3/4″ x 20″ – End Panels
- 4 – 1×2 at 44″ – Side Frames
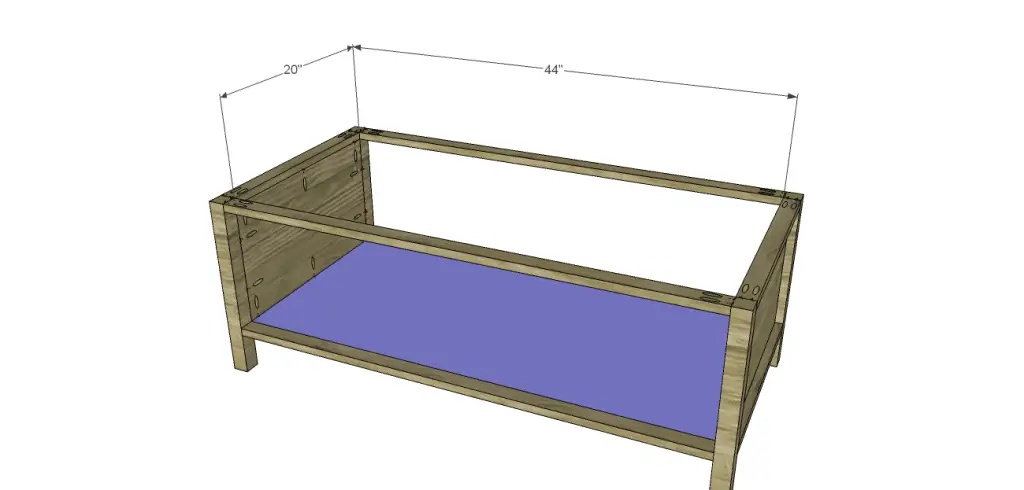
- 1 – 3/4″ plywood at 20″ x 44″ – Bottom
- 2 – 3/4″ plywood at 11-3/4″ x 44″ – Side Panels
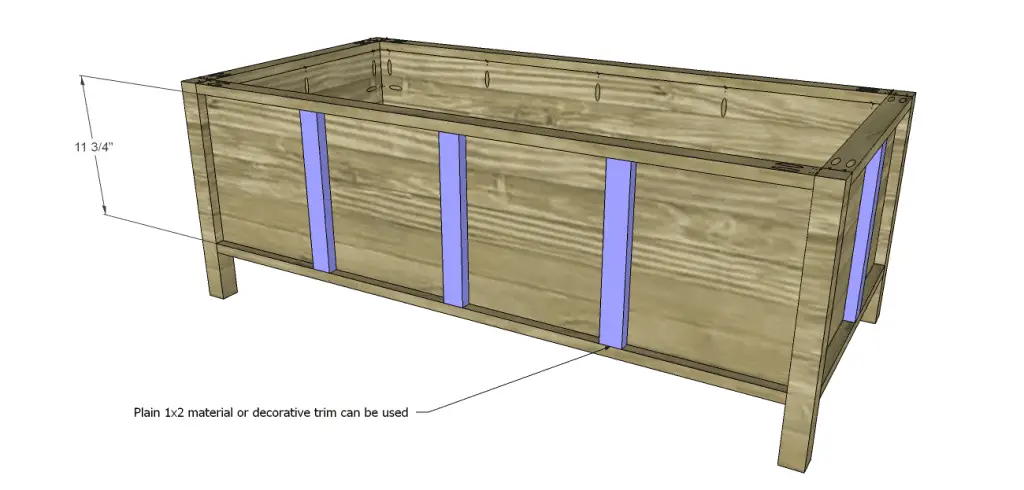
- 8 – 1×2 (or decorative trim) at 11-3/4″ – Vertical Trim Pieces
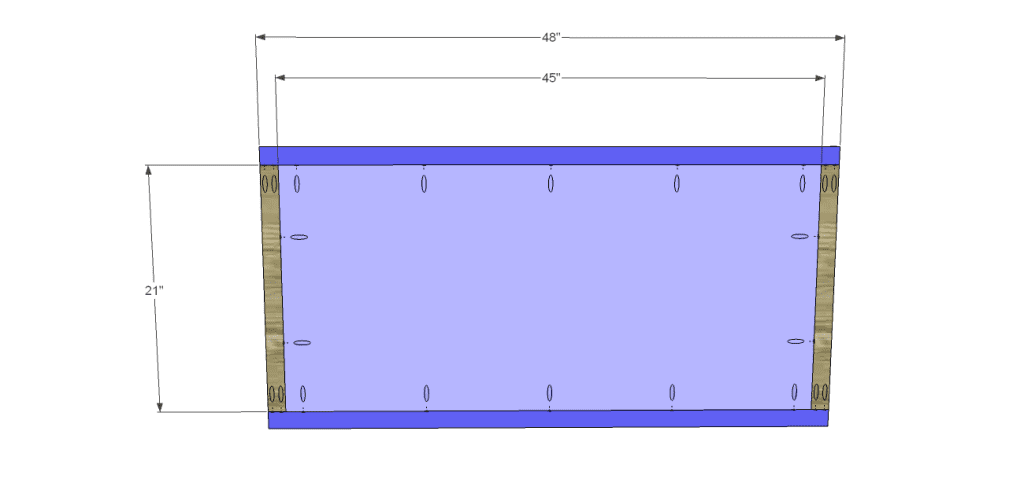
- 1 – 3/4″ plywood at 21″ x 45″ – Top
- 2 – 1×2 at 21″ – Top Trim
- 2 – 1×2 at 45″ – Top Trim
Step One
Cut the pieces for the legs, end frames, and end panels. With the pocket hole jig set for 3/4″ material, drill pocket holes in each end of the frame pieces as well as all four edges of the panels. Attach the frame pieces to the legs using glue and 1-1/4″ pocket hole screws. Orient the pocket holes so they face away from the center. This way they will be hidden and will not have to be filled. Insert the panel then secure using glue and 1-1/4″ pocket hole screws. The back face of the panel will be flush with the back edge of the frame.
Step Two
Cut the pieces for the side stretchers. Secure to the legs using glue and 1-1/4″ pocket hole screws. Orient the pieces so the pocket holes face away from the center.
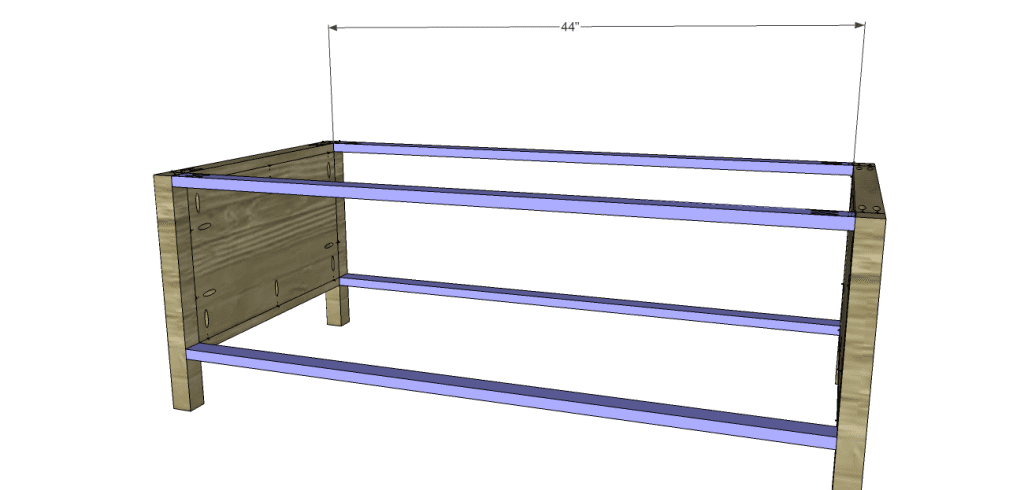
Step Three
Cut the piece for the bottom and drill pocket holes in all four edges. Secure to the lower stretchers and the sides using glue and 1-1/4″ pocket hole screws.
Step Four
Cut the pieces for the side panels and drill pocket holes in all four edges. Secure to the side stretchers using glue and 1-1/4″ pocket hole screws. The back face of the panels will be flush with the inside face of the stretchers.
Step Five
Cut the pieces for the vertical trim. Position the pieces so they are evenly spaced, then secure using 1-1/4″ brad nails.
Step Six
Cut the pieces for the top and the top trim. Drill pocket holes in each end of the side trim pieces, as well as all four edges of the panel. Attach the side pieces to the panel using glue and 1-1/4″ pocket hole screws, then attach the longer trim pieces. Rout a decorative edge if desired.
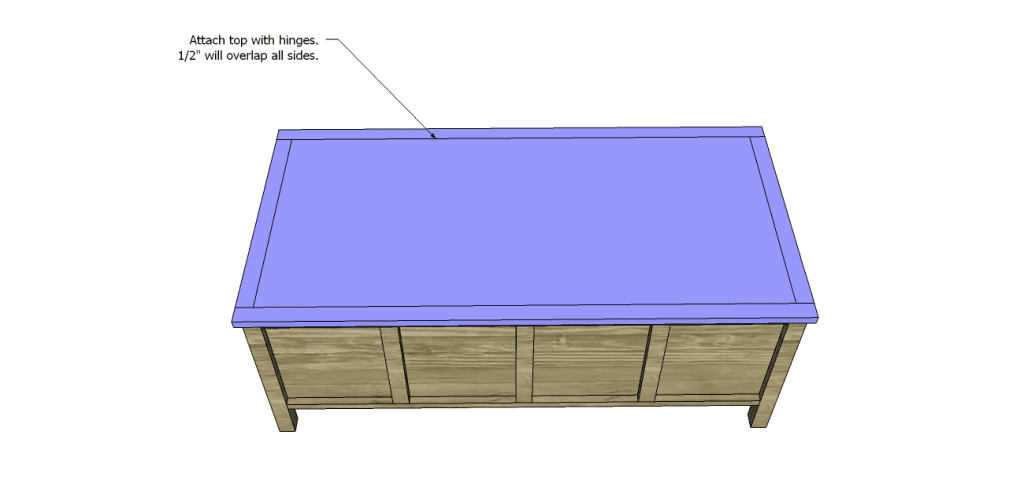
Position the top with 1/2″ overlapping all sides, then install the hinges.
Finish as desired.
Storage is usually at a minimum – build these trunk style coffee table plans to help provide extra space! Do you have a request for furniture plans? Contact me at cher {at} designsbystudioc {dot} com!


Comments are closed.