An Easy to Build Project Inspired by Ballard Designs
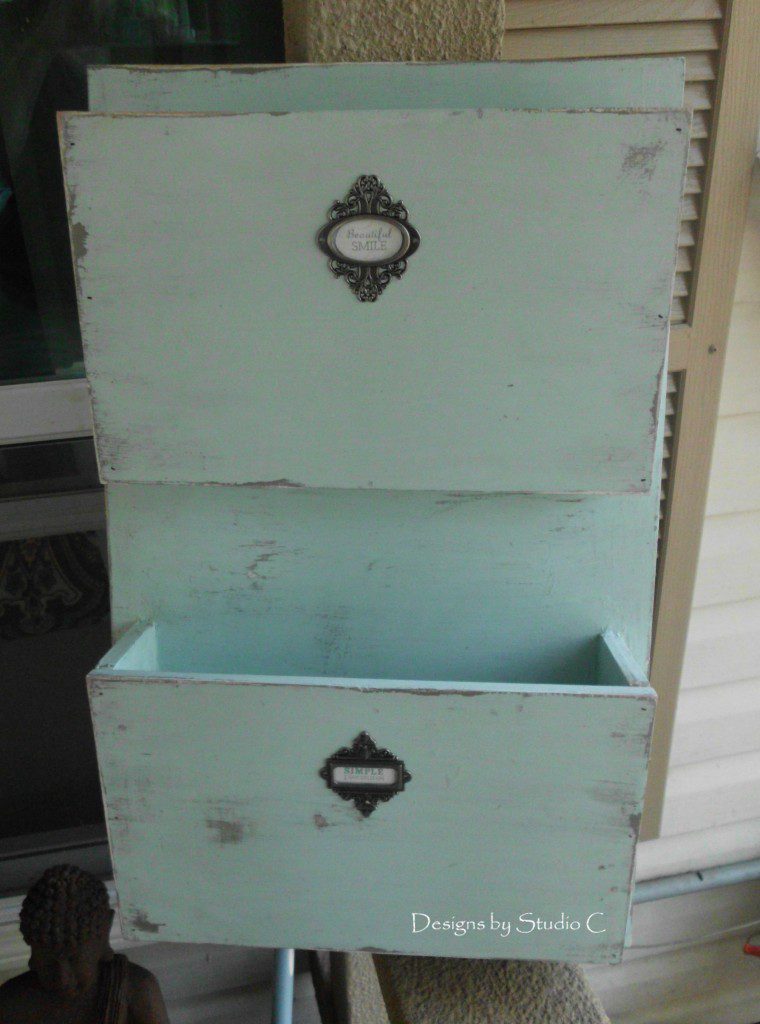
We can always use a little extra storage, right? Actually, some of us (pointing the finger at myself) could do better with less stuff! These plans are inspired by wall pockets found in the Ballard Designs catalog but are much cheaper! I built this in a little over an hour and used my trusty chalk paint as the finish. I added a couple of bookplates found in the scrapbooking section of my local hobby store to complete the look.
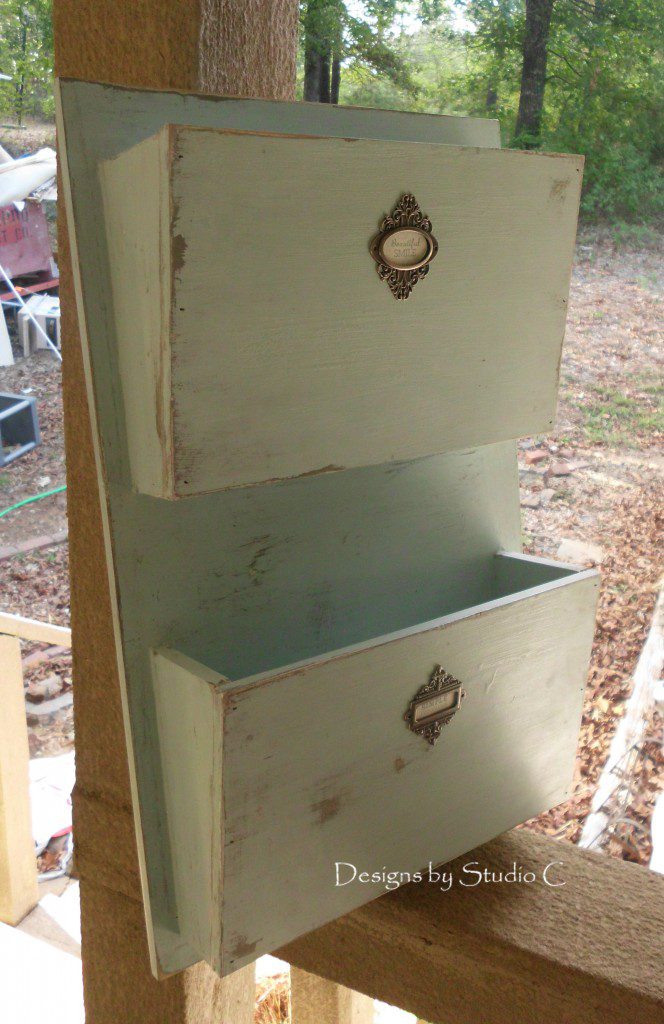
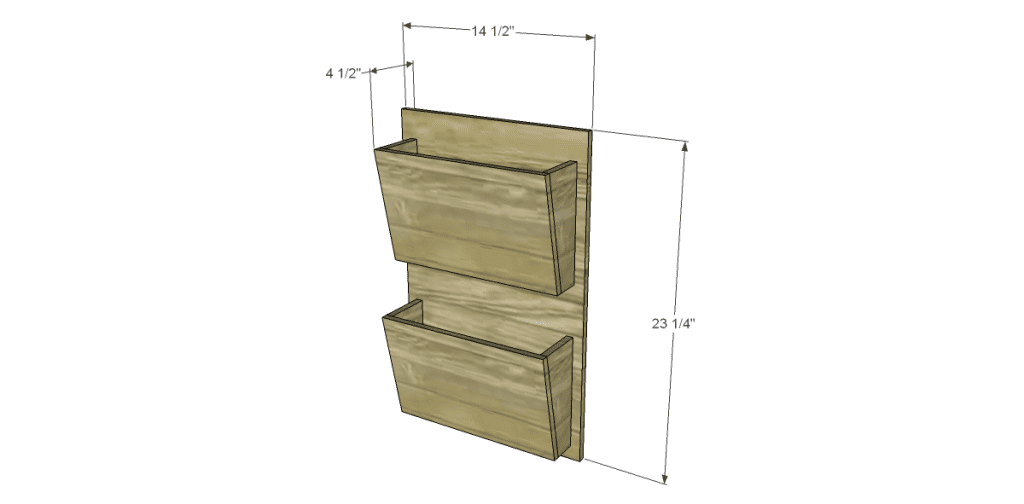
A two-pocket hanging will cost about $10 to build. It can also be customized to add additional pockets – Just lengthen the base including the appropriate spacing between pockets.
Materials:
- Wood glue
- 1-1/2″ brad nails (<–affiliate link!)
- Pencil & square
- Decorative plates for the front
- Finishing supplies
Lumber:
- 2′ x 4′ sheet of 1/2″ plywood (I used Purebond plywood)
Cut List:
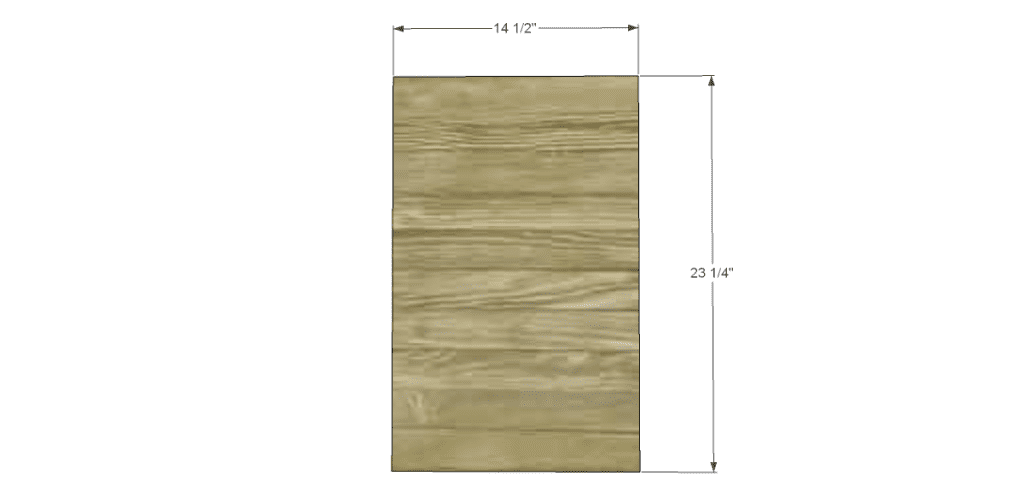
- 1 – 1/2″ plywood at 14-1/2″ x 23-1/4″ – Base
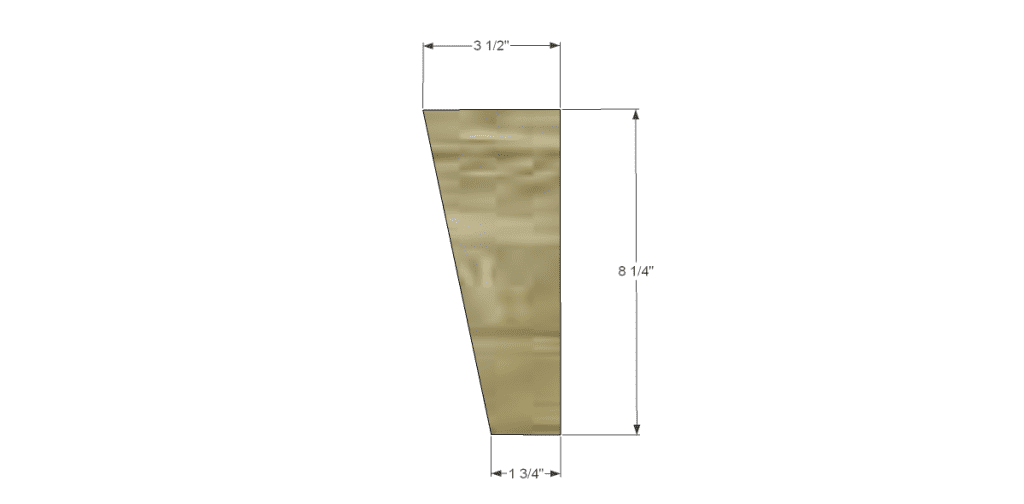
- 4 – 1/2″ plywood at 3-1/2″ x 8-1/4″ – Sides
- 2 – 1/2″ plywood at 1-3/4″ x 12″ – Bottoms
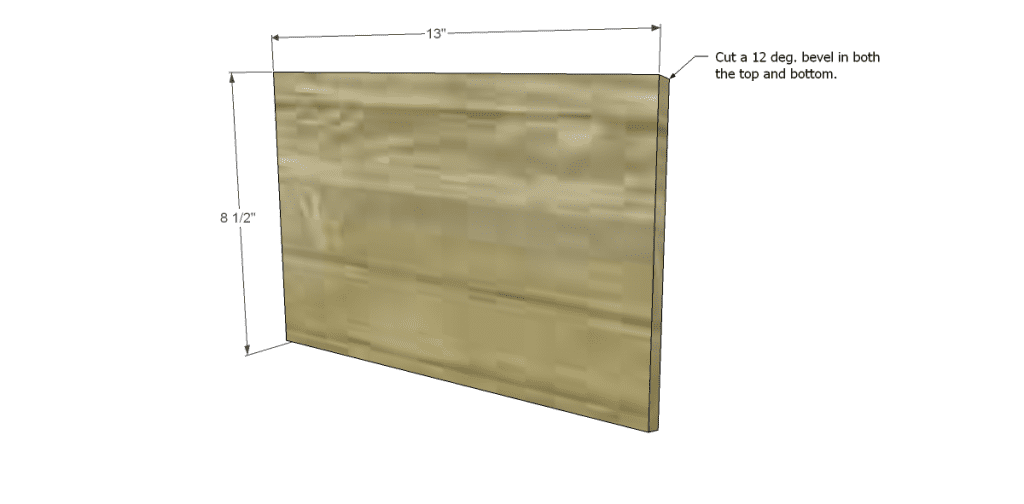
- 2 – 1/2″ plywood at 8-1/2″ x 13″ – Fronts
Step One
Cut the piece for the base.
Step Two
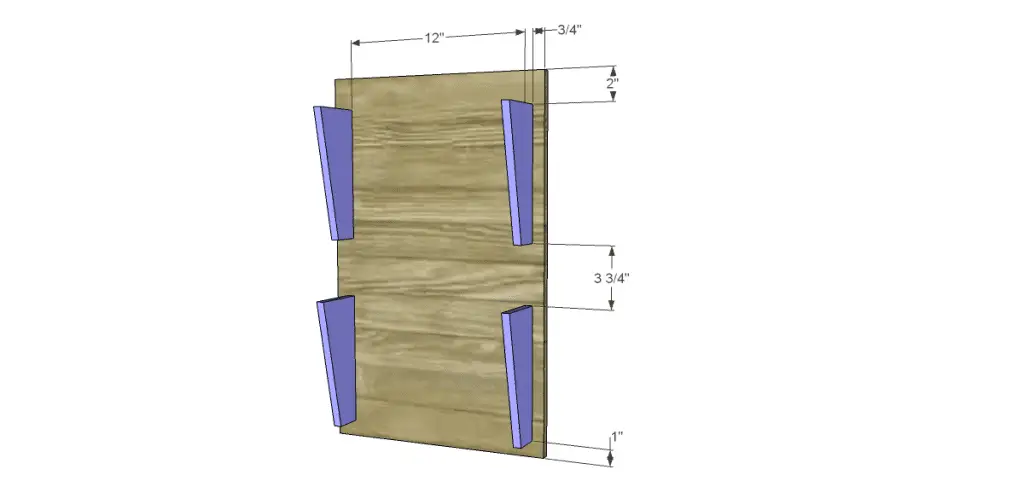
Cut the pieces for the sides and cut the angles as shown. Draw lines on the base for placement of the sides. Use glue and 1-1/4″ brad nails through the back side of the base to secure.
Step Three
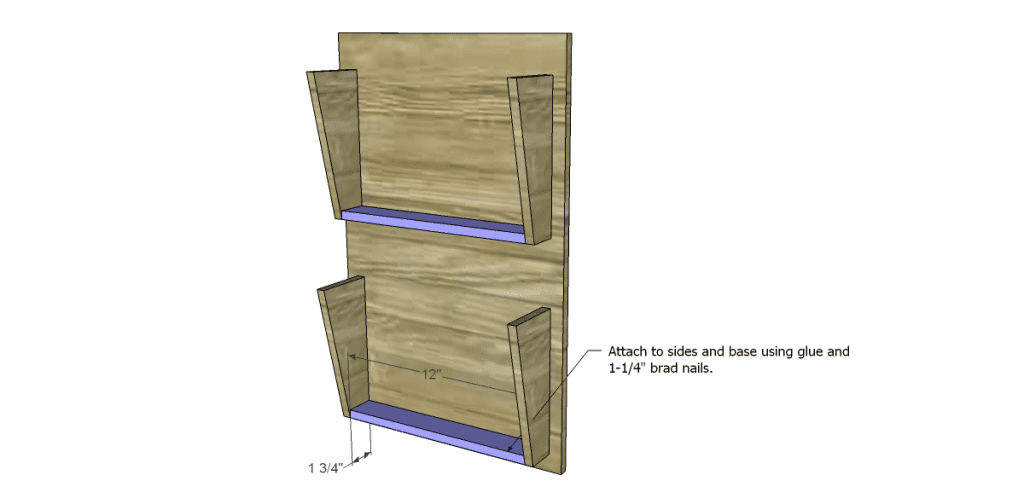
Cut the pieces for the bottoms. Secure to the base and sides using glue and 1-1/4″ brad nails.
Step Four
Cut the pieces for the fronts. Cut a 12 degree bevel in each of the longer sides of the fronts as shown. Do not attach to the pocket sides and bottoms yet!
Step Five
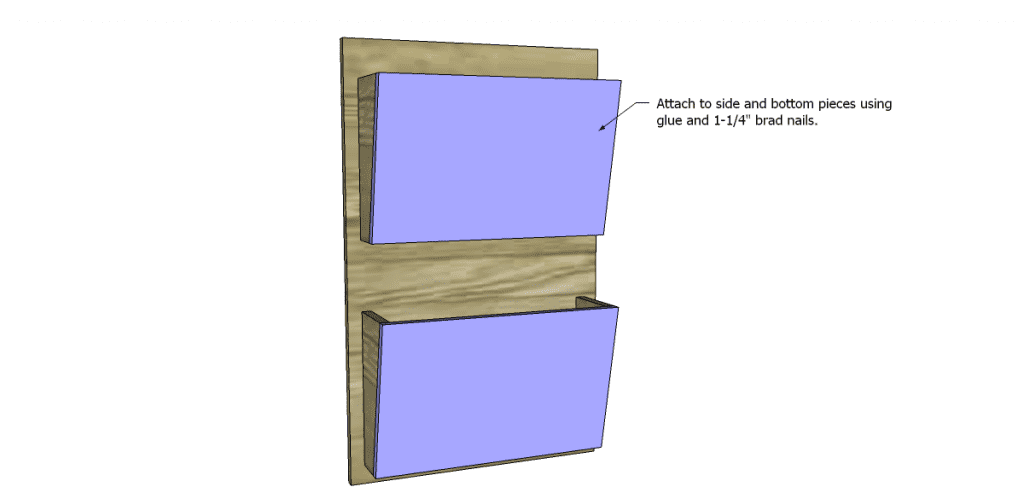
Thoroughly sand the entire assembly, as well as the front pieces. I found it was much easier to prime and paint or stain the wall pockets before the front pieces were attached. Once the paint or stain is dry, attach the front pieces with glue and 1-1/4″ brad nails, then hang on the wall with a couple of screws through the base into a wall stud.
** Please note – these plans are designed and created by me. They are not to be sold without express written consent from me. They can be shared on any site as long as they are credited back to me!
Originally posted 2012-09-14 08:00:22.

5 Comments
They look awesome. Great job!
Happy Sharefest. Have a wonderful weekend.
Thank you so much! Stop by again soon! Happy Sharefest!!
That is so great that you made your own! I love the ones at Ballards, but can’t bring myself to pay the price and yet I am not crafty to do this. You should consider selling stuff like this! I don’t know how much shipping would cost, but yours looks great and you could probably charge $20-40. Just a thought!
Thank you so much! I really appreciate it! Stop by again soon!!