Free Plans Inspired by World Market
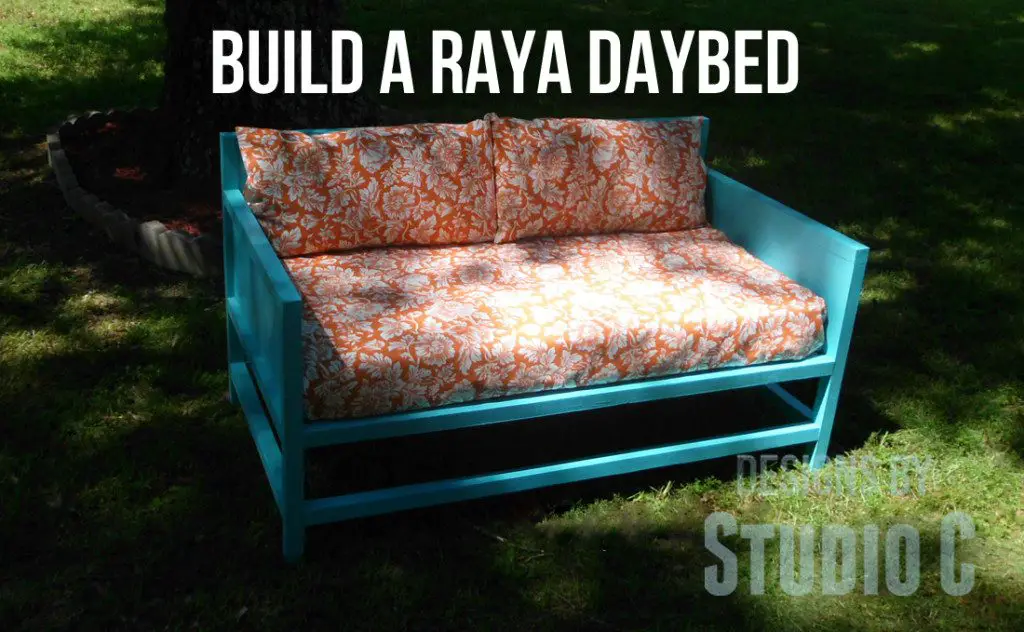
I’ve been trying to build more outdoor seating, especially since my son’s graduation is coming up! I came upon this daybed from World Market and really liked the simplicity. It is such an easy build. I based the free plans to build a World Market inspired Raya daybed around the cushion and you’ll never believe what I used for it… The kids’ old crib mattress! (Yes, it is sad that my kids are in high school and I still have the crib mattress but that is beside the point! I’m sure I’m not the only mom who still has one in storage!!) Anyway, crib mattresses are inexpensive and waterproof! All you need is outdoor fabric for a cover, a few plastic-bag-stuffed pillows, and voila! Instant outdoor seating! A new crib mattress is very inexpensive, as well but I would check the thrift stores first.
Materials:
- Crib mattress – mine measures 28″ x 52″
- Outdoor fabric and lots of plastic grocery bags
- 1-1/4″ pocket hole screws
- 2-1/2″ pocket hole screws
- 1-1/4″ screws or 1-1/4″ brad nails
- Finishing Supplies
Lumber:
- 6 – 2×2 at 8′ (or 3 – 2×4 ripped in half)
- 2 – 1×2 at 6′
- 1 – 1×3 at 6′
- 5 – 1×3 at 8′ (or 2 – 1×6 at 8′)
- 1 sheet of 3/4″ plywood (I used PureBond plywood!)
Cut List:
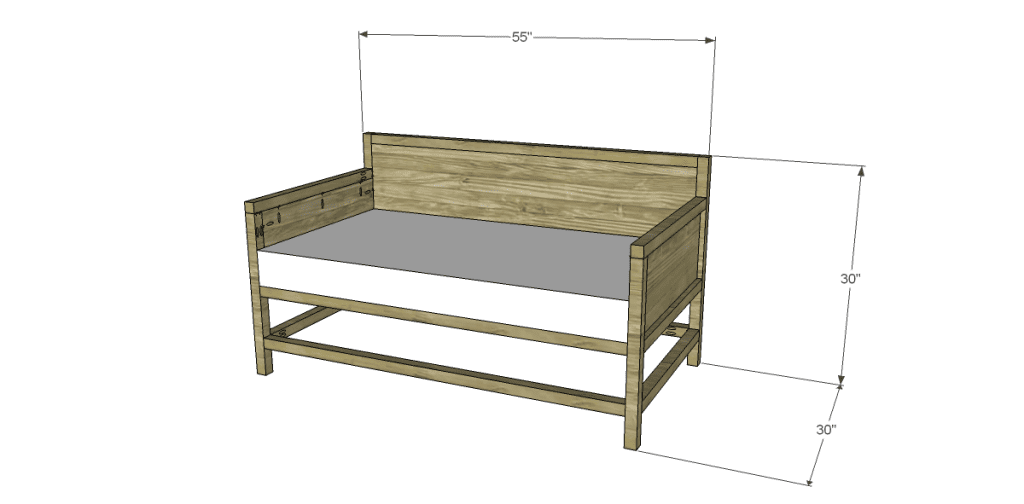
- 2 – 2×2 at 23″ – Front Legs
- 2 – 2×2 at 30″ – Back Legs
- 2 – 2×2 at 28-1/2″ – Arms
- 4 – 2×2 at 27″ – Side Stretchers
- 5 – 2×2 at 52″ – Long Stretchers
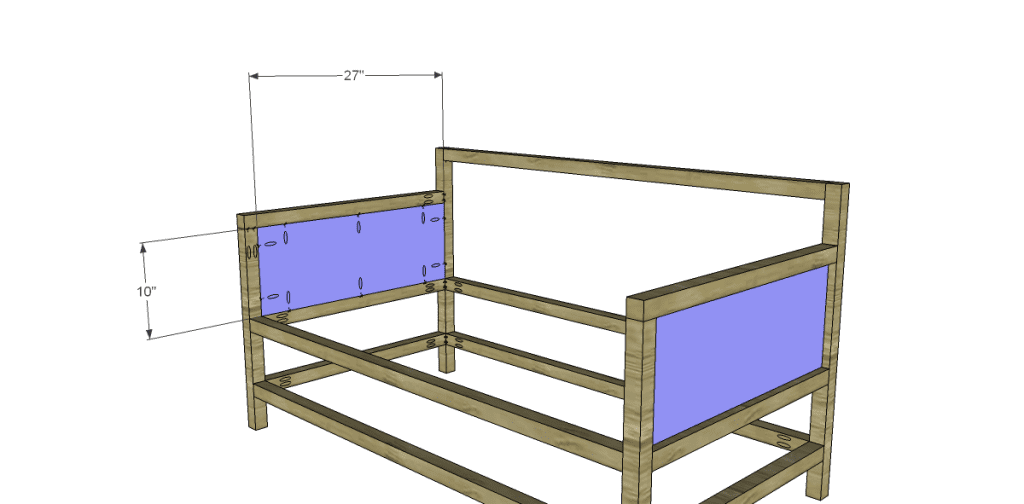
- 2 – 3/4″ plywood at 10″ x 27″ – Side Panels
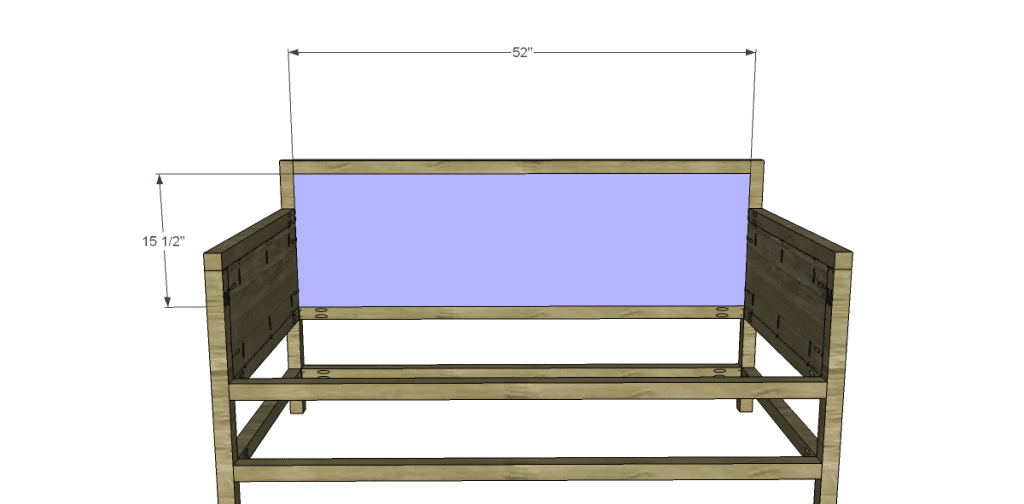
- 1 – 3/4″ plywood at 15-1/2″ x 52″ – Back Panel
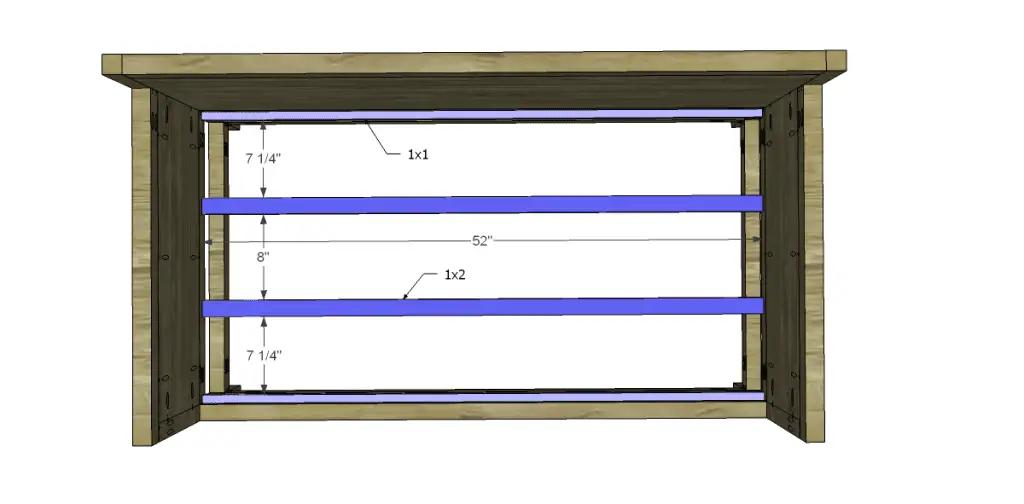
- 2 – 1×1 (these can be ripped off of a 1×3) at 52″ – Cleats
- 2 – 1×2 at 52″ – Cleats
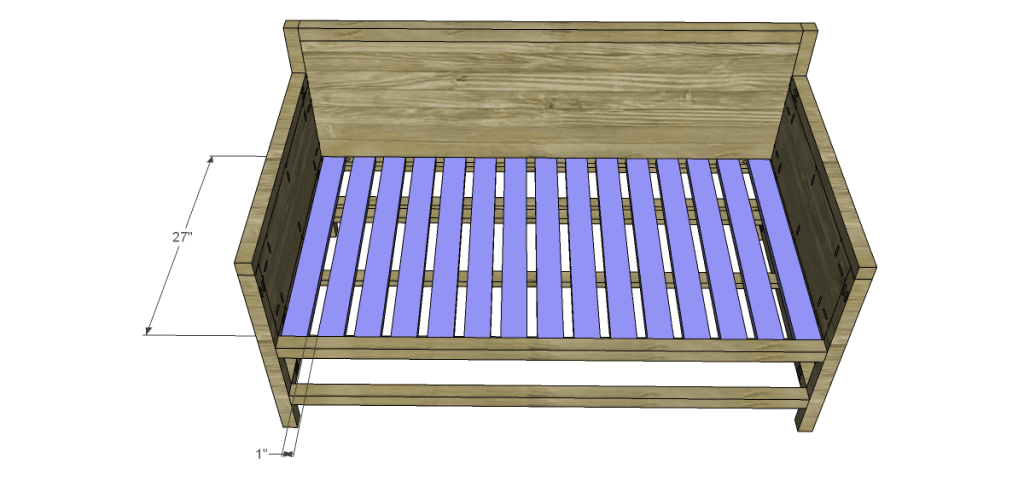
- 15 – 1×3 at 27″ – Slats
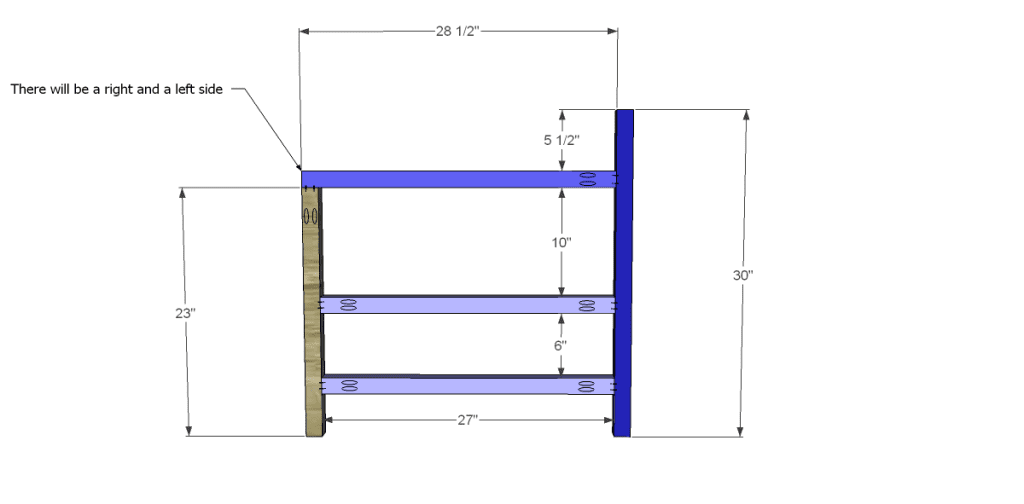
Step One
Cut the pieces for the legs, arms, and side stretchers. Drill pocket holes in one end of each of the front legs as well as the arms, and in each end of the stretchers. Assemble as shown using glue and 2-1/2″ pocket hole screws.
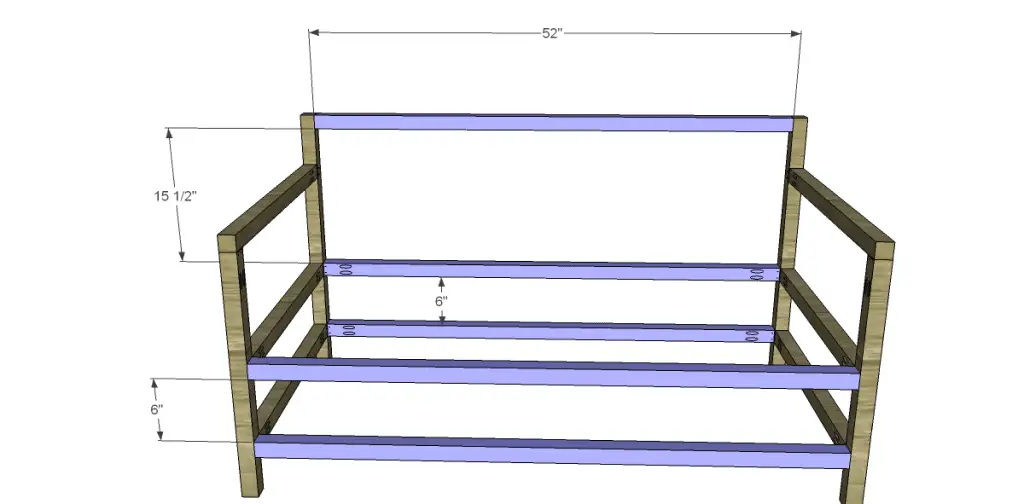
Step Two
Cut the pieces for the long stretchers and drill pocket holes in each end. Attach to the sides as shown using glue and 2-1/2″ pocket holes.
Step Three
Cut the pieces for the side panels and drill pocket holes in all four edges. Position so that the inside face of the panel is flush with the inside face of the side frame (the pocket holes can face in or out). Secure in place using glue and 1-1/4″ pocket hole screws.
Step Four
Cut the piece for the back panel and drill pocket holes in all four edges. The piece of plywood I had on hand was not quite long enough so I joined a piece at each end, with a 1×2 cleat on the back. This can be done so that a half sheet of plywood can be purchased instead of a full sheet. Position so that the inside face of the panel is flush with the inside face of the side frame (the pocket holes can face in or out). Secure in place using glue and 1-1/4″ pocket hole screws.
Step Five
Cut the pieces for the cleats and drill pocket holes in each end of the 1×2 pieces. The 1×1 pieces can be secured using countersunk 1-1/4″ screws or 1-1/4″ brad nails. Secure the 1×2 cleats as shown using glue and 1-1/4″ pocket hole screws.
Step Six
Cut the pieces for the slats. Secure to the cleats using glue and countersunk 1-1/4″ screws or 1-1/4″ brad nails.
Fill all exposed holes, then finish the daybed as desired! I painted the entire daybed with Behr in Mermaid Treasure. Create a Basic Box Cushion for the mattress, then create the plastic-bag-stuffed cushions, and you are set!
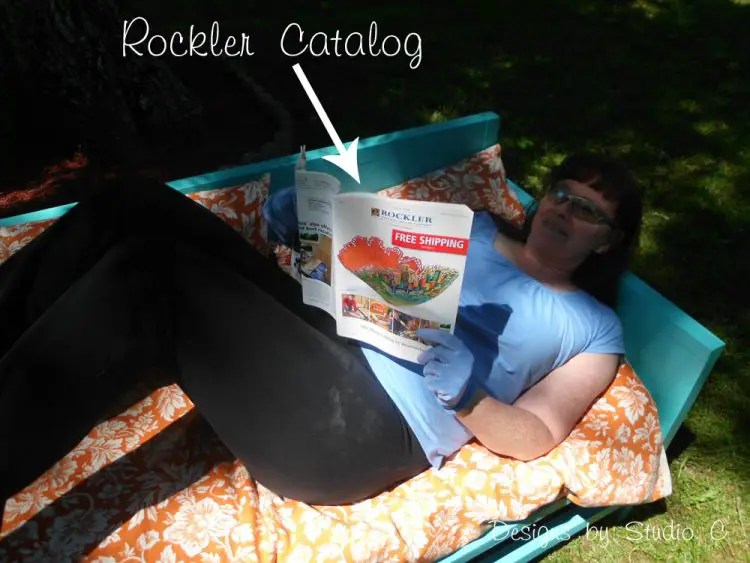
The free plans to build a World Market inspired Raya daybed can be completed in a weekend which makes this a super-quick project! Share your fabulous work with me… Send photos to cher {at} designsbystudioc {dot} com or designsbystudioc {at} gmail {dot} com. I would love to feature your work on DbSC!
Sharing with:
The Real Thing with the Coake Family
That DIY Party
Common Ground
My Romantic Home
Jennifer Rizzo
504 Main
Funky Junk Interiors
The SITS Girls Saturday Sharefest

8 Comments
Wow! What a great project! I love the shot of you relaxing with your catalog. 🙂 Thanks so much for linking up at the Real Family Fun link
party! Hope to see you next week.
KC
Thanks!! i wanted to make sure I was the first one to lay on it!! See you next week!
You are so funny that you still have the crib mattress for high school graduate! But it is an awesome idea to use it for outdoor seating. Thanks for sharing the plans!
Sad, isn’t it?? But at least I found a use for it! Thank you for stopping by!!
This is great, we have been thinking about building something like this for our bakyard! #SITSblogging
I LOVE ours! The old crib mattress I used is perfect because it is waterproof and holds up well to the weather! Thank you very much for stopping by!