A Fabulous Chest with Lots of Storage, Inspired by Joss & Main
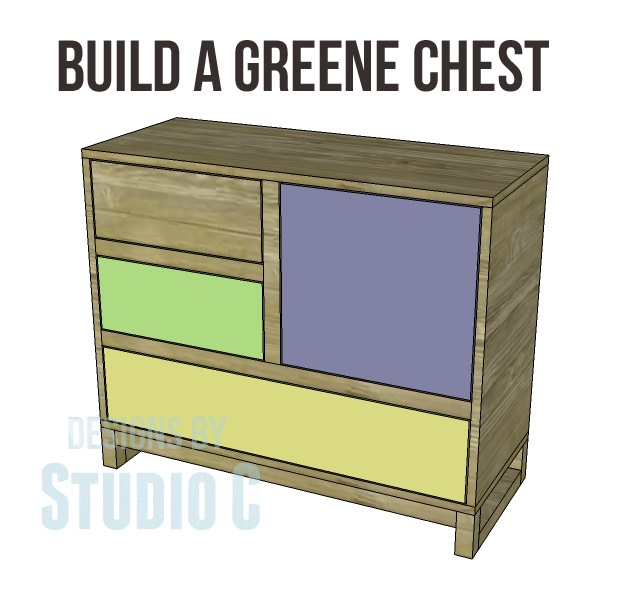
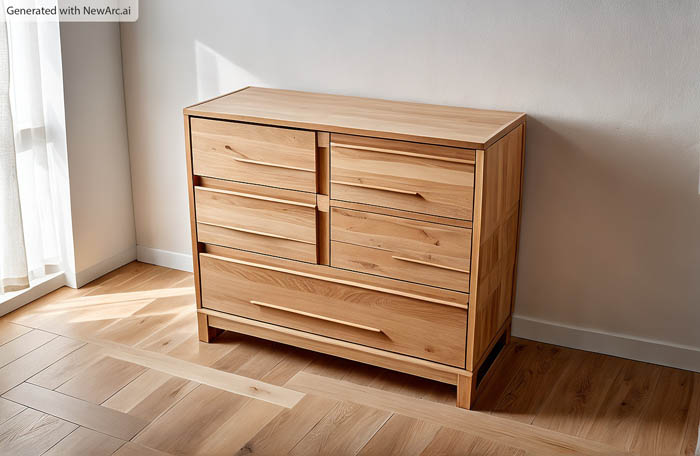
Hey there! Check out this awesome little chest that’s just perfect for storing linens or hiding all sorts of random stuff. The plans to build the Greene chest include a door and drawer fronts that you can paint in different colors, which is a great way to use up any leftover paint you have or even try out some new samples. Of course, you can also choose to have the whole cabinet with the same finish. How cool is that?
Materials:
- 1-1/4″ pocket hole screws
- 2-1/2″ pocket hole screws
- 1-1/4″ brad nails
- 3 sets of 12″ drawer slides
- 1 set of non-mortise hinges
- 4 cabinet pulls
- 1 magnetic catch
- Edge banding
- Finishing supplies
Lumber:
- 1 – 1×2 at 8′
- 2 – 2×2 at 8′
- 1 – half sheet of 3/4″plywood
- 1 – full sheet of 3/4″ plywood
Cut List:
- 4 – 2×2 at 4″ – Base Legs
- 2 – 2×2 at 12″ – Base Frame
- 2 – 2×2 at 33″ – Base Frame
- 2 – 3/4″ plywood at 15″ x 36″ – Bottom & Top
- 2 – 3/4″ plywood at 15″ x 24-1/2″ – Sides
- 1 – 3/4″ plywood at 24-1/2″ x 34-1/2″ – Back
- 1 – 3/4″ plywood at 13-1/2″ x 17-1/4″ – Shelf
- 1 – 3/4″ plywood at 13-1/2″ x 15-1/2″ – Divider
- 1 – 1×2 at 15-1/2″- Front Trim
- 1 – 1×2 at 16-1/2″ – Front Stretcher
- 1 – 1×2 at 34-1/2″ – Front Stretcher
- 2 – 1×2 at 13-1/2″ – Drawer Spacers
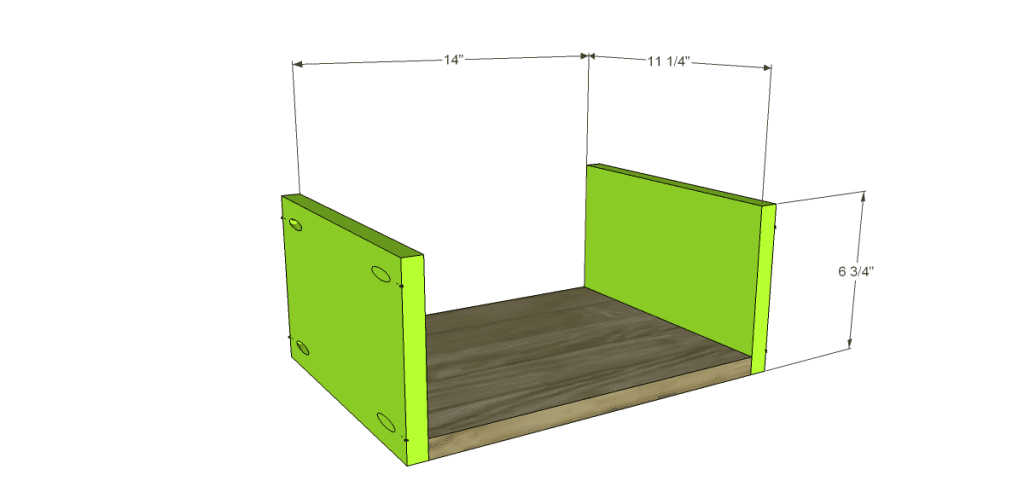
- 2 – 3/4″ plywood at 11-1/4″ x 14″ – Small Drawer Bottoms
- 4 – 3/4″ plywood at 6-3/4″ x 11-1/4″ – Small Drawer Sides
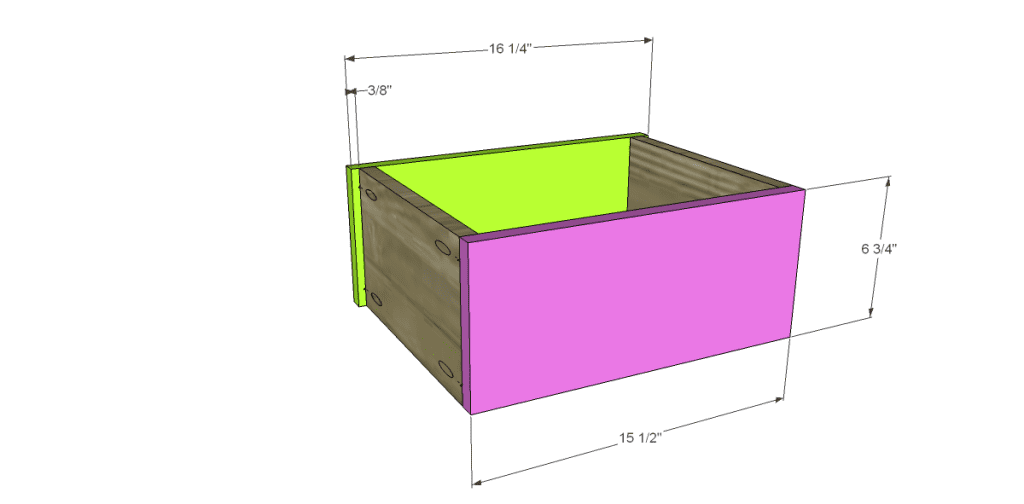
- 2 – 3/4″ plywood at 6-3/4″ x 15-1/2″ – Small Drawer Backs
- 2 – 3/4″ plywood at 6-3/4″ x 16-1/4″ – Small Drawer Fronts
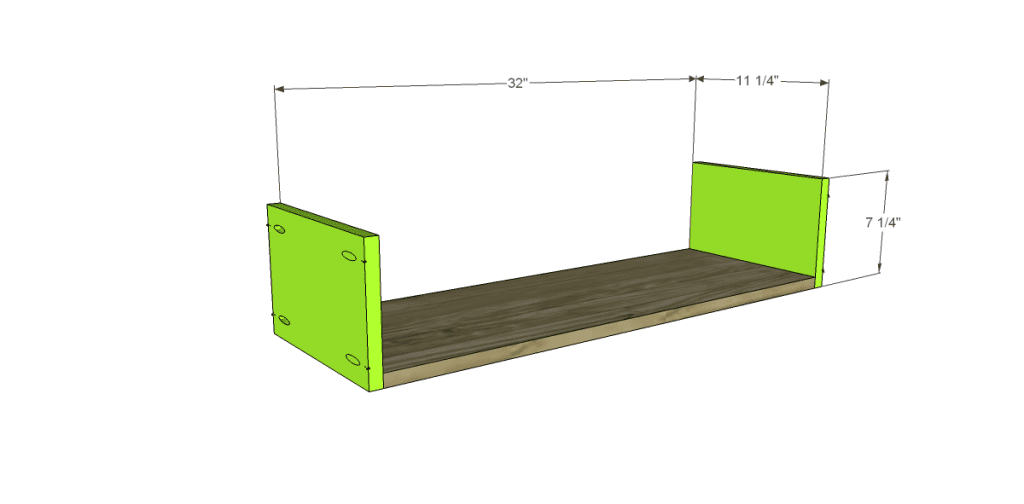
- 1 – 3/4″ plywood at 11-1/4″ x 32″ – Large Drawer Bottom
- 2 – 3/4″ plywood at 7-1/4″ x 11-1/4″ – Large Drawer Sides
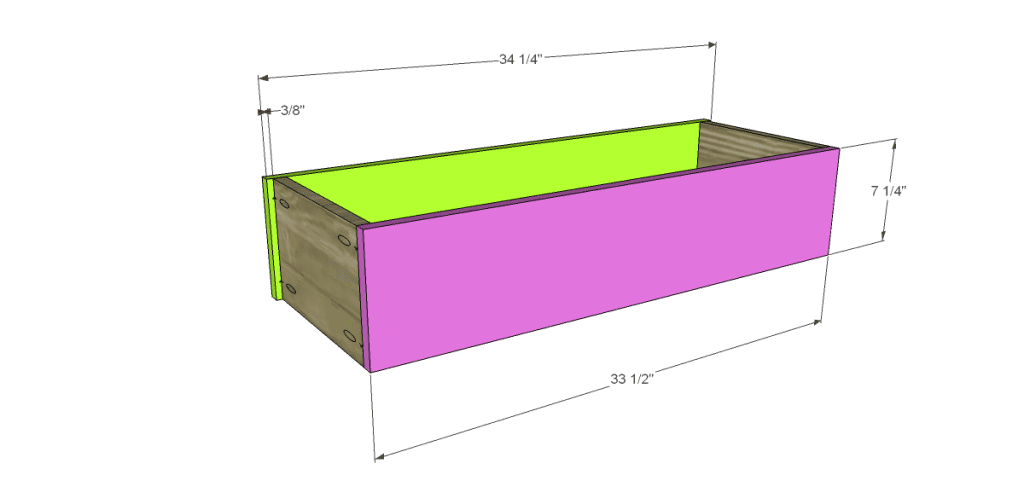
- 1 – 3/4″ plywood at 7-1/4″ x 33-1/2″ – Large Drawer Back
- 1 – 3/4″ plywood at 7-1/4″ x 34-1/4″ – Large Drawer Front
- 1 – 3/4″ plywood at 15-1/4″ x 16-1/4″- Door
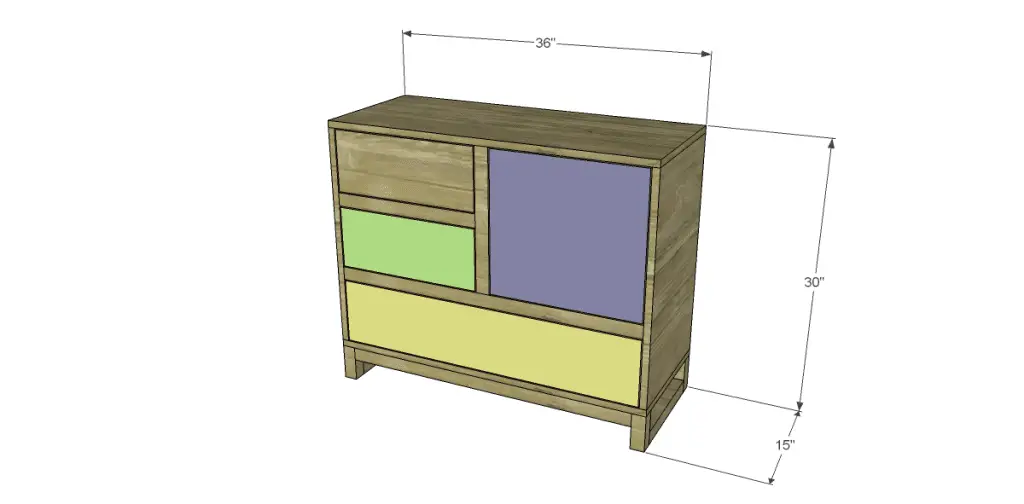
If using edge banding, it will be applied before assembly.
Step One
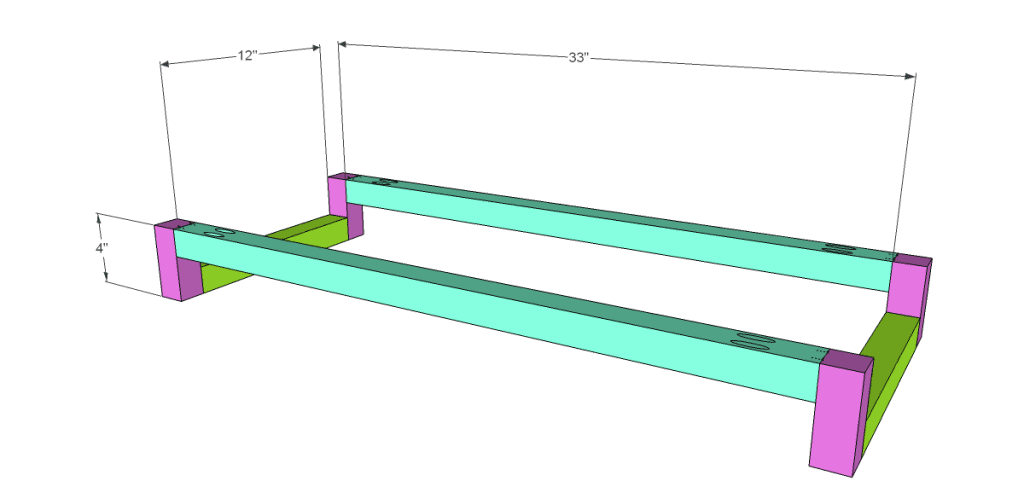
Cut the pieces for the base. Drill pocket holes in each end of the frame pieces. Assemble as shown using glue and 2-1/2″pocket hole screws.
Step Two
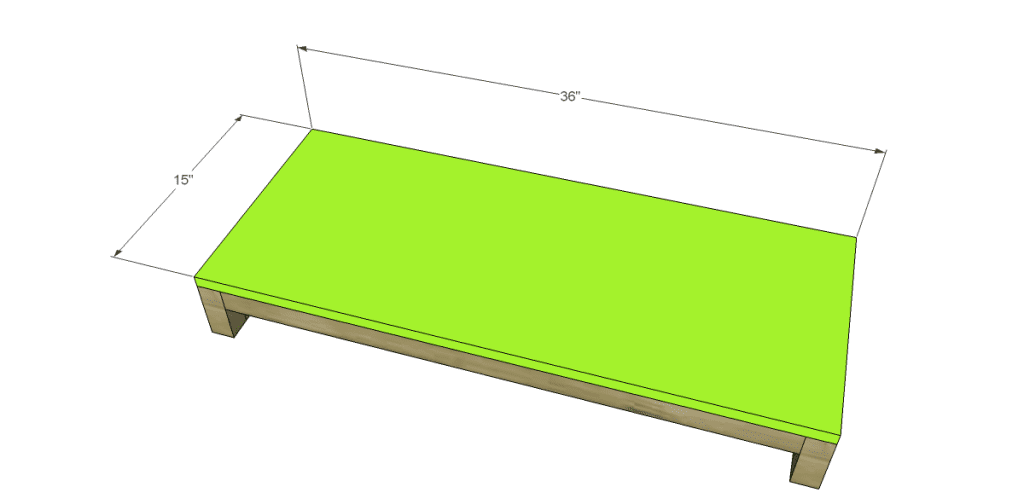
Cut the piece for the bottom. Secure to the frame using glue and 1-1/4″ brad nails.
Step Three
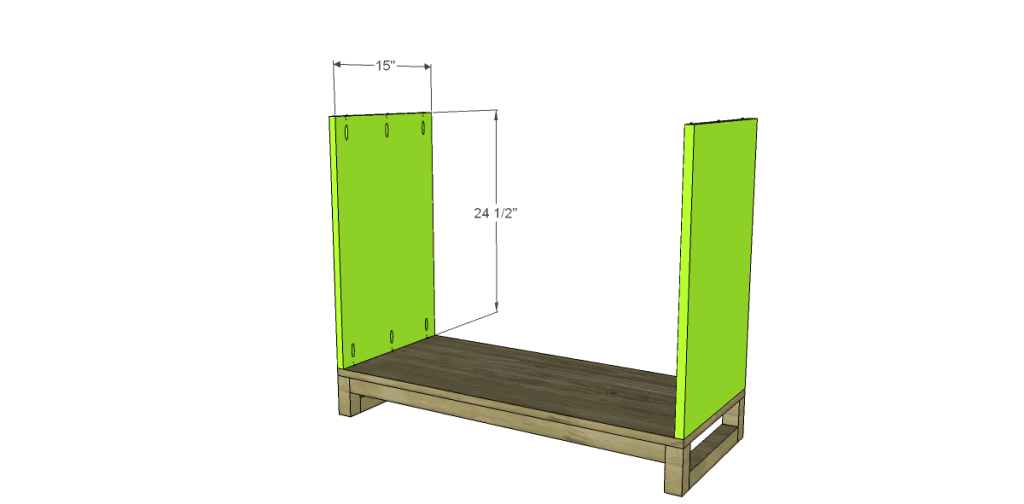
Cut the pieces for the sides and drill pocket holes in each end. Secure to the bottom as shown using glue and 1-1/4″ pocket hole screws.
Step Four
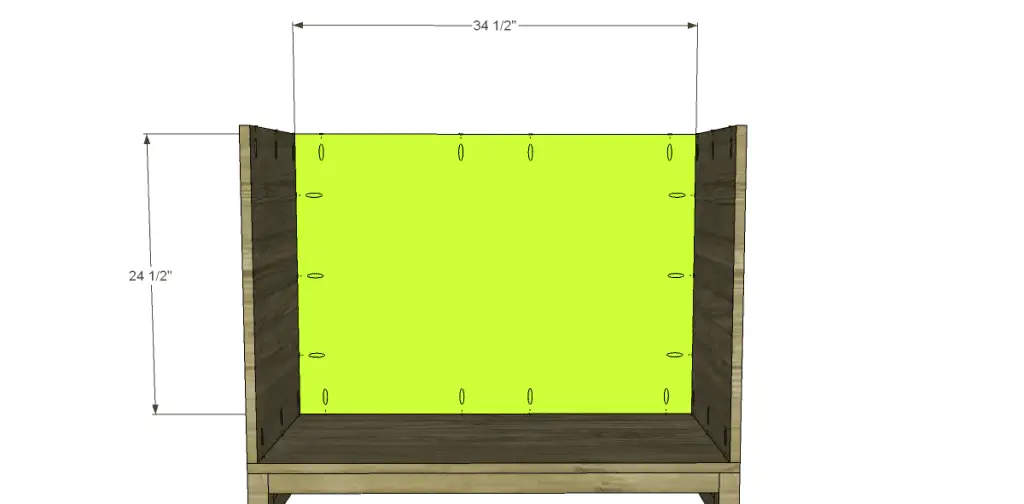
Cut the piece for the back and drill pocket holes in all four edges. Position as shown then secure using glue and 1-1/4″ pocket hole screws.
Step Five
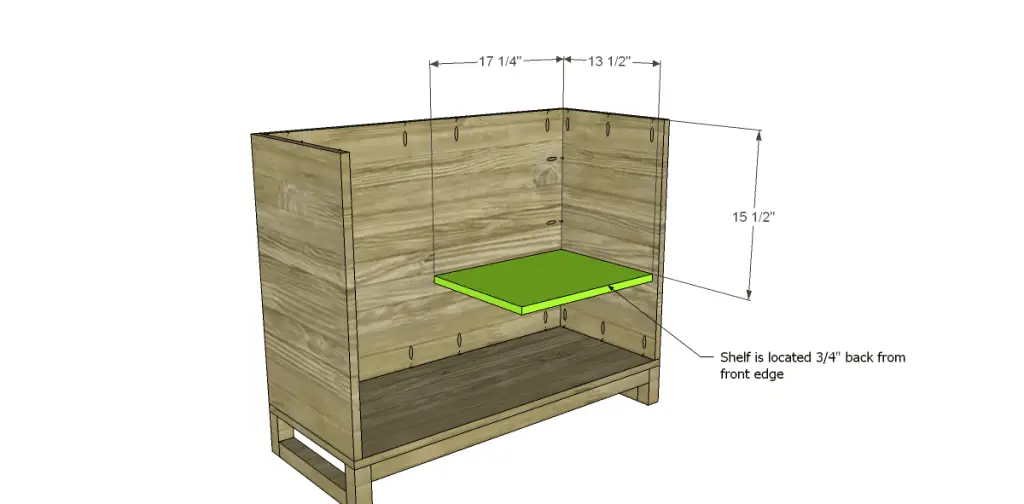
Cut the piece for the shelf and drill pocket holes in the side edge as well as the back. Position the shelf as shown locating it 3/4″ back from the front edge then secure using glue and 1-1/4″ pocket hole screws.
Step Six
Cut the piece for the divider and drill pocket holes in the back, bottom, and top edges. Position as shown and secure to the shelf and back using glue and 1-1/4″ pocket hole screws.
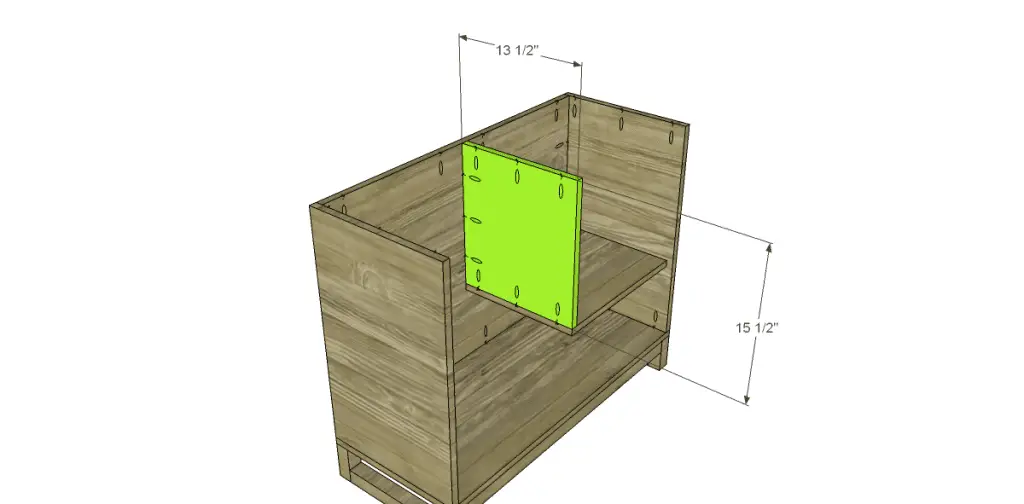 Step Seven
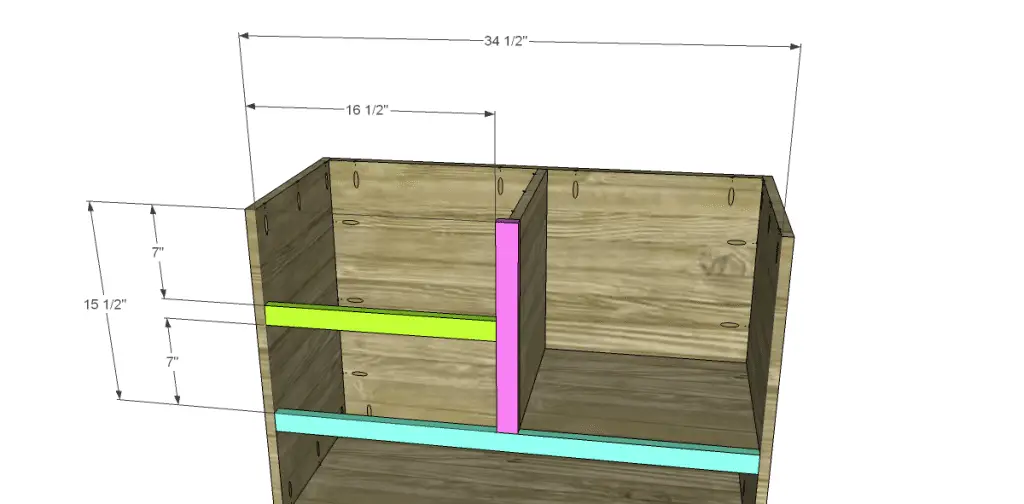
Cut the pieces for the front trim and front stretchers. Drill pocket holes in each end of the stretcher pieces. Drill one pocket hole in the bottom of the trim piece locating it on the right side (the back side of the trim is facing you) so it can be connected to the stretcher below it. Attach the trim to the divider first as shown, using glue and 1-1/4″ brad nails. Attach the stretchers as shown using glue and 1-1/4″ pocket hole screws. Drive one pocket hole screw through the trim into the longer stretcher.
Step Eight
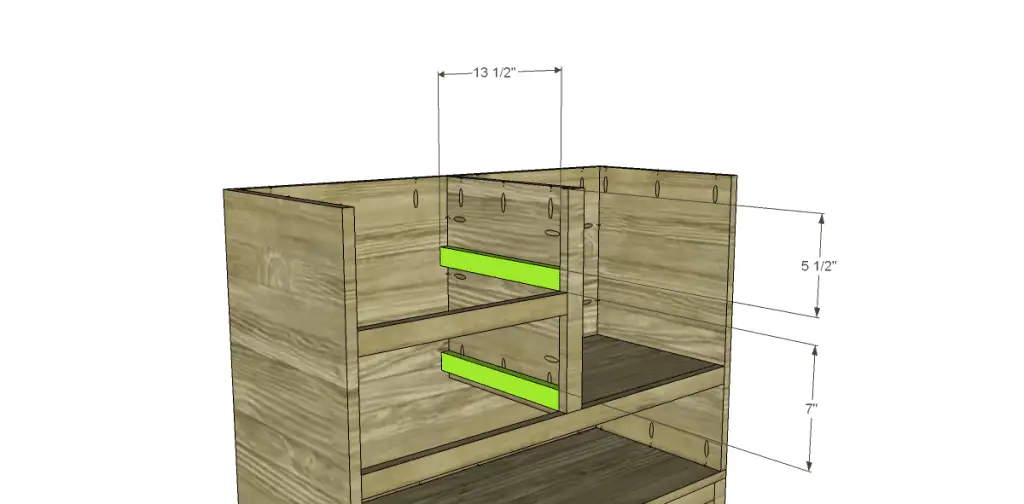
Cut the pieces for the drawer slide spacers. Attach as shown using glue and 1-1/4″ brad nails.
>
Step Nine
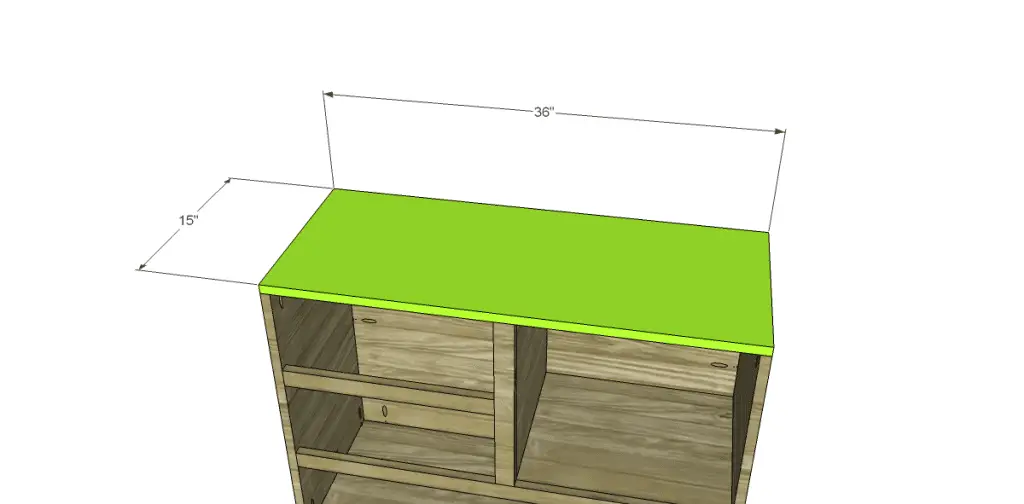
Cut the piece for the top. Secure to the cabinet using glue and 1-1/4″ pocket hole screws.
Step Ten
Cut the pieces for the drawers. Drill pocket holes in each end of the side pieces as well as all four edges of the bottom. Assemble as shown using glue and 1-1/4″ pocket hole screws. The fronts will overlap the drawer box by 3/8″ on each side.
Install the drawer slides according to the manufacturer’s instructions. This easy tutorial on installing drawer slides will make it easy! Make any necessary adjustments.
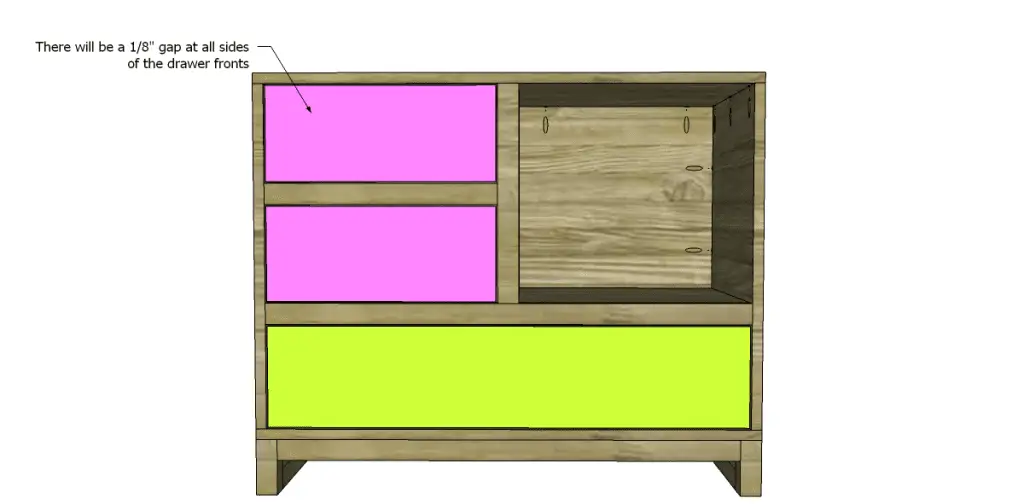
Step Eleven
Cut the pieces for the door. Install the hinges on the door, then install in the cabinet. Install all of the cabinet pulls and the magnetic catch.
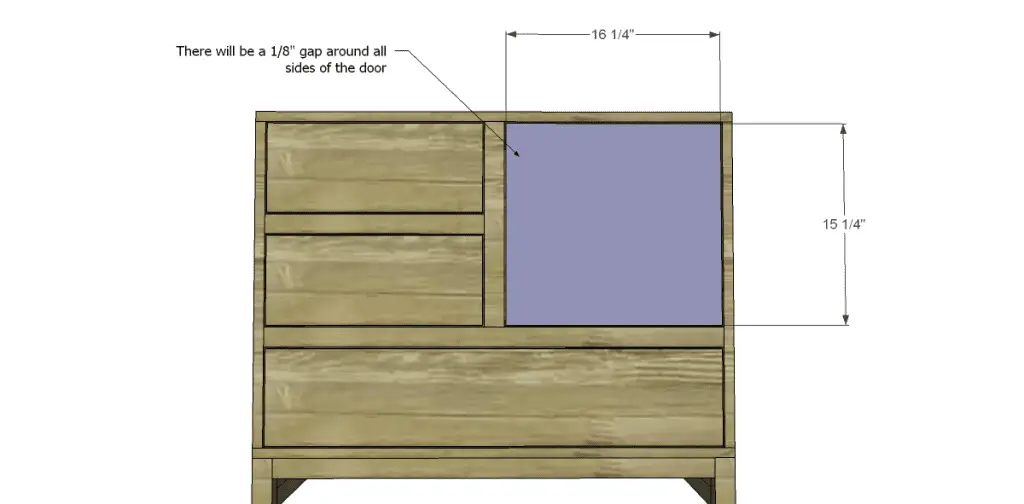
Finish as desired!
The free plans to build a Joss & Main Inspired Greene Chest would make a great addition to a kid’s bedroom or playroom, or Share your fabulous work with me… Send photos to cher {at} designsbystudioc {dot} com or designsbystudioc {at} gmail {dot} com. I would love to feature your work on DbSC!
Originally posted 2013-05-23 12:00:46.


Comments are closed.