
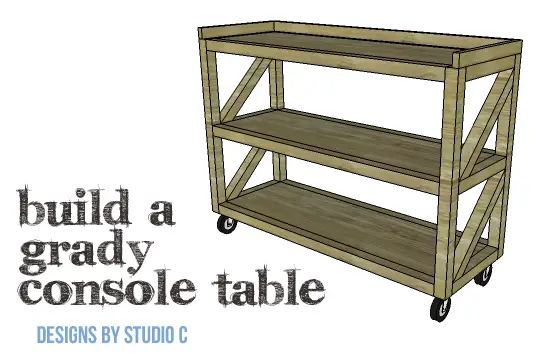
Plans to Build a Grady Console Table
A Simple DIY Console Table on Casters
This simple console table is the easiest of builds… The DIY plans to build a Grady Console Table feature three shelves, angled bracing on each side, and is set on casters. This DIY console table on casters will fit into any room décor and can be completed in a weekend!
Materials:
- 1-1/4″ pocket hole screws (<– affiliate link!)
- 2-1/2″ pocket hole screws
- 1-1/4″ brad nails
- 2″ screws
- 4″ casters
- Wood glue
- Sandpaper (100, 150, 220 grits)
- Finishing supplies (primer & paint, or stain, sealer)
Lumber:
- 1 – 1×2 at 6′
- Scrap of 1×3 at 1′
- 5 – 2×2 at 8′
- 1 – 4′ x 4′ sheet of 3/4″ plywood
Cut List:
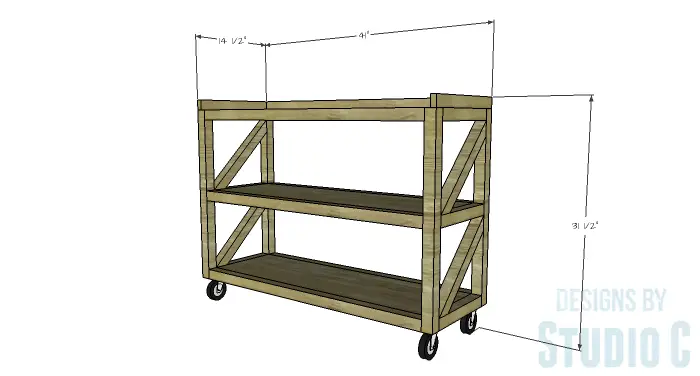
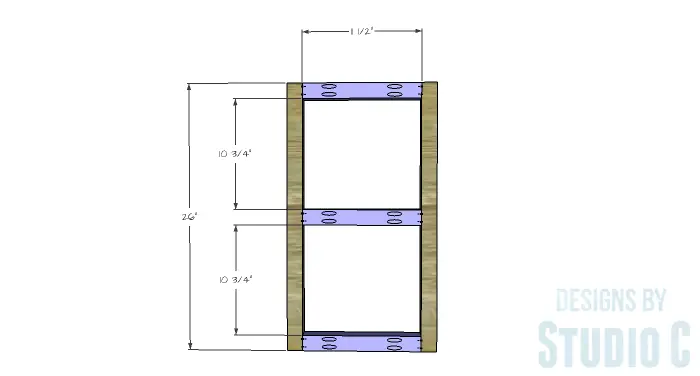
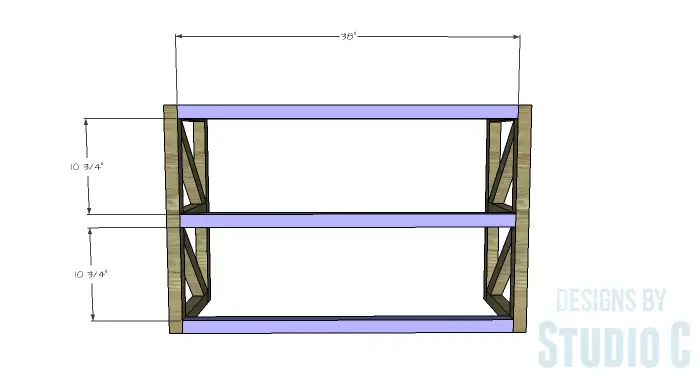
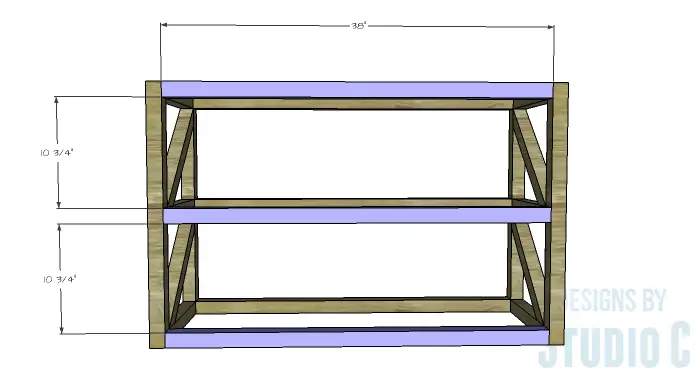
- 4 – 2×2 at 26″ – Side Framing
- 6 – 2×2 at 11-1/2″ – Side Framing
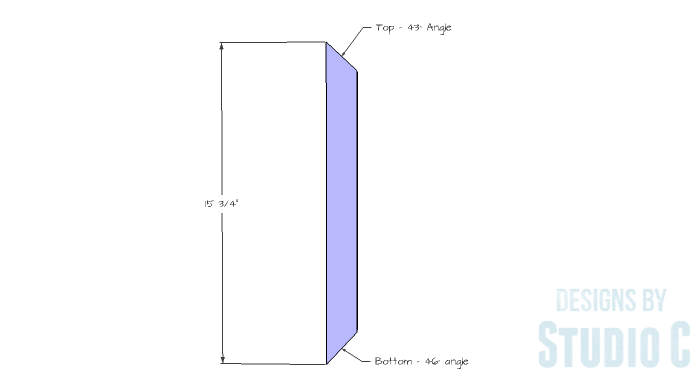
- 4 – 2×2 at 15-3/4″ – Side Bracing
- 6 – 2×2 at 38″ – Stretchers
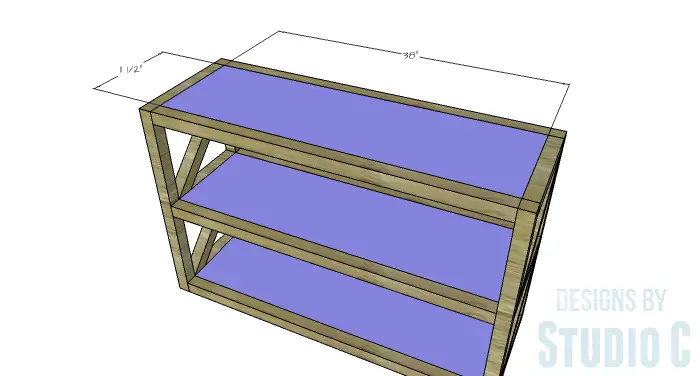
- 3 – 3/4″ plywood at 11-1/2″ x 38″ – Shelves
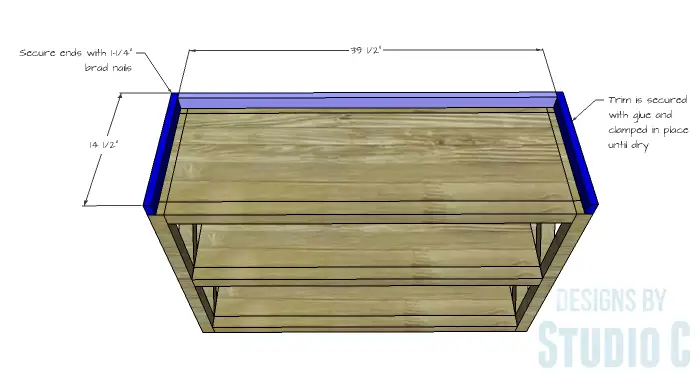
- 1 – 1×2 at 39-1/2″ – Top Trim
- 2 – 1×2 at 14-1/2″ – Top Trim
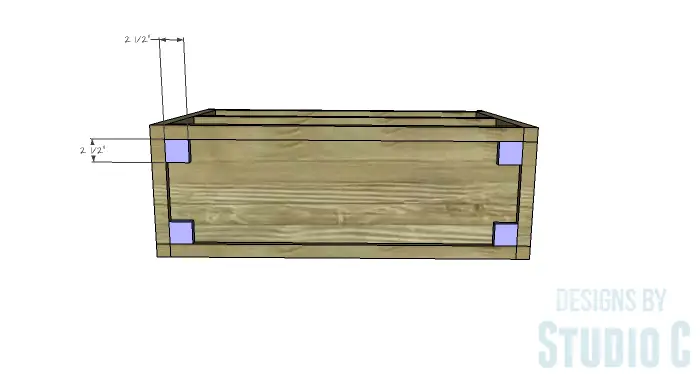
- 4 – 1×3 at 2-1/2″ – Caster Blocks
Click on the drawings for a larger view!
Step One
Cut the pieces for the side framing. With the pocket hole jig set for 1-1/2″ material, drill pocket holes in each end of the shorter pieces. Secure the shorter pieces to the legs using glue and 2-1/2″ pocket hole screws.
Step Two
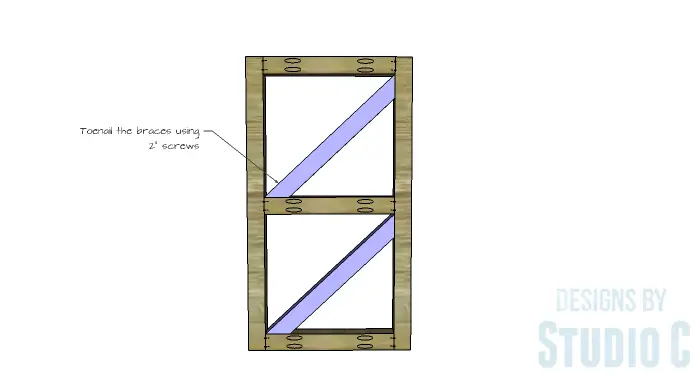
Cut the pieces for the bracing. Cut the angles in the top end of the pieces at 43° and the bottom end at 46°. These angles can be adjusted as necessary.
Secure the bracing inside the side frames using glue and toenailed 2″ screws.
Step Three
Cut the pieces for the stretchers and drill pocket holes in each end. Secure the stretchers to the legs using glue and 2-1/2″ pocket hole screws.
Step Four
Cut the pieces for the shelves. Set the pocket hole jig for 3/4″ material and drill pocket holes in all four edges. Secure the shelves to the side framing and the stretchers using glue and 1-1/4″ pocket hole screws. The top face of the shelves will be flush with the top face of the stretchers.
Step Five
Cut the pieces for the top trim. The top trim will be secured to the top of the console table using glue and clamped into place until dry. A couple of brad nails through the sides into the back piece can be used to tie the trim together.
Step Six
Cut the pieces for the caster blocks. Secure the blocks to the underside of the lowest shelf using glue and 1-1/4″ brad nails.
Step Seven
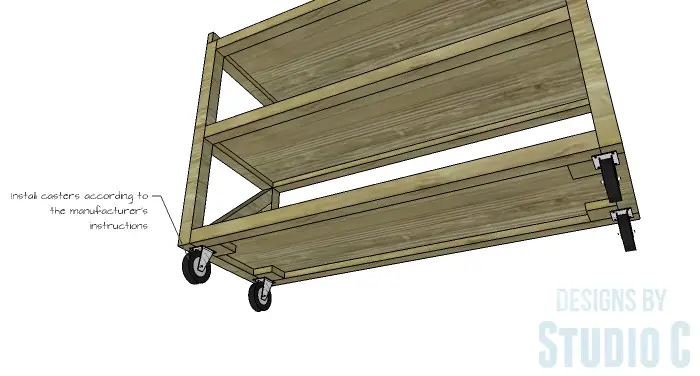
Secure the casters to the bottom according to the manufacturer’s instructions.
Finish the console as desired.
The console table would be great as a mobile bookcase! The console would also be a great piece in a bathroom to store clean towels. Have any questions about the DIY plans to build a Grady Console Table? Leave a comment below!
Originally posted 2015-12-14 08:00:32.
[…] Console Table Free Woodworking Plans.Build this console table which features angled bracing on the sided, three shelves, and casters, using these free […]