A Mid Century Modern Coffee Table with Plexiglas Insert
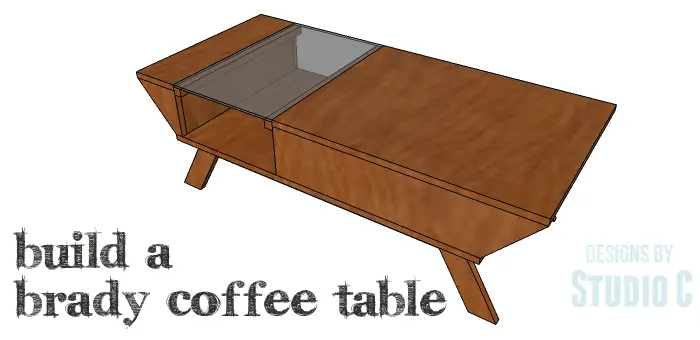
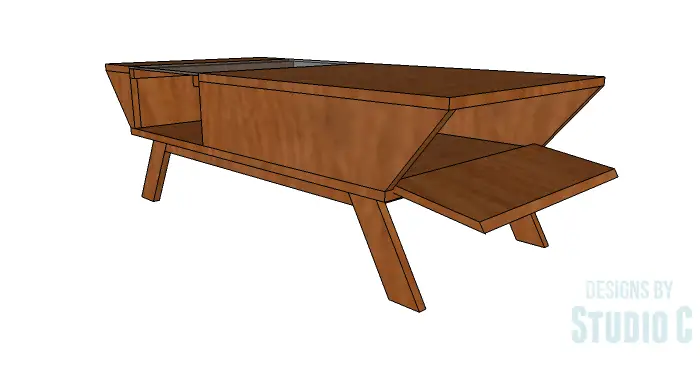
Hey there! Check out this awesome piece in the Mid-Century Modern style – and guess what? It comes with storage! The DIY plans for the Brady Coffee Table include a cool open shelf with a Plexiglas insert. Plus, on the other end, there’s a handy enclosed box with a door, perfect for keeping your remotes, magazines, or books neatly tucked away. Don’t worry about the angles in the midcentury coffee table plans, they may look a bit tricky, but trust me, it’s actually a super easy build that you can finish in just one weekend!
Materials:
- 1-1/2″ brad nails
- 1-3/4″ brad nails
- 1-1/4″ pocket hole screws
- Edge banding (<– affiliate link!)
- 1/4″ Plexiglas
- Magnetic catch (for the door) (<– affiliate link!)
- Small cabinet pull
- Wood glue
- Sandpaper (100, 150, 220 grits)
- Finishing supplies (primer & paint, or stain, sealer)
Lumber:
- 1 – 3/4″ square dowel at 4′ (or 2 @ 3′)
- 2 – 1×2 at 6′
- 1 – 1×3 at 4′
- 1 – 4′ x 8′ sheet of 3/4″ plywood
Cut List:
- 4 – 1×3 at 10-11/16″ – Base Side Assembly Legs
- 2 – 1×2 at 28-15/16″ – Base Side Assembly Stretchers
- 3 – 1×2 at 17-1/2″ – Base Side Assembly Stretchers
- 1 – 3/4″ plywood at 22″ x 38″ – Bottom
- 2 – 3/4″ plywood at 6″ x 28″ – Box Assembly Sides
- 1 – 3/4″ plywood at 6″ x 20-1/2″ – Box Assembly Back
- 2 – 3/4″ plywood at 6″ x 6″ – Side Assembly
- 1 – 3/4″ plywood at 6″ x 20-1/2″ – Side Assembly Back
- 1 – 3/4″ plywood at 6″ x 22″ – Top
- 1 – 3/4″ plywood at 22″ x 28″ – Top
- 2 – 3/4″ square dowels at 22″ – Plexiglas Top Supports
- Plexiglas cut to fit
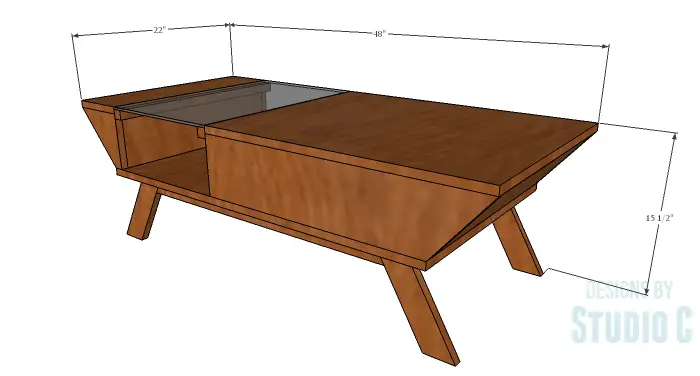
Edge banding will be applied to the exposed edges of the plywood prior to assembly.
Step One
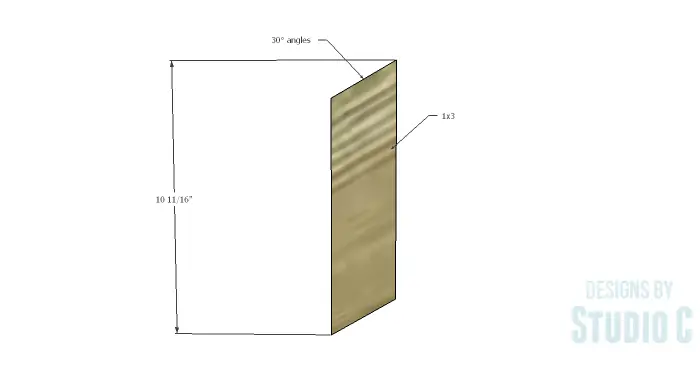
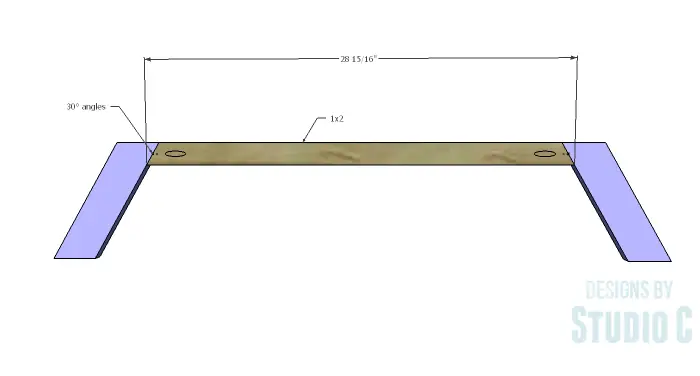
Cut the pieces for the base assembly legs. Cut the angles at 30° as shown in the drawings.
Cut the pieces for the longer base assembly stretchers, and cut an angle in each end at 30°. With the pocket hole jig set for 3/4″ material, drill a pocket hole in each end. Secure the stretchers to the legs using glue and 1-1/4″ pocket hole screws.
Step Two
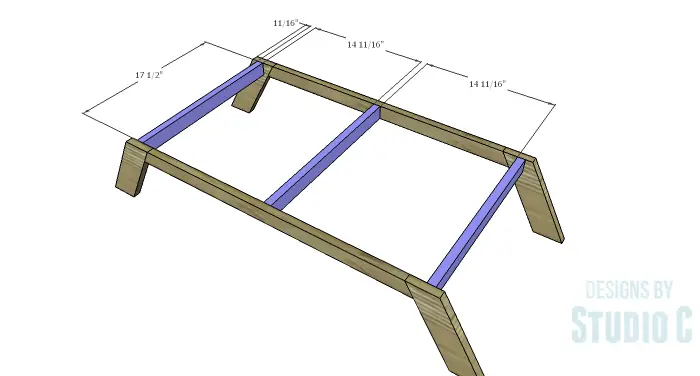
Cut the pieces for the shorter base assembly stretchers. Position the shorter stretchers as shown then secure in place using glue and 1-3/4″ brad nails.
Step Three
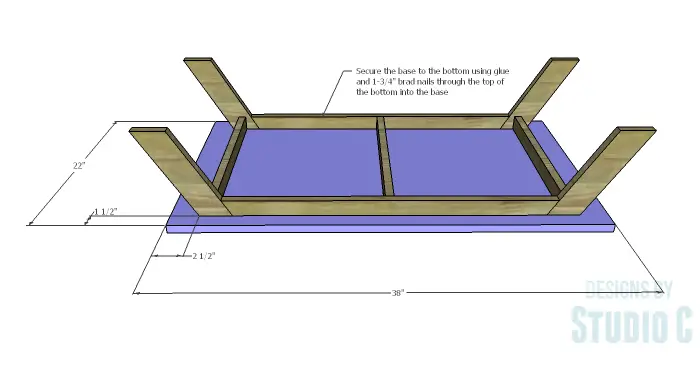
Cut the piece for the bottom. Position the base assembly on the underside as shown in the drawings then secure in place using glue and 1-3/4″ brad nails.
Step Four
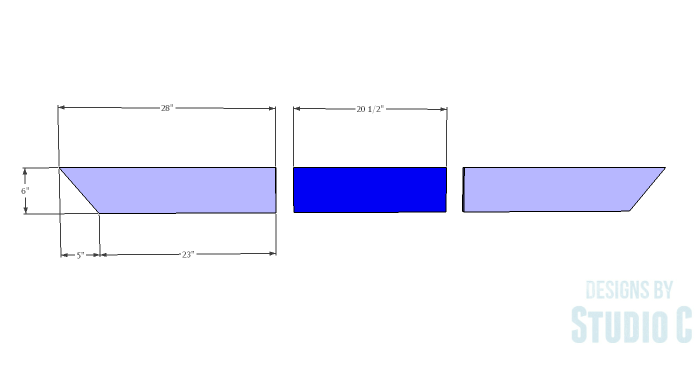
Cut the pieces for the box assembly. Assemble the box using glue and 1-3/4″ brad nails with the sides overlapping the ends of the back. Secure the box assembly to the bottom using glue and 1-3/4″ brad nails. The side faces will be flush with the side edges of the bottom.
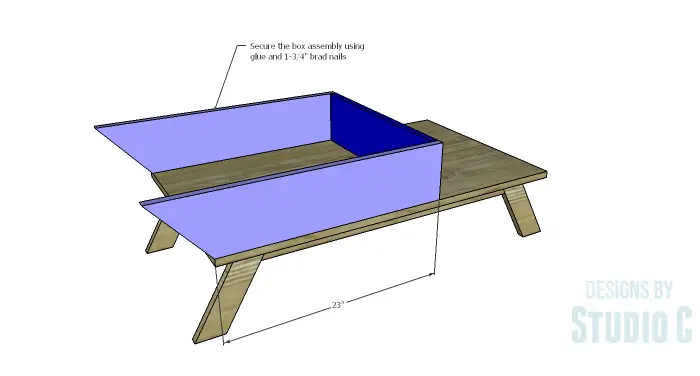
Step Five
Cut the pieces for the side assembly. This part is assembled in the same manner as the box assembly (only shorter!). Assemble the side using glue and 1-3/4″ brad nails with the sides overlapping the ends of the back. Secure the side assembly to the bottom using glue and 1-3/4″ brad nails. The side faces will be flush with the side edges of the bottom.
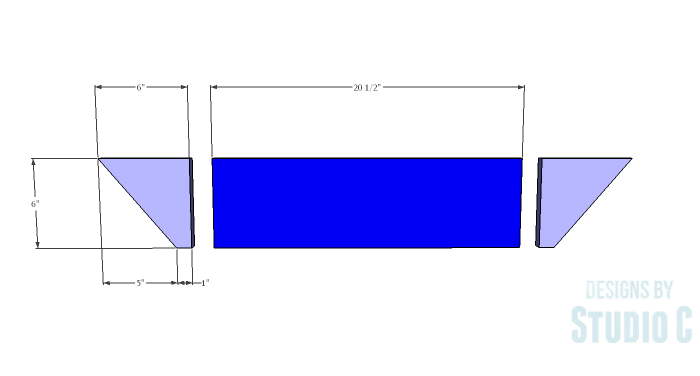
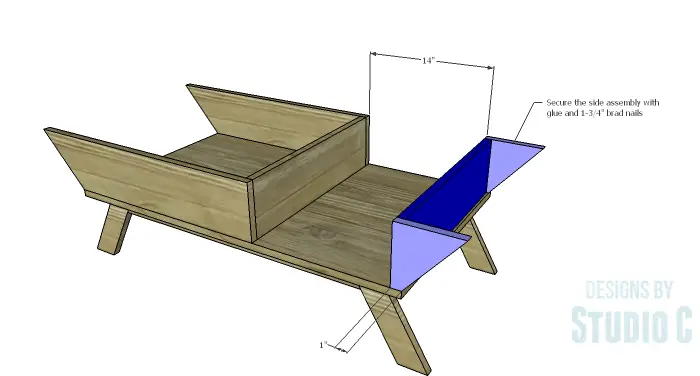
Step Six
Cut the pieces for the tops. Secure the tops using glue and 1-3/4″ brad nails.
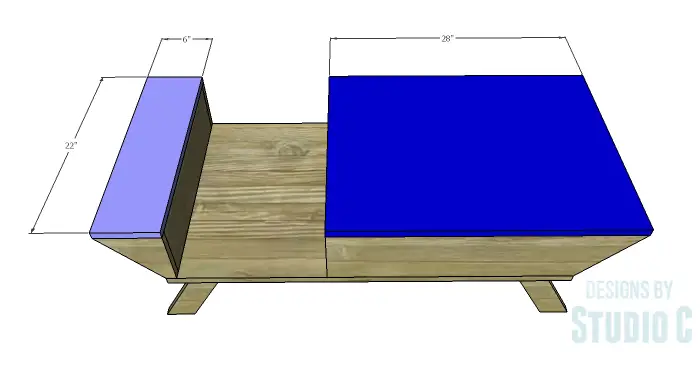
Step Seven
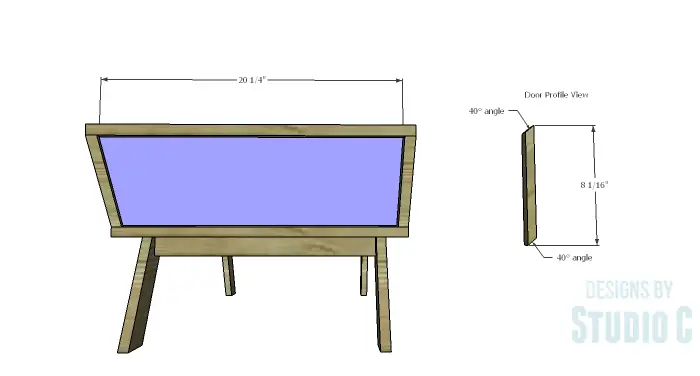
Cut the piece for the door. Cut the bevels in the edges at 40° as shown in the profile on the drawing. Attach the hinges to the door, then install the door in the box. There will be a 1/8″ gap around all sides of the door in the opening. Install the magnetic catch to keep the door closed, and install a small cabinet pull.
Step Eight
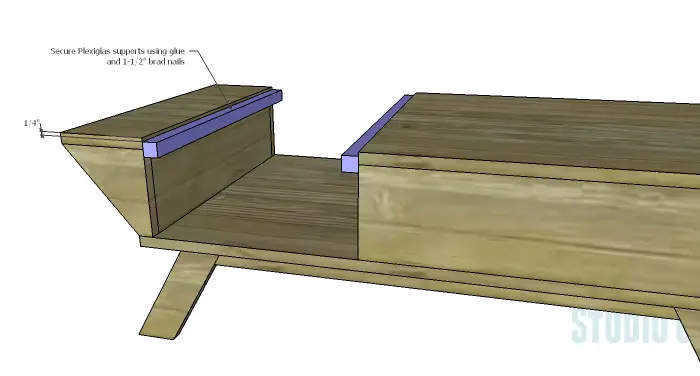
Cut the pieces for the Plexiglas supports from the 3/4″ square dowels. Secure the dowels to the back of the box assembly and the side assembly using glue and 1-1/2″ brad nails. Position the supports 1/4″ down from the top face of the tops to all ow the Plexiglas piece to be flush with the tops.
Step Nine
Cut the Plexiglas to fit. Sand the edges smooth. The Plexiglas can be secured in place using dots of clear silicone or double sided tape. It may show through the Plexiglas.
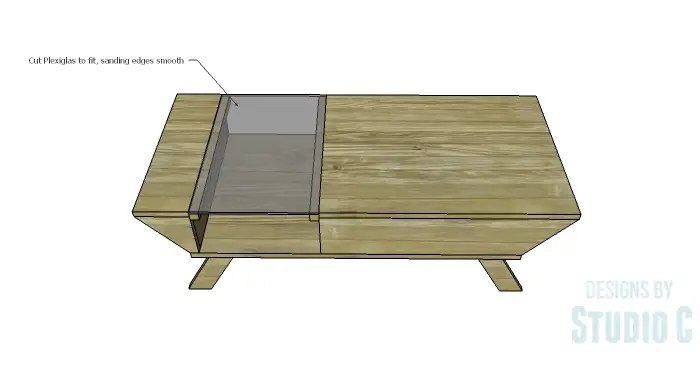
Finish the table as desired.
I have a few other free plans for Mid-Century Modern furniture on the blog: a cabinet, a chair, and an angled cabinet. Have any questions about the DIY Mid Century Modern coffee table plans to build the Brady Coffee Table? Leave a comment below!



Comments are closed.