An Easy to Build Bookcase with Adjustable Shelves
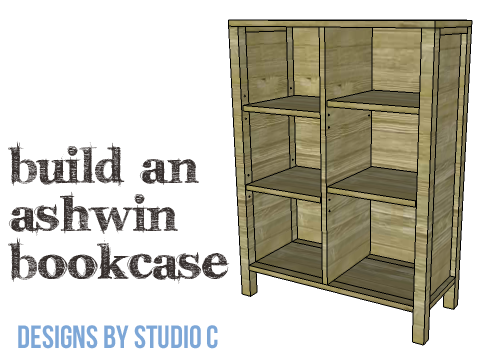
This bookcase is a little different from regular bookcases… The DIY plans to build an Ashwin bookcase feature four adjustable shelves with a vertical divider making this piece a great place to store home decor items, fine china or, of course, books! This fabulous bookcase can be completed in a weekend!
Materials:
- 1-1/4″ pocket hole screws (<– affiliate link!)
- 1-1/4″ brad nails
- 1-3/4″ brad nails
- Edge banding
- 16 shelf pins
- Wood glue
- Sandpaper (100, 150, 220 grits)
- Finishing supplies (primer & paint, or stain, sealer)
Lumber:
- 1 – 1×2 at 8′
- 2 – 2×2 at 8′
- 1 – 4′ x 4′ sheet of 1/4″ plywood
- 1 – 4′ x 8′ sheet of 3/4″ plywood
Cut List:
- 4 – 2×2 at 37-1/4″ – Legs
- 4 – 1×2 at 9″ – Side Framing
- 2 – 3/4″ plywood at 9″ x 31-3/4″ – Side Panels
- 2 – 1×2 at 25″ – Stretchers
- 1 – 3/4″ plywood at 9″ x 25″ – Bottom
- 1 – 3/4″ plywood at 12″ x 32-1/2″ – Divider
- 1 – 3/4″ plywood at 12″ x 28″ – Top
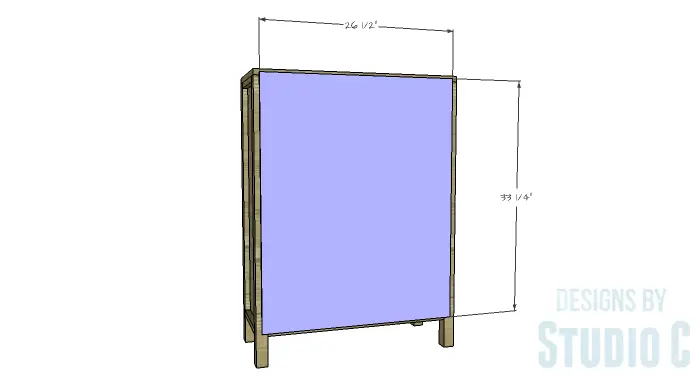
- 1 – 1/4″ plywood at 26-1/2″ x 33-1/4″ – Back
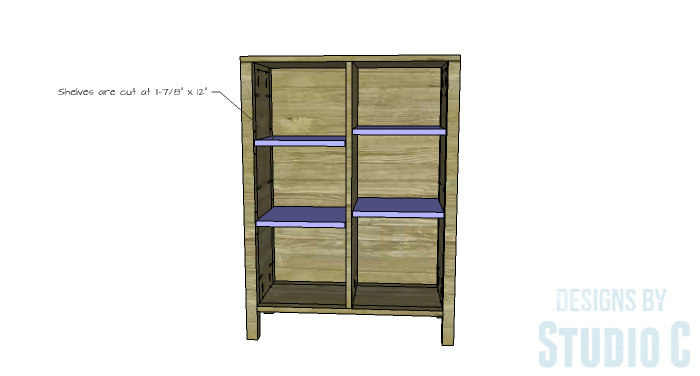
- 4 – 3/4″ plywood at 11-7/8″ x 12″ – Shelves
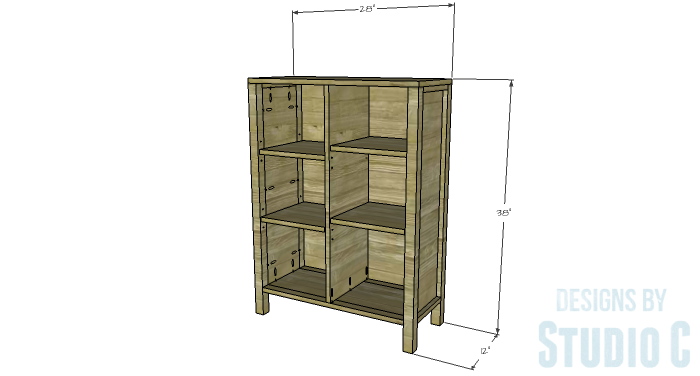
Edge banding will be applied to the exposed edges of the plywood prior to assembly.
Step One
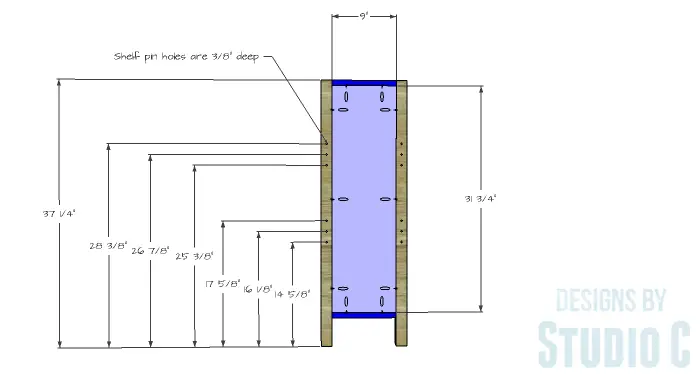
Cut the pieces for the legs, side framing and the side panels. Drill the holes for the shelf pins (3/8″ deep) in the legs as shown.
With the pocket hole jig set for 3/4″ material, drill pocket holes in each end of the framing pieces. Secure the framing to the legs using glue and 1-1/4″ pocket hole screws.
Drill pocket holes in all four edges of the panels. Secure the panels to the framing using glue and 1-1/4″ pocket hole screws. The back face of the panel will be flush with the back face of the frame.
Step Two
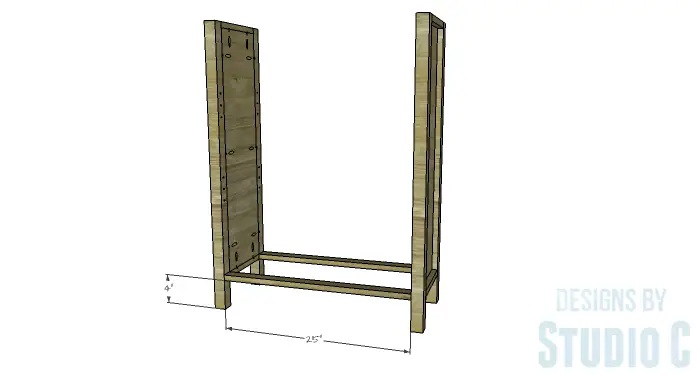
Cut the pieces for the stretchers and drill pocket holes in each end. Secure the stretchers to the legs using glue and 1-1/4″ pocket hole screws.
Step Three
Cut the piece for the bottom and drill pocket holes in all four edges. Secure the bottom to the stretchers and the lower side framing using glue and 1-1/4″ pocket hole screws.
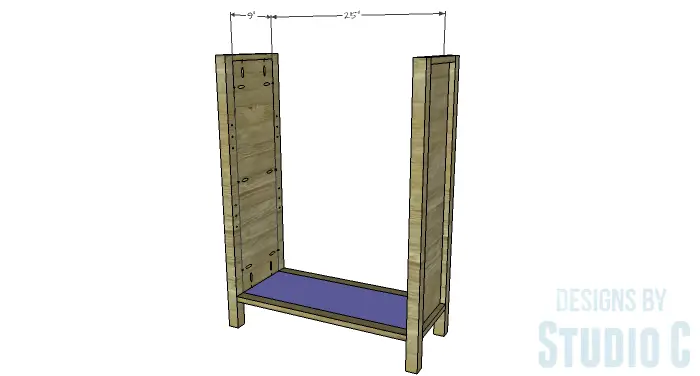
Step Four
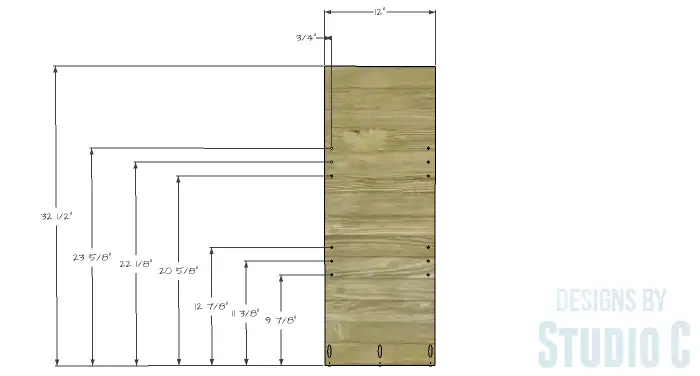
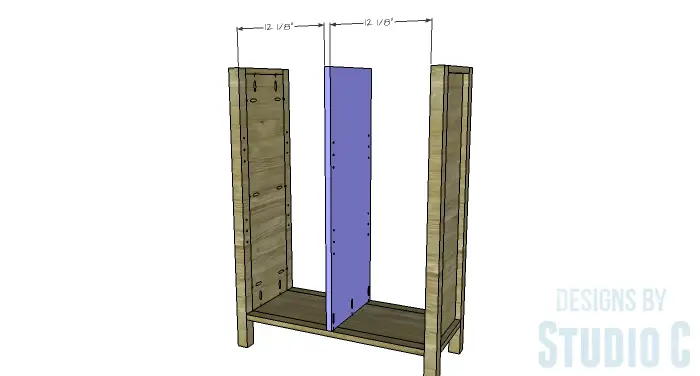
Cut the piece for the divider. Drill the holes for the shelf pins (all the way through the divider) as shown in the drawing. Drill pocket holes at the lower edge. Secure the divider to the bottom using glue and 1-1/4″ pocket hole screws.
Step Five
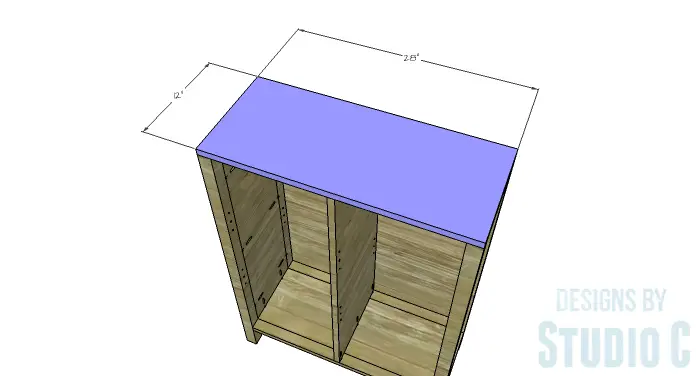
Cut the piece for the top. Secure the top to the side framing and the divider using glue and 1-3/4″ brad nails.
Step Six
Cut the piece for the back. Secure the back using glue and 1-1/4″ brad nails.
Step Seven
Cut the pieces for the shelves. Insert the shelf pins into the holes and place the shelf on the pins. Trim the sides of the shelves, if necessary.
Finish as desired.
The DIY plans to build an Ashwin Bookcase are perfect for those new to woodworking, as well as those looking for an easy project. Have any questions about the plans? Leave a comment below!
Originally posted 2015-12-11 08:00:50.


Comments are closed.