Build a Simple Mirror Frame
An Easy to Build Frame For an Inexpensive Mirror – DIY Furniture Plans
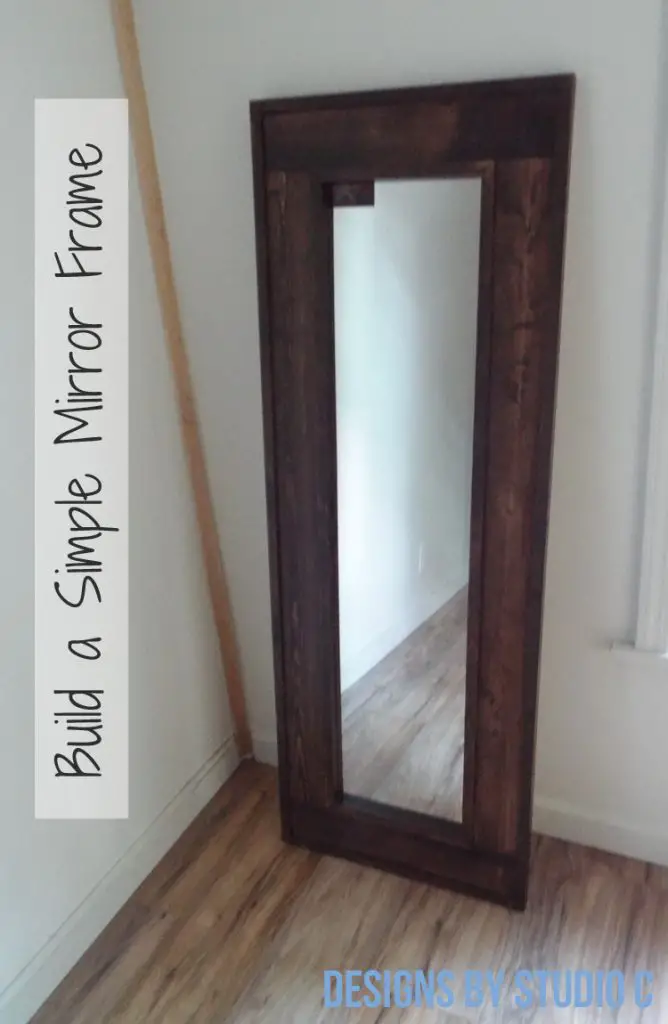
Hey there! So, my daughter has this super affordable $5 mirror in her room, which I affectionately refer to as a “dorm mirror”. Every time I passed by her room and caught a glimpse of it, I couldn’t help but think it looked a bit cheap. That’s when I made a mental note to myself to build a new frame for it, you know, to give it a more polished look!
Now, here’s the exciting part. We’re actually remodeling Big Brother’s room for my daughter to move into, and I thought, what better time to finally build that frame? So, I created these amazing DIY furniture plans for a simple mirror frame, and let me tell you, they’re as straightforward as can be!
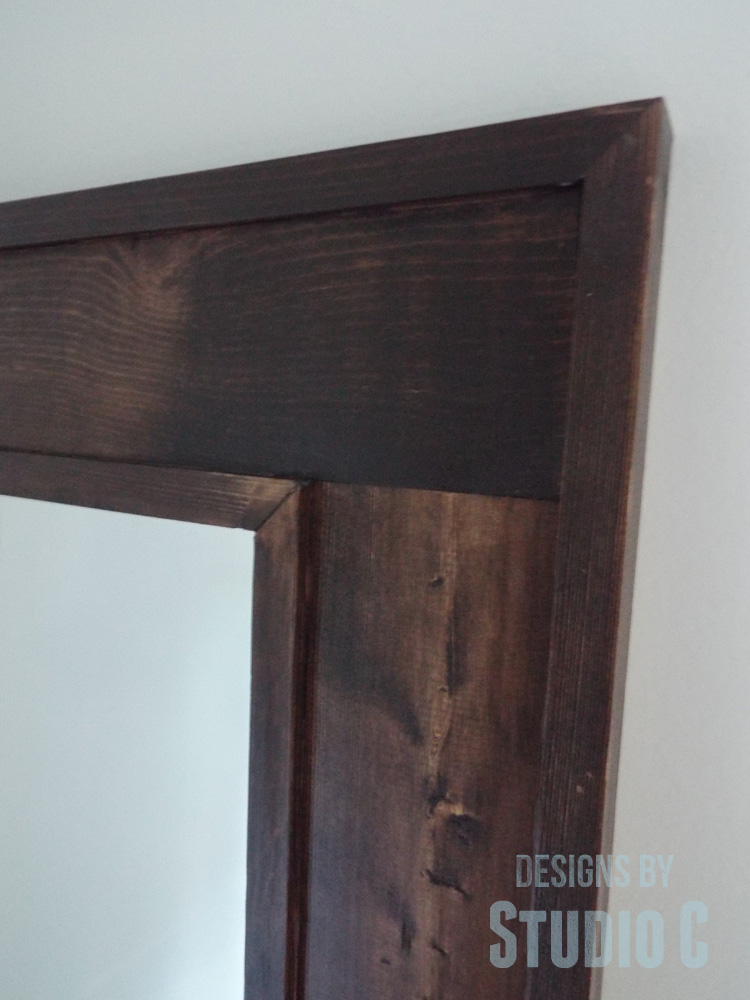
The frame itself is made from a 1×4 base, with a lovely trim profile along the inside and outside edges. The mirror fits perfectly inside the inner opening, and to keep it securely in place, I used a 1/4″ piece of plywood. It’s a pretty neat setup, if I do say so myself!
Believe it or not, I managed to complete this frame in just about two days. Plus, the best part is that it matches the letter jewelry hanger I made for her room! How cool is that? So, yeah, I’m pretty proud of this little project. It’s amazing how a simple frame can transform the look of a mirror. Now my daughter’s room will have a touch of elegance and style. Can’t wait to see her reaction when she sees it!
Materials:
- 1-1/4″ pocket hole screws (<– affiliate link!)
- Fast-drying adhesive such as DAP® Weldwood Instant Adhesive (<– affiliate link!)
- Wood glue
- Sandpaper (100, 150, 220 grits)
- Finishing supplies (primer & paint, or stain, sealer)
Tools needed:
- Miter saw or circular saw (<– affiliate link!)
- Table saw, optional
- Drill
- Pocket hole jig
Lumber:
- 4 – 1×4 at 6′ OR
- 2 – 1×4 at 6′
- 3 – 1″ square dowels
- 3 – 3/4″ square dowels
- 1 – 2′ x 4′ sheet of 1/4″ plywood
Cut List:
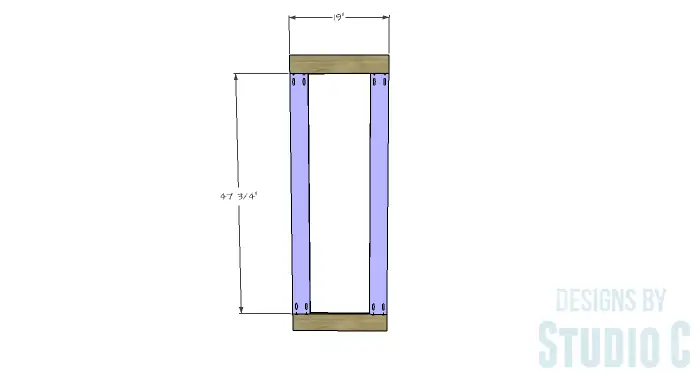
- 2 – 1×4 at 19″ – Frame Base
- 2 – 1×4 at 47-3/4″ – Frame Base
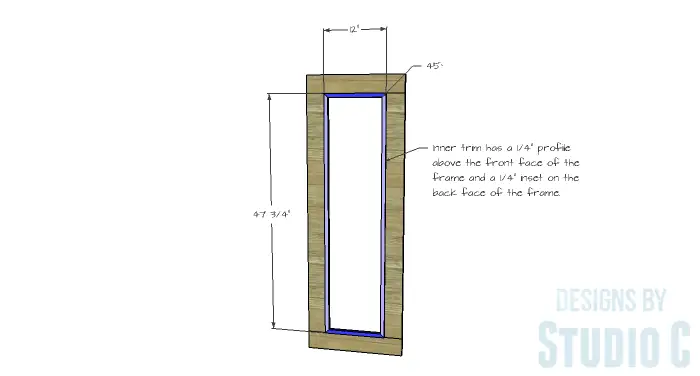
- 2 – 3/4″ square pieces at 12″ – Inner Trim
- 2 – 3/4″ square pieces at 47-3/4″ – Inner Trim
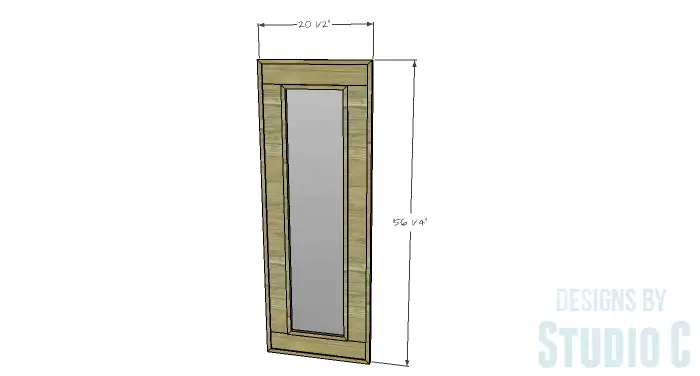
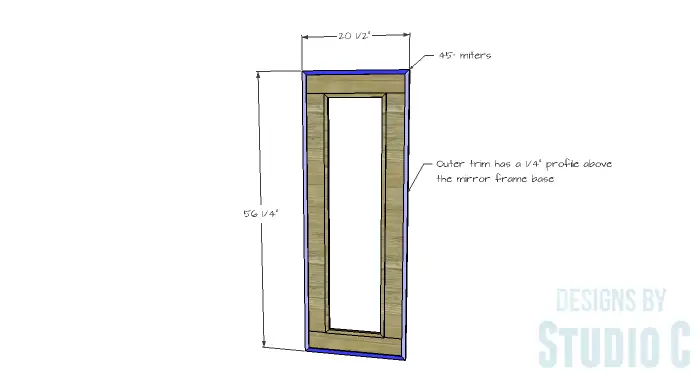
- 2 – 3/4″ x 1″ pieces at 20-1/2″ – Outer Trim
- 2 – 3/4″ x 1″ pieces at 56-1/4″ – Outer Trim
- (If using 1″ square dowels, they will be cut to the same length as the 3/4″ x 1″ pieces.)
- 1 – 1/4″ plywood at 12″ x 47-3/4″ – Back
Notes about the project:
I ripped the trim pieces from a 1×4. If you are not comfortable enough to safely rip pieces this narrow on a table saw, use square dowels instead. Most home improvement stores sell them in 3′ or 4′ lengths.
The mirror I used measured 12″ x 47-3/4″ without the frame. Measure the mirror you are using before cutting any of the pieces and adjust the plan accordingly.
Step One
Cut the pieces for the frame base. With the pocket hole jig set for 3/4″ material, drill pocket holes in each end of the longer pieces. Assemble the frame using glue and 1-1/4″ pocket hole screws.
Step Two
Cut the pieces for the inner trim (3/4″ square). Each piece will have a 45° miter at each end. Make marks on the inside edge of the frame 1/4″ from the back. This will allow the trim to create a 1/4″ inset on the back of the frame and maintain a 1/4″ profile on the front. Secure the trim pieces along the inner edge of the frame base using a fast-drying adhesive and clamp in place until dry.
Step Three
Cut the pieces for the outer trim (3/4″ x 1″ OR 1″ square dowels). Each piece will have a 45° miter at each end. Secure the trim pieces along the outer edge of the frame base using a fast-drying adhesive and clamp in place until dry.
Finish the frame as desired. I used a coat of stain in Kona and finished with two coats of satin polyurethane.
Step Four
Insert the mirror in the inset on the back of the frame. Cut the 1/4″ plywood to fit, then secure in place using washers and screws (I used soda can tabs – see photo!) or duct tape.
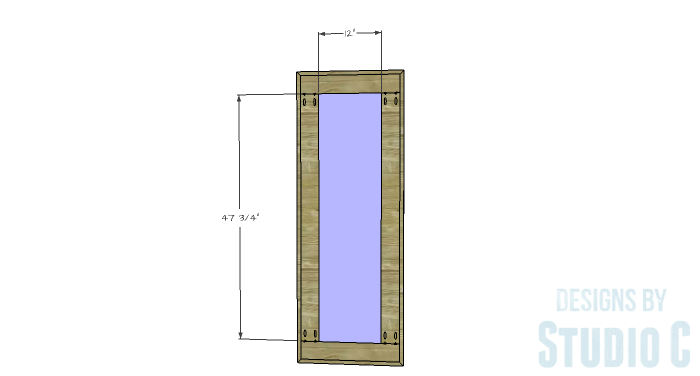
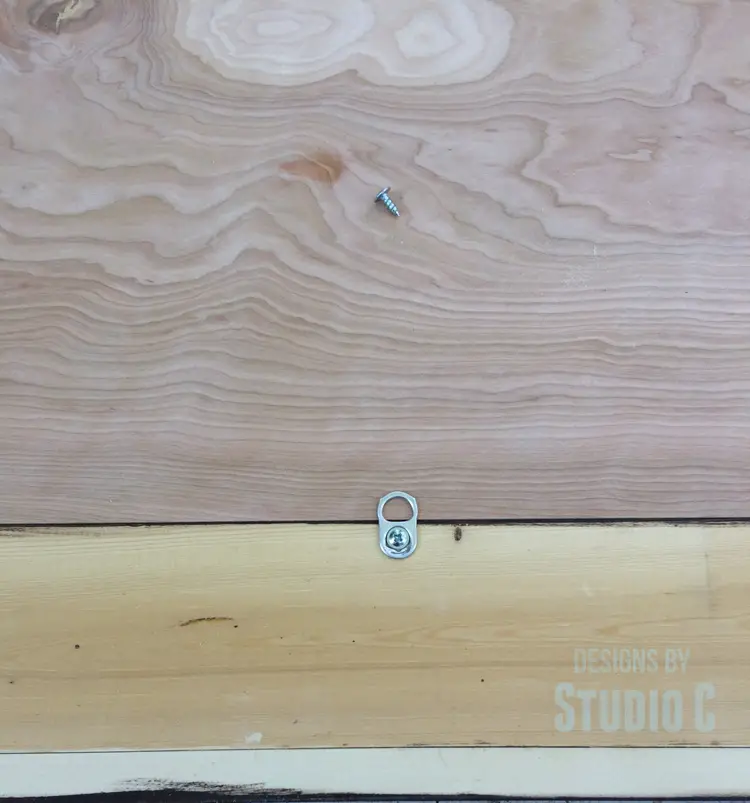
Add a hanger to the back of the frame if desired. My daughter’s mirror will just lean against the wall.
Have any questions about the DIY furniture plans to build a simple mirror frame? Leave a comment below – I’m here to help!


[…] build a framed brick panel to use as a back drop for Felipe. this frame is built exactly like the framed dorm mirror but sized to fit a piece of the leftover brick […]
[…] it needed a larger frame to accommodate the drawer slides and since I love what I call the “stacked frame” which I’ve used on other projects, I added it to this one. I used one 1×6 at 8′, […]
[…] anywhere, and it doesn’t take much to upgrade the frame to something fabulous! I previously posted plans for a frame for one of these mirrors using 1×6 lumber for my daughter’s room. I wanted to try […]