
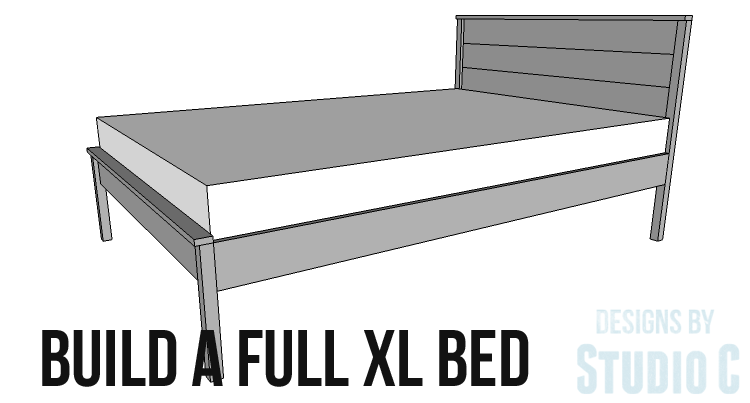
An Easy To Build Bed for a Full XL Mattress
When my son decided to move into his own apartment, he decided he needed a new bed, as well. He wanted something simple that the two of us could create together. The DIY furniture plans to build a Full XL bed are sized for a full XL mattress (he’s a long, tall guy) and can easily be resized for any size mattress!

Materials:
- 1-1/4″ pocket hole screws
- 2″ brad nails
- 1-1/4″ screws
- Keyhole bed rail hardware
- Wood glue
- Finishing supplies
Tools Needed:
- Miter saw or circular saw
- Drill
- Pocket hole jig
- Brad nailer with compressor (or battery-powered model)
- Sander
Lumber:
- 2 – 1×2 at 6′
- 2 – 1×2 at 8′
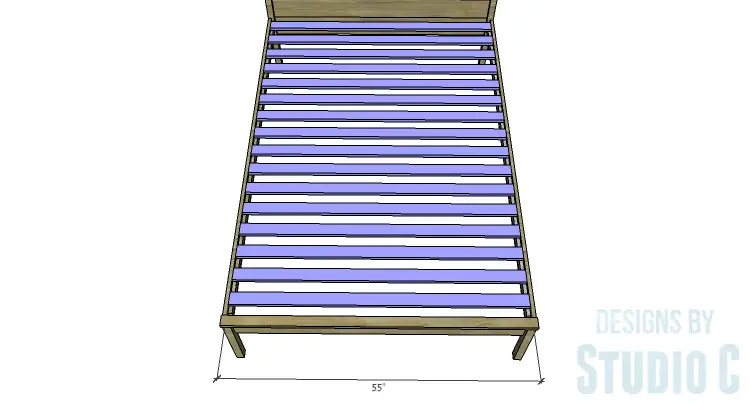
- 1×3 for slats (number of slats is a personal preference)
- 6 – 1×6 at 6′
- 2 – 1×6 at 8′
- 2 – 2×2 at 6′
Cut List:
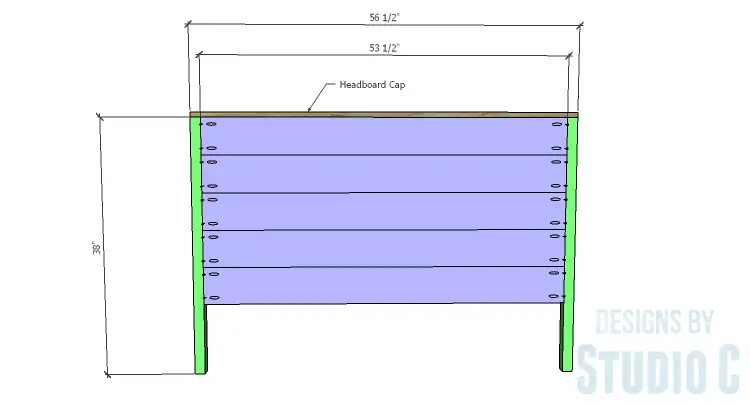
- 2 – 2×2 at 38″ – Headboard Legs
- 6 – 1×6 at 53-1/2″ – Headboard Panel
- 1 – 1×2 at 56-1/2″ – Headboard Cap
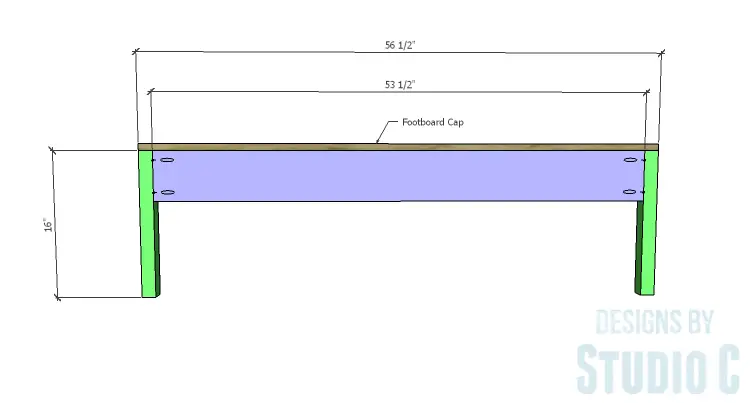
- 2 – 2×2 at 16″ – Footboard Legs
- 1 – 1×6 at 53-1/2″ – Footboard Panel
- 1 – 1×2 at 56-1/2″ – Footboard Cap
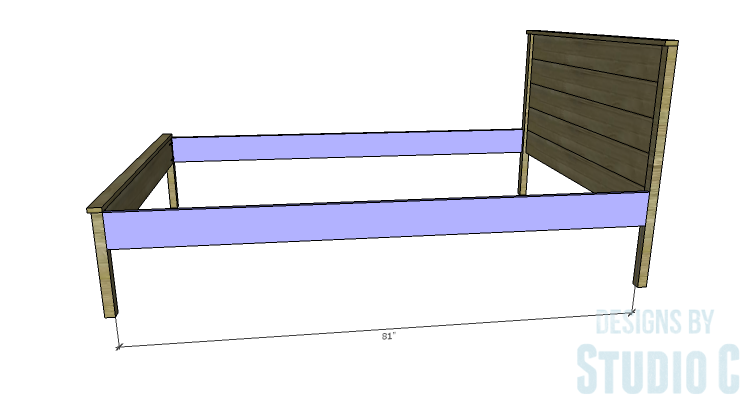
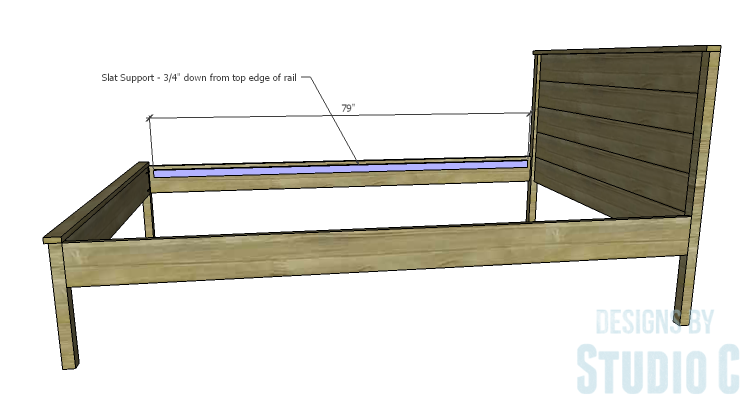
- 2 – 1×6 at 81″ – Side Rails
- 2 – 1×2 at 79″ – Slat Supports
- 1×3 slats at 55″ (Cut as many as desired – I used old pine tongue and groove boards)
Click on the drawings for a larger view!
Step One
Cut the pieces for the headboard. With the pocket hole jig set for 3/4″ material, drill pocket holes in each end of the 1×6 pieces. Secure the 1x6s to the 2×2 legs using glue and 1-1/4″ pocket hole screws. The back faces of the 1x6s will be flush with the back faces of the legs.
Cut the piece for the cap. Secure the cap to the top of the legs and the uppermost 1×6 using glue and 2″ brad nails.
Step Two
Cut the pieces for the footboard. Drill pocket holes in each end of the 1×6 piece and secure it to the legs using glue and 1-1/4″ pocket hole screws. The back face of the 1×6 will be flush with the back faces of the legs.
Cut the piece for the cap. Secure the cap to the top of the legs and the uppermost 1×6 using glue and 2″ brad nails.
Step Three
Cut the pieces for the side rails and the slat supports. The slat supports will be positioned 3/4″ down from the top edge of the rails. Secure the supports in place using glue and 1-1/4″ screws. Leave 1″ on each end of the support when it is positioned on the rail to allow for the bed rail hardware.
Install the bed rail hardware on the side rails, headboard and footboard according to the manufacturer’s installation instructions. Spacers may have to be mounted to the headboard at the rail level in order to install the hardware.
Step Four
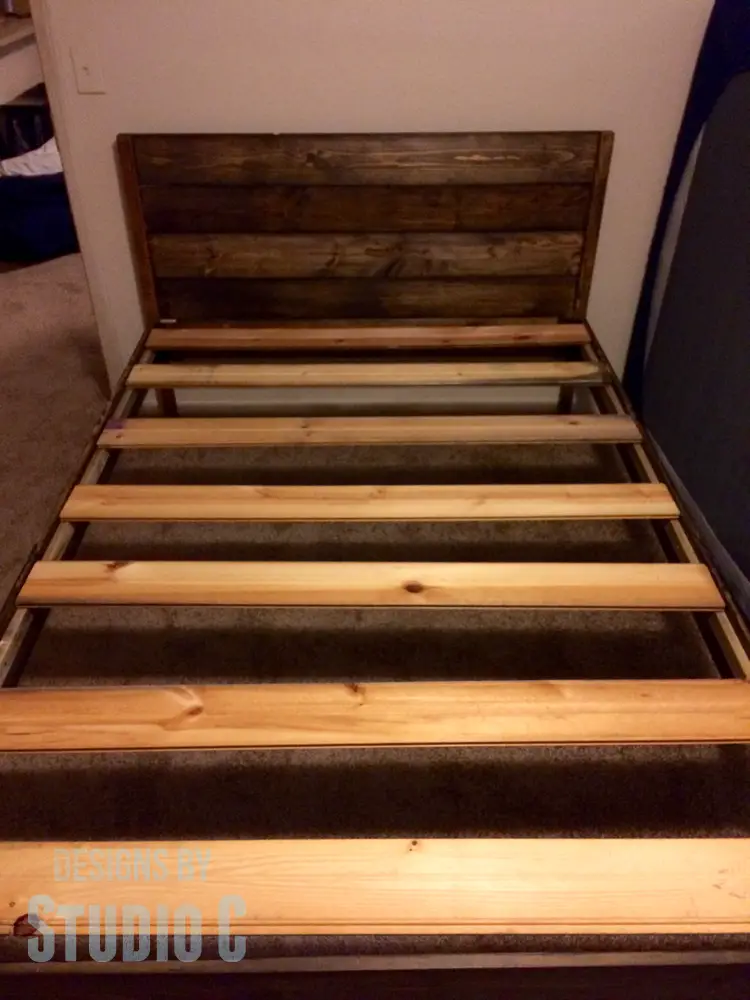
Cut the pieces for the slats at 55″ long. The number of slats is a personal preference – use however many are needed and secure them to the slat supports using 1-1/4″ screws (DO NOT use glue!)
Finish the bed as desired.
My son chose to finish the pieces of the bed prior to assembly. The stain took better to some pieces of the lumber than others which lead to a distinctly rustic look!
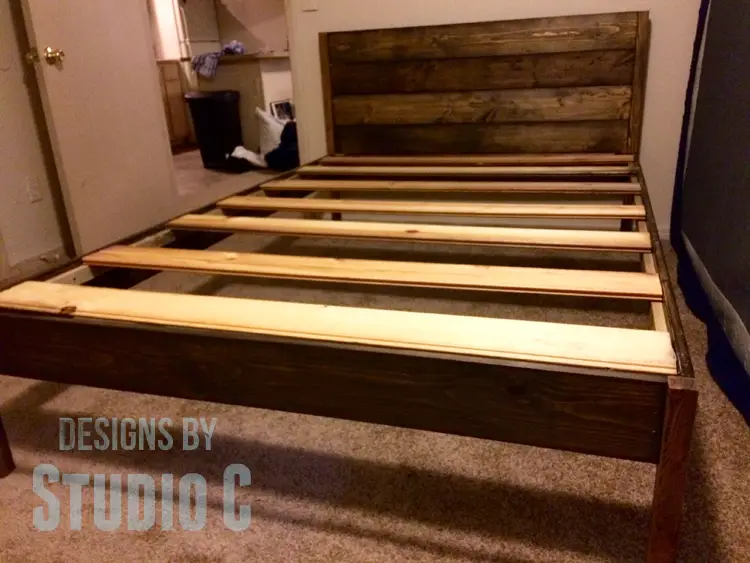
The DIY furniture plans to build a Full XL bed are easy to follow and completely customizeable, making for a super-simple bed frame that anyone can build!
Originally posted 2017-10-06 08:00:10.


Comments are closed.