
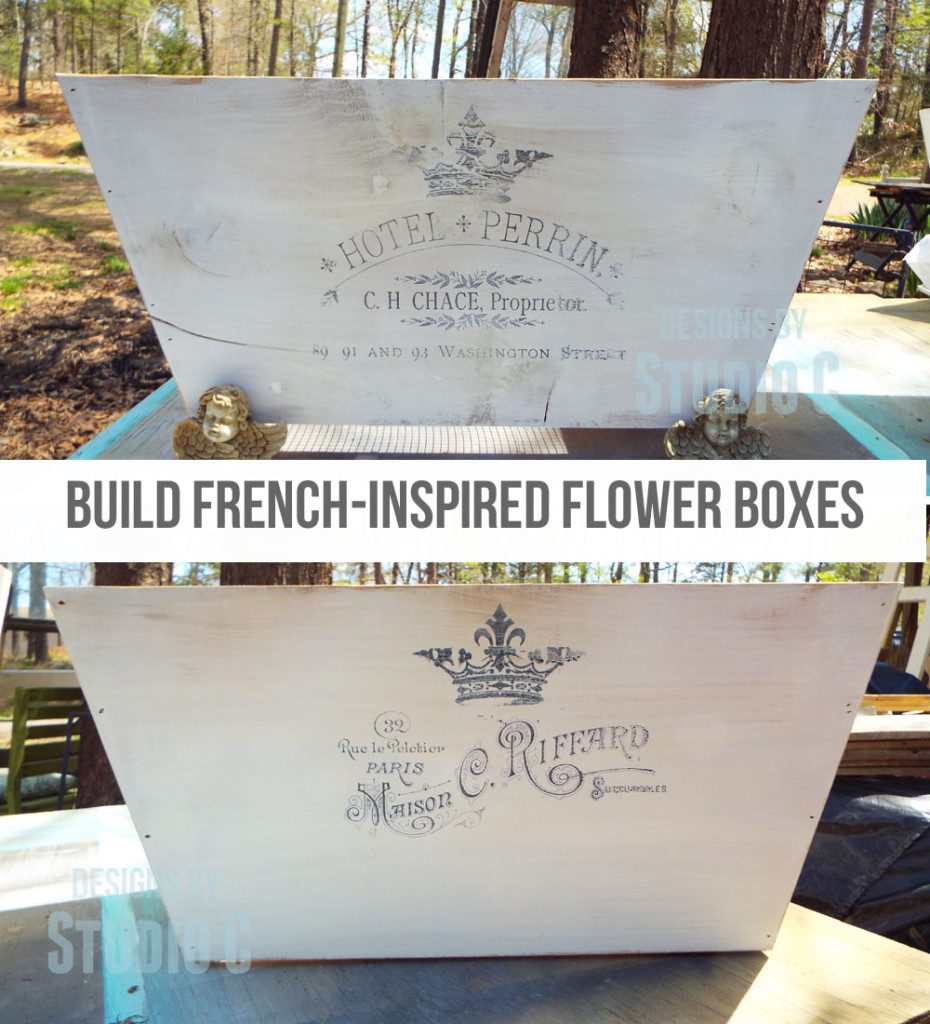
Make a Few French-Inspired Flower Boxes For a Spring Garden!
One of my main goals this year is to actually give my yard a little TLC. Seriously, my yard is a huge mess and it is time to increase my curb appeal starting with these DIY flower boxes! I used 1×12 cedar, wire mesh (also known as hardware cloth), a bit of paint, and a really neat technique for transferring a French-inspired label!
Materials:
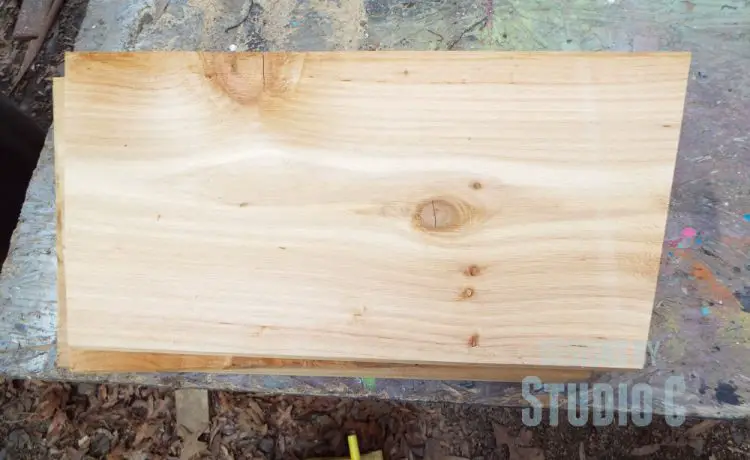
- 1×12 cedar – 1 board at 8′ and 1 board at 4′ (This will make two flower boxes)
- 1-1/4″ brad nails
- Wood glue rated for outdoor use
- 1/4″ wire mesh (or “hardware cloth”) (<– affiliate link!)
- Heavy duty stapler and staples
- Paint of your choice (paint samples are perfect for this project!)
- Wax paper
- Printer
- Clear Sealer
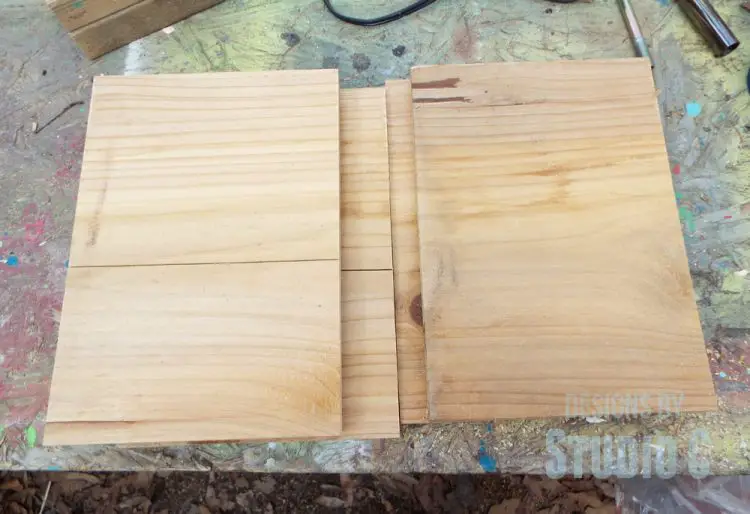
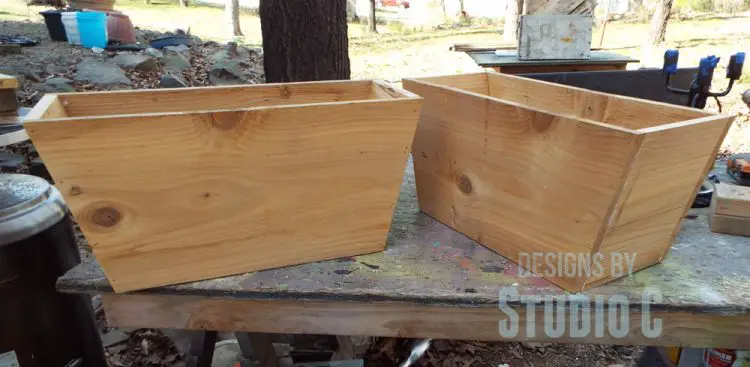
Start by cutting the long sides of the flower boxes at 23″ long. Make a mark on one long end at 3″ in from each side. Draw a diagonal line from the marks to the corners and cut the angles. (It is a 15° angle!)
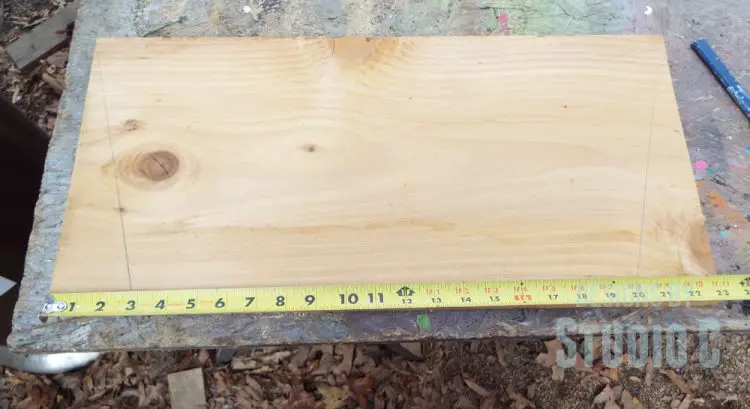
Cut the pieces for the ends at 7-1/2″ long. I cut a 15° bevel at the top of each of the end pieces so that the top of the ends will be level with the top of the long sides. This step is completely optional. I did it because I knew it would drive me crazy if I didn’t!
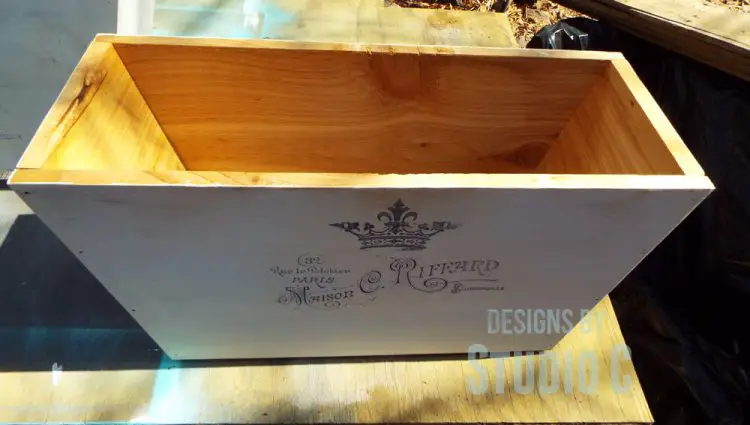
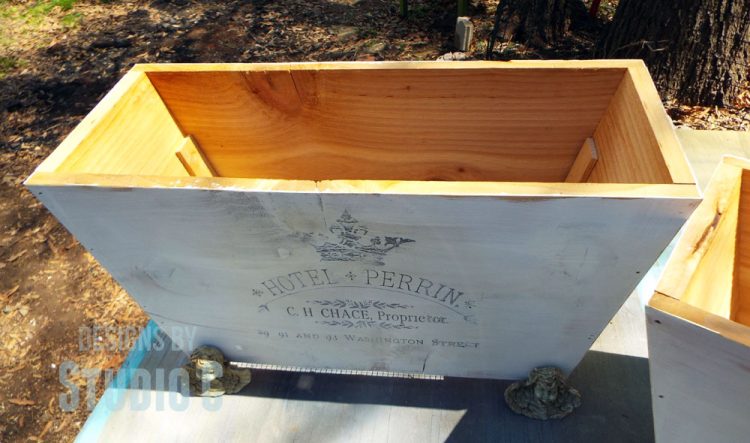
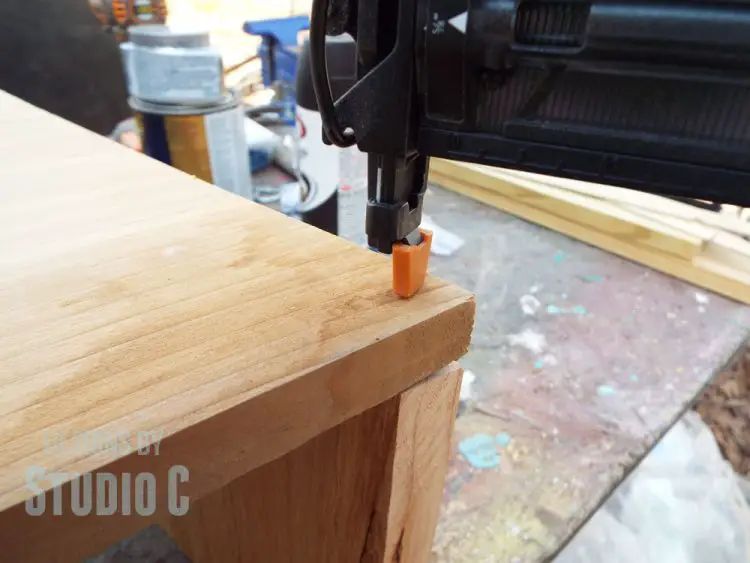
Assemble the boxes using glue rated for outdoor use and 1-1/4″ brad nails. The end pieces will follow the angle of the sides.
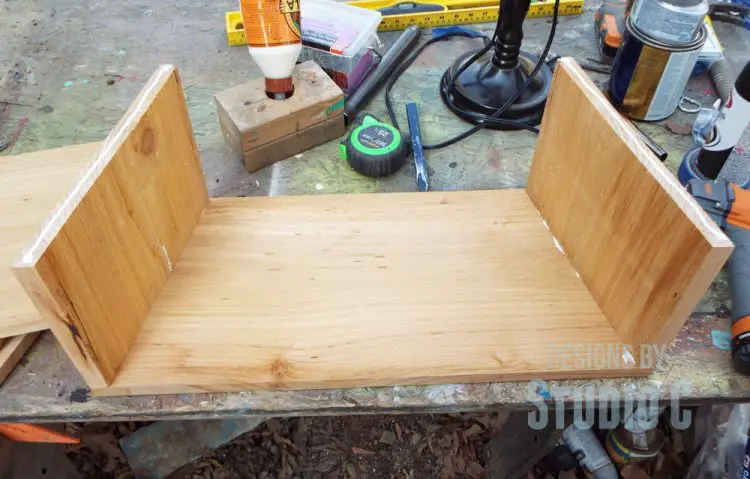
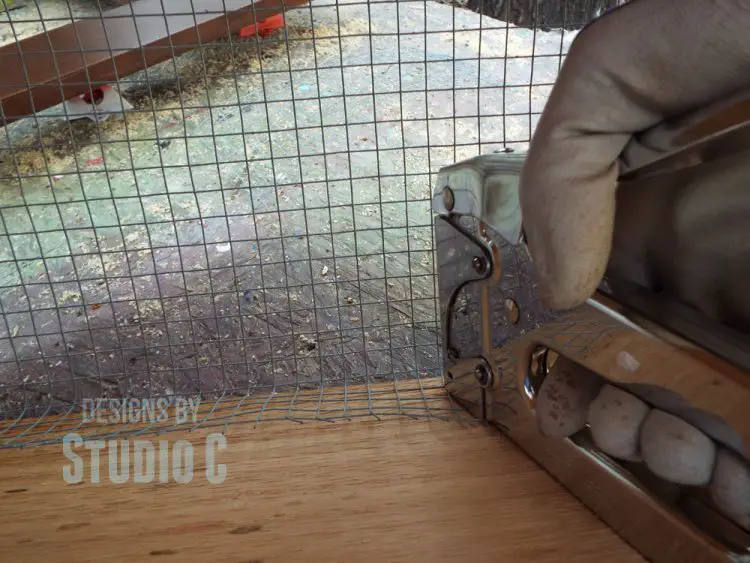
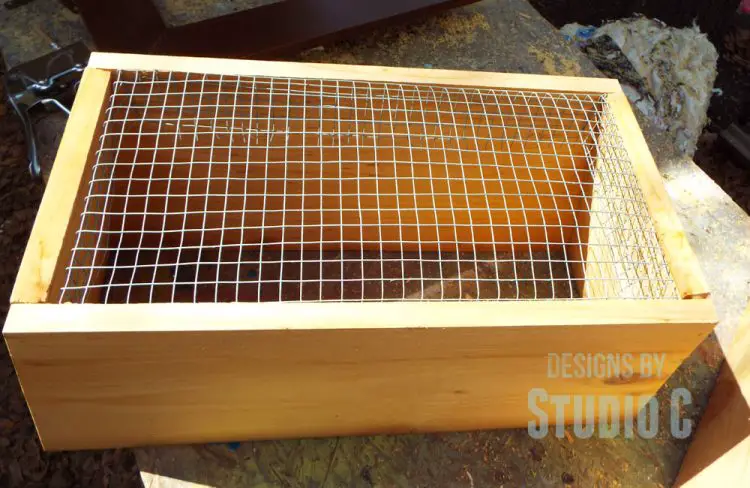
To attach the mesh at the bottom, lay the mesh over the bottom of the opening, then cut a piece approximately 1″ bigger on all sides. Cut a notch in each corner so that the mesh can be folded and inserted inside the bottom of the boxes. Secure the mesh on the inside with the stapler and staples.
Now for the super fun part… Paint the boxes in the color of your choice. I decided that I didn’t want the paint to be perfect as I was going for a vintage, weathered look. (My boxes are two different colors!) If the cedar has huge cracks in it like mine did, that adds to the look!
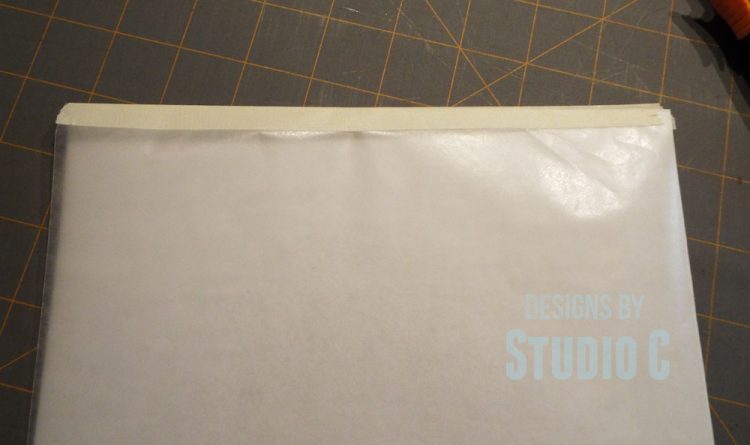
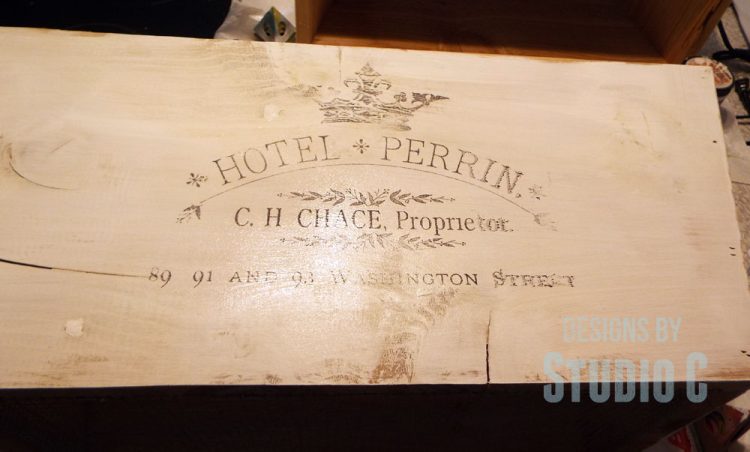
The designs I used are from The Graphics Fairy (she has really cool designs) and I used a wax paper technique I found at The Art of Doing Stuff to transfer the designs with a few modifications. The bottom line to the technique is this: the design is mirrored, then printed on a sheet of wax paper. The ink from the wax paper is then transferred to the project. It is such an awesomely easy technique, that I cannot wait to try it on another project! To help the wax paper go through my printer easier, I put a piece of regular printer paper behind it then secured the sheets together with a piece of masking tape folded over the top.
Once the designs were transferred to the boxes, I applied a coat of sealer to keep the designs in place!
To put plants or flowers in the boxes, Line each box with weed cloth (which will let water drain but will keep the soil in place), then plant whatever your heart desires! I haven’t planted anything in the boxes yet because it is still a tad chilly here plus I haven’t quite decided what to plant – any ideas?
Any questions about the DIY flower boxes? Let me know at cher {at} designsbystudioc {dot} com!
Sharing with:
Twinkling Trees, Fluster’s Creative Muster, Domestically Speaking Inspire Me Monday, A Stroll Through Life, Addicted 2 DIY
Originally posted 2014-04-08 08:00:48.


21 Comments
Wow, this is fabulous! I absolutely love it and can’t wait to try it – thanks for all the great tips!
Thank you so much! I really love the way they came out… Thank you for stopping by!
Love this idea…honey, I have a new honey do…
LOL, Linda! Thanks so much!
These are beautiful Cher!
Thank you very much, Marie, I really appreciate it! They were fun to build and I LOVE them! So glad you stopped by…
Beautiful flower boxes, Cher!
Thanks, Jessica! Now I have to find the perfect flowers to grow in them!
My printer does not seem to print on wax paper or freezer paper. What other methods have you used? I have used it on tissue paper and it works great.
Hi, Elaine! In all honesty, this is the only time I have ever tried this method and I haven’t tried any other! How did you do it with tissue paper? Did you feed it through the printer as well?
I am sorry, I should have said it works well on tissue paper if you plan on putting it on fabric. I have made a pic using it this way, just to try it out. What I did is wrap the white tissue paper around cardstock and taped in place. Then I painted mod podge on the fabric itself, not on the tissue paper. I took the tissue paper after I took it off the cardstock and laid it on the mod podge. There is no straightening after, you have to get it right the first time. The only thing about this is that you are kind of limited as to what you can use it on since the edges look messy. A frame covers up the messy edge. Here is the one I did.
I left out a step, after you wrap the tissue around the cardstock, you print it, which is obvious I guess. Make sure your printer is turned so that you are printing on the tissue side
Wow! That is a really neat technique and I may have to try that – thank you so much for sharing!
Looks nice. But there is no image “transfer” here right? You are just placing it on the mod podge coated fabric??
These look great Cher!
Thank you so much, Kelly! I appreciate it!
Wow, these are really beautiful. I love the French design on the front…it really adds a lot of charm to the boxes!
Thank you so much, Kim! I finally bought flowers to plant in them and hope to get it done tomorrow!
What type of paint and printer did you use? I don’t own a printer at the moment and want to make sure whatever I borrow/buy will work OK. 🙂 Thanks! Jon
Hi, there! I used a regular HP printer. I used a chalky paint for the boxes and the lettering is created with the printer ink on the wax paper. I’m sure your project will be awesome! Thank you for stopping by!