Another Easy to Build Dining Chair
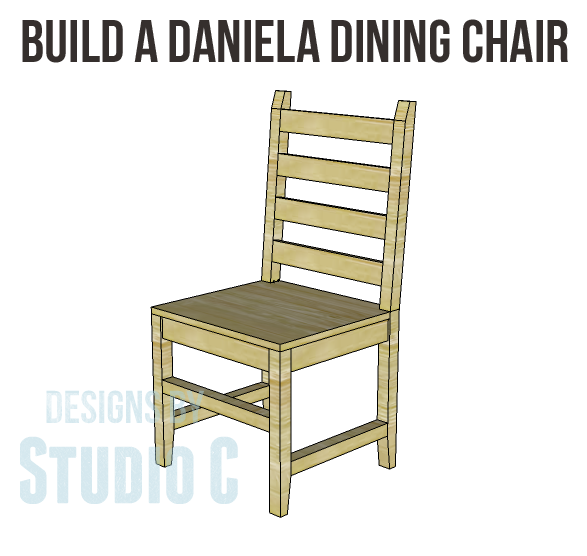
I really love this chair design and am considering building these for myself! The Daniela dining chair plans are really easy to build, and several can be built in a weekend. I think it would look really cool if several were built, then painted different colors around a dining table… Plus, this would be quite the inexpensive project!
Materials:
- 1-1/4″ pocket hole screws
- 2-1/2″ pocket hole screws
- 1-1/4″ brad nails
- Edge banding, optional
- Wood glue
- Sandpaper (80 grit, 120 grit, 220 grit)
- Finishing Supplies
Cut List:
- 2 – 2×2 at 18″ – Lower Back Legs
- 2 – 2×2 at 22″ – Upper Back Legs
- 2 – 1×3 at 16-1/2″ – Back & Front Stretchers
- 2 – 2×2 at 17-1/4″ – Front Legs
- 1 – 2×2 at 16-1/2″ – Lower Front Stretcher
- 2 – 1×3 at 15″ – Upper Side Stretchers
- 2 – 2×2 at 15″ – Lower Side Stretchers
- 4 – 1×3 at 16-1/2″ – Back Slats
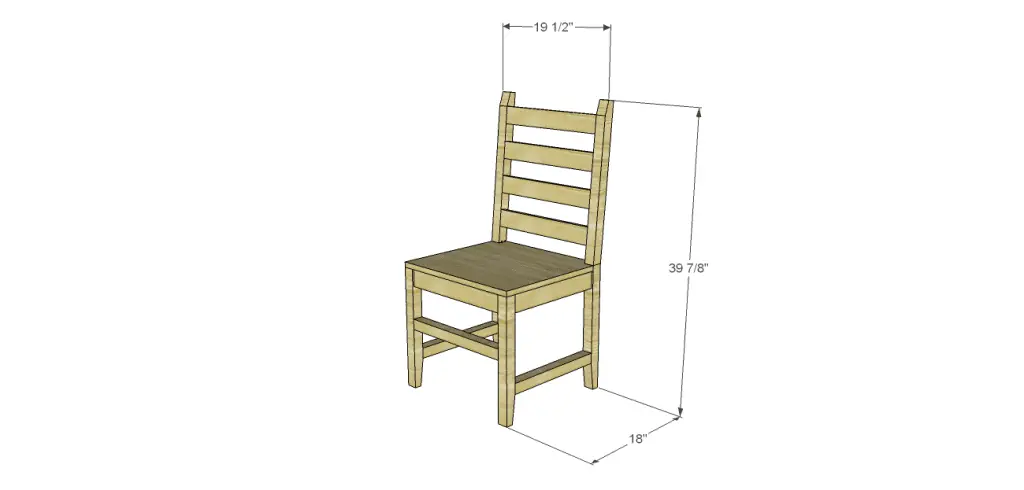
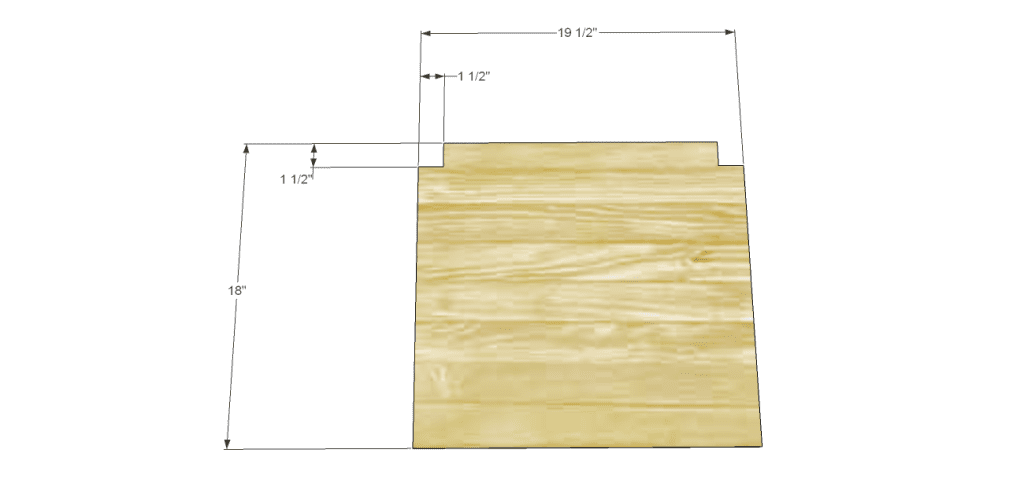
- 1 – 3/4″ plywood at 18″ x 19-1/2″ – Seat
 Step One
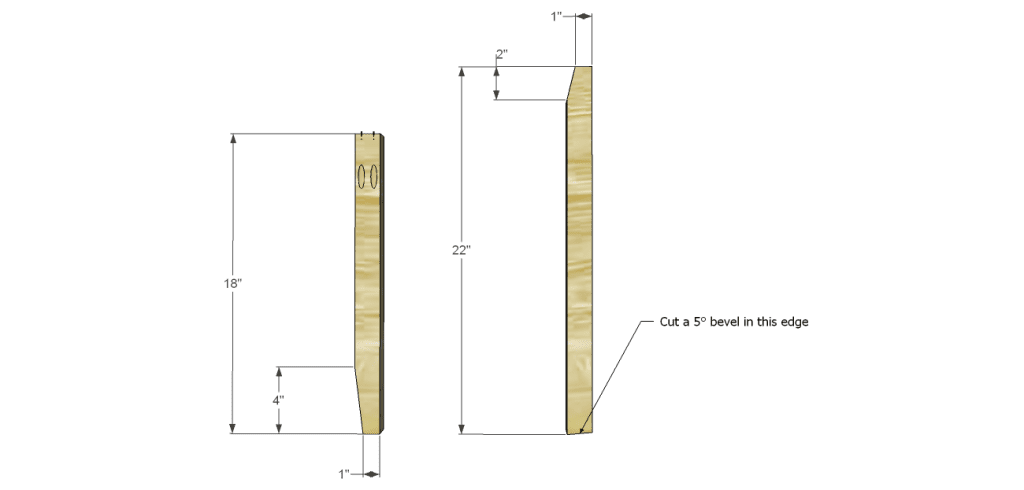
Cut the pieces for the back legs. With the pocket hole jig set for 1-1/2″ material, drill pocket holes in the top end of the lower back legs as shown. Cut the angles as shown in each piece using a jigsaw or bandsaw. Cut a 5° bevel in the lower edge of the upper back legs. Assemble the back legs as shown using glue and 2-1/2″ pocket hole screws.
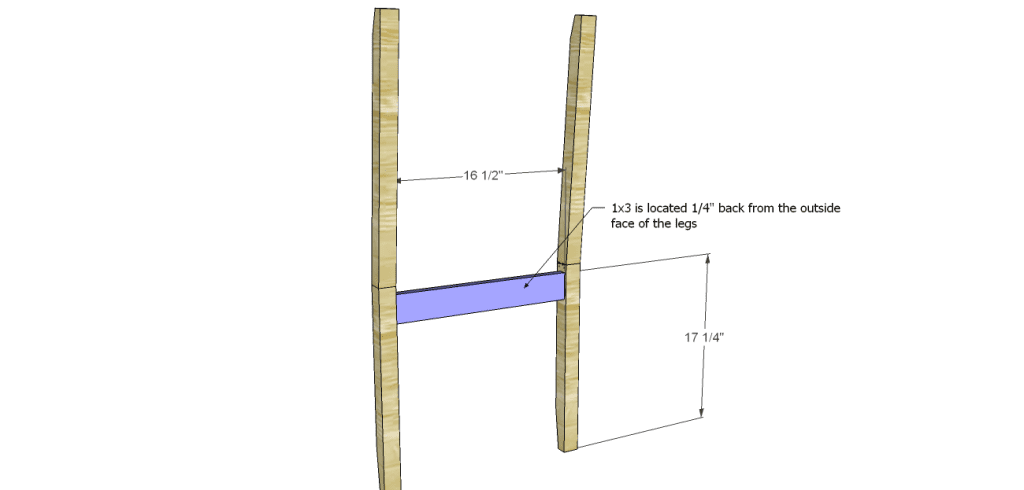
Cut the piece for the back stretcher. Set the pocket hole jig for 3/4″ material and drill pocket holes in each end. Secure the stretcher to the back legs using glue and 1-1/4″ pocket hole screws. The stretcher will be located 1/4″ back from the outside face of the legs.
Step Two
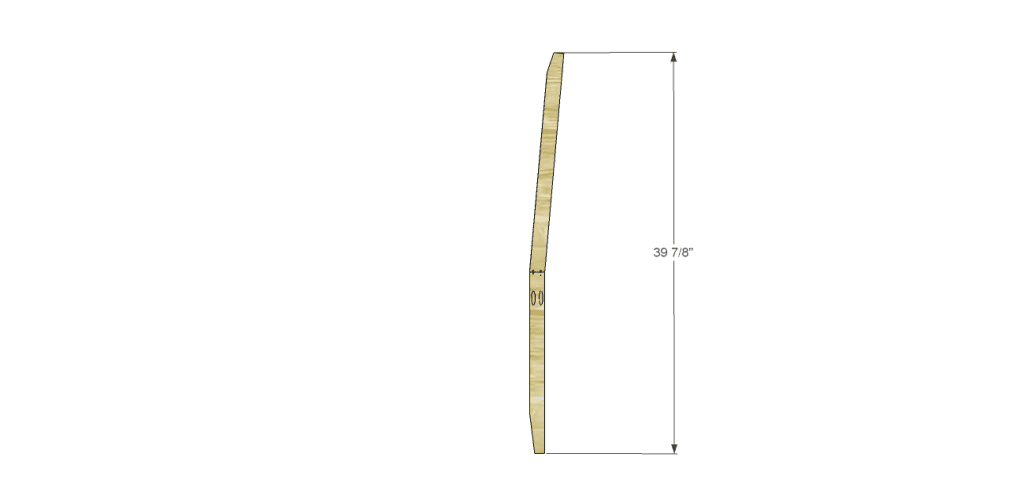
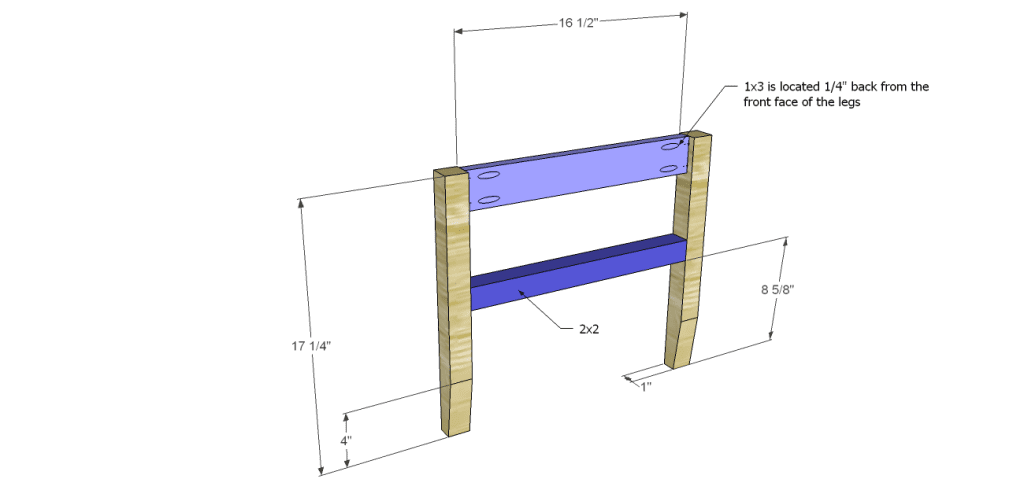
Cut the pieces for the front legs and the front stretchers. Cut the angles in the lower edge of the legs using a jigsaw or bandsaw. Drill pocket holes in each end of the 1×3 stretcher. Secure to the front legs using glue and 1-1/4″ pocket hole screws. The stretcher will be located 1/4″ back from the front face of the legs.
Set the pocket hole jig for 1-1/2″ material, and drill pocket holes in each end of the 2×2 pieces. Orient the piece so that the pocket holes face down and will not have to be filled. Secure the 2×2 in place as shown using glue and 2-1/2″ pocket hole screws.
Step Three
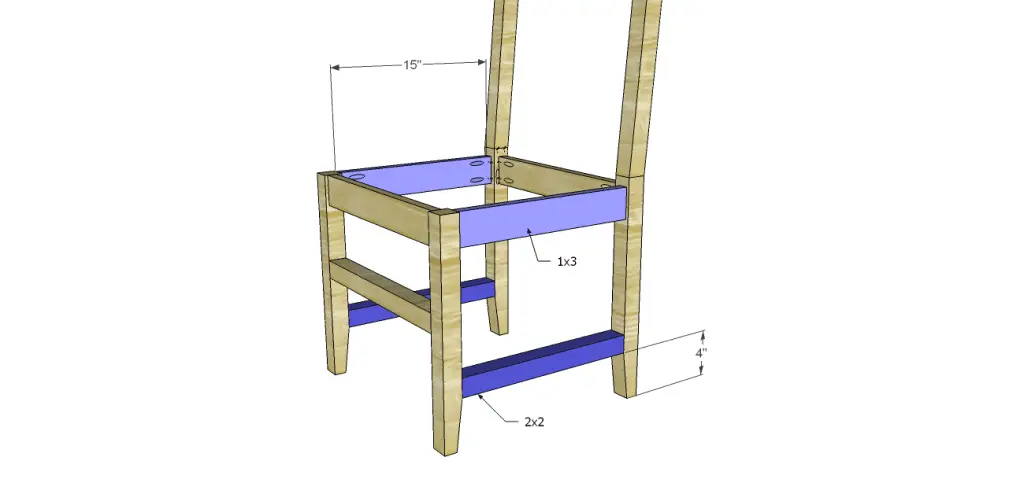
Cut the pieces for the side stretchers. Drill pocket holes in each end of the 2×2 pieces, then reset the pocket hole jig for 3/4″ material and drill pocket holes in each end of the 1×3 pieces. Secure the 1×3 pieces to the leg assemblies using glue and 1-1/4″ pocket hole screws in the front legs and 2″ pocket hole screws in the back legs, locating them 1/4″ back from the outside face of the legs. Secure the 2×2 pieces as shown using glue and 2-1/2″ pocket hole screws.
Step Four
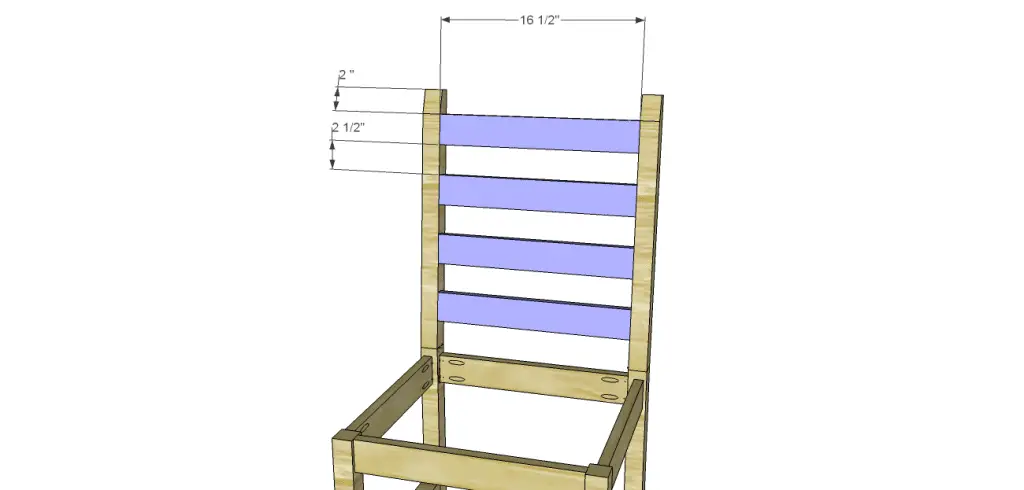
Cut the pieces for the slats and drill pocket holes in each end. Secure to the upper back legs as shown using glue and 1-1/4″ pocket hole screws. Position the slats so that the front face is flush with the front face of the legs.
Step Five
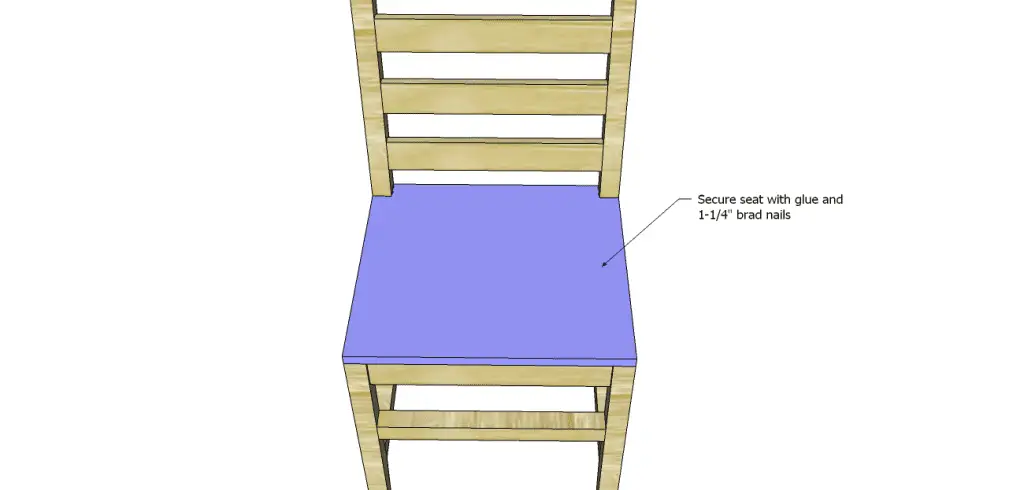
Cut the piece for the seat, and cut the notches using a jigsaw or bandsaw. Secure the seat to the frame using glue and 1-1/4″ brad nails.
 Finish as desired!
The chair would look great at a desk, on a porch by the front door, or even in a bathroom to hold clean towels! Have any questions about the Daniela dining chair plans? Contact me at cher {at} designsbystudioc {dot} com!
Originally posted 2014-05-19 08:00:08.



4 Comments
Ha, easy for you. I would be afraid to sit in one I built I think…but I love the idea of different colors around the table.
You can do it, Linda, I promise!