DIY End Table Plans Perfect for Beginners!
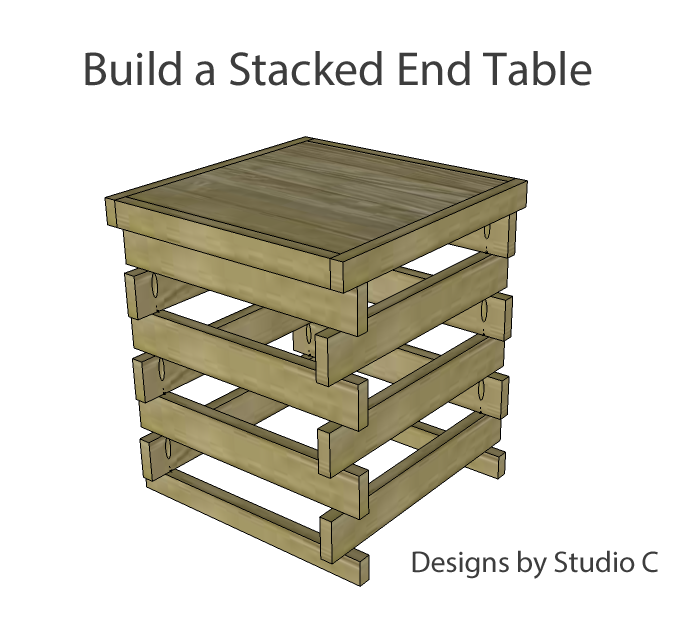
Today’s plans are to build a stacked end table, perfect for beginners or those who are looking for something quick and easy. The stacked end table and can be constructed using pallet boards or regular off-the-shelf boards. Plus, it can be finished in a variety of ways to suit your individual style – painted, stained, stenciled, etc.
The plans are drawn using a pocket hole jig but can also be assembled using 1-1/2″ angle brackets which will allow it to be just as sturdy!
Materials:
- 1-1/4″ pocket hole screws or 1-1/2″ angle brackets and 3/4″ screws
- 1-1/4″ brad nails
- Four – 1″ angle brackets (to attach top)
- Wood glue
- Sandpaper (100, 150, 220 grits)
- Finishing supplies
Lumber:
- One – 1×2 at 4′
- One – 1×2 at 6′
- Three – 1×3 at 6′
- One – 2′ x 2′ sheet of 3/4″ plywood
Cut List:
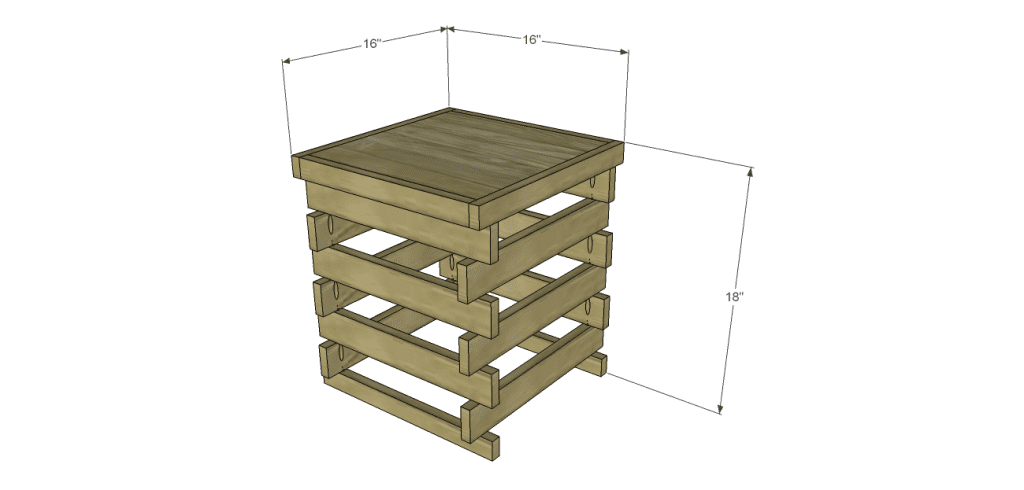
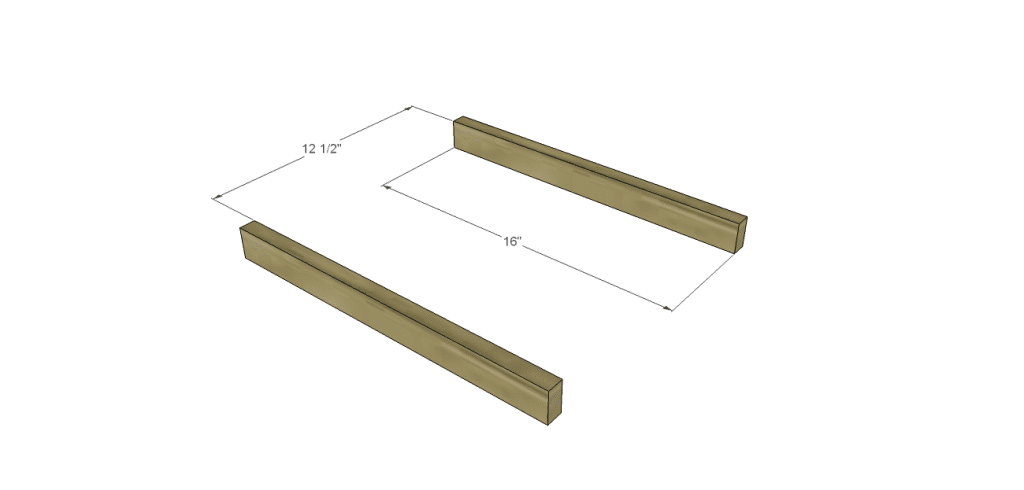
- Four – 1×2 at 16″ – Bottom Base, Top Trim
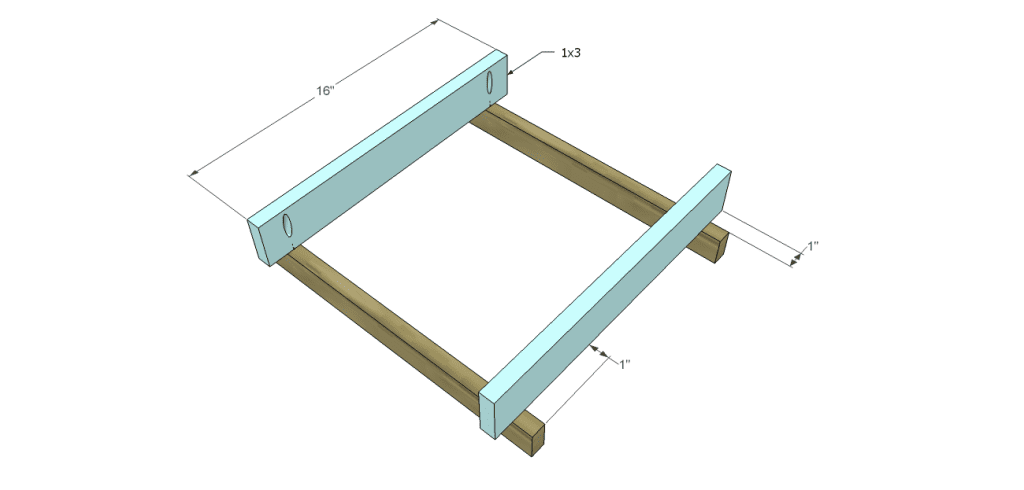
- Twelve – 1×3 at 16″ – Sides
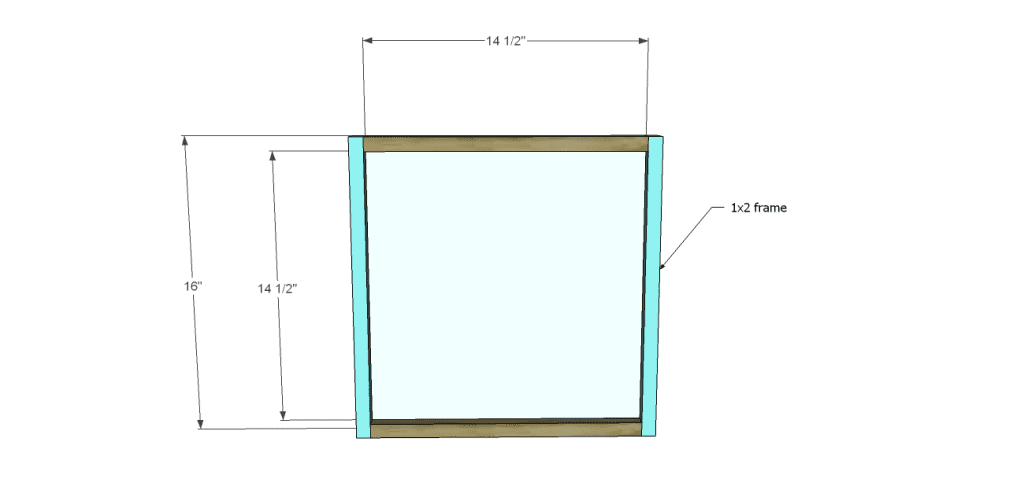
- Two – 1×2 at 14-1/2″ – Top Trim
- One – 3/4″ plywood at 14-1/2″ x 14-1/2″ – Top
Step One
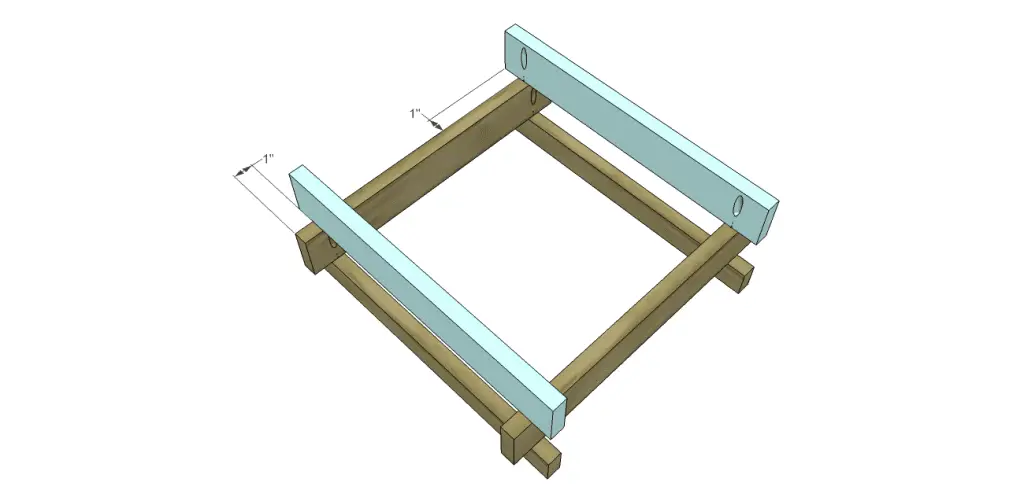
Cut the pieces for the bottom base and sides. Each piece will overhang the piece below by 1″ as they are stacked. If using the pocket hole method, drill two pocket holes in one long edge locating them 1-3/8″ from each end. Secure the first “layer” of boards to the bottom base pieces as shown using glue and 1-1/4″ pocket hole screws.
If using angle brackets, position them 1-3/8″ in from each edge. Secure the first “layer” of boards to the bottom base pieces as shown using glue and 3/4″ screws.
Step Two
Position the second “layer” as shown and secure.
Step Three
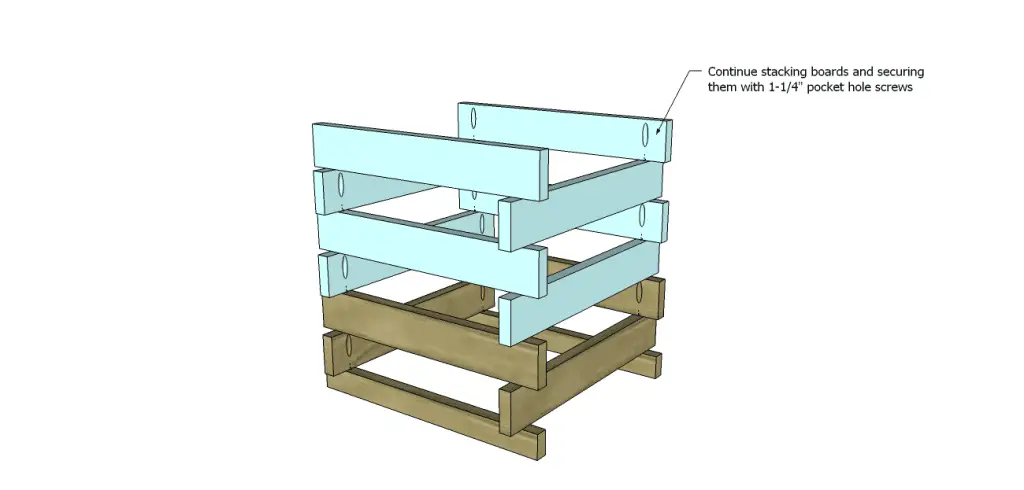
Continue stacking the pieces as shown.
Step Four
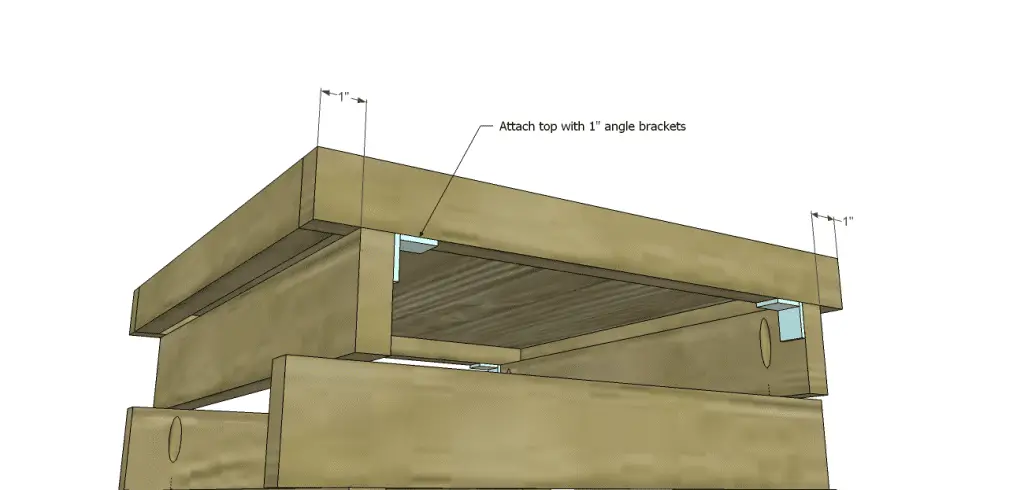
Cut the pieces for the top and the top trim. Position and secure the side trim pieces to the top using glue and 1-1/4″ brad nails, then position and secure the longer trim pieces in the same manner. Attach the 1″ angle brackets to the underside locating them 1-3/8″ in from the outside of the frame and secure them in place.
Finish as desired.
I’m hoping to be able to add more plans for beginners to build like the stacked end table and hopefully this will get you started… We all have to start somewhere, right? This way those new to woodworking can build their skills and confidence while creating some awesome furniture pieces! As always, if you have a request or need help with a project, contact me at cher {at} designsbystudioc {dot} com!


Comments are closed.