Plans to Build a Knock-off Storage Cabinet
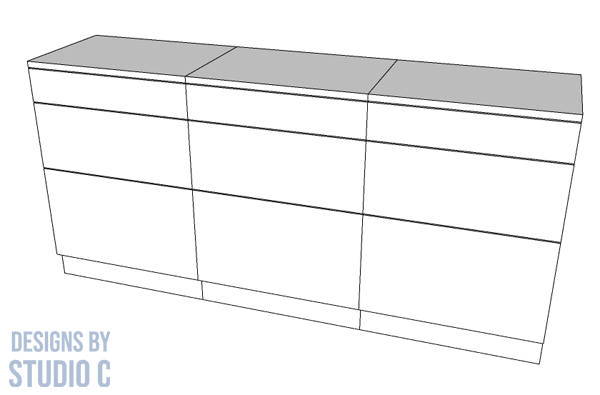
We can always use more storage, right? The plans to build a Bowen storage cabinet features three drawers and can be built as a stand alone unit, in a pair or a whole line of the cabinets to fill a wall!
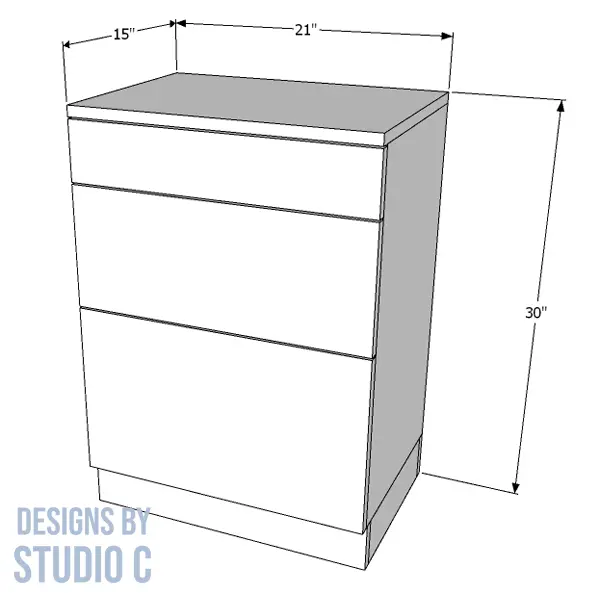
This DIY storage cabinet plans are suitable for all skill levels, and the project can be finished however you want!
Materials to build ONE cabinet:
- 1-1/4″ pocket hole screws
- 2″ brad nails
- 3 – 14″ drawer slides (<– affiliate link!)
- Edge banding, optional
- 1-1/4″ screws
- Wood glue
- Sandpaper (80, 120, 220 grits)
- Finishing supplies
Lumber:
- 1 – 1×2 at 4′
- 2 – 1×4 at 6′
- 1 – 1×8 at 6′
- 1 – 1×12 at 6′
- 1 – 4′ x 4′ sheet of 1/4″ plywood
- 1 – 4′ x 4′ sheet of 3/4″ plywood
Cut List:
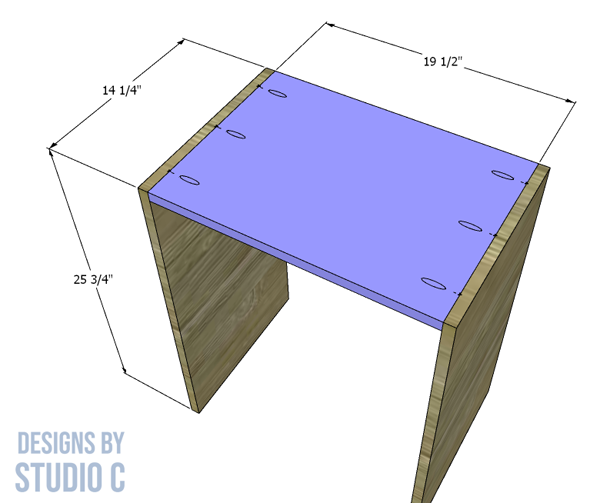
- 2 – 3/4″ plywood at 14-1/4″ x 25-3/4″ – Sides
- 1 – 3/4″ plywood at 14-1/4″ x 19-1/2″ – Bottom
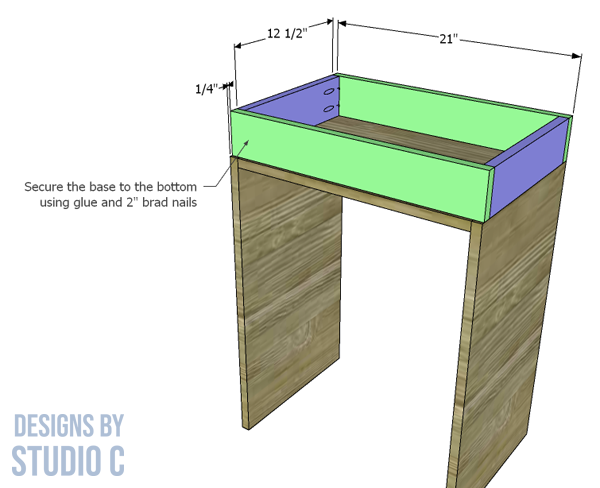
- 2 – 1×4 at 12-1/2″ – Base
- 2 – 1×4 at 21″ – Base
- 2 – 1×2 at 19-1/2″ – Stretchers
- 1 – 3/4″ plywood at 15″ x 21″ – Top
- 1 – 1/4″ plywood at 20-1/4″ x 26-1/8″ – Back
- 2 – 1×4 at 14″ – Upper Drawer Box Frame
- 2 – 1×4 at 17″ – Upper Drawer Box Frame
- 2 – 1×8 at 14″ – Middle Drawer Box Frame
- 2 – 1×8 at 17″ – Middle Drawer Box Frame
- 2 – 1×12 at 14″ – Lower Drawer Box Frame
- 2 – 1×12 at 17″ – Lower Drawer Box Frame
- 3 – 1/4″ plywood at 14″ x 18-1/2″ – Drawer Box Bottom
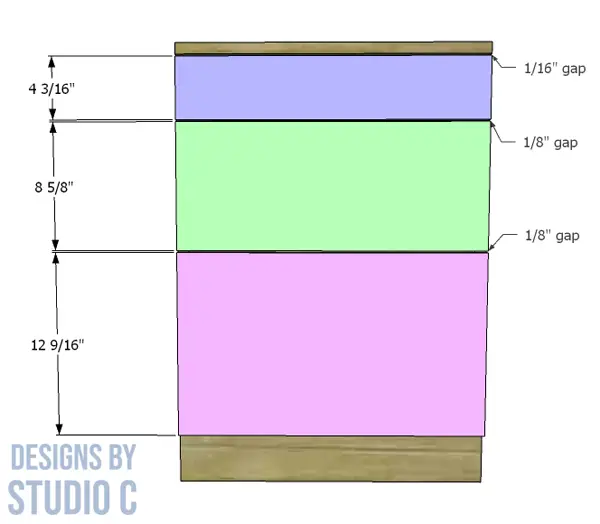
- 1 – 3/4″ plywood at 4-3/16″ x 21″ – Upper Drawer Front
- 1 – 3/4″ plywood at 8-5/8″ x 21″ Middle Drawer Front
- 1 – 3/4″ plywood at 12-9/16″ x 21″ – Lower Drawer Front
Notes About the Project:
- Edge banding will be applied on the exposed edges of the plywood
- Sand all pieces before putting everything together
Step One
Cut the pieces for the sides and the bottom. With the pocket hole jig set for 3/4″ material. drill pocket holes in each end of the bottom piece. Secure the sides to the bottom using glue and 1-1/4″ pocket hole screws.
Step Two
Cut the pieces for the base and drill pocket holes in each end of the shorter pieces. Assemble the base using glue and 1-1/4″ pocket hole screws. Place the base on the bottom of the cabinet – the front edge will overhang by 1/4″. Secure the base to the bottom using glue and 2″ brad nails through the bottom into the base.
Step Three
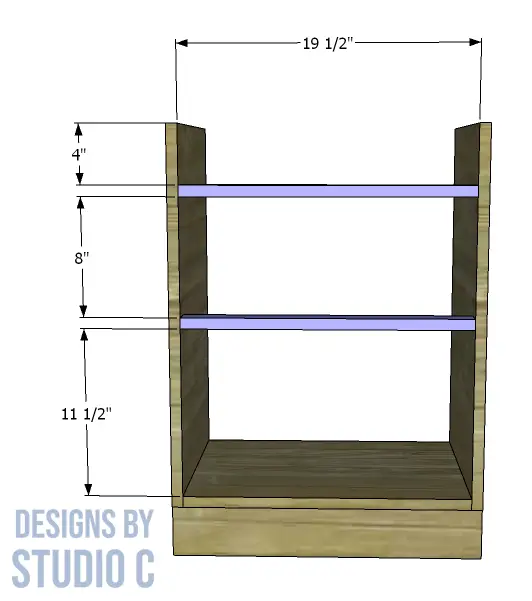
Cut the pieces for the 1×2 stretchers and drill pocket holes in each end. Secure the stretchers to the sides using glue and 1-1/4″ pocket hole screws.
Step Four
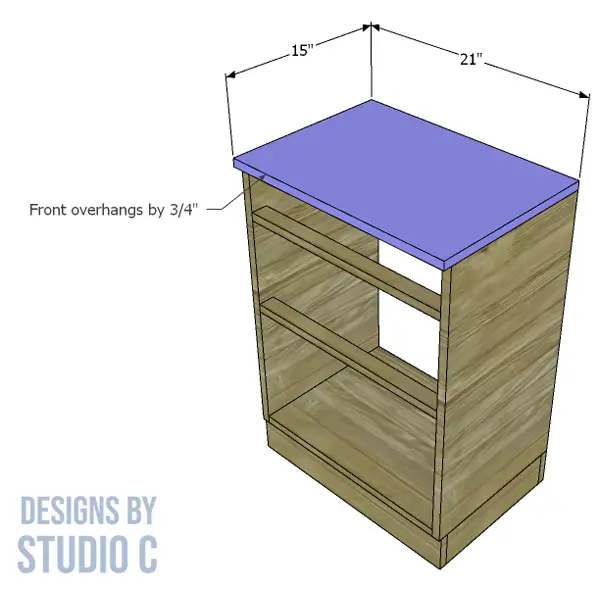
Cut the piece for the top. The front edge of the top will overhang by 3/4″. Secure the top in place using glue and 2″ brad nails.
Step Five
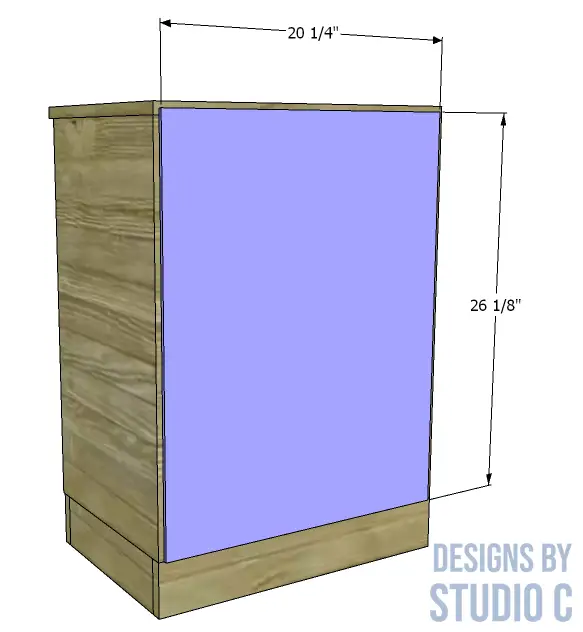
Cut the piece for the back. Secure the back using glue and 2″ brad nails.
Step Six
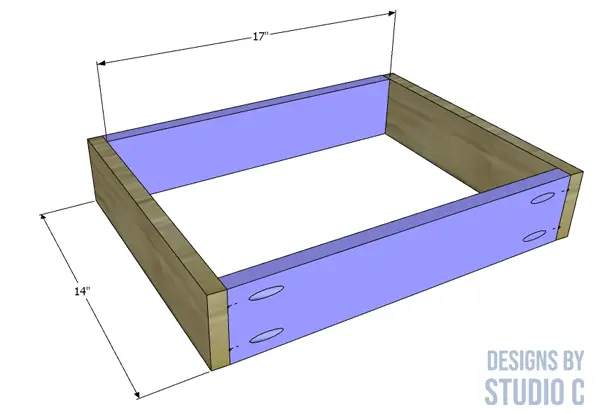
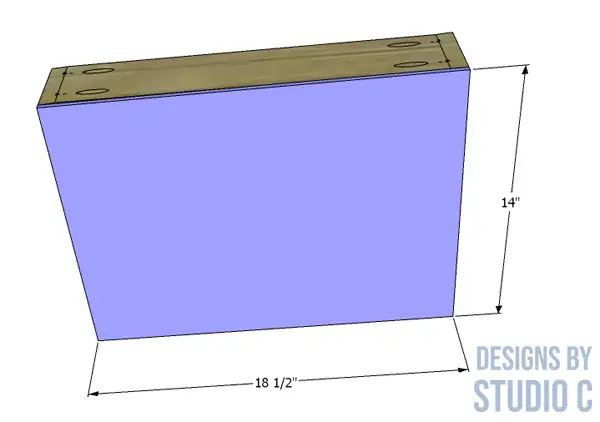
Cut the pieces for the drawer boxes. All of the drawer boxes are assembled in the same manner but only the shallowest drawer is shown. Drill pocket holes in each end of the front and back pieces. Assemble the drawer boxes using glue and 1-1/4″ pocket hole screws.
Step Seven
Cut the pieces for the drawer bottoms. Secure to the bottom of the drawer boxes using glue and 2″ brad nails. Install the drawer slides according to the manufacturer’s instructions. Follow this easy tutorial. Make any necessary adjustments.
Step Eight
Cut the pieces for the drawer fronts. Note the spacing between the drawer fronts and the top. Starting with the bottom drawer, secure the drawer front to the drawer box with hot glue. Open the drawer then secure the front from the inside using 1-1/4″ screws. Add a spacer, then install the middle drawer, and repeat with the top drawer.
Finish the cabinet as desired.
Have questions about the Bowen storage cabinet? Leave a comment below!
Originally posted 2022-04-22 08:00:26.

Comments are closed.