
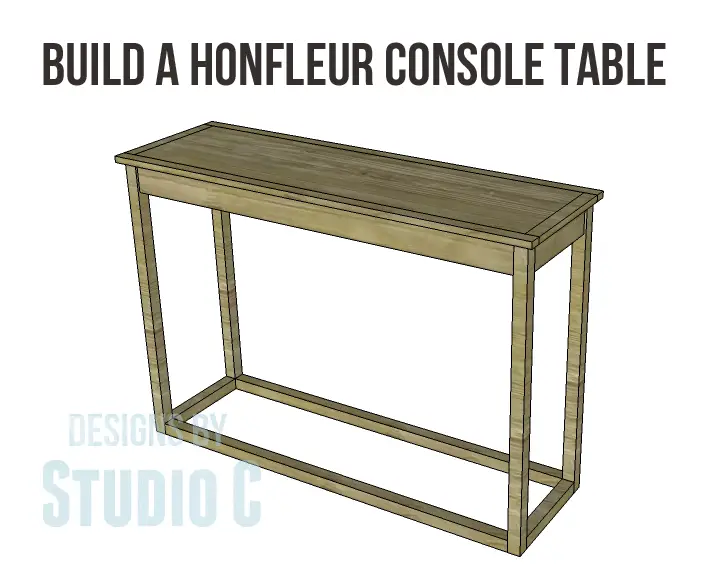
The Honfleur Console Table Plans
The Perfect Project for Those New to Woodworking!
This table is one of those easy designs that is an excellent choice for all skill levels. With its simplicity, the Honfleur Console Table will come to life with that special finish… Stained, painted, distressed, chalk painted, or however the completed table is finished, the Honfleur Console Table will be fabulous!
Materials:
- 1-1/4” pocket hole screws (<– affiliate link!)
- 2-1/2″ pocket hole screws
- 1-1/4” brad nails
- Wood glue
- Sandpaper (100, 150, 220 grits)
- Finishing supplies (primer & paint, or stain, sealer)
Lumber:
- 2 – 1×2 at 6′
- 2 – 1×4 at 8′
- 4 – 2×2 at 6′
- 1 – sheet of 3/4″ plywood
Cut List:
- 4 – 2×2 at 35-1/4″ – Legs
- 2 – 1×4 at 12″ – Upper Side Aprons
- 2 – 2×2 at 12″ – Lower Side Stretchers
- 2 – 1×4 at 48″ – Front & Back Upper Aprons
- 2 – 2×2 at 48″ – Front & Back Lower Stretchers
- 2 – 1×4 at 13″ – Supports
- 1 – 3/4″ plywood at 13-1/2″ x 49-1/2″ – Top
- 2 – 1×2 at 13-1/2″ – Top Side Trim
- 2 – 1×2 at 52-1/2″ – Top Front & Back Trim
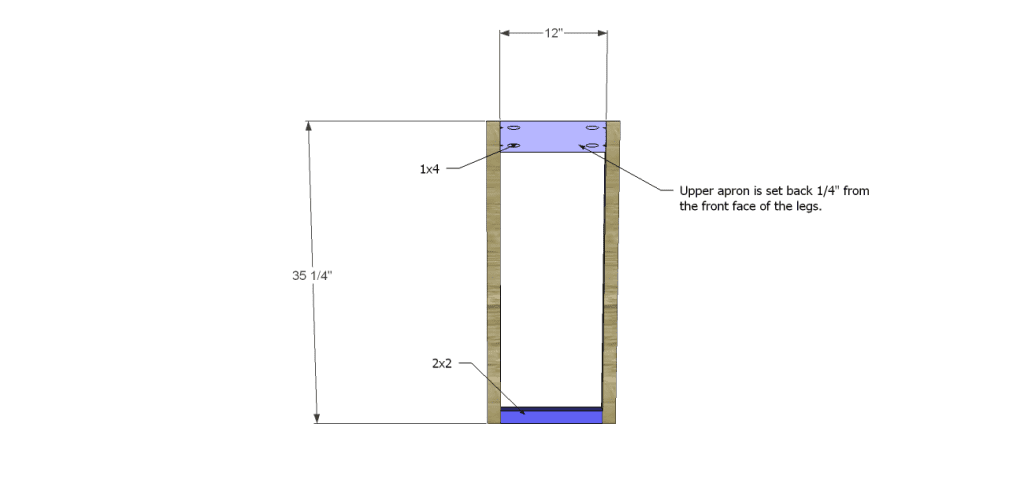
Step One
Cut the pieces for the legs and side aprons. With the pocket hole jig set for 3/4″ material, drill pocket holes in each end of the 1×4 pieces. Attach to the legs, locating the aprons 1/4″ back from the outside face of the legs, using glue and 1-1/4″ pocket hole screws.
Set the pocket hole jig for 1-1/2″ material and drill pocket holes in each end of the 2×2 pieces. Secure to the bottom of the legs using glue and 2-1/2″ pocket hole screws. Orient the pocket holes so they face down and will not have to be filled.
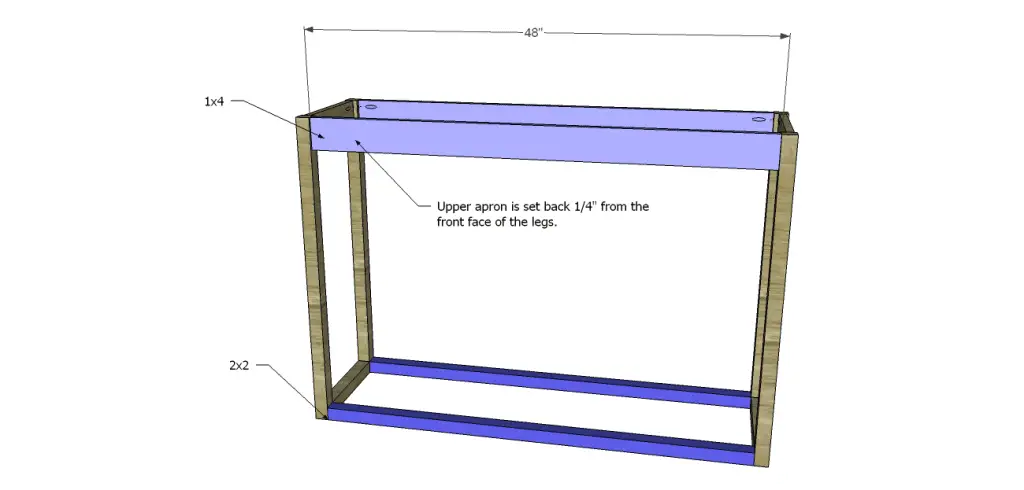
Step Two
Cut the pieces for the front and back aprons. Set the pocket hole jig for 3/4″ material and drill pocket holes in each end of the 1×4 pieces. Attach to the legs, locating the aprons 1/4″ back from the outside face of the legs, using glue and 1-1/4″ pocket hole screws.
Set the pocket hole jig for 1-1/2″ material and drill pocket holes in each end of the 2×2 pieces. Secure to the bottom of the legs using glue and 2-1/2″ pocket hole screws. Orient the pocket holes so they face down and will not have to be filled.
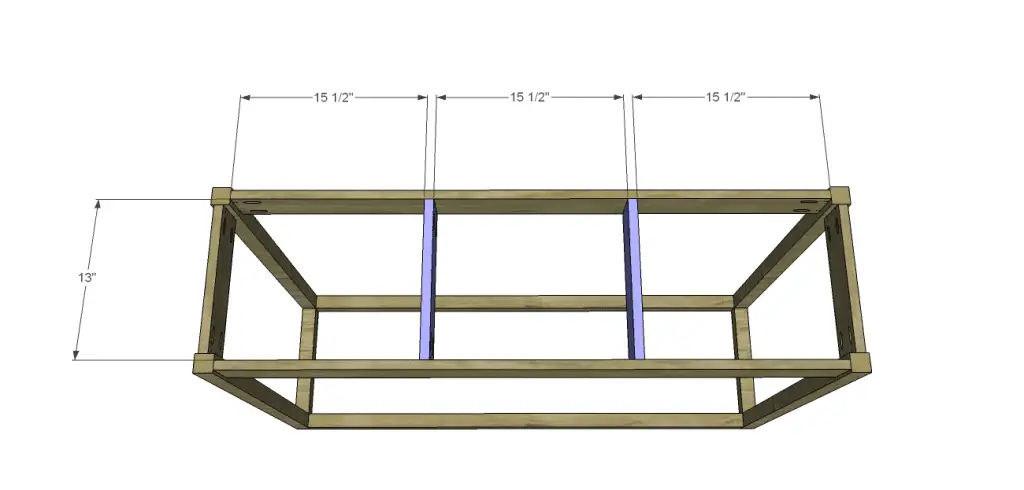
Step Three
Cut the pieces for the supports. Set the pocket hole jig for 3/4″ material and drill pocket holes in each end of the 1×4 pieces. Secure to the front and back aprons using glue and 1-1/4″ pocket hole screws.
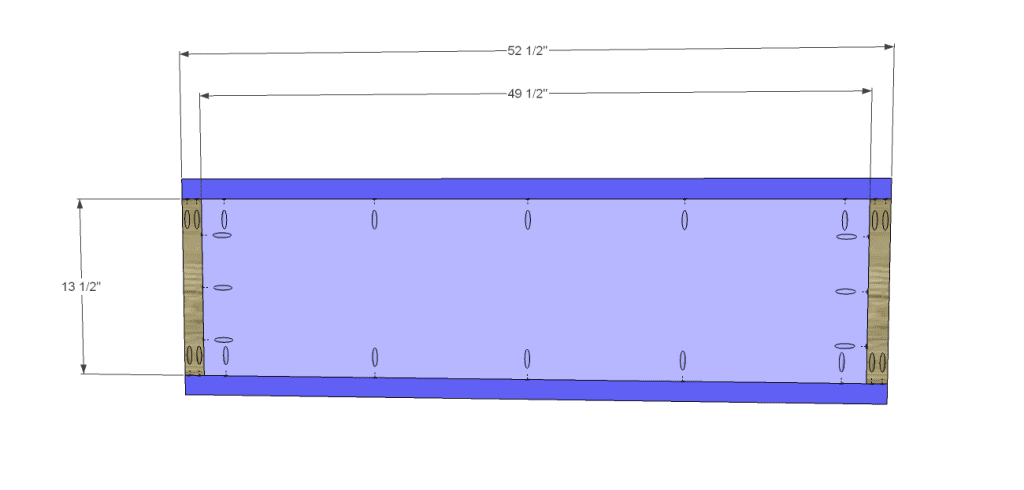
Step Four
Cut the pieces for the top and the top trim. Drill pocket holes in all four edges of the top panel, as well as each end of the shorter trim pieces. Assemble the top as shown using glue and 1-1/4″ pocket hole screws. Use a router and a decorative bit to create an edge on the trim pieces all the way around. Spread glue on the top of the aprons, legs, and supports. Position the top so that 3/4″ overhangs at all edges, then secure using glue and 1-1/4″ brad nails.

Finish as desired.
So what do you think of the Honfleur Console Table Plans? The top would be really neat if it were pieced from different species of wood or even pallet boards, with a painted or distressed base and legs… Have any questions? Contact me at cher {at} designsbystudioc {dot} com!
Disclaimer:
This post contains links to a site of which I am an affiliate. What that means is if the link is clicked and a purchase is made, I will get a commission of that sale. Rest assured I would only direct my readers to sites I shop at myself!