Maximize Your Space with a DIY Trix Media Cabinet: Build it Yourself with These Plans
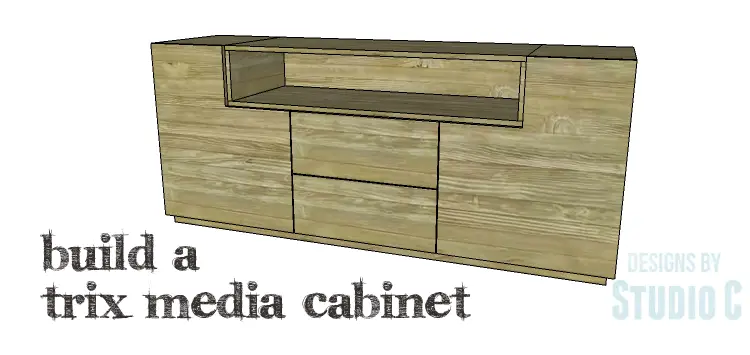
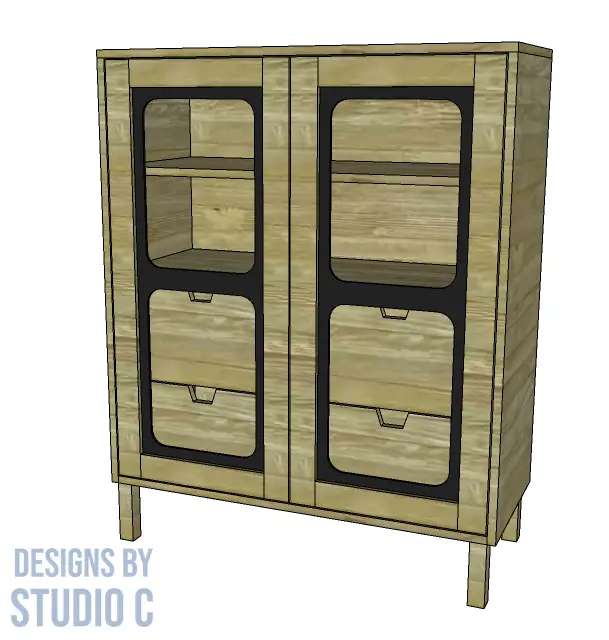
Who wouldn’t love a media cabinet with nice clean lines like this one? The free plans to build a One Kings Lane inspired Trix Media Cabinet (Large) feature an open center shelf with two drawers below, and L-shaped doors on either side. This quick and easy build will have your media components and accessories looking good in a flash!
Materials:
- 1-1/4″ pocket hole screws
- 1-1/4″ brad nails
- Edge banding, if desired
- Two sets of 16″ drawer slides
- Two sets of hinges
- Four cabinet pulls
- Finishing supplies
Lumber:
- 3 – 1×2 at 8′
- 3 sheets of 3/4″ plywood
Cut List:
- 3 – 1×2 at 15-1/4″ – Base
- 2 – 1×2 at 69″ – Base
- 1 – 3/4″ plywood at 18″ x 71″ – Bottom
- 2 – 3/4″ plywood at 18″ x 27″ – Sides
- 1 – 3/4″ plywood at 27″ x 69-1/2″ – Back
- 1 – 3/4″ plywood at 17-1/4″ x 69-1/2″ – Shelf
- 2 – 3/4″ plywood at 17-1/4″ x 17-3/4″ – Dividers
- 1 – 1×2 at 22″ – Drawer Divider
- 2 – 3/4″ plywood at 17-1/4″ x 23″ – Shelves
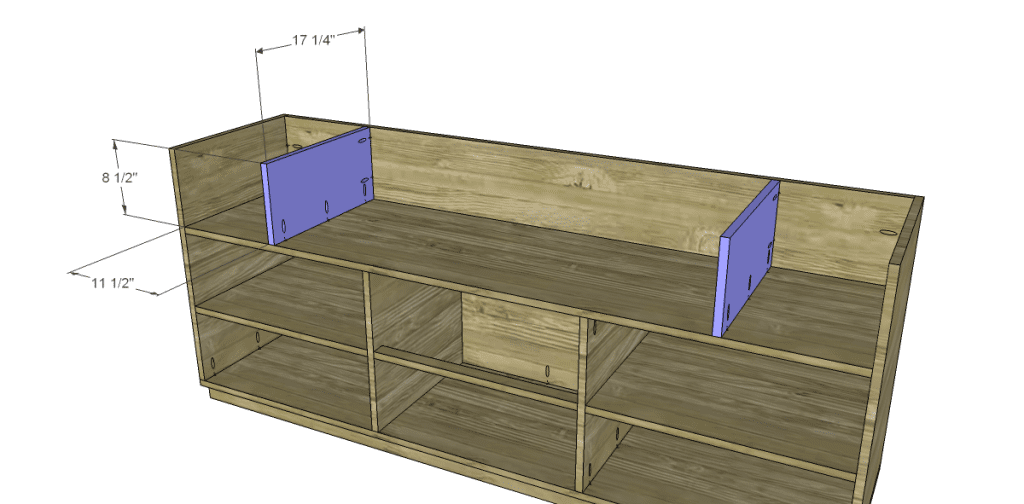
- 2 – 3/4″ plywood at 8-1/2″ x 17-1/4″ – Small Dividers
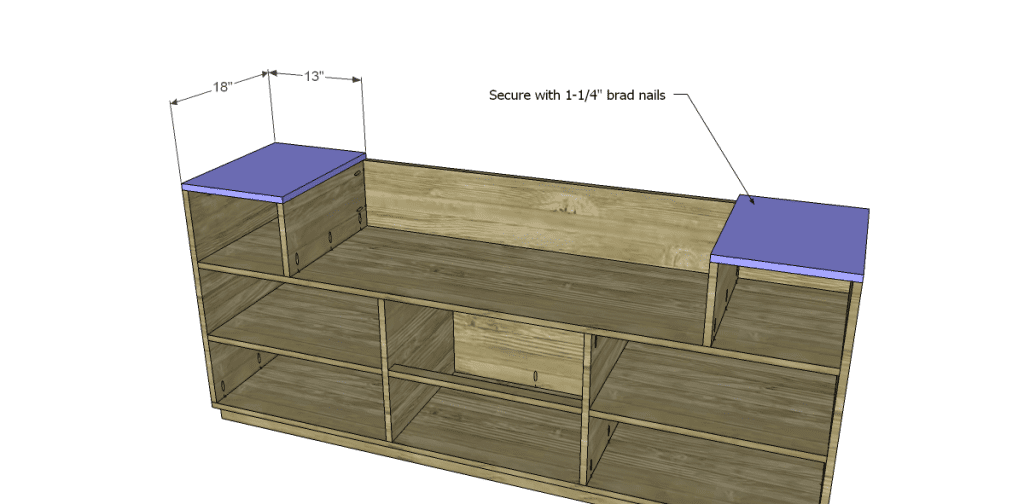
- 2 – 3/4″ plywood at 13″ x 18″ – Tops
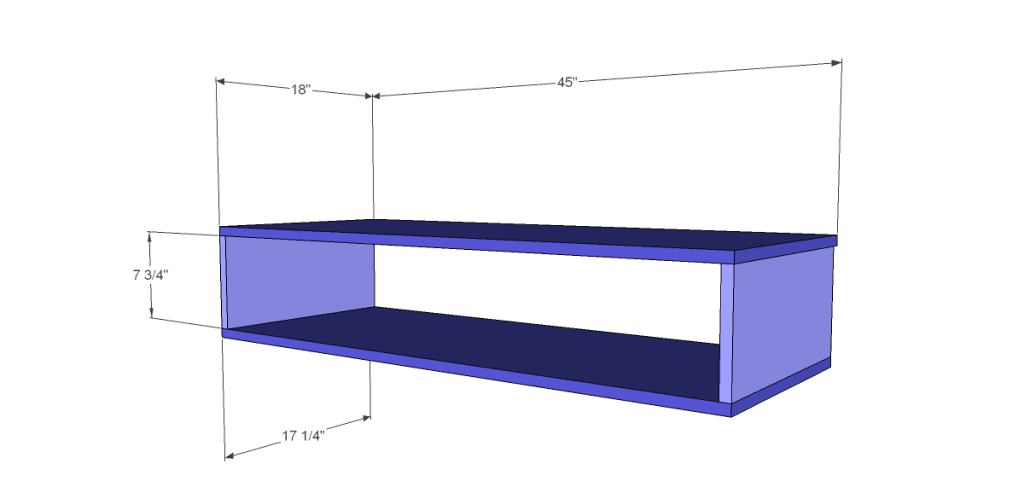
- 2 – 3/4″ plywood at 7-3/4″ x 17-1/4″ – Insert Sides
- 1 – 3/4″ plywood at 17-1/4″ x 45″ – Insert Bottom
- 1 – 3/4″ plywood at 18″ x 45″ – Insert Top
- 2 – 3/4″ plywood at 24″ x 28-1/2″ – Doors
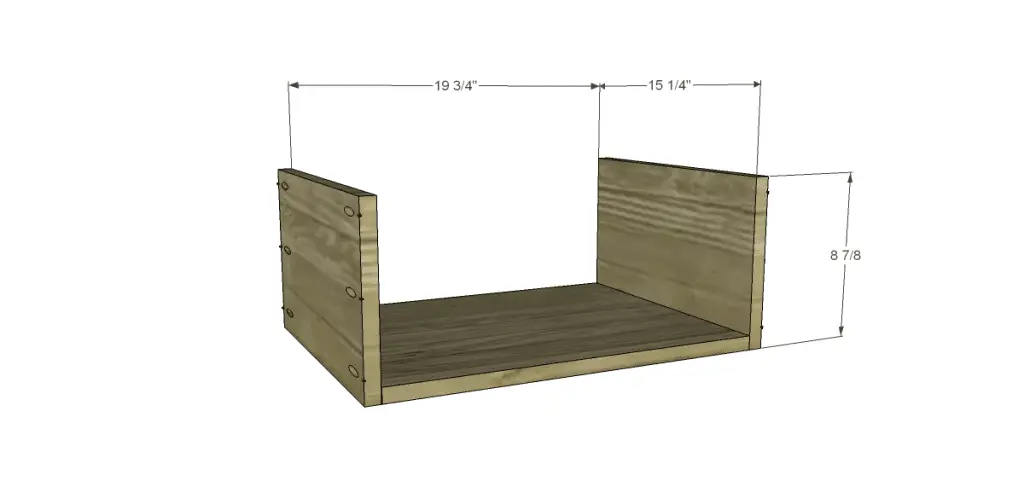
- 2 – 3/4″ plywood at 15-1/4″ x 19-3/4″ – Drawer Bottoms
- 4 – 3/4″ plywood at 8-7/8″ x 15-1/4″ – Drawer Sides
- 2 – 3/4″ plywood at 8-7/8″ x 21-1/4″ – Drawer Backs
- 2 – 3/4″ plywood at 9-1/2″ x 22-5/8″ – Drawer Fronts
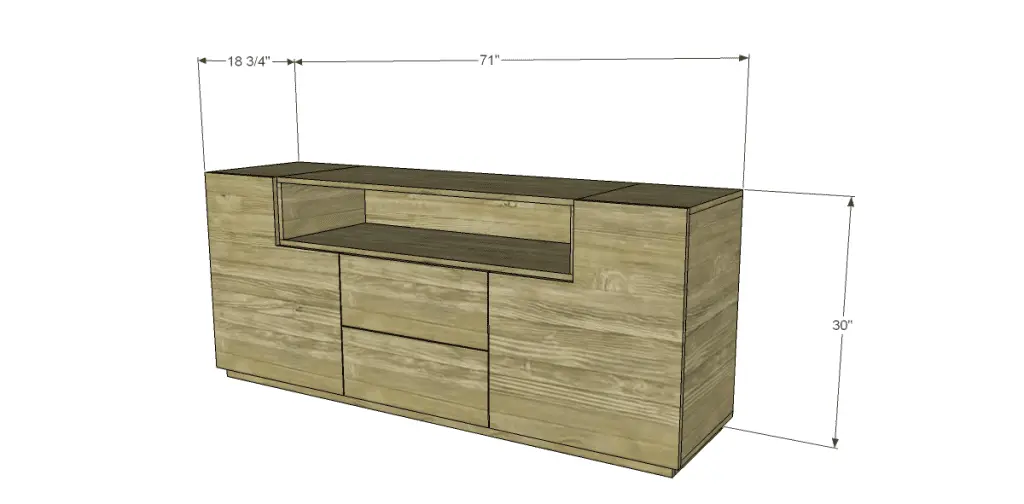
Click on the drawings for a larger view!
Step One
If using edge banding, it will be applied to the exposed edges of the plywood before assembly.
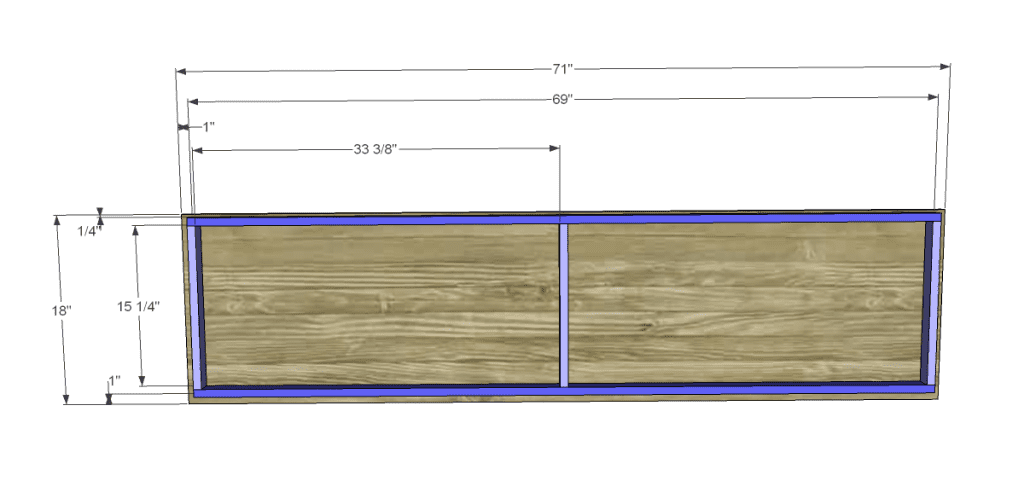
Cut the pieces for the bottom and the base frame. Drill pocket holes in each end of the shorter pieces for the base, as well as one long edge of each base piece. Assemble the frame as shown using glue and 1-1/4″ pocket hole screws, then attach the frame to the bottom using glue and 1-1/4″ pocket hole screws.
Step Two
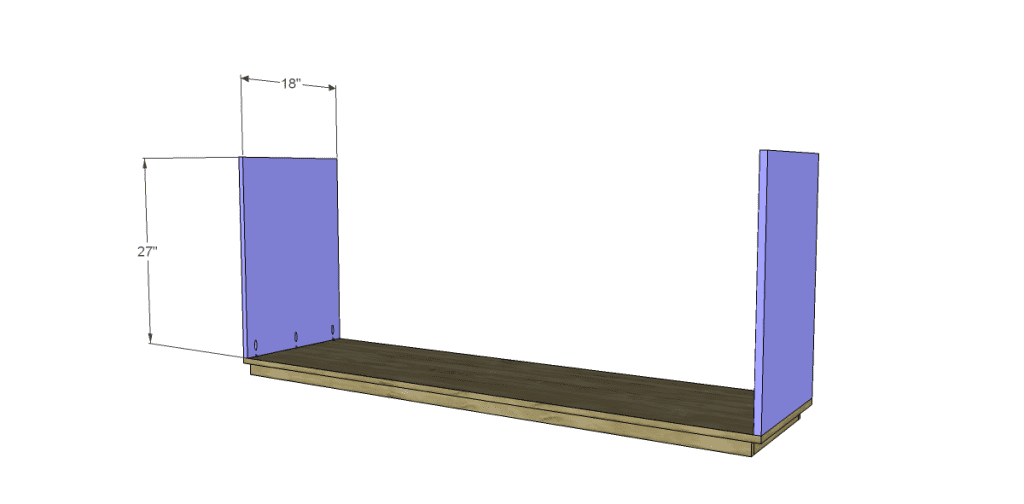
Cut the pieces for the sides and drill pocket holes at one end only. Attach tot he bottom using glue and 1-1/4″ pocket hole screws.
Step Three
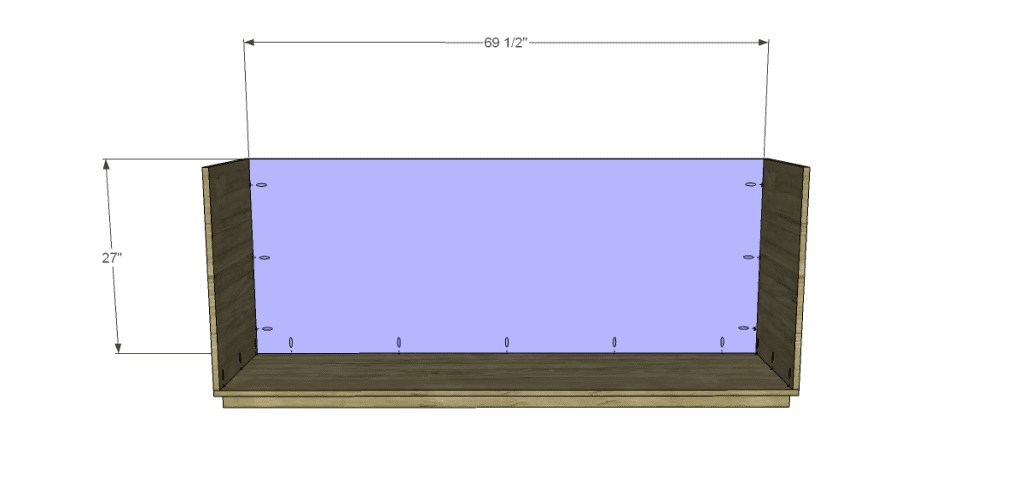
Cut the piece for the back and drill pocket holes as shown. Secure to the sides and bottom using glue and 1-1/4″ pocket hole screws.
Step Four
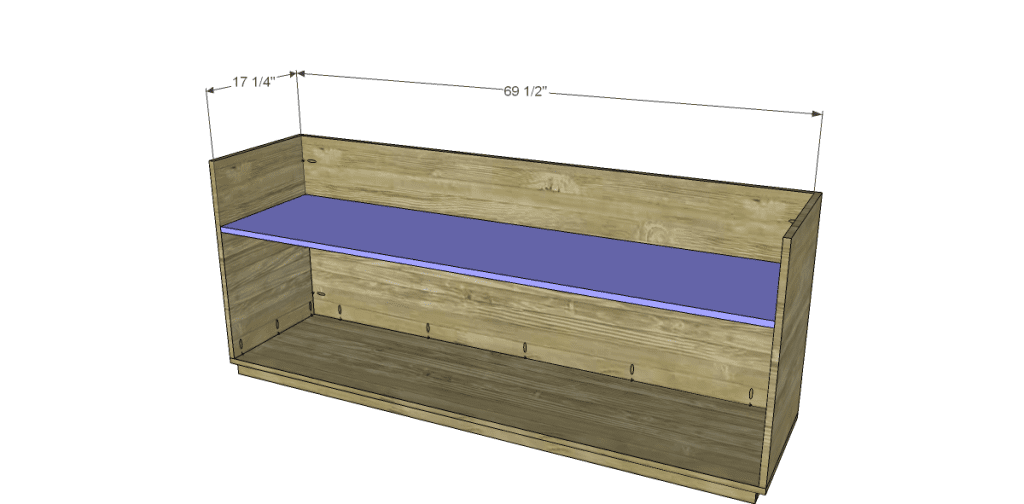
Cut the piece for the shelf. Drill pocket holes in both short edges and one long edge. Position in the cabinet as shown and secure using glue and 1-1/4″ pocket hole screws.
Step Five
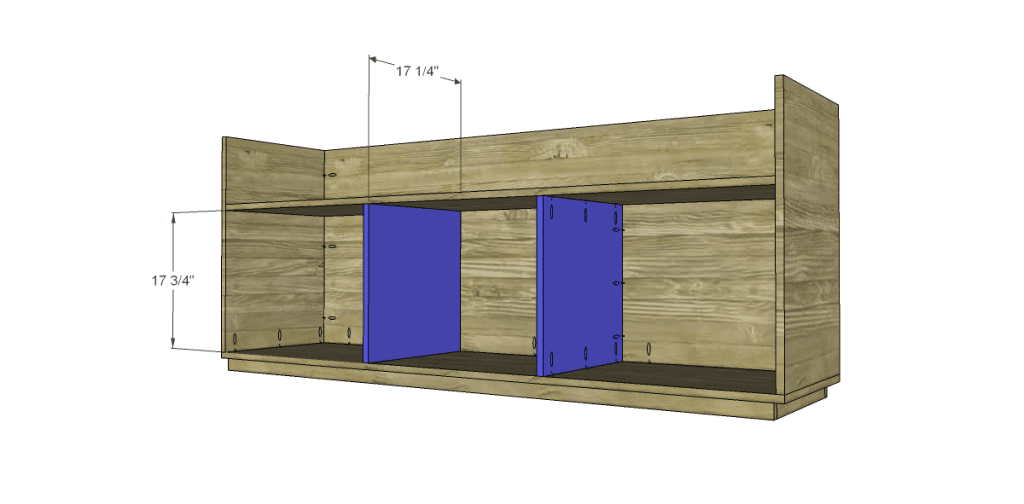
Cut the pieces for the dividers. Drill pocket holes in both short edges and one long edge. Position in the cabinet as shown and secure using glue and 1-1/4″ pocket hole screws.
Step Six
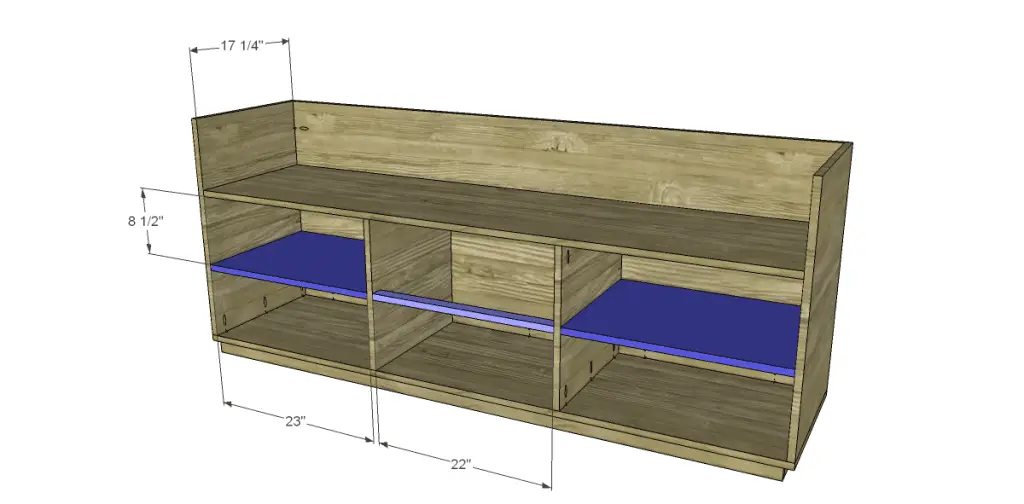
Cut the pieces for the smaller shelves and the drawer divider. Drill pocket holes in both short edges and one long edge of the shelf pieces. Position in the cabinet as shown and secure using glue and 1-1/4″ pocket hole screws.
Drill pocket holes in each end of the drawer divider. Position as shown then secure using glue and 1-1/4″ pocket hole screws.
Step Seven
Cut the pieces for the small dividers. Drill pocket holes in one short edge and one long edge. Position as shown then secure using glue and 1-1/4″ pocket hole screws.
Step Eight
Cut the pieces for the tops. Position as shown and secure using glue and 1-1/4″ brad nails.
Step Nine
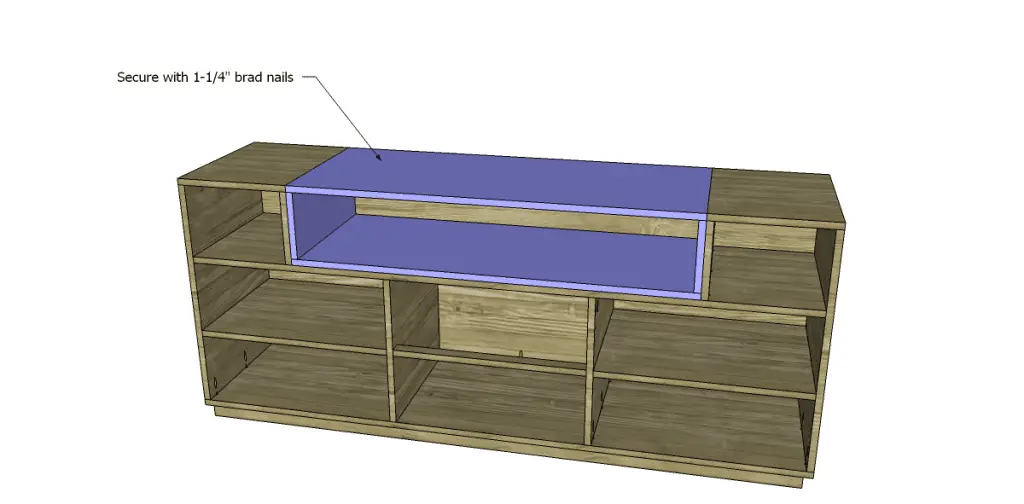
Cut the pieces for the insert and drill pocket holes in each end of the shorter pieces. Assemble the frame with the pocket holes facing the outside. Position the insert with the top overlapping the back and secure with 1-1/4″ brad nails.
Step Ten
Cut the pieces for the doors. Attach the hinges to the doors, then install the doors on the cabinet. Add cabinet pulls, if desired.
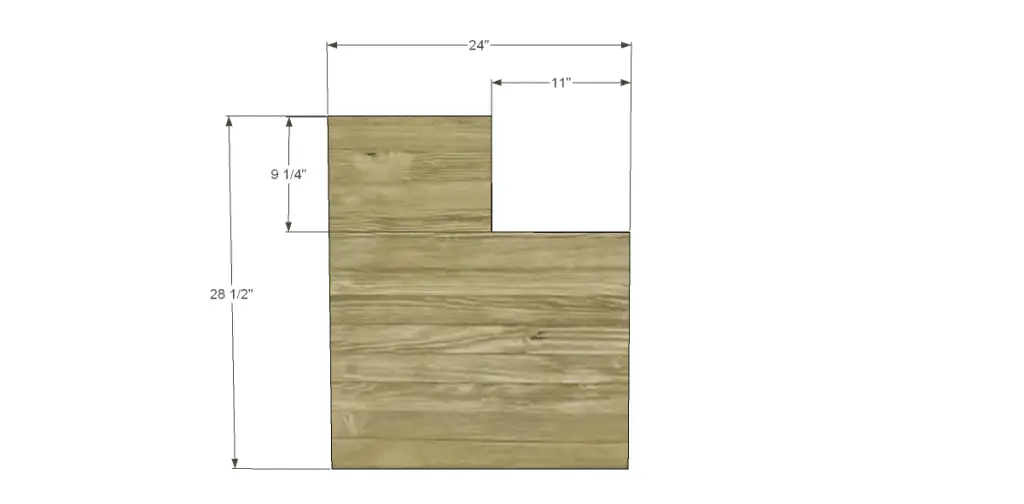
Step Eleven
Cut the pieces for the drawers. Drill pocket holes in each end of the side pieces as well as all four edges of the bottom pieces. Assemble as shown using glue and 1-1/4″ pocket hole screws. The front will overlap the sides of the drawer box by 11/16″, the top of the drawer box by 3/8″, and the bottom of the drawer box by 5/16″. Install the drawer slides according to the manufacturer’s instructions. For an easy tutorial, click here . Make any necessary adjustments.
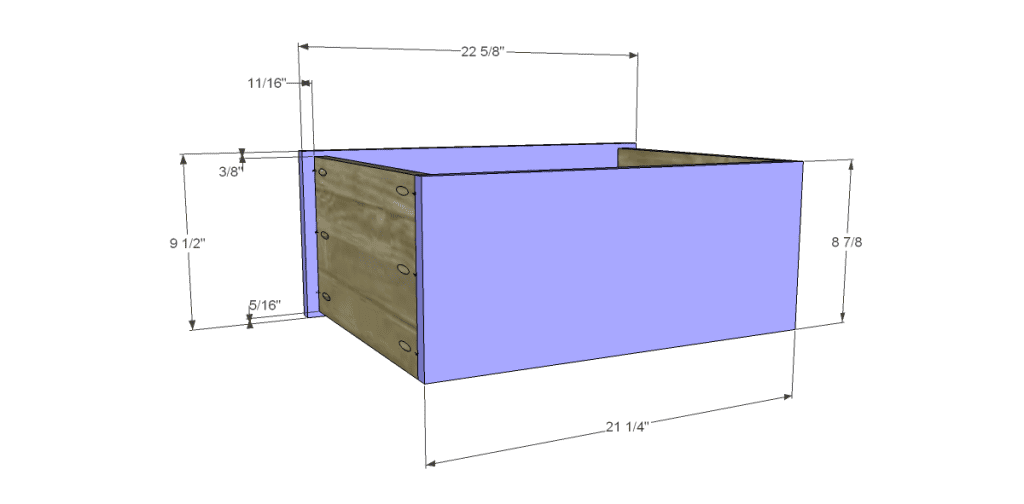
Finish as desired!
This fabulous piece of furniture can also be used as a buffet, as storage in an entryway or mudroom, or even as a dresser! Have any questions about the free DIY plans to build a One Kings Lane inspired Trix Media Cabinet (Large)? Leave a comment below!
Originally posted 2013-03-15 08:00:54.

Comments are closed.