An Easy to Build Cabinet for the Home Office!
Free furniture plans to build a file cabinet that is easy to build and totally customizable. The depth should stay the same but the length can be increased to fit your needs! Click on the drawings to enlarge them!
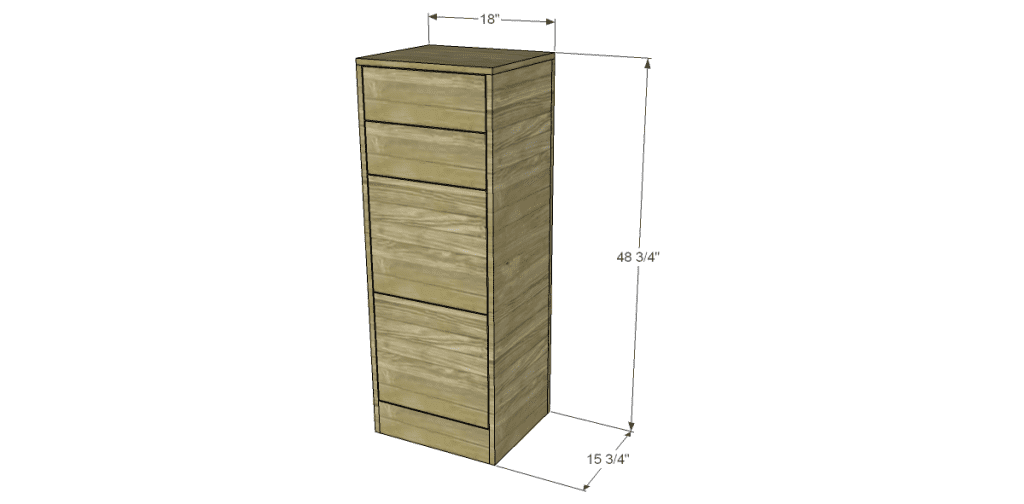
Materials:
- 1-1/4″ pocket hole screws (<– affiliate link!)
- One sheet of 3/4″ plywood
- Edge banding to match the 3/4″ plywood (<– affiliate link!)
- One half sheet of 1/2″ plywood
- One half sheet of 1/4″ plywood
- Two – 1/8″ x 1/2″ x 36″ strips of aluminum
- Four 1/4″ nylon spacers
- Four 1″ screws to mount the aluminum
- Four sets of 14″ drawer slides (ball bearing 3/4 extension)
- Four drawer handles
Tools:
- Table saw, jigsaw or circular saw
- Drill
- Kreg jig and 1-1/4″ pocket hole screws
- Brad nailer and 1-1/4″ brad nails
- Square and pencil
Cut List:
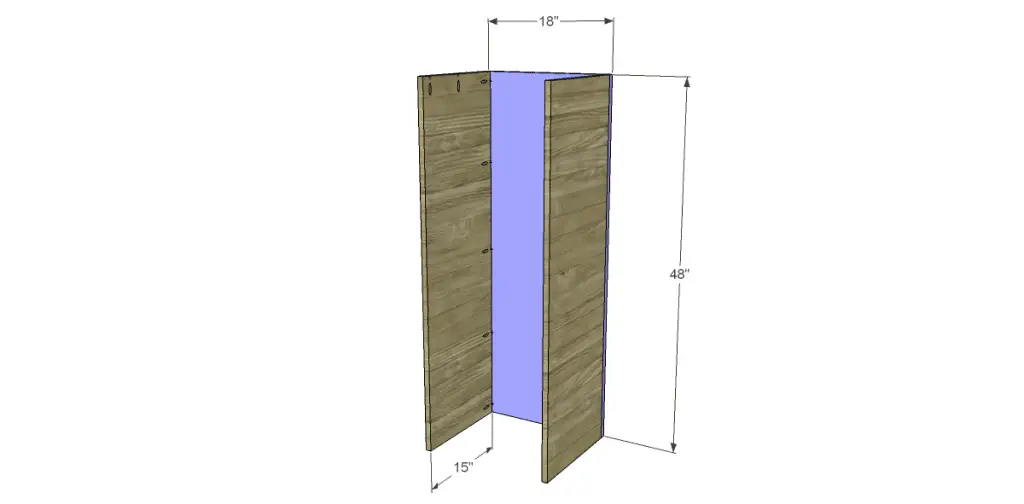
- Two – 3/4″ plywood @ 15″ x 48″ – Sides
- One – 3/4″ plywood @ 18″ x 48″ – Back
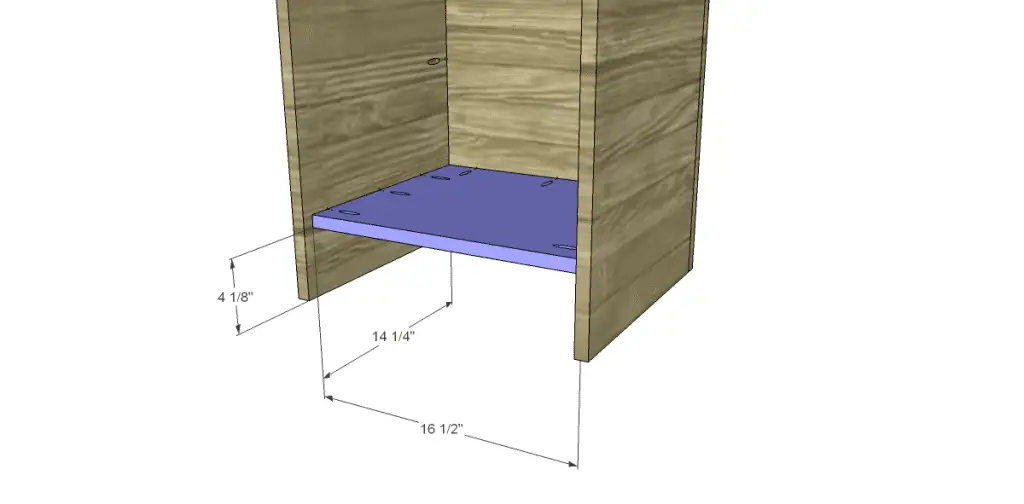
- One – 3/4″ plywood @ 14-1/4″ x 16-1/2″ – Bottom
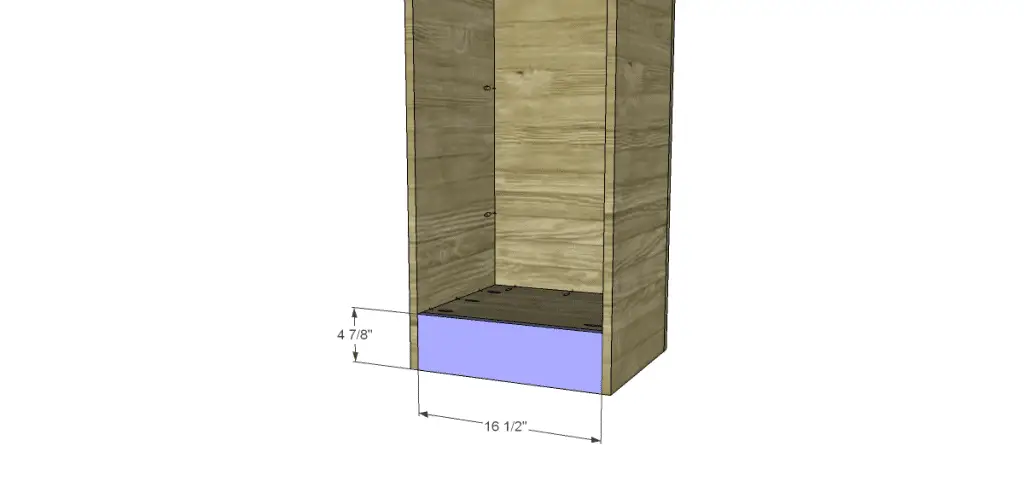
- One – 3/4″ plywood @ 4-7/8″ x 16-1/2″ – Kick Plate
- Two – 3/4″ plywood @ 2-1/2″ x 16-1/2″ – Interior Supports
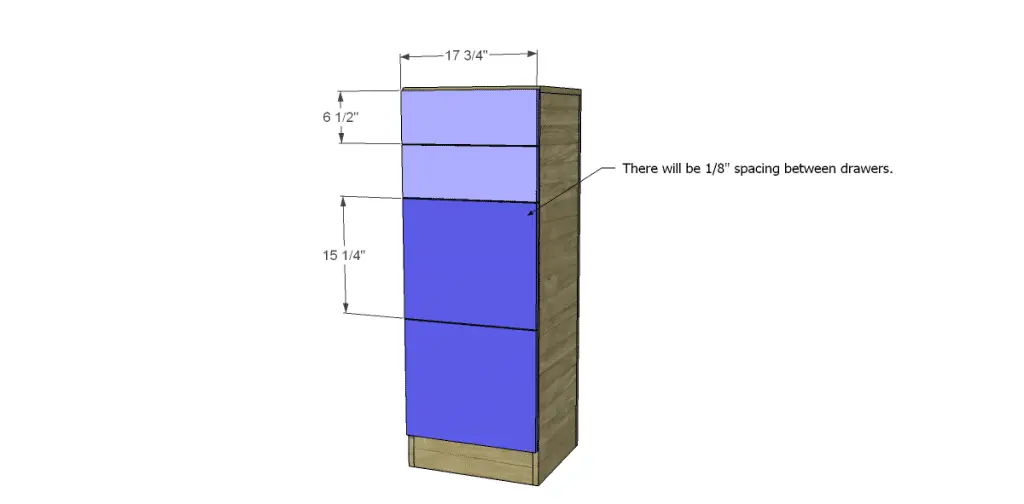
- Two – 3/4″ plywood @ 6-1/2″ x 17-3/4″ – Smaller Drawer Fronts
- Two – 3/4″ plywood @ 15-1/4″ x 17-3/4″ – Larger Drawer Fronts
- Four – 1/2″ plywood @ 5-1/2″ x 15-1/4″ – Smaller Drawer Boxes
- Four – 1/2″ plywood @ 5-1/2″ x 13″ – Smaller Drawer Boxes
- Four – 1/2″ plywood @ 13″ x 15-1/4″ – Larger Drawer Boxes
- Four – 1/2″ plywood @ 13″ x 13″ – Larger Drawer Boxes
- Four – 1/4″ plywood @ 14″ x 15-1/4″ – Drawer Bottoms
Edge banding should be applied to all exposed edges before assembly.
Step One
Cut the pieces for the sides and the back. Drill pocket holes for 3/4″ material in the top of the sides, as well as one long edge at the back. Also drill pocket holes in the top edge of the back. Remember, there will be a right and left! Attach the sides to the back using glue and pocket hole screws.
Step Two
Cut the piece for the bottom. Drill pocket holes in the edges to attach the bottom to the sides and back. Use glue and pocket hole screws to secure the bottom to the sides and back as shown.
Step Three
Cut the piece for the kick plate. Drill pocket holes in each end of this piece and attach to the sides of the cabinet. The top of the kick plate will be flush with the top face of the bottom piece.
Step Four
Cut the piece for the top. Attach the top to the sides and back using glue and pocket hole screws through the pocket holes at the top of the sides and back into the top.
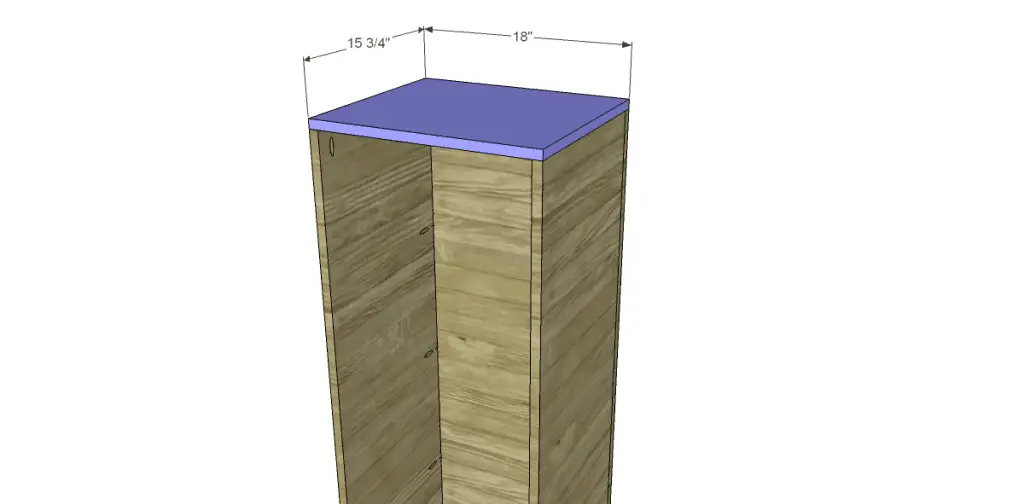
Step Five
Cut the pieces for the inner supports. Drill pocket holes in each end. Attach to the sides as shown with glue and pocket hole screws.
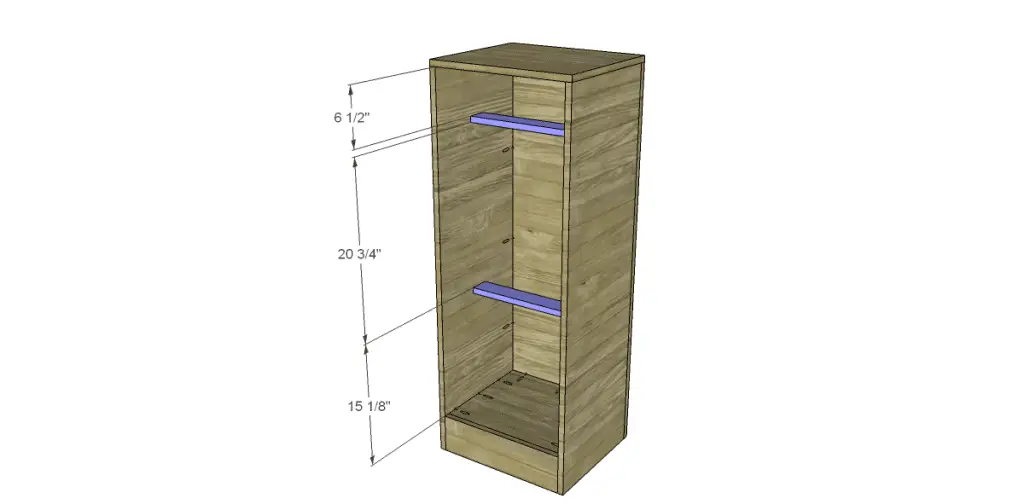
Step Six
Cut the pieces for the drawer boxes. They can be assembled using glue with pocket holes (for 1/2″ material), brad nails, or countersunk screws. I used glue and brad nails to assemble the drawers for my file cabinet. Attach the bottom using glue and brad nails.
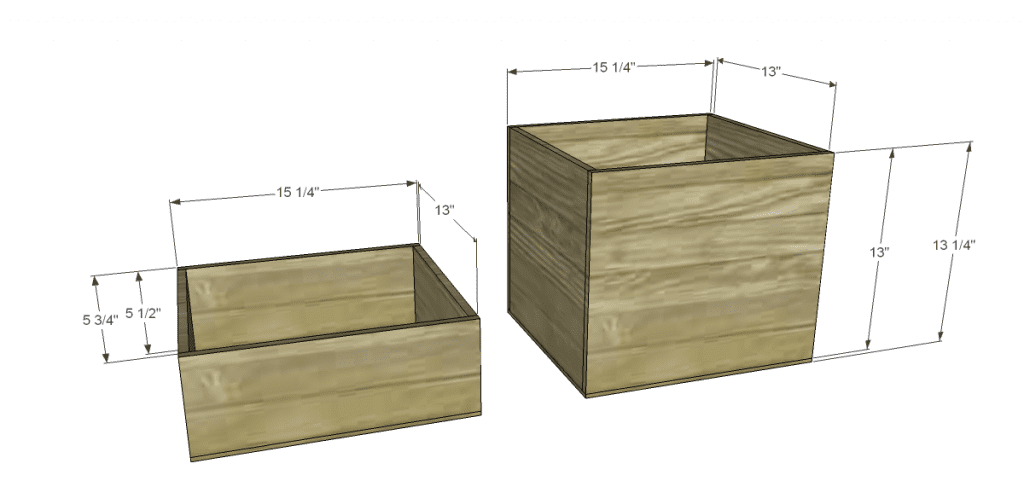
Step Seven
Attach the drawer hardware according to the manufacturer’s instructions. The dimensions shown on the drawing are to the bottom of the smaller upper drawers, and the middle of the larger lower drawers.
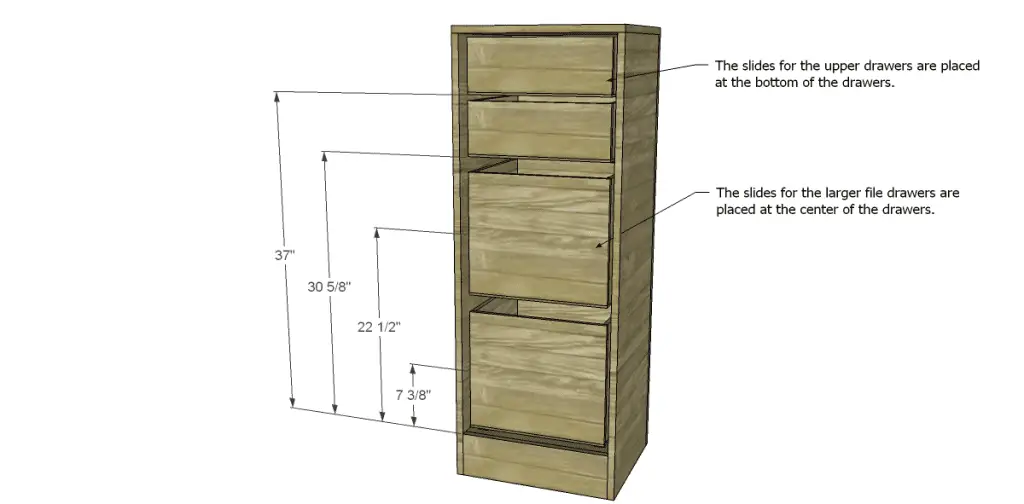
Step Eight
Cut the pieces for the drawer fronts. There will be a 1/8″ gap between the fronts to allow the drawers to freely open and close. FTake a look at this tutorial on installing drawer fronts.
Step Nine
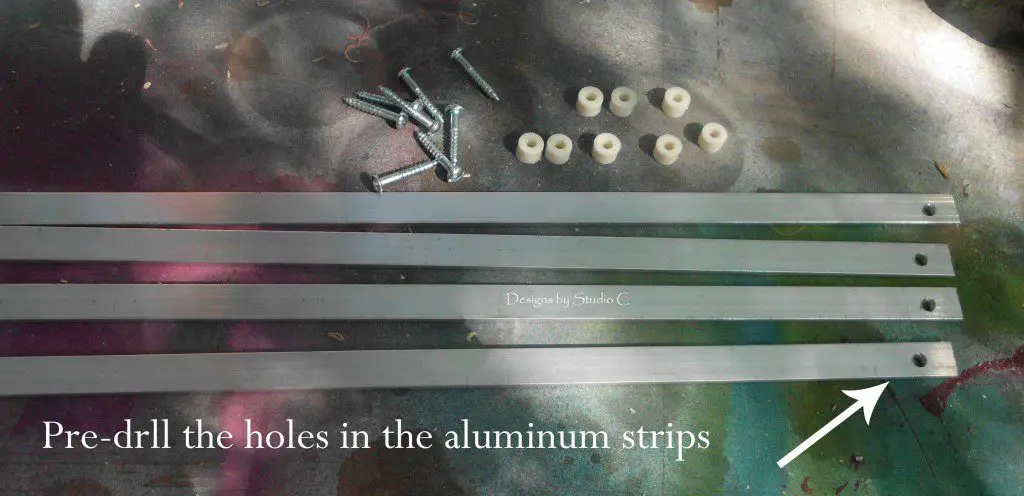
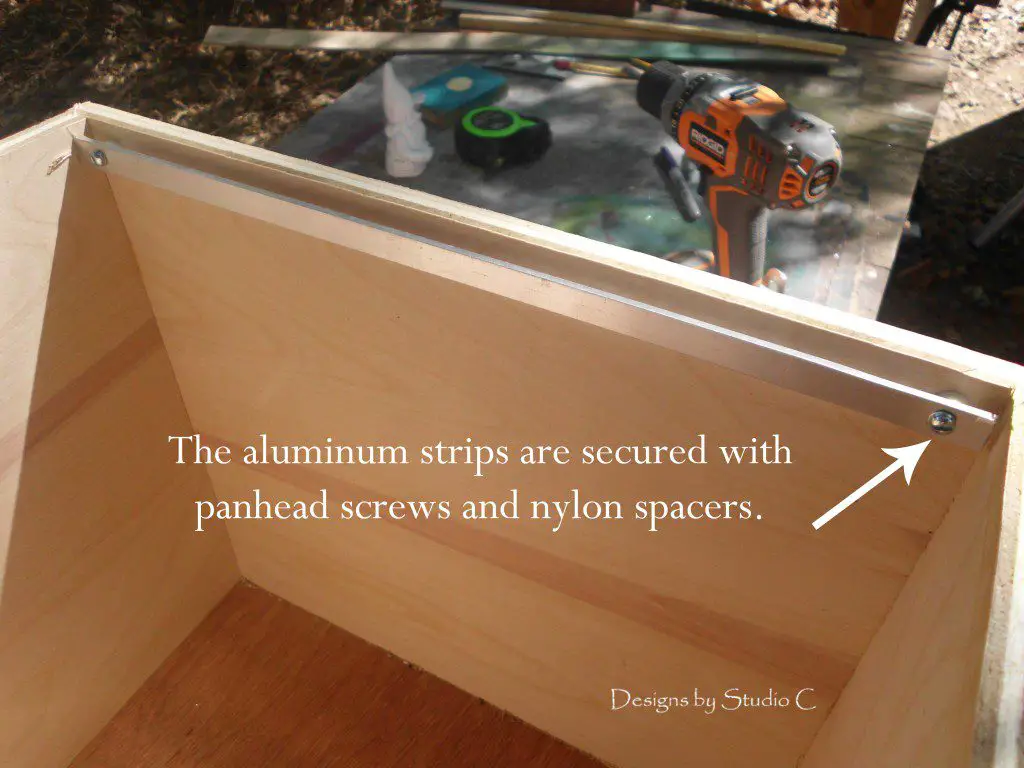
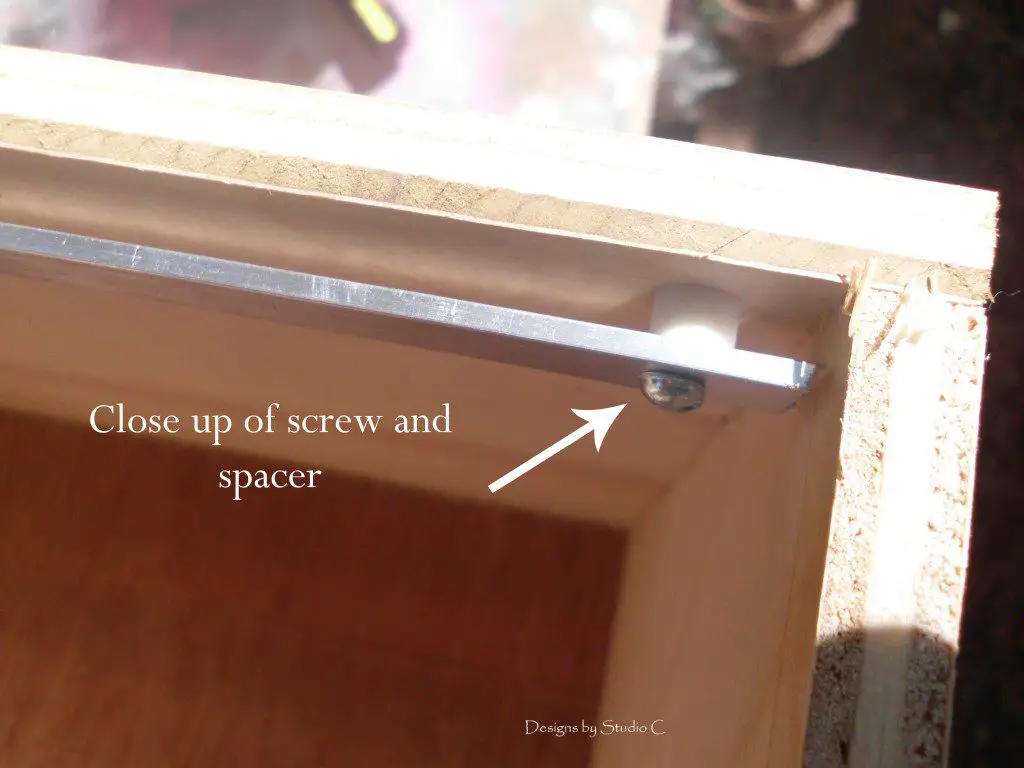
To attach the aluminum strips for the file folders, cut the strips into four 13″ long pieces. Pre-drill a hole in each end of the strip and attach the strips with the 1″ pan head screws each through a spacer into the larger drawer boxes.
Finish the file cabinet as desired. Have any questions about the free furniture plans to build a file cabinet? Leave a comment below!
Originally posted 2012-09-04 08:00:25.

12 Comments
Very cool! That project is a little ambitious for me, but I love that you showed you can DIY! Stopping in from SITS.
Thank you very much! Stop by again soon!!
Are your two “larger” drawers different dimensions (that is, the dimension for the drawers of hte same name are different so I was wondering why)? Thanks.
Hi, Lisa! No, the drawers are not different sizes. The four pieces at 13″ x 13″ are for the sides of the drawer boxes and the four pieces at 13″ x 15-1/2″ are for the front/back of the drawer boxes. This is also shown in the drawing of the drawer boxes which I have now made larger!
so I’ve been pricing a new filing cabinet, and anything decent is crazy expensive. Thank you so much for these plans!!
So glad to hear it – thanks so much for visiting the site and good luck with your project!