A Simple Chair for a Desk or Dining Table
Building a chair always seemed like a complicated task until I tried it… It was so easy, and building chairs became my favorite projects! There are literally a ton of chair plans on this site that all started with these simple wooden chair plans. The plans to build a desk chair are perfect for those wanting to build one but aren’t sure how or are intimidated by the process.
Trust me, this chair is very easy to make. In the following tutorial, I will show you how to make a chair step by step so you will be building chairs like a pro in no time!
I built my example entirely out of Purebond plywood and the only reason I no longer have this chair is because my dog thought the plywood tasted good and ate the legs. This chair can also be made using off the shelf boards or even pallet wood, and is the perfect project to hone chair-building skills!
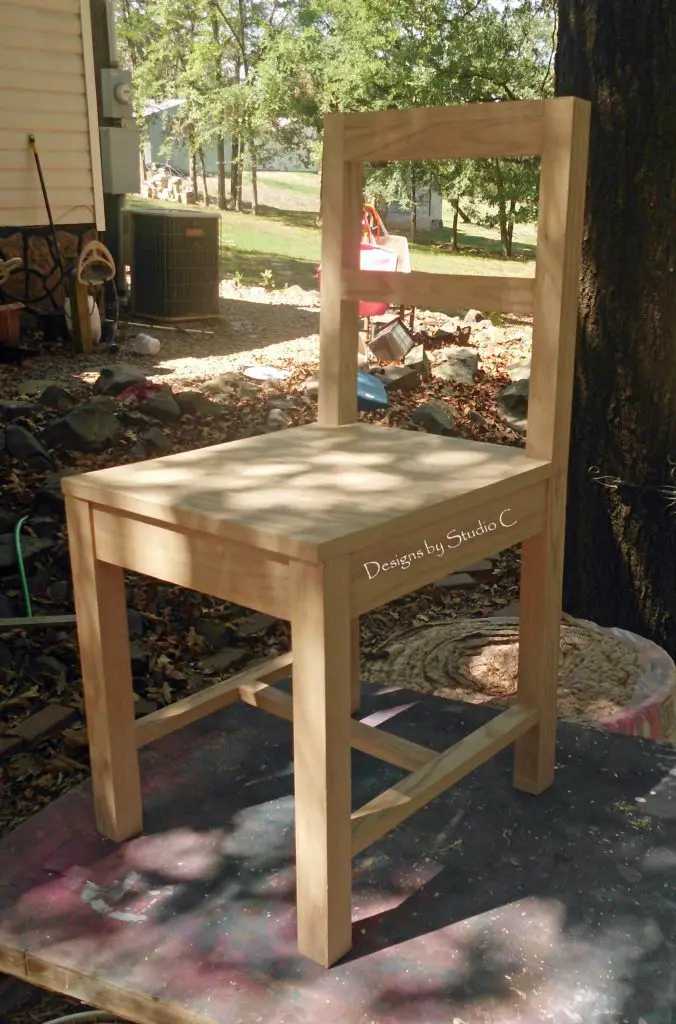
If you’re interested in other wood desk chair plans, farmhouse chair plans, or kitchen chair plans, click “Plans” in the menu at the top of this page, then scroll to “Chairs & Seating”… There, you will find several other plans to build!
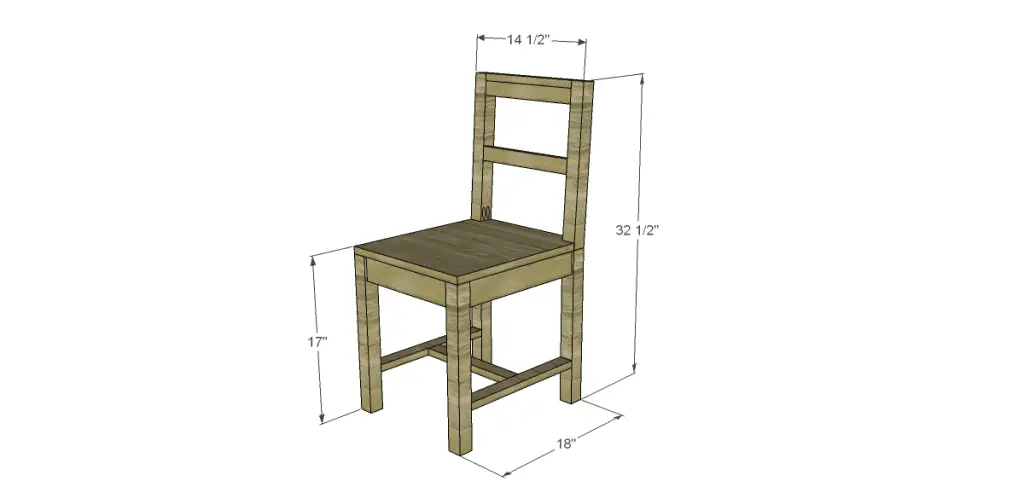
Materials:
- 2-1/2″ pocket hole screws
- 2″ pocket hole screws
- 1-1/4″ pocket hole screws (<– affiliate link!)
- Pocket hole plugs or wood filler
- 1-1/4″ brad nails
- Edge banding for the exposed edges of the plywood seat (optional)
- Wood glue
- Finishing supplies
Tools:
- Kreg jig
- Drill
- Brad nailer
- Saw – miter, circular, or jigsaw
Lumber:
- One 2×2 at 8′
- One 1×3 at 6′
- One 1×2 at 8′
- 2′ x 2′ sheet of 3/4″ plywood
Cut List:
- Six – 2×2 at 16-1/4″ – Legs
- Two – 1×3 at 11-1/2″ – Aprons
- Two – 1×3 at 14″ – Aprons
- Four – 1×2 at 11-1/2″ – Back Slats & Center Stretcher
- Two – 1×2 at 14″ – Stretchers
- One – 3/4″ plywood at 14-1/2″ x 17″ – Seat
Notes About the Project:
- I find it easier to sand all of the pieces prior to assembly
- If you’re using plywood for the seat, apply edge banding to cover the exposed edges before securing it to the frame
Step One
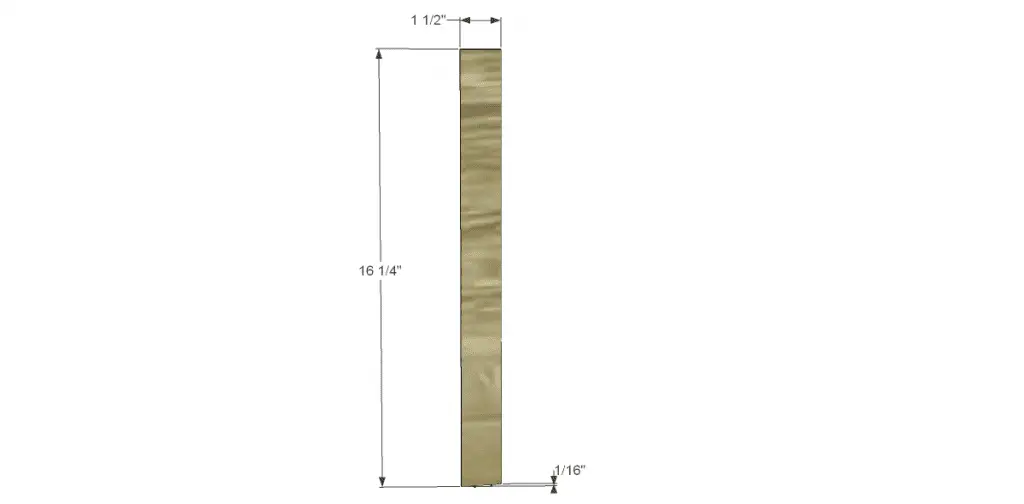
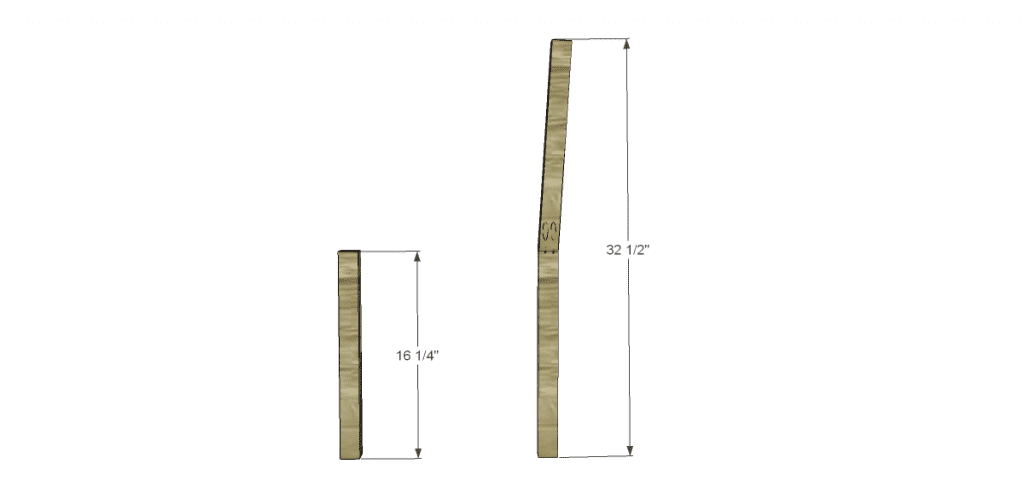
Cut the pieces for the legs. Two of the pieces will have a 1/16″ angle cut at the bottom. This angle is necessary for the angle of the back. Set the Kreg jig for 3/4″ material and drill pocket holes in the bottom of the upper back pieces (the pieces with the angles). Attach to the back leg pieces using glue and 2-1/2″ pocket hole screws. (See drawings) If you choose the back to be straight in line with the back legs, one continuous piece can be cut at 32-1/2″.
I started out making chairs with a two-piece back leg. They’ve always been sturdy and the back has never broken off at the joint.
Step Two
Cut the pieces for the aprons. Drill pocket holes in each end and attach to the legs as shown setting them 1/4″ back from the outside faces of the legs. The 14″ aprons will be the sides and the 11-1/2″ aprons will be the front and back. Use glue and 2″ pocket hole screws.
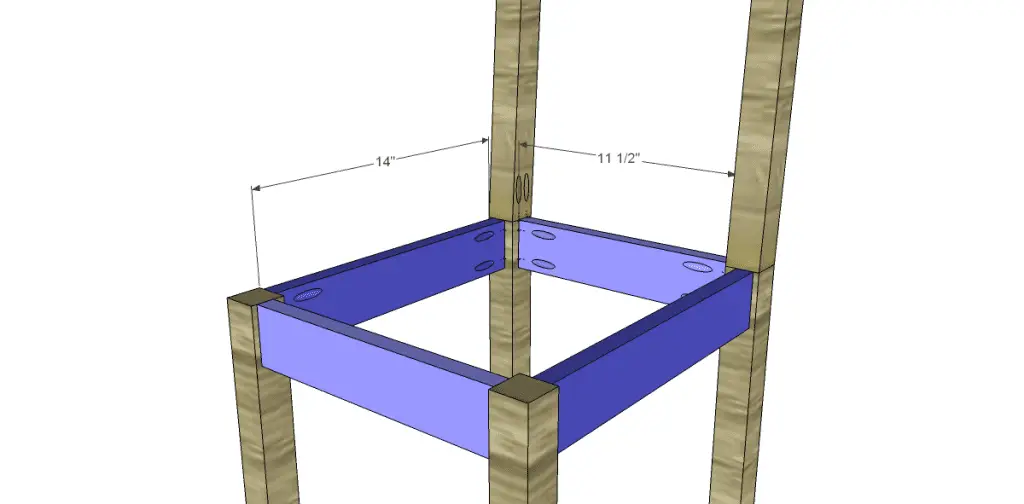
Step Three
Cut the pieces for the back slats. Drill pocket holes in each end and secure to the back legs as shown using glue and 1-1/4″ pocket hole screws.
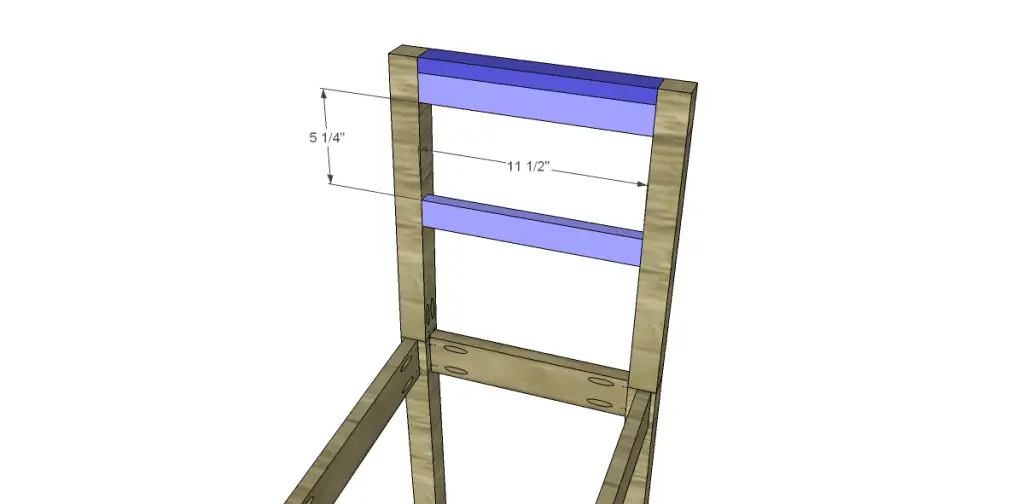
Step Four
Cut the pieces for the stretchers. Drill pocket holes in each and and secure to the legs as shown using glue and 1-1/4″ pocket hole screws. Locate them about 4″ up from the bottom of the legs.
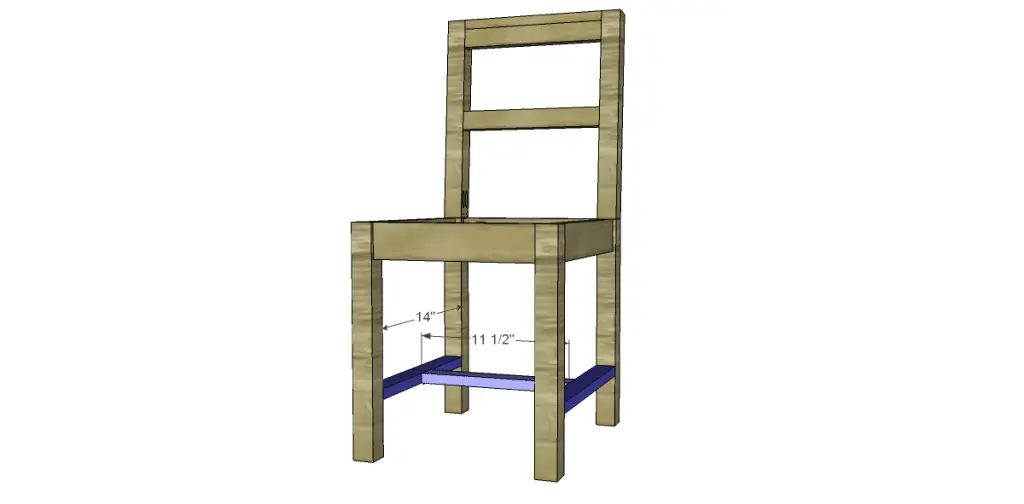
Step Five
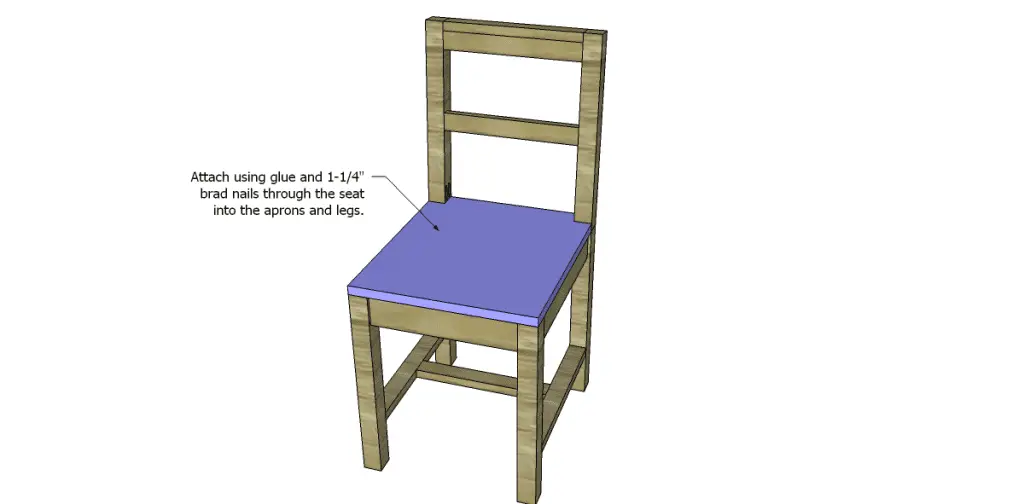
Cut the piece for the seat. Apply edge banding, if desired, and attach to the chair frame using glue and 1-1/4″ brad nails through the top of the seat into the aprons and legs.
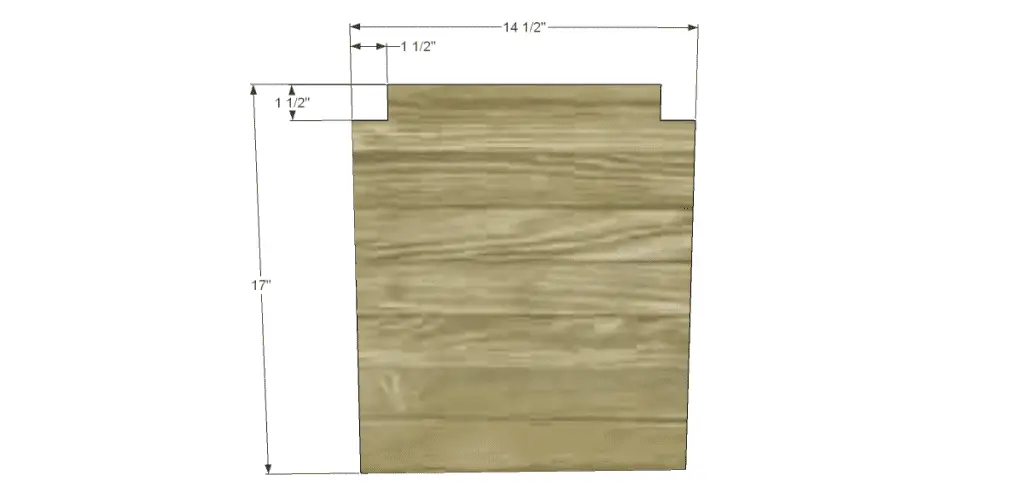
Have questions about how to build a simple chair? Leave a comment below! Have you built a chair using one of my plans? Send me a photo! I’d love to see your project!
Originally posted 2012-09-10 08:00:10.

4 Comments
I really like seeing a photograph of finished projects. The SketchUp plans are great for building but are kind of sterile. The photograph really shows you how great the final product can be.
Good observation, Jake, but unfortunately for me I do not have the time (or resources) to build every plan that is posted! That is where reader photos would really come in handy, hint hint!
Thank you very much for the plans and detailed photographs, it has been a great help to start a small custom furniture project with wood!