
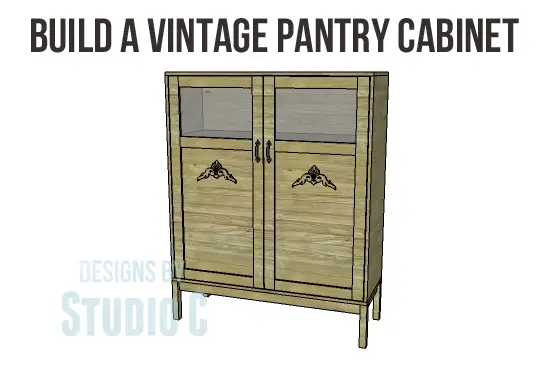
DIY Plans to Build a Vintage Pantry Cabinet
Build a Gorgeous Piece of Furniture for Storage Using the DIY Vintage Pantry Plans
I am really crazy about this furniture piece… As “Plain Jane” as it may look, there are so many ways to finish it to make it uniquely yours to fit your style! The DIY plans to build a Vintage pantry cabinet feature two shelves on the inside, with paneled doors. The cabinet would be great storing dry goods in a kitchen or maybe as linen and towel storage. The cabinet is a quick , easy, and inexpensive build, and is perfect for a first project!
Materials:
- 1-1/4″ pocket hole screws
- 1-1/4″ brad nails
- 1-1/4″ screws
- Edge banding
- Plexiglas for the upper door panels
- 2 sets of hinges
- 2 – cabinet pulls
- 2 decorative carved wood pieces for the doors
- Wood glue
- Sandpaper (100, 150, 220 grits)
- Finishing supplies (primer & paint, or stain, sealer)
Lumber:
- 3 – 1×2 at 8′
- 5 – 1×3 at 8′
- 1 – 2×2 at 4′
- 1 – 4′ x 4′ sheet of plywood
- 2 sheets of 3/4″ plywood
Cut List:
- 4 – 2×2 at 10″ – Legs
- 2 – 1×3 at 45″ – Base Frame/
- 4 – 1×3 at 15″ – Base Frame
- 1 – 3/4″ plywood at 18″ x 48″ – Bottom
- 2 – 3/4″ plywood at 18″ x 48-1/2″ – Sides
- 1 – 3/4″ plywood at 46-1/2″ x 48-1/2″ – Back
- 1 – 3/4″ plywood at 18″ x 48″ – Top
- 4 – 1×2 at 46-1/2″ – Shelf Frames
- 6 – 1×2 at 14-3/4″ – Shelf Frames
- 2 – 3/4″ plywood at 16-1/4″ x 46-1/2″ – Shelves
- 4 – 1×3 at 48-1/4″ – Door Stiles
- 6 – 1×3 at 18-1/16″ – Door Rails
- 2 – 1/4″ plywood at 18-9/16″ -x 30″ – Lower Door Panels
- 2 – 1/4″ Plexiglas at 11-3/4″ x 18-9/16″ – Upper Door Panels
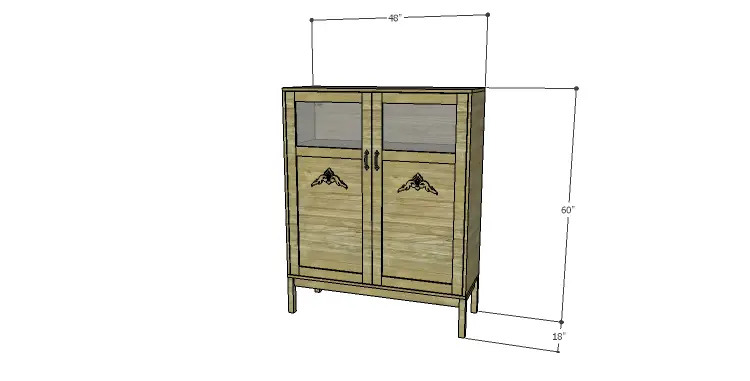
Click on the drawings for a larger view!
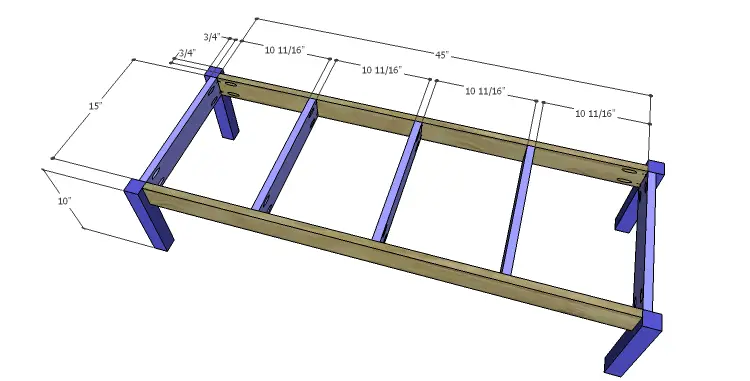
Step One
Edge banding will be applied to the exposed edges of the plywood prior to assembly!
Cut the pieces for the legs and the base frame. With the pocket hole jig set for 3/4” material, drill pocket holes at each end of the 1×3 pieces. Assemble the base as shown using glue and 1-1/4″ pocket hole screws. The stretchers will be positioned so that the back faces are flush with the inside face of the legs.
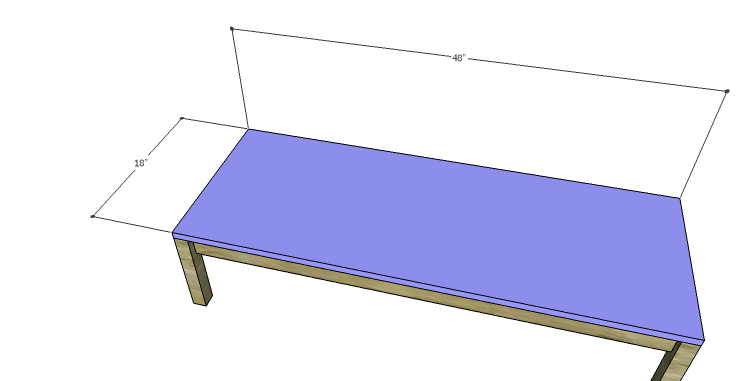
Step Two
Cut the piece for the bottom. Position the piece so that each side is flush with the legs (and overhangs the stretchers) and secure in place using glue and 1-1/4″ brad nails.
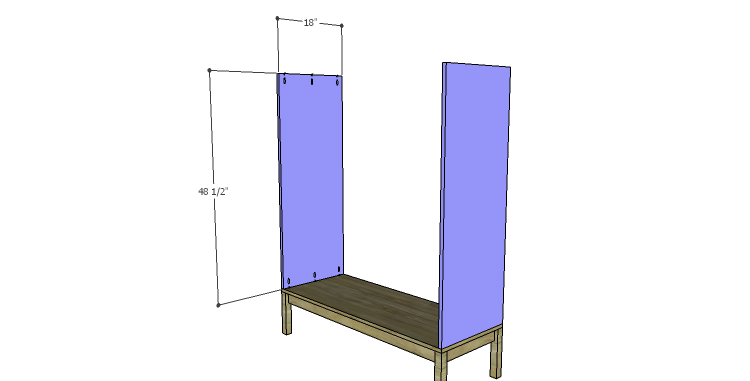
Step Three
Cut the pieces for the sides. Drill pocket holes in the top and bottom edges. Secure the sides to the bottoms using glue and 1-1/4″ pocket hole screws.
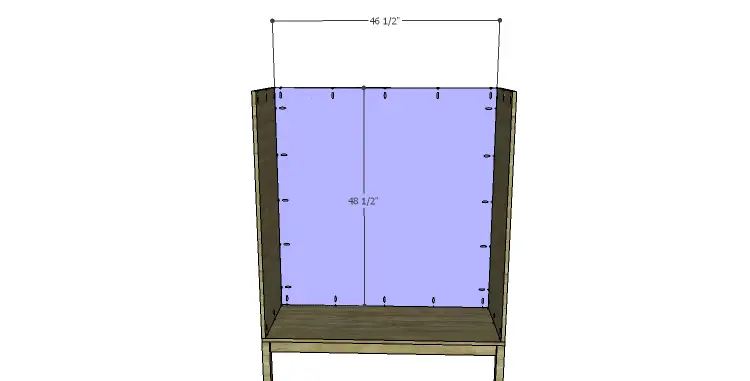
Step Four
Cut the piece for the back and drill pocket holes in all four edges. Secure the back to the sides and bottom using glue and 1-1/4″ pocket hole screws.
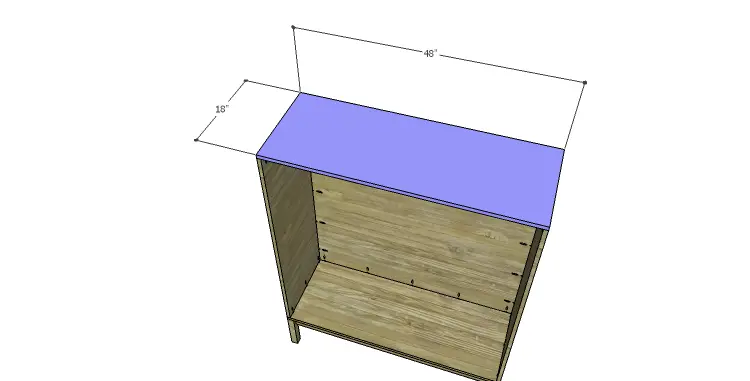
Step Five
Cut the piece for the top. Secure to the cabinet using glue and 1-1/4″ pocket hole screws. The edges of the top will be flush with the sides, front, and back of the cabinet.
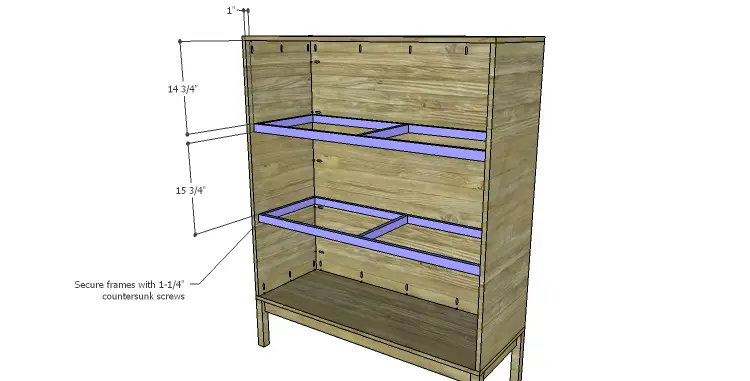
Step Six
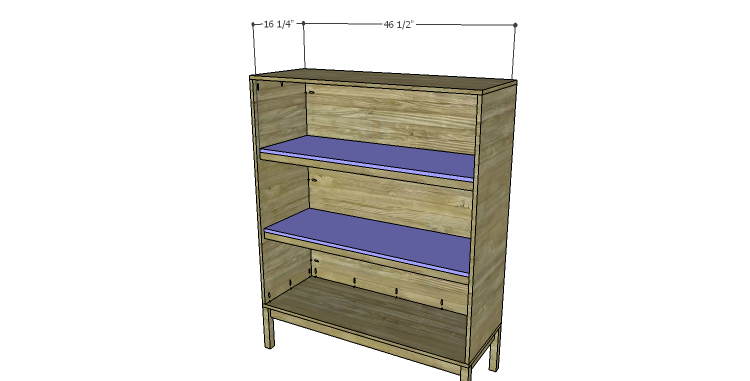
Cut the pieces for the shelf frames and drill pocket holes in each end of the shorter pieces. Assemble the frames as shown using glue and 1-1/4″ pocket hole screws.
Position the frames in the cabinet and secure in place using glue and 1-1/4″ countersunk screws. The frames will be located 1″ back from the front edge of the cabinet.
Cut the pieces for the shelves. Position them on the frames and secure them in place using glue and 1-1/4″ brad nails.

Step Six
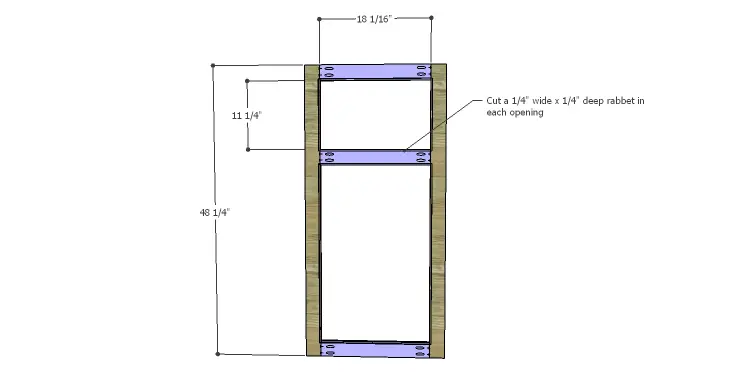
Cut the pieces for the doors and drill pocket holes in each end of the shorter pieces. Assemble the door frame as shown using glue and 1-1/4″ pocket hole screws. Use a router and a 1/4″ rabbeting bit to cut a rabbet in each opening on the doors.
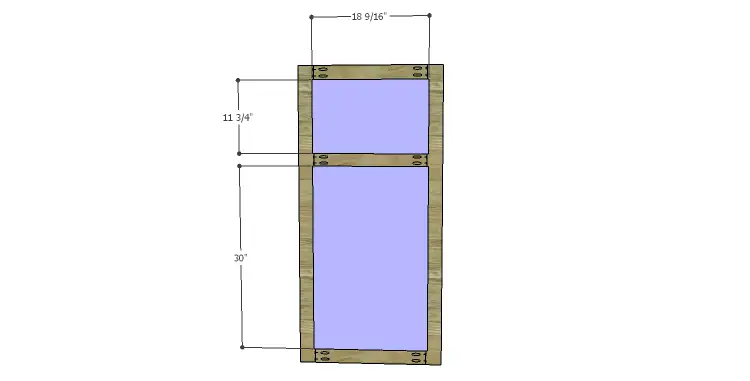
Cut the Plexiglas to fit the upper opening and the 1/4″ plywood to fit the lower opening. Secure the panels in place on the door frames using silicone.
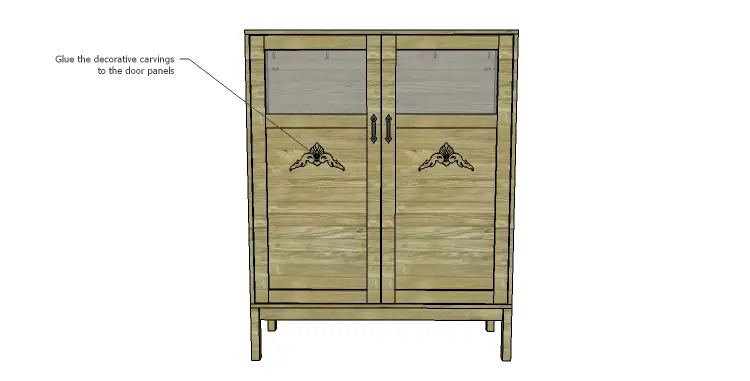
Install the hinges on the doors, then install the doors in the cabinets. Install the cabinet pulls.

Finish as desired! Add the decorative carved pieces to the front panels of the doors, staining or painting as desired.
Punched aluminum, decorative wire, or mirrors can be used as the panels in the doors. The doors would also look awesome using the glue-resist technique and a neat damask pattern instead of the carved pieces. Have questions or a comment about the DIY plans to build a Vintage pantry cabinet? Leave a comment below or contact me at cher {at} designsbystudioc {dot} com!
Originally posted 2014-07-25 08:00:18.