
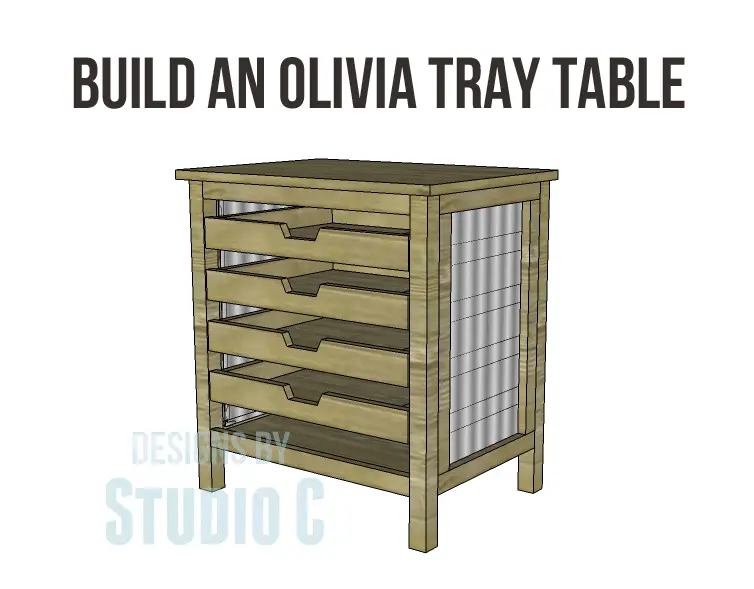
An Easy to Build Piece for Storage
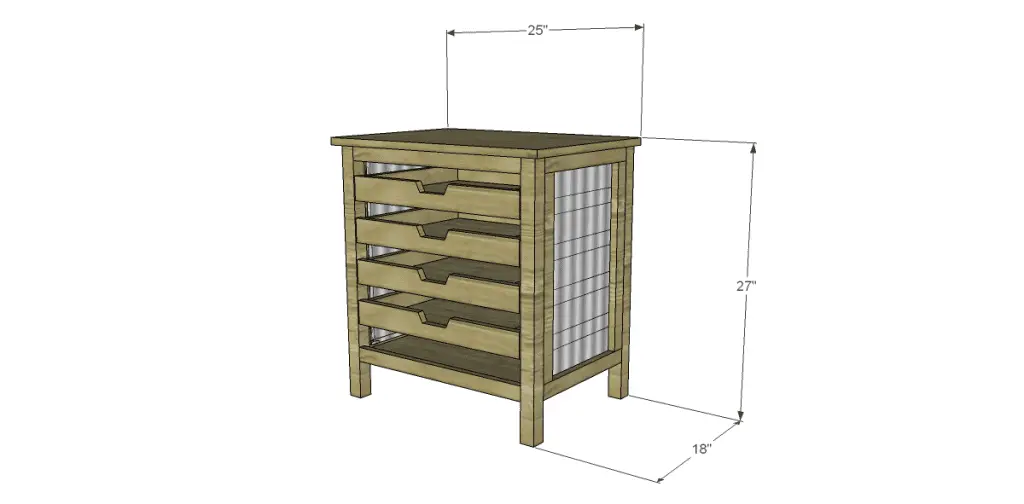
Here is another table I’m sure I’ll be adding to my “to-build-just-because” list… Sometimes I just can’t help myself! The plans to build an Olivia Tray Table will help create a fantastic piece for a living space or a craft area to store a variety of items including magazines, craft supplies, linens, etc! The side panels are created with decorative punched aluminum. How cool is this??
Materials:
- 1-1/4″ pocket hole screws
- 1″ screws
- 1/2″ washer-head screws
- 1-1/4″ brad nails
- 4 sets of 14″ ball-bearing drawer slides
- Decorative punched aluminum for the sides
- Finishing supplies
Lumber:
- 3 – 1×2 at 8′
- 3 – 1×3 at 8′
- 2 – 2×2 at 6′
- 1 half sheet of 3/4″ plywood
Cut List:
- 4 – 2×2 at 26-1/4″ – Legs
- 4 – 1×2 at 14-1/4″ – Side Frames
- 4 – 1×2 at 19-1/4″ – Side Frames
- 1 – 3/4″ plywood at 20-1/2″ x 22-1/4″ – Back
- 2 – 1×2 at 20-1/2″ – Stretchers
- 1 – 3/4″ plywood at 15-3/4″ x 22″ – Bottom
- 8 – 1×2 at 14-1/4″ – Drawer Spacers
- 1 – 3/4″ plywood at 18″ x 25″ – Top
- 4 – 3/4″ plywood at 14″ x 18″ – Drawer Bottom
- 8 – 1×3 at 14″ – Drawer Sides
- 4 – 1×3 at 19-1/2″ – Drawer Back
- 4 – 1×3 at 20-1/4″ – Drawer Front
Note:
It will be much easier if each section is finished before assembly.
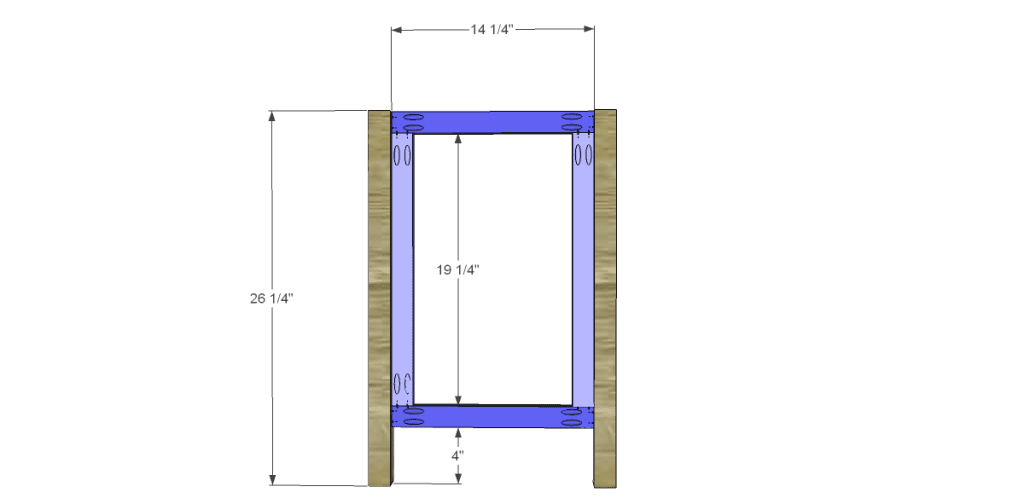
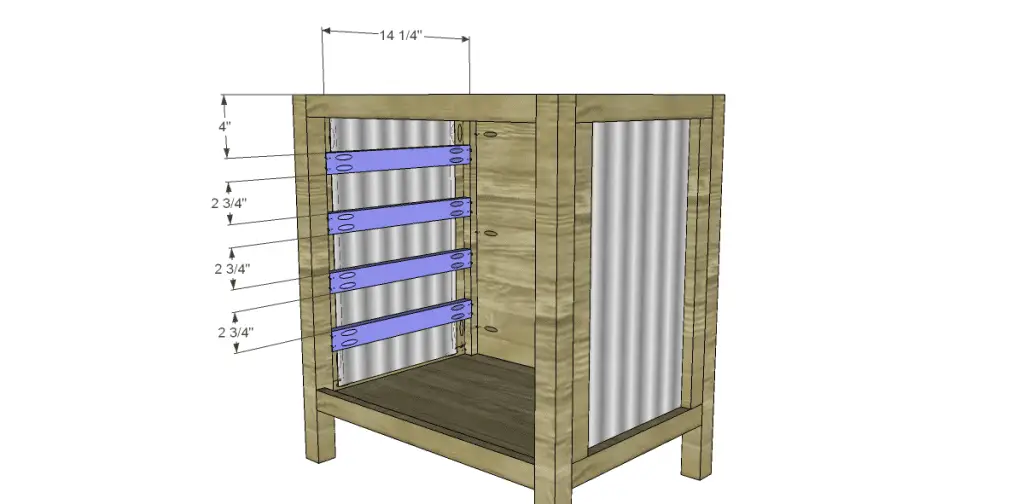
Step One
Cut the pieces for the legs and the side frames. Drill pocket holes in each end of the 1×2 pieces. Assemble the frame as shown using glue and 1-1/4″ pocket hole screws. The front face of the frame pieces will be flush with the outside face of the legs.
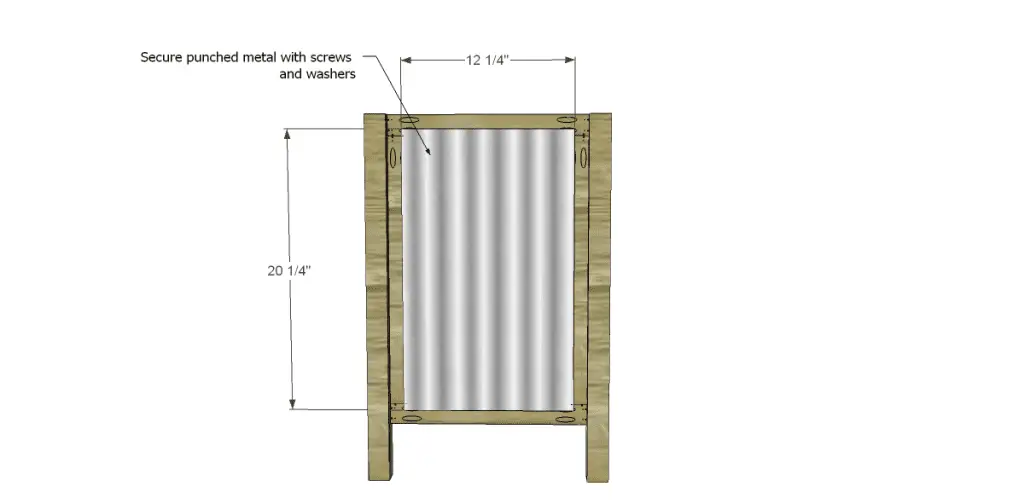
Cut the decorative aluminum into two 12-1/4″ x 20-1/4″ pieces. Spray paint the pieces. When dry, attach to the inside of the side frames using the 1/2″ washer head screws.
 Step Two
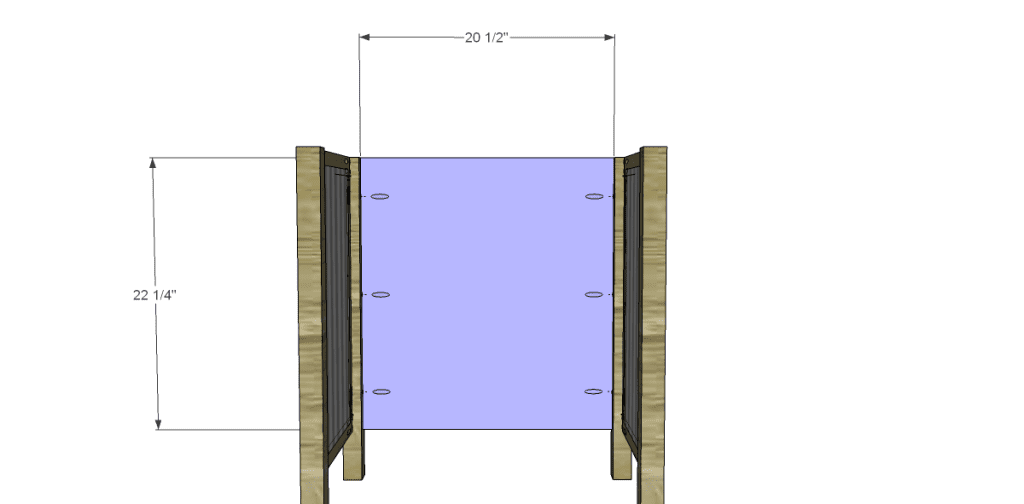
Cut the piece for the back and drill pocket holes in each side as shown. Secure to the legs using glue and 1-1/4″ pocket hole screws. The outside face of the back will be flush with the outside face of the legs.
Step Three
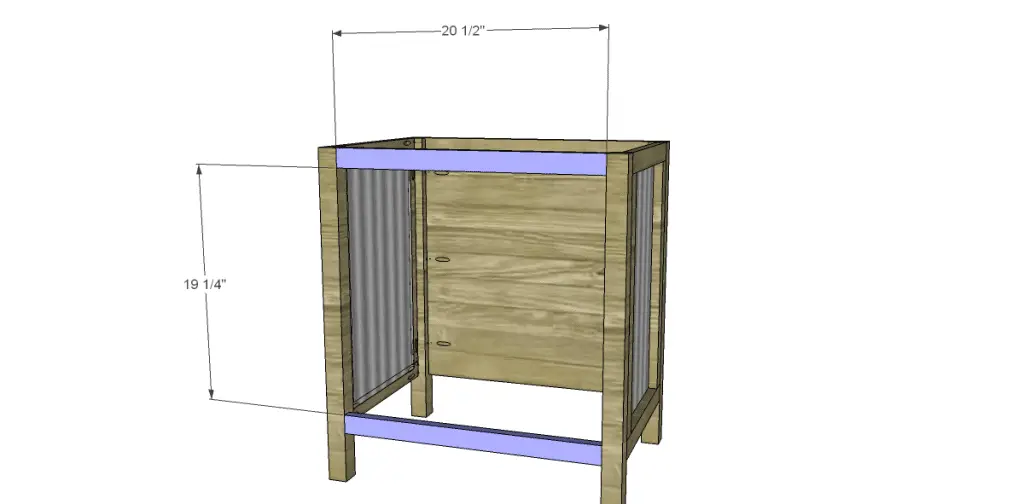
Cut the pieces for the stretcher and drill pocket holes in each end. Position as shown then secure using glue and 1-1/4″ pocket hole screws.
Step Four
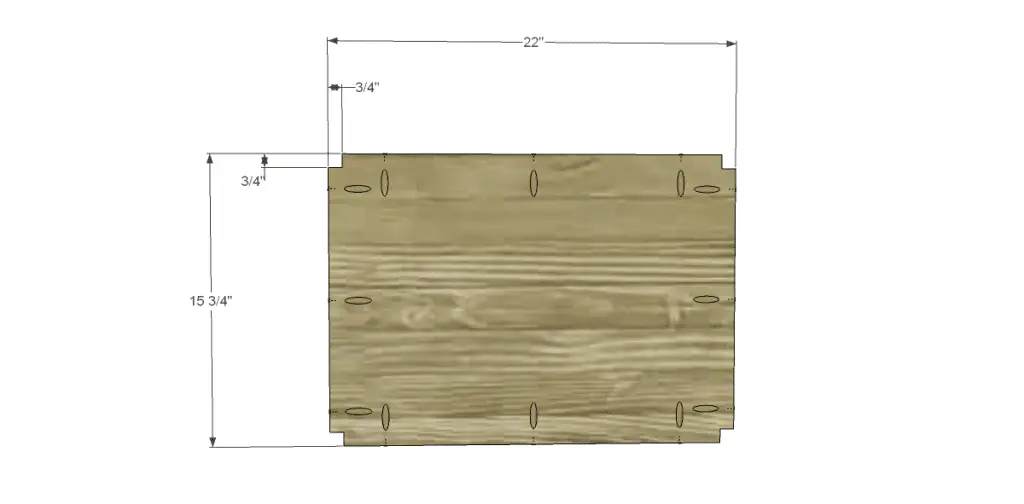
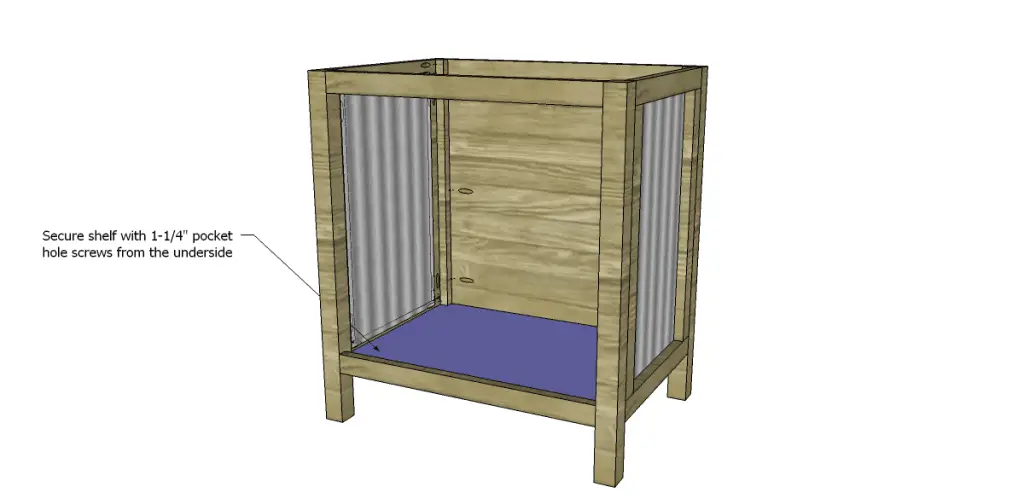
Cut the piece for the bottom. Cut the notches as shown using a jigsaw or bandsaw, and drill pocket holes as shown. Secure to the bottom using glue and 1-1/4″ pocket hole screws. The back side of the bottom with be flush with the bottom edge of the back, lower stretcher, and lower frame pieces.
 Step Five
Cut the pieces for the drawer spacers and drill pocket holes in each end. Secure to the legs as shown using glue and 1-1/4″ pocket hole screws.
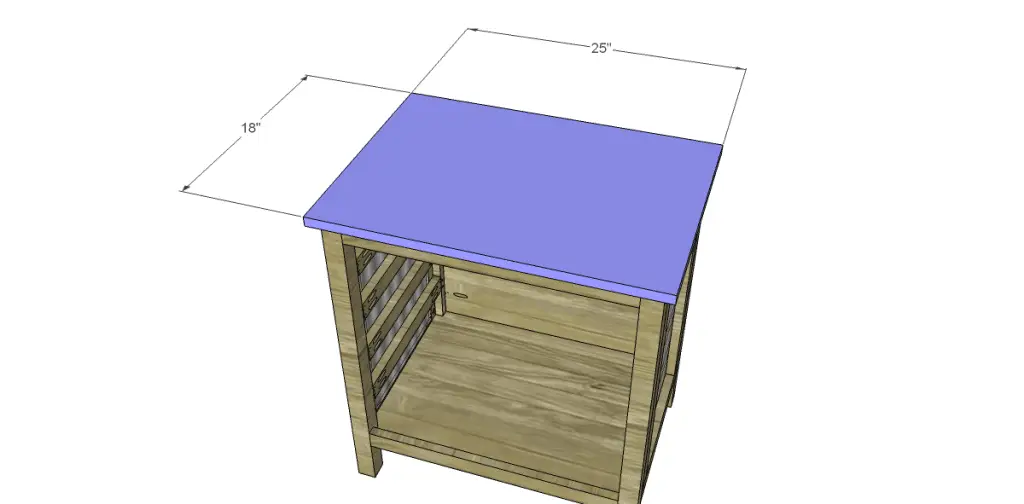
Step Six
Cut the piece for the top. Secure to the top of the cabinet with 3/4″ overlapping the sides and front using glue and 1-1/4″ brad nails.
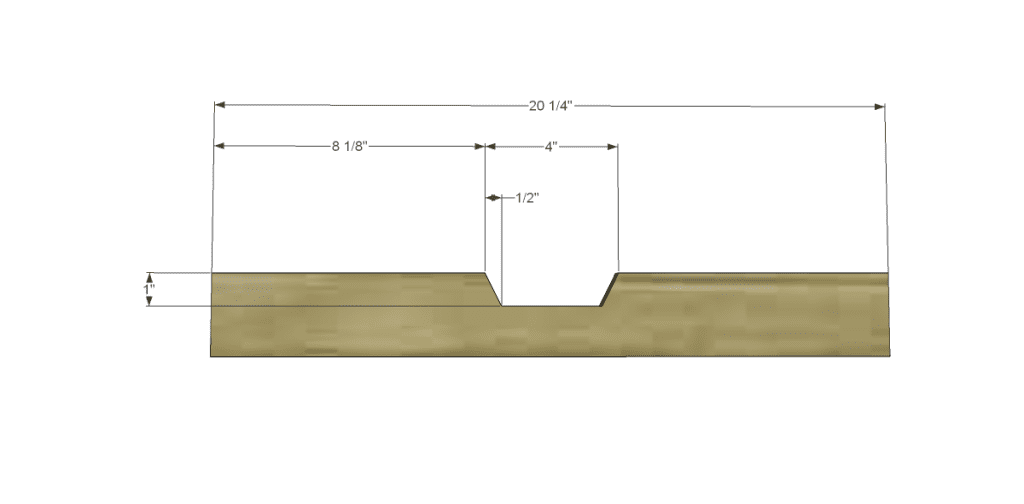
Step Seven
Cut the pieces for the drawers. Cut the notch in the fronts using a jigsaw or bandsaw. Drill pocket holes in each end of the side pieces as well as all four edges of the bottom. Assemble as shown using glue and 1-1/4″ pocket hole screws. The fronts will overlap the drawer box by 3/8″ on each side.
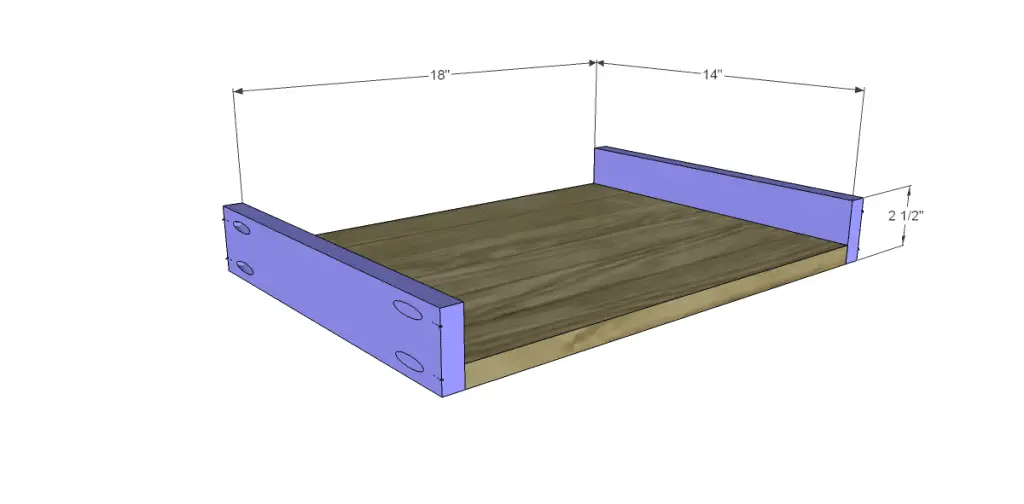
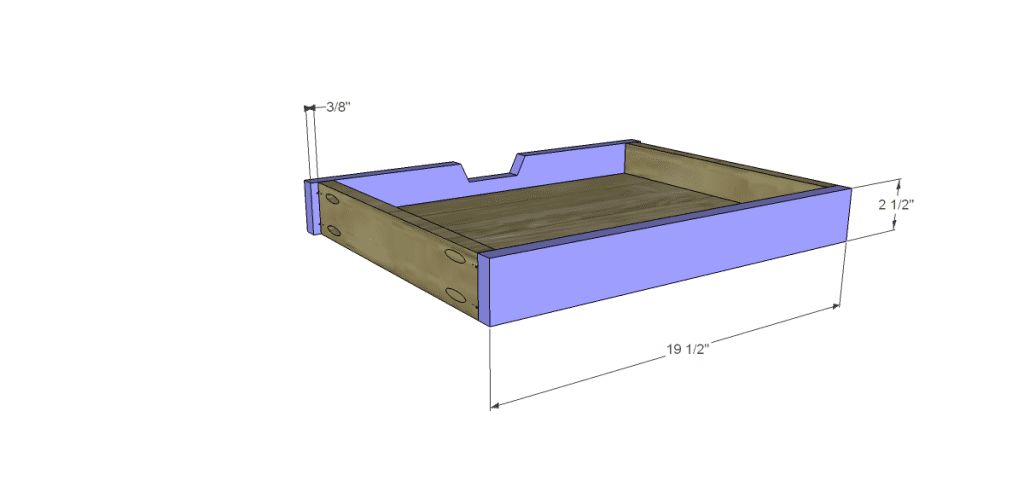
Install the drawer slides according to the manufacturer’s instructions. Follow this easy tutorial on installing drawer slides! Make any necessary adjustments.
Finish as desired!
The sides in the DIY tray table can also be created with chicken wire for a “country look”, or even painted peg board if used in a shop or craft room. Of course, plain 1/2″ plywood panels can also be used!
Have questions about the plans to build an Olivia Tray Table? Leave a comment below!
Originally posted 2013-06-19 08:00:18.


Comments are closed.