An Easy to Build Curved Leg Footstool
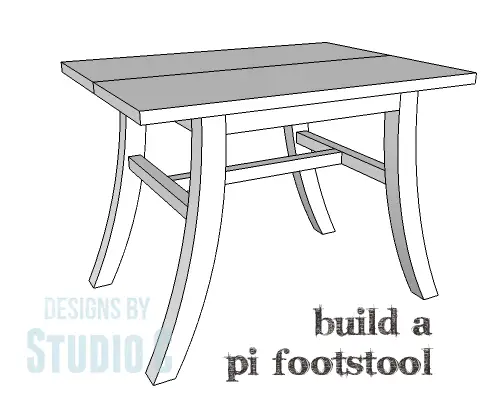
Hey there! I decided to call this footstool plan “Pi” because I think it resembles the mathematical symbol! Building this stool is a breeze, especially with the leg templates provided!
Materials:
- 1-1/2″ pocket hole screws (<– affiliate link!)
- 2-1/2″ pocket hole screws
- 1-1/4″ brad nails
- Wood glue
- Sandpaper (100, 150, 220 grits)
- Finishing supplies (primer & paint, or stain, sealer)
Lumber:
- 2 – 1″ square dowels at 3′ OR
- 1 – 1″ square dowel at 4′
- 1 – 1×10 at 4′
- 1 – 2×2 at 6′
- 1 – 2×6 at 6′
Cut List:
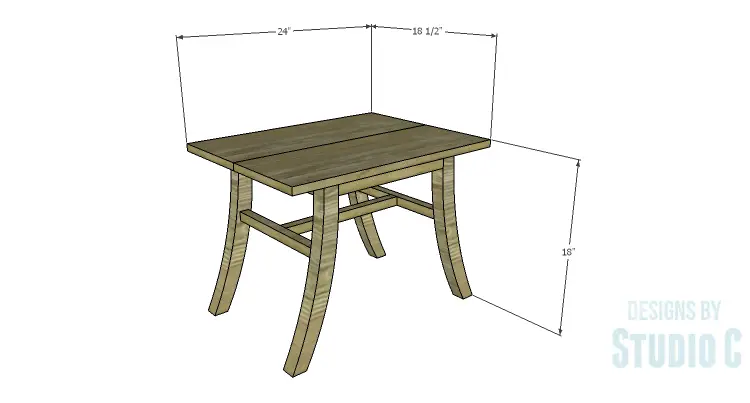
- 4 – 2×6 at 17-1/4″ – Legs
- 4 – 2×2 at 13″ – Framing
- 2 – 1″ square dowels at 13″ – Stretchers
- 1 – 1″ square dowel at 14-1/2″ – Center Stretchers
- 2 – 1×10 at 23-7/8″ – Top
Step One
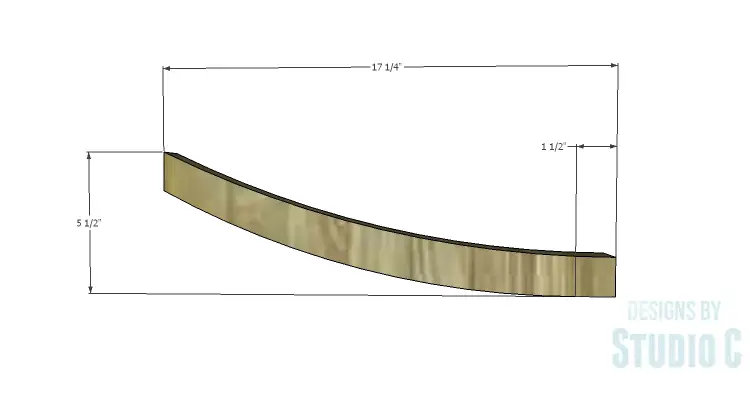
Cut the 2×6 pieces to length for the legs. Print the templates. Align the sheets at the registration marks and tape the sheets together. Cut out the templates and trace around the template on the 2×6 material. Cut out the legs using a jigsaw or a bandsaw.
Step Two
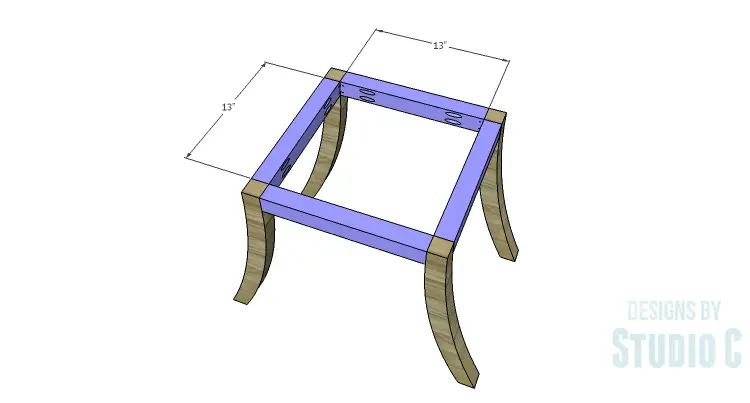
Cut the pieces for the framing. With the pocket hole jig set for 1-1/2″ material, drill pocket holes in each end of each piece. Secure the framing to the legs using glue and 2-1/2″ pocket hole screws.
Step Three
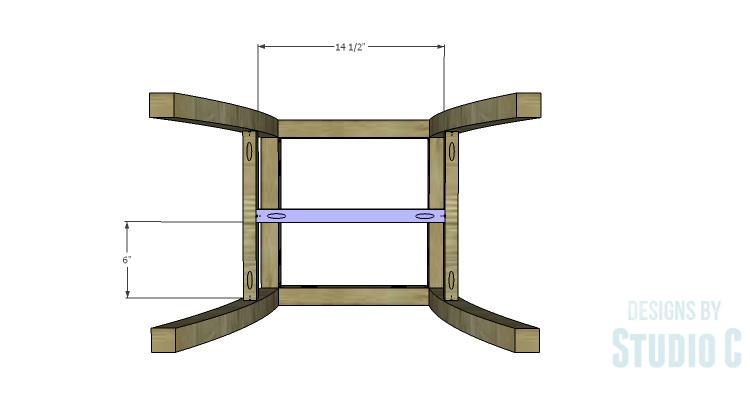
Cut the pieces for the stretchers from the 1″ dowels. Set the pocket hole jig for 3/4″ (or 1″) material and drill one pocket hole in each end of each piece. Secure the side stretchers to the inside of the legs as shown using glue and 1-1/2″ pocket hole screws locating the stretchers approximately 5″ below the framing.
Secure the center stretcher to the center of each stretcher using glue and 1-1/2″ pocket hole screws. Orient the pocket holes so they face down and will not have to be filled.

Step Four
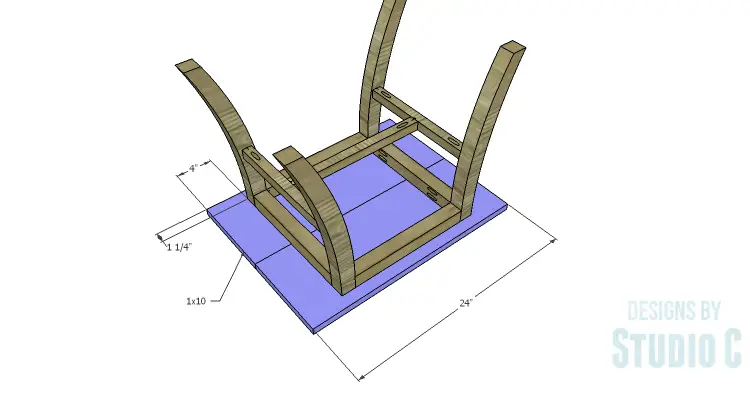
Cut the pieces for the top. The top will overhang the ends by approximately 4″ and the sides by approximately 1-1/4″. Secure the top in place using glue and 1-1/4″ brad nails.
Finish as desired.
This footstool has a very unique style due to the curved legs. Here’s a link to another easy to build footstool: Ottoman or Footstool Using a Wooden Spool.
A box cushion can be made to fit the top of the stool to make it more comfortable, if desired. Have any questions about the DIY plans to build a Pi Footstool? Leave a comment below!
Originally posted 2015-06-03 08:00:14.

Comments are closed.