An Easy to Build Stool for Bar or Counter Height
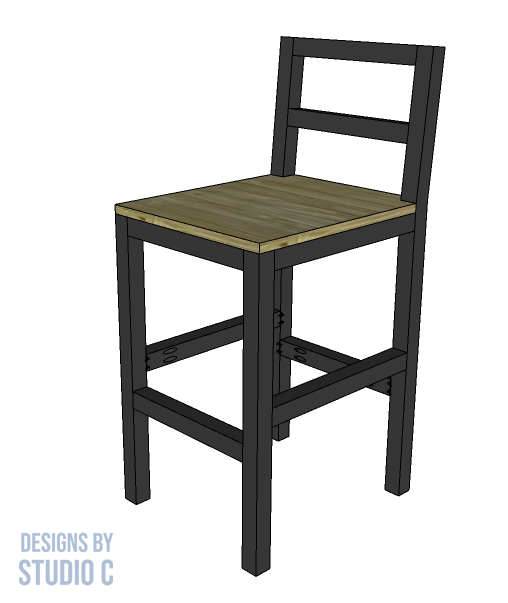
The easy to build Daya low back bar stool uses off the shelf boards for a super-simple project, and can be easily modified as a counter-height option. The entire frame is built using 2x2s with a plywood seat, and a fabulous cushion can be made, if desired. The materials and lumber list are outlined to build one stool and since this project is so easy, several can be built in a weekend!
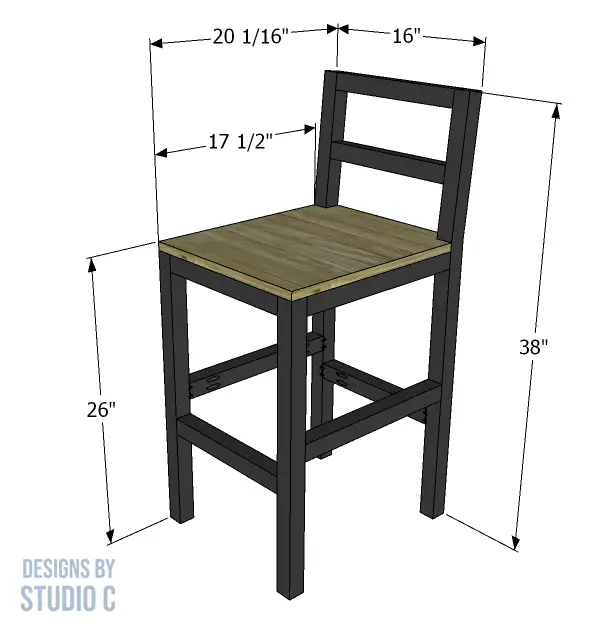
Materials:
- 2-1/2” Pocket Hole Screws (<– affiliate link!)
- 2” Brad Nails
- Edge Banding
- Wood Glue
- Sandpaper (80, 120, 220 grits)
- Finishing Supplies
Lumber:
- 3 – 2×2 at 8′
- 1 – 2×4 at 8′
- 1 – 2’x2’ sheet of 3/4” plywood
Cut List:
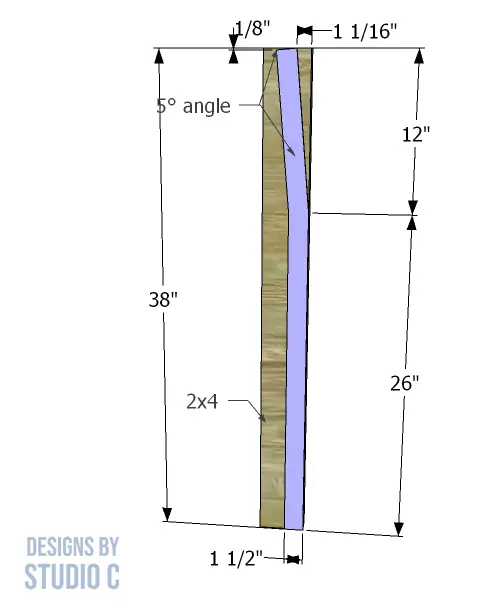
- 2 – 2×4 at 38″ – Back Legs
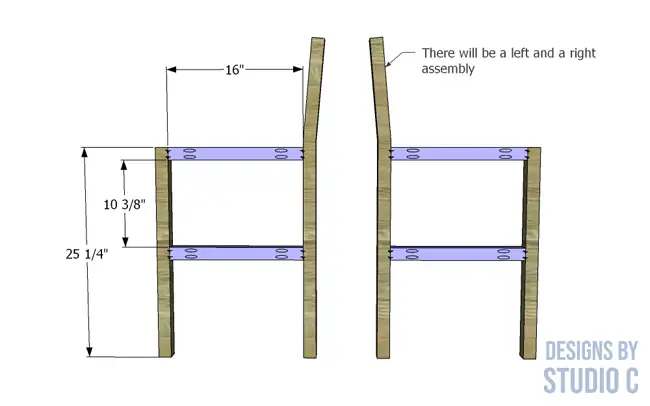
- 2 – 2×2 at 25-1/4″ – Front Legs
- 4 – 2×2 at 16″ – Side Stretchers
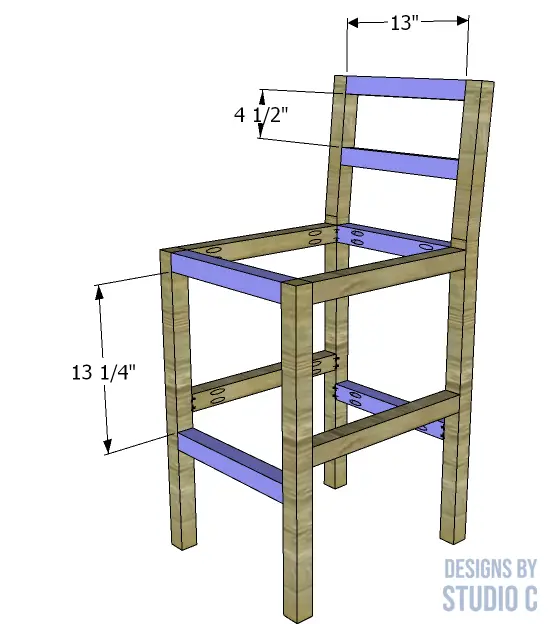
- 6 – 2×2 at 13″ – Front, Back and Backrest Stretchers
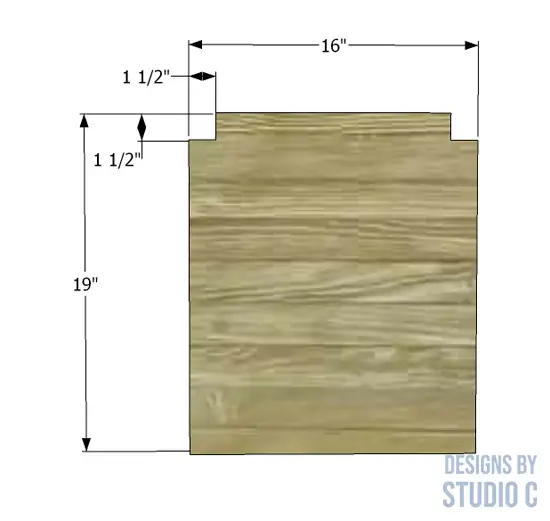
- 1 – 3/4″ plywood at 16″ x 19″ – Seat
Notes About the Project:
- Sand all pieces prior to assembly
- Apply edge banding to the exposed edges of the seat
Step One
Cut the pieces for the back legs. Print the template. Align the registration marks on the sheets and tape the sheets together. Cut out the template and trace it onto the board for the back legs or use low-tack spray adhesive to secure the template then cut out the legs with a jigsaw or bandsaw.
Step Two
Cut the pieces for the front legs and the side stretchers. With the pocket hole jig set for 1-1/2″ material, drill pocket holes in each end of the stretchers. Secure the stretchers to the front and back legs using glue and 2-1/2″ pocket hole screws. There will be one right and one left assembly.
Step Three
Cut the pieces for the front, back and back rest stretchers, and drill pocket holes in each end. Secure the stretchers to the side assemblies as shown using glue and 2-1/2″ pocket hole screws.
Pro tip: Orient the pieces for the back rest with the pocket holes facing down so they don’t have to be filled!
Step Four
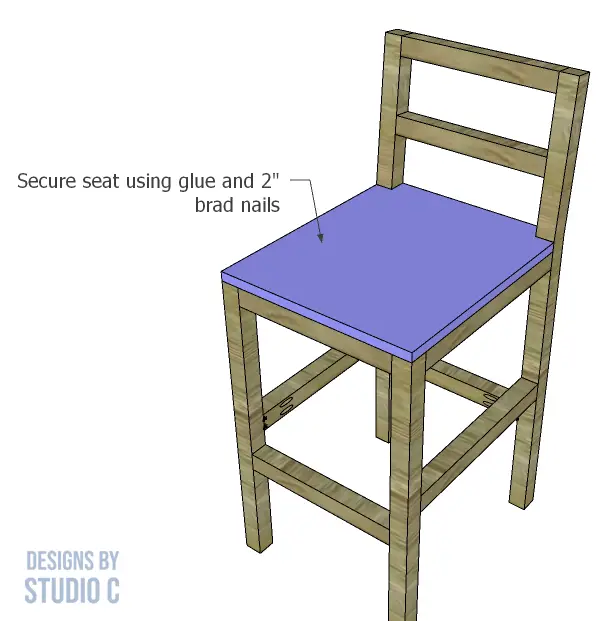
Cut the piece for the seat, and cut the notches for the back legs using a jigsaw. Secure the seat to the frame using glue and 2″ brad nails.
Finish the stool as desired!
Have questions about the plans to build the Daya low back bar stool? Leave a comment below!

