
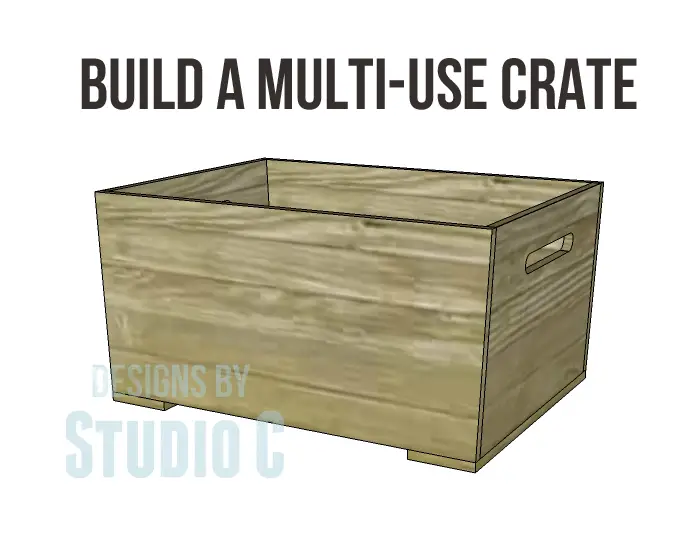
Build a Plywood Multi-Use Crate
An Easy to Build Piece for Storage
Looking for a quick and easy weekend project? I’ve got just the project for you! A multitude of these crates can be whipped out in a weekend… Use them for storing logs by the fireplace, books and magazines, corral wayward school supplies, etc. Plus, in true DbSC form, they are virtual blank slates to be finished however you choose – why not use pallet boards for the front and back pieces? Or maybe sand, distress, then stencil the crate? How about leaving the wood in its natural color then applying paste wax to protect it? The possibilities are endless and I plan on constructing a few of these beauties for myself!
Materials:
- 1″ brad nails (<– affiliate link!)
- Wood glue
- 1″ hole saw or spade bit (<– affiliate link!)
- Jigsaw
- Finishing supplies
Lumber:
- 1 full sheet of 1/2″ plywood should yield three crates (another project perfect for PureBond plywood!!)
Cut List:
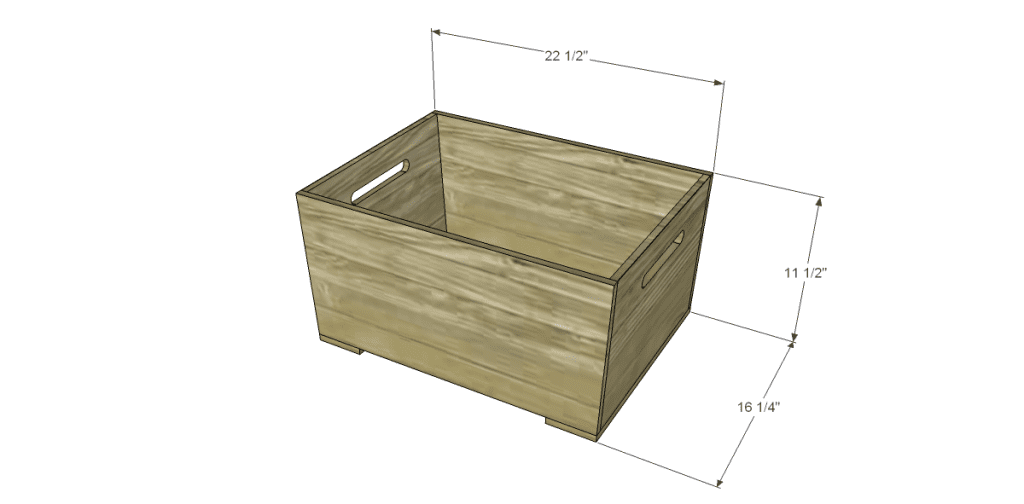
- 1 – 1/2″ plywood at 15-1/4″ x 20-1/2″ – Bottom
- 2 – 1/2″ plywood at 11″ x 15-1/4″ – Sides
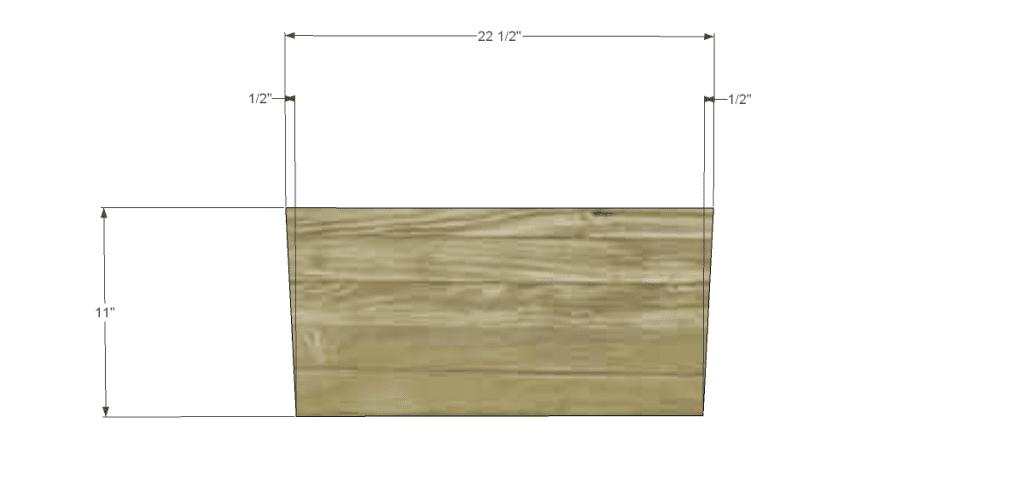
- 2 – 1/2″ plywood at 11″ x 22-1/2″ – Front & Back
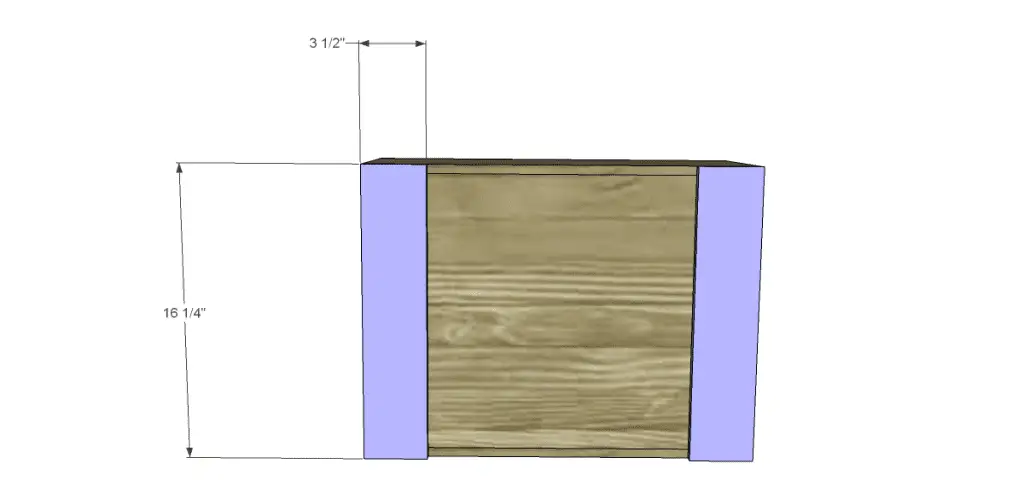
- 2 – 1/2″ plywood at 3-1/2″ x 16-1/4″ – Bottom Runners
Click on the drawings for a larger view!
Step One
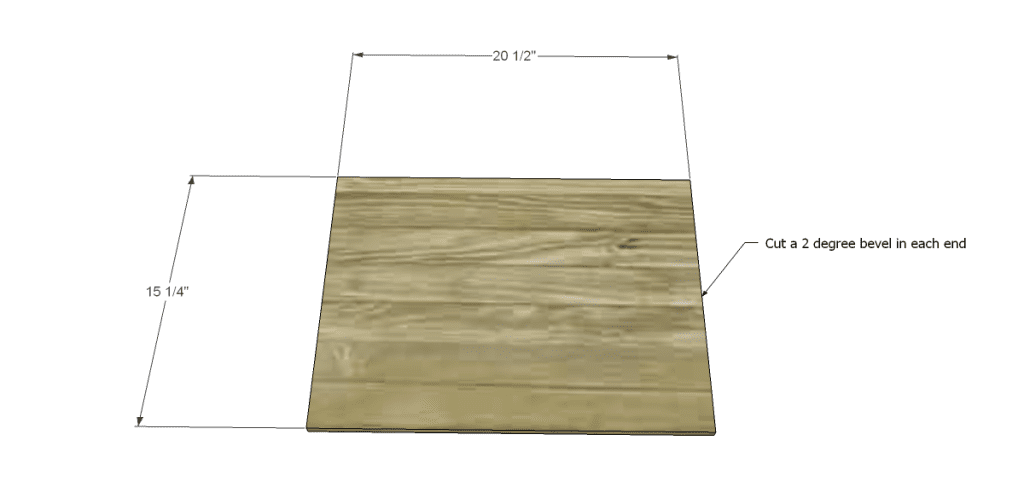
Cut the piece for the bottom. Using a table saw, cut a 2 degree bevel in each shorter end. This will allow the sides to sit at an angle and match the angle of the front and back pieces.
Step Two
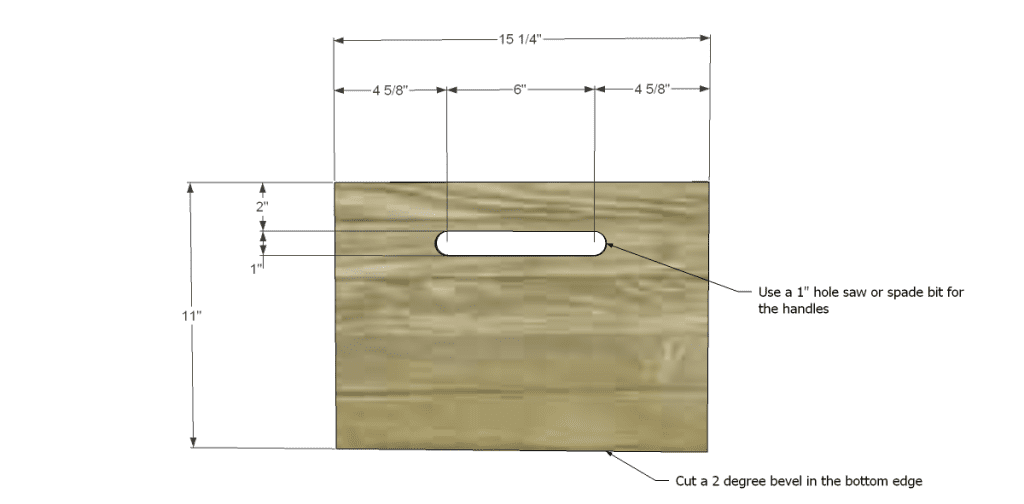
Cut the pieces for the sides. Cut a 2 degree angle in the bottom edges. Mark the position for the handles. They will measure 1″ high by 6″ wide on center (actual measurement including “circles” will measure 7″). Using the 1″ hole saw or spade bit, cut two 1″ circles. Connect the circles at the top and bottom by drawing a line, then cutting along the line with a jigsaw. Attach the sides to the bottom using glue and 1″ brad nails.
Step Three
Cut the pieces for the front and back as shown. Attach to the sides and bottom using glue and 1″ brad nails.
Step Four
Cut the pieces for the bottom runners. Attach to the bottom of the crate using glue and 1″ brad nails.
Finish as desired! I used the glue resist technique to make a scrolled design on the sides of the crate I built.
Put these free DIY woodworking plans for a plywood Multi-Use Crate to good use – these are fabulous crates to use for firewood, to corral toys, or even laundry! Do you plan on building a crate or two? Share it with me when you’re finished!! I’d love to see the final results – cher {at} designsbystudioc {dot} com
Originally posted 2013-08-23 08:00:29.
[…] by cutting the pieces to build your crate or box. Great plans for boxes or crates can be found here, here, and here! Mark the position for the handle cutouts as indicated in the […]
[…] by cutting the pieces to build your crate or box. Great plans for boxes or crates can be found here, here, and here! Mark the position for the handle cutouts as indicated in the […]