
DIY Furniture Plans – Power Tool Challenge: Porch & Patio Edition
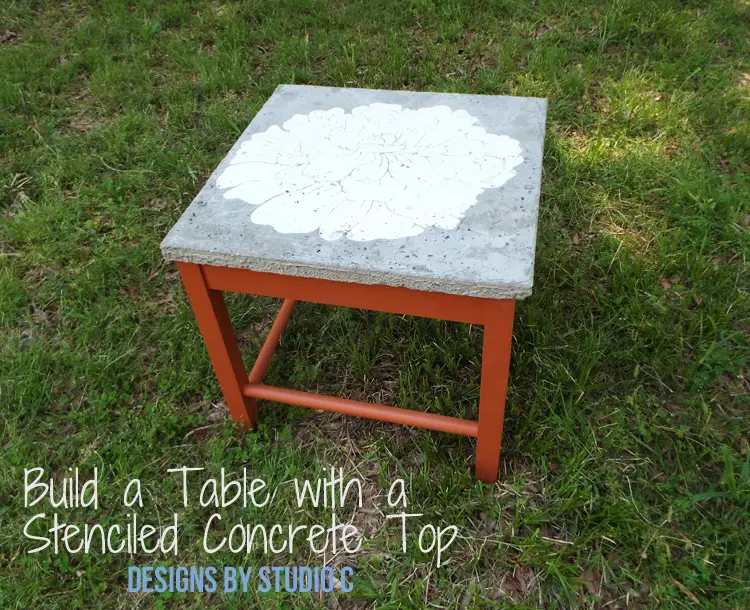
It is that time again, my friends – Power Tool Challenge time! This month’s theme is “Porch and Patio” and it couldn’t be a better topic with better timing! I have been working hard around my house which includes building deck though the deck will not be completed for at least another month. It certainly doesn’t stop me from building fabulous furniture for it! The DIY furniture plans to build a Stenciled Concrete Top Table feature a wood frame with round rungs at the bottom and a simple concrete top. I used a solid exterior stain on the table frame then added a stencil to the concrete top with exterior paint. It looks fabulous, if I say so myself!
Materials:
- 1-1/4″ pocket hole screws (<– affiliate link!)
- 2-1/2″ screws
- 1 – 50lb bag of quick setting concrete mix
- Wood glue
- Sandpaper (100, 150, 220 grits)
- Finishing supplies (primer & paint, or stain, sealer)
- Stencil & Exterior Paint
Tools Needed:
- Miter Saw or Circular Saw
- Drill
- Pocket Hole Jig
- 1″ Forstner Bit
Lumber:
- 2 – 1″ Round Dowels at 4′ (or 4 at 3′)
- 1 – 1×3 at 4′
- 1 – 1×3 at 6′
- 1 – 2×2 at 8′
- Scrap 1x2s at approximately 24″ long – total of four
Cut List:
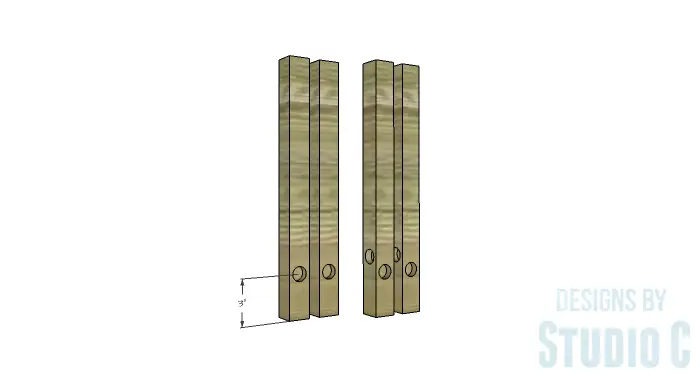
- 4 – 2×2 at 17-1/4″ – Legs
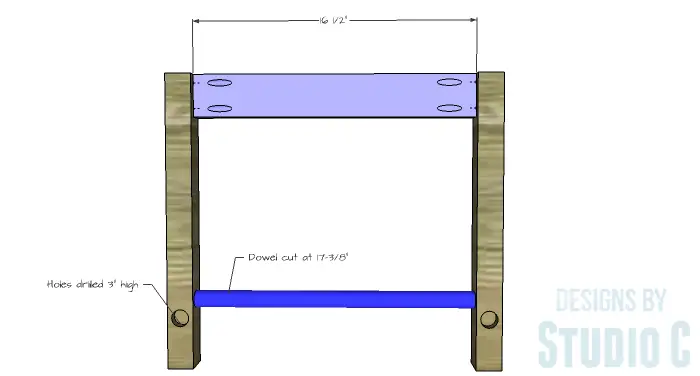
- 4 – 1×3 at 16-1/2″ – Aprons
- 4 – 1″ dowels at 17-3/8″ – Bottom Rungs
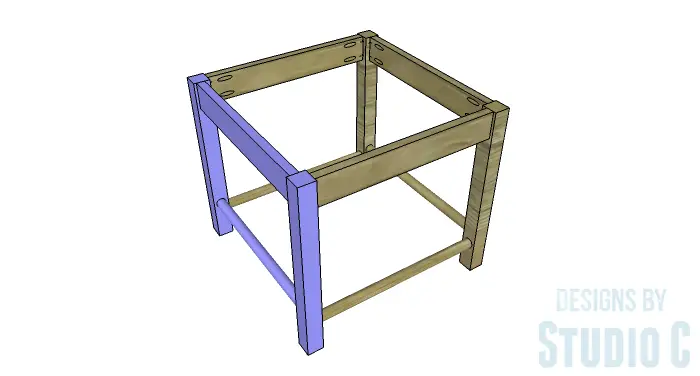
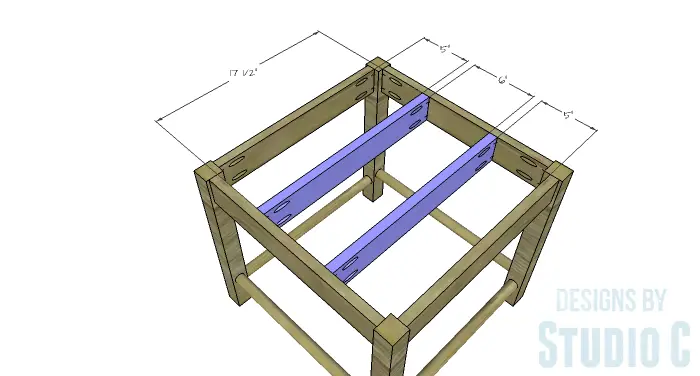
- 2 – 1×3 at 17-1/2″ – Top Supports
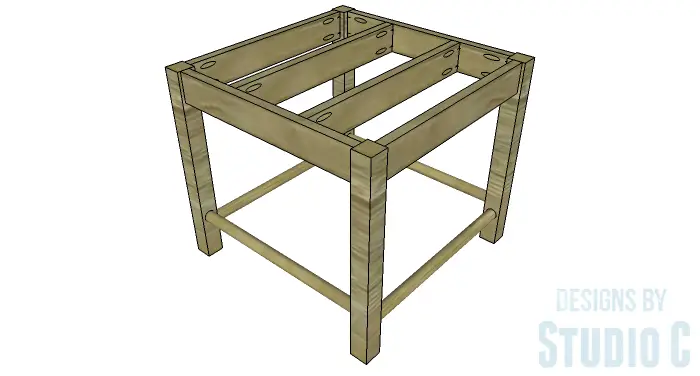
To construct the base:
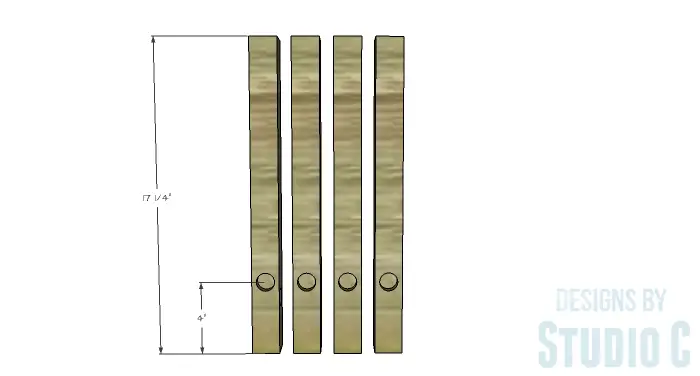
Step One
Cut the pieces for the legs. With all four legs lined up against each other, drill a 1/2″ deep hole with the 1″ Forstner bit (<– affiliate link!) approximately 4″ up from the bottom of each leg.
Turn two of the legs over so the adjoining face is up and the holes (just drilled with the Forstner bit) face left, then turn the remaining two legs over so that the holes face to the right. Drill another hole with the Forstner bit approximately 3″ up from the bottom of each leg on the face of the leg that is pointing up.
Step Two
Cut the pieces for the aprons. With the pocket hole jig set for 3/4″ material, drill pocket holes in each end of each piece. Secure one apron to one leg, positioning the apron 1/4″ back from the outside face of the leg using glue and 1-1/4″ pocket hole screws. Note the position of the holes on the leg to which the apron is secured… For example, if the face of the leg with the 4″ hole faces the inside (toward the apron) and the face of the leg with the 3″ hole is facing the same direction as the pocket holes (up), the opposite leg has to have the face with the 4″ hole facing in and the hole with the 3″ hole facing up. (See the drawing for clarity.)
Insert a dowel into the hole facing toward the apron, then position the other leg on the other side securing to the apron using glue and 1-1/4″ pocket hole screws.
Create a second assembly identical to this one for the opposite side of the table.
Step Three
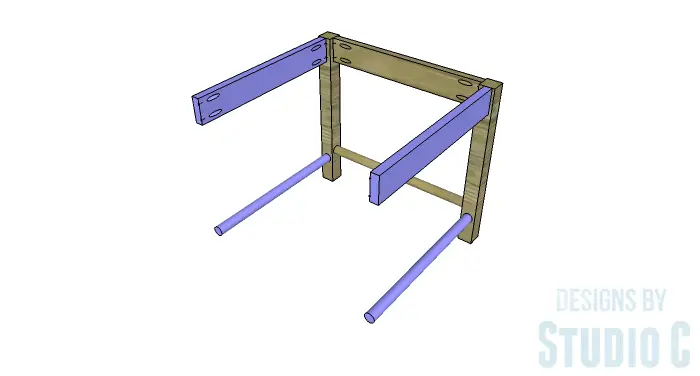
With one of the side assemblies laying face down (pocket holes facing up), secure the remaining aprons to each of the legs, positioning them 1/4″ back from the outside faces of the legs. Insert a dowel into each of the holes, then position the remaining leg assembly on top. Secure the aprons using glue and 1-1/4″ pocket hole screws.
Step Four
Cut the pieces for the top supports and drill pocket holes in each end. Secure the supports to two of the aprons using glue and 1-1/4″ pocket hole screws.
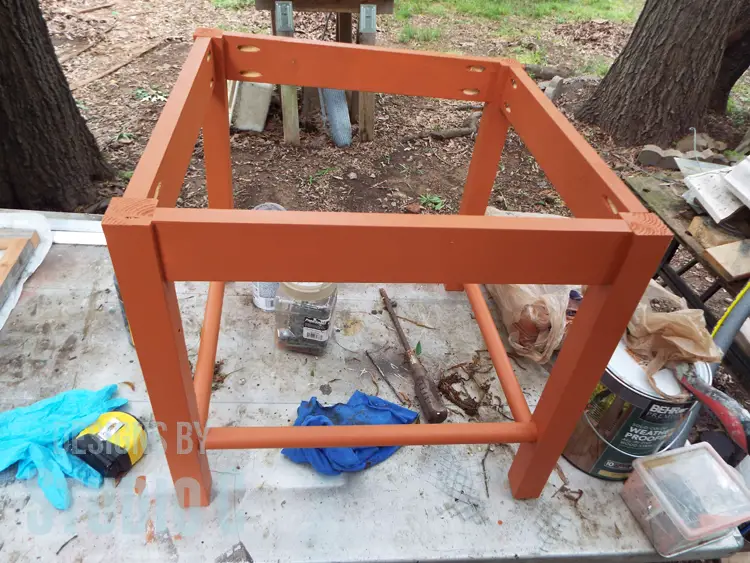
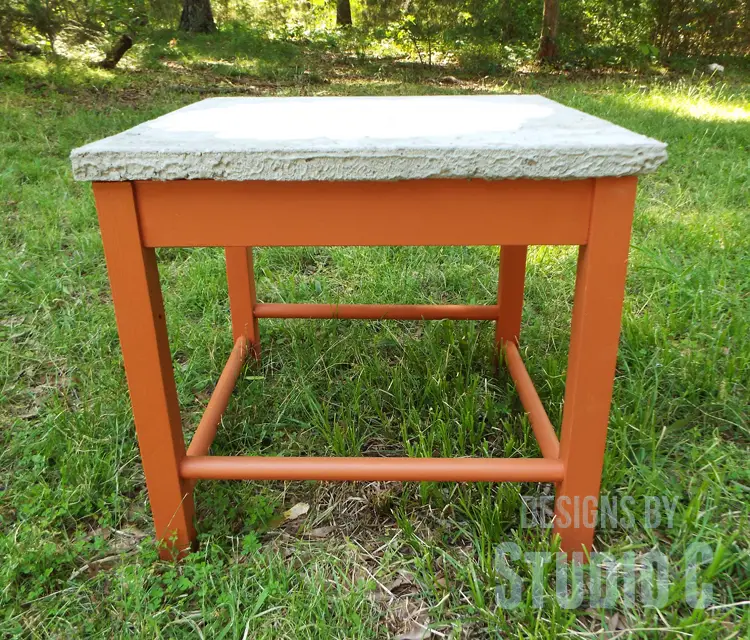
Finish the base frame as desired. I used a waterproofing exterior stain in a color named Royal Hayden which is a sort of clay-orange color. It is the same stain I used on my picnic table.
To construct the top:
Before the concrete is mixed up, a mold for the top will have to be built. I used scrap wood at approximately 1″ thick but I think a thicker top would have been better. 1x2s measure 1-1/2″ wide and would be perfect!
Step One
Cut two 1x2s at 20-1/2″ long and two at 22″ long. Drill a pilot hole in each end of the 22″ pieces and assemble the mold using 2-1/2″ screws with no glue.
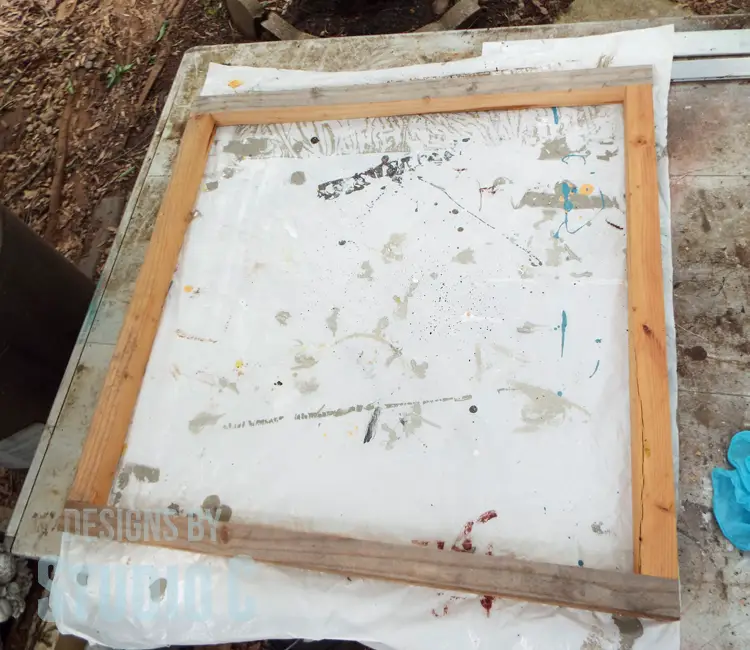
Step Two
Place the mold on top of a flat surface covered with plastic (a trash bag works well) or a piece of cardboard.
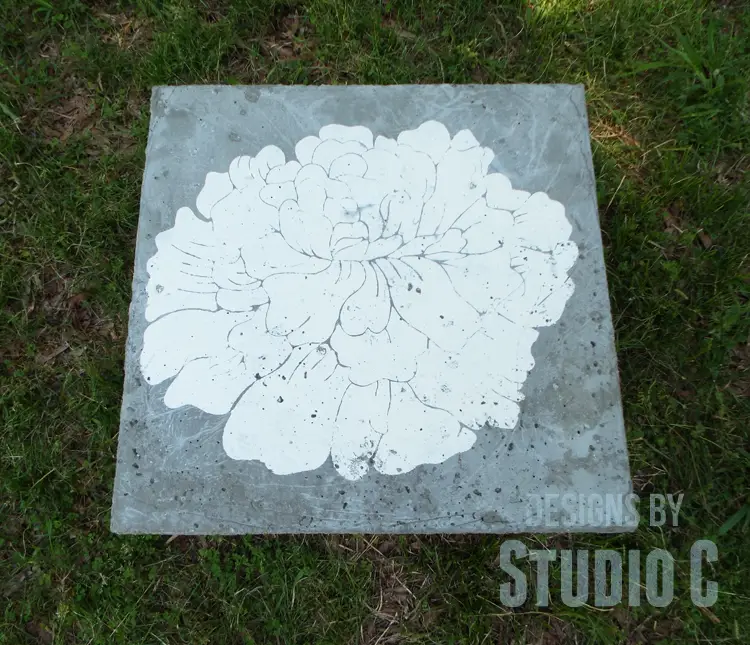
Mix the concrete according to the manufacturer’s instructions. When I mixed mine it was a bit “soupy” (too much water) and that is ok because the water will evaporate but the top will take longer to dry. I added a concrete colorant (charcoal grey) to the mixing water before I added the water to the concrete mix.
Pour the concrete into the mold spreading it with a small trowel or garden shovel. Give the mold a few taps with a rubber mallet to remove any voids or air bubbles in the concrete.
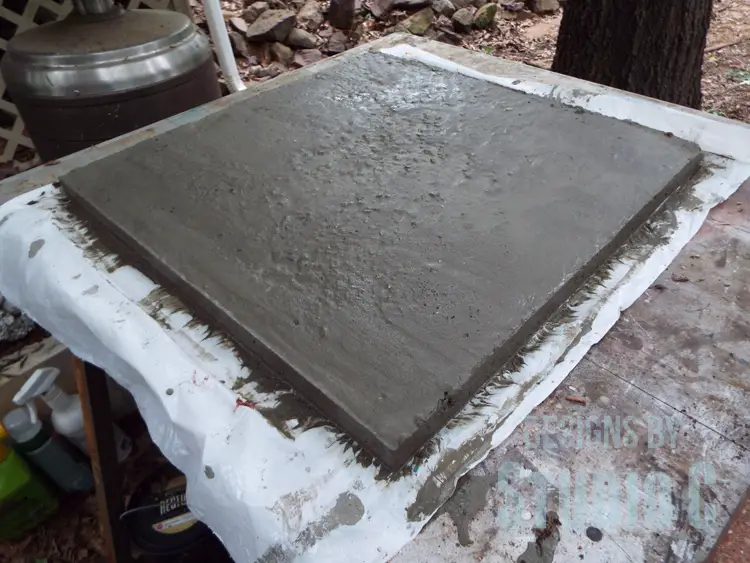
Step Three
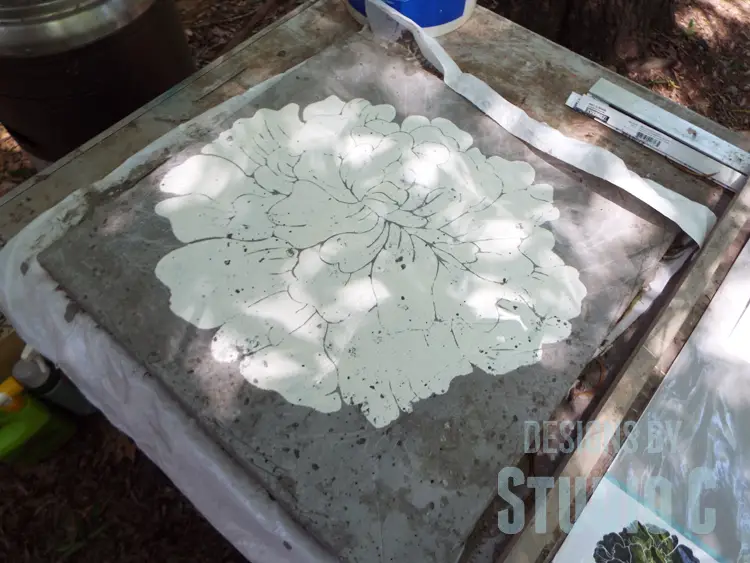
Let the concrete sit in the mold until most of the water has evaporated, then carefully remove the mold. I let mine sit for about two hours before I removed the mold (yours may not have to sit as long).
Let the concrete dry and cure for a couple of days.
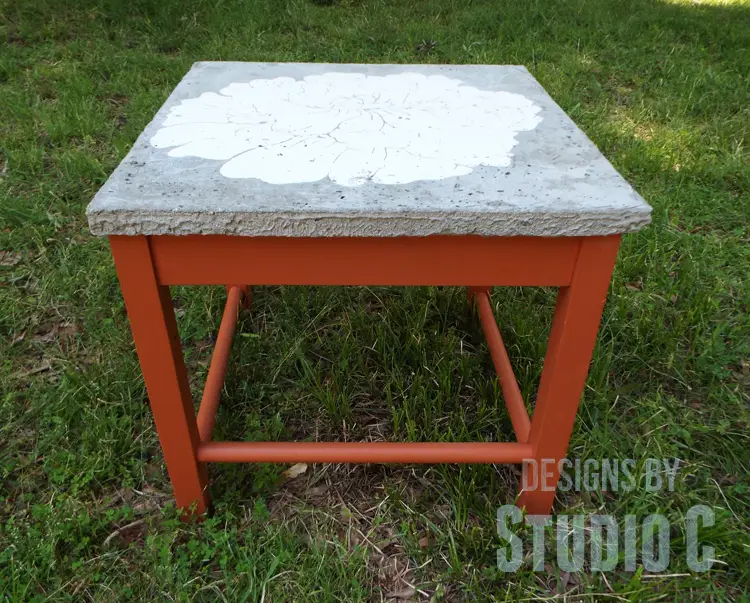
Once the concrete has dried, the top can be stenciled as desired. I chose to use a large flower stencil with white exterior paint.
Move the base frame into position on the porch or patio, then position the concrete top so that each side hangs over approximately 1/2″.
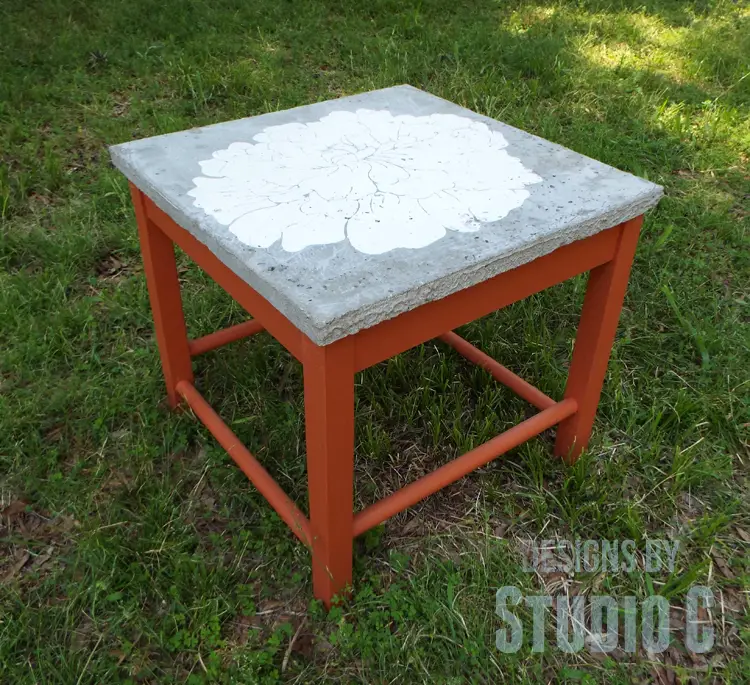
I love this table – it came out way better than I expected! Want to check out the awesomeness from the others in the Power Tool Challenge?
1. Long Porch Planters by My Love To Create
2. DIY Flower Pot Plant Stand by Her Tool Belt
3. DIY Easy Swinging Bed by Domestically Speaking
4. PVC Pipe Vertical Garden by Kim Six
5. How to Build An Outdoor Serving Table by Create and Babble
6. Repurposed Window Garden Shelf by Refresh Restyle
7. Trimming Out Porch Posts by My Repurposed Life
8. Stenciled Concrete Topped Table by Designs By Studio C
9. 2 X 4 DIY Bench by Virginia Sweet Pea
10. DIY Outdoor Sofa Table Tutorial by H2OBungalow
11. Repurposed Electrical Spool Holder Table by Designed Decor
12. DIY Outside Standing Plant Hanger by Confessions of A Serial DIYer

Have any questions about the DIY furniture plans to build a Stenciled Concrete Top Table? Leave a comment below!
Originally posted 2016-05-19 07:00:40.


18 Comments
This is such a cool table. I love the concrete top! It will stand up to the weather so well! Love!
Thank you, Kim! I want to make more projects with concrete because of that!
Super cute table! I love the stenciled concrete top! I need to try something with concrete…someday!
Thank you, Mindi! Concrete can be a little challenging to mix but is really awesome to work with!
What a great design for a table and the concrete top gives it a unique look. This is going to be great for use outdoors this summer and should last for a very long while.
Thank you, Paula! I cannot wait to actually use it!
Ok – that tabletop is awesome!
Thanks, Maryann! I wasn’t sure how it would come out but I really love it!
I can’t believe the creativity of this group today…this is awesome!! I never would have thought to use concrete…perfect for your outdoor space!
Thank you, Christy! I really want to do more projects with concrete because it is cheap and easy!
I’ve never done a concrete project, but you make it sound so easy Cher! I love that you stenciled the concrete table top! perfection!
gail
Thank you, Gail! It is really easy to work with concrete… I love the stencil, too!
You know I love concrete projects and this one is darling! Love the dowels on your table too. I always learn something new from your projects! I have no doubt this will look awesome on your new back deck! XO-Wendi@H2OBungalow
Thank you so much, Wendi! I was so excited with the way it came out. I appreciate the kind words!
That concrete top is the prefect addition to your awesome table! It turned out great!
Thank you so much, DeDe! I knid of like it myself! 🙂
Awesome idea for an outdoor or indoor table, Cher! Stenciling the concrete top is perfect too. I’m thinking someone like me who isn’t handy mixing concrete could still make this fabulous table using a concete sidewalk block instead. Pinning to share!
Marie, The Interior Frugalista
Awww, marie, thank you so much! It was really, really easy and I love the result! We missed you this month! 🙂