
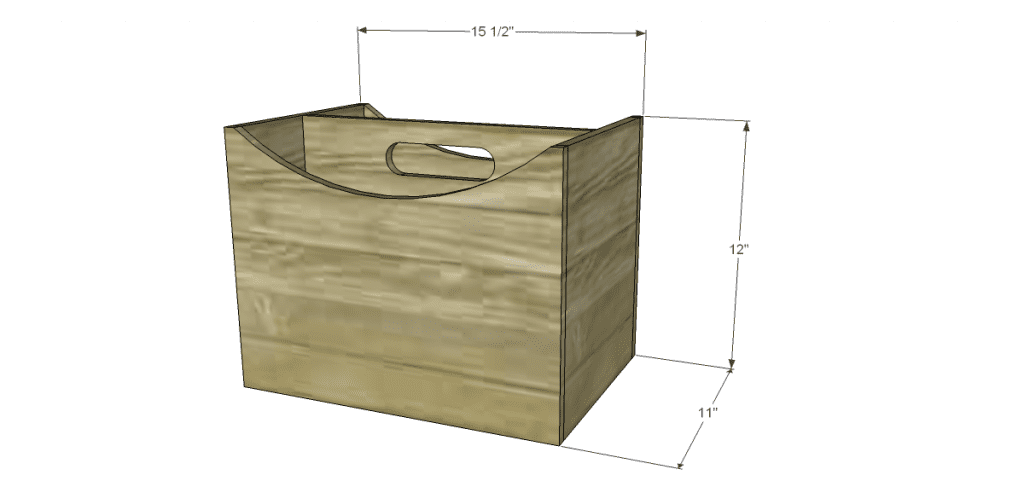
Build a Caddy Inspired by a Magazine Holder
A Great Project for Organization!
Hey there! I recently stumbled upon a gorgeous magazine holder on Pier One’s website that caught my attention. The design was so impressive that I couldn’t stop myself from creating my own version of their magazine holder. The best part is that it is a quick and inexpensive build, perfect for anyone looking for an easy-peasy DIY project. I especially love the curved sides of the holder, which makes it even more unique. If you’re interested in creating your own caddy inspired by a magazine holder, these easy-to-follow plans are the perfect project!
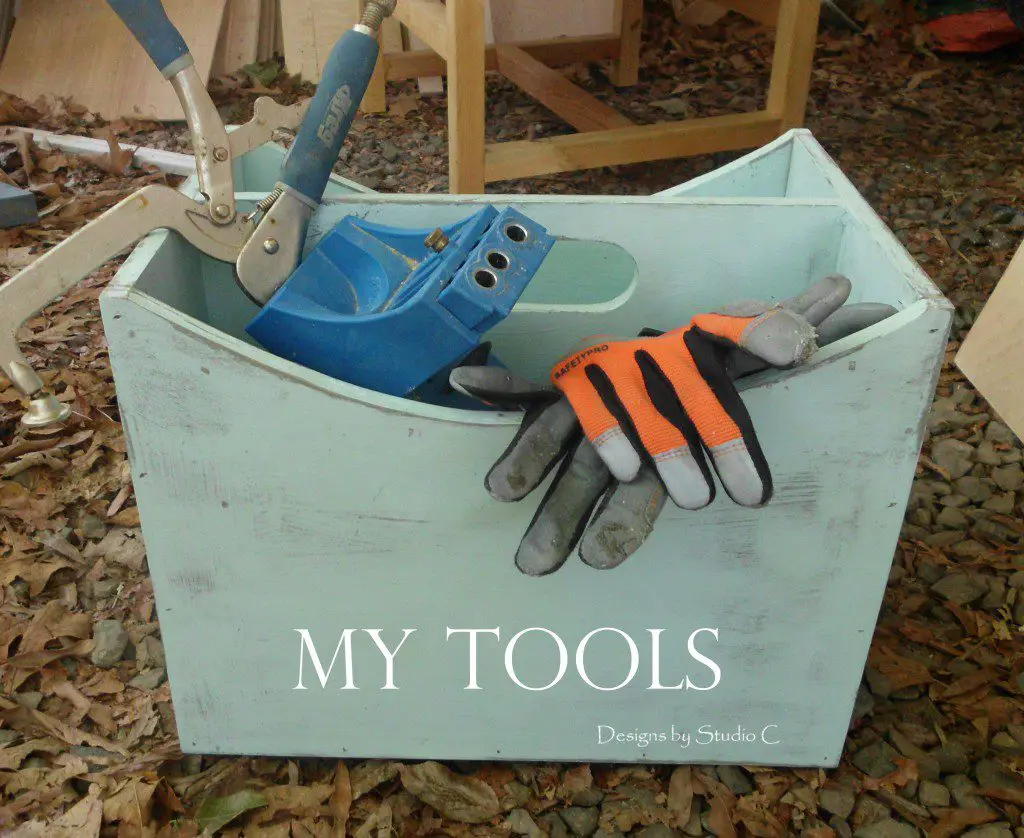
 The inspiration piece is actually constructed of fabric but I thought that one constructed out of wood would serve many other purposes than just magazines. It could be a toolbox…
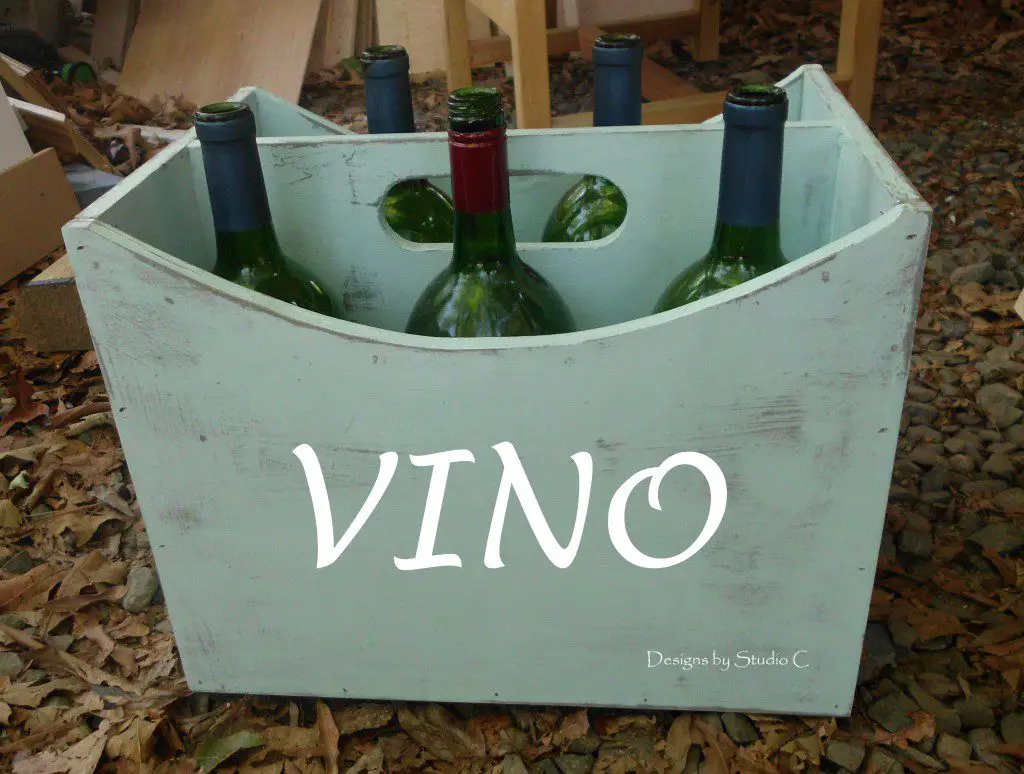
 A wine caddy…
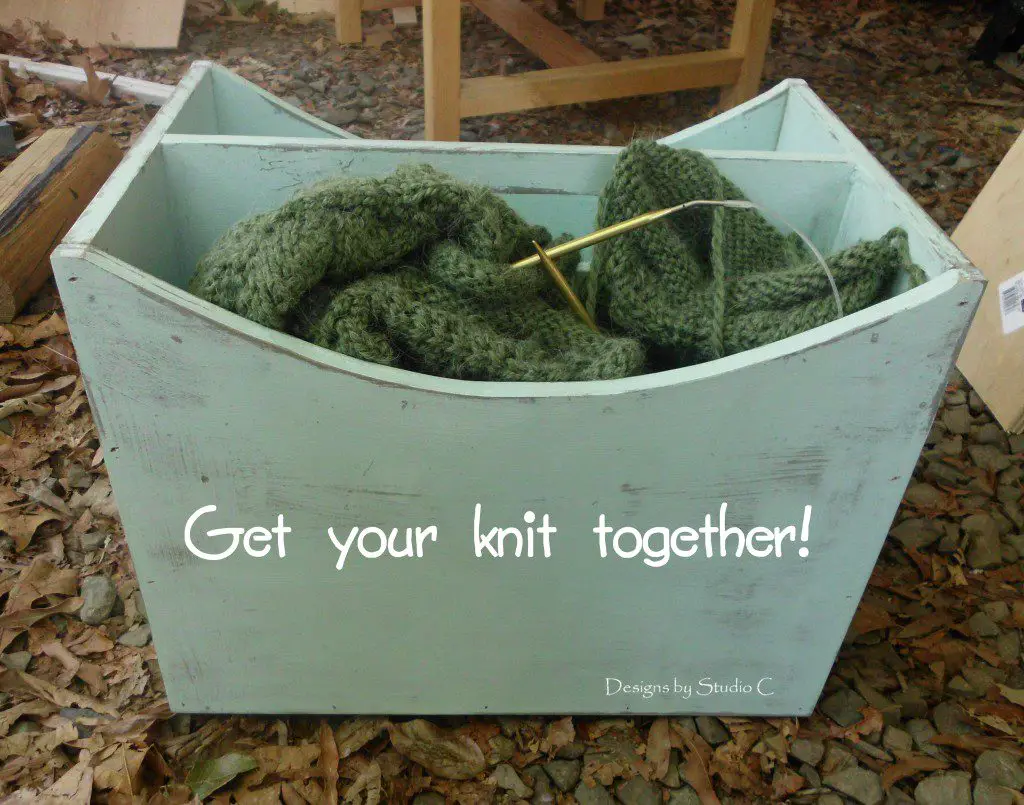
 A knitting box…
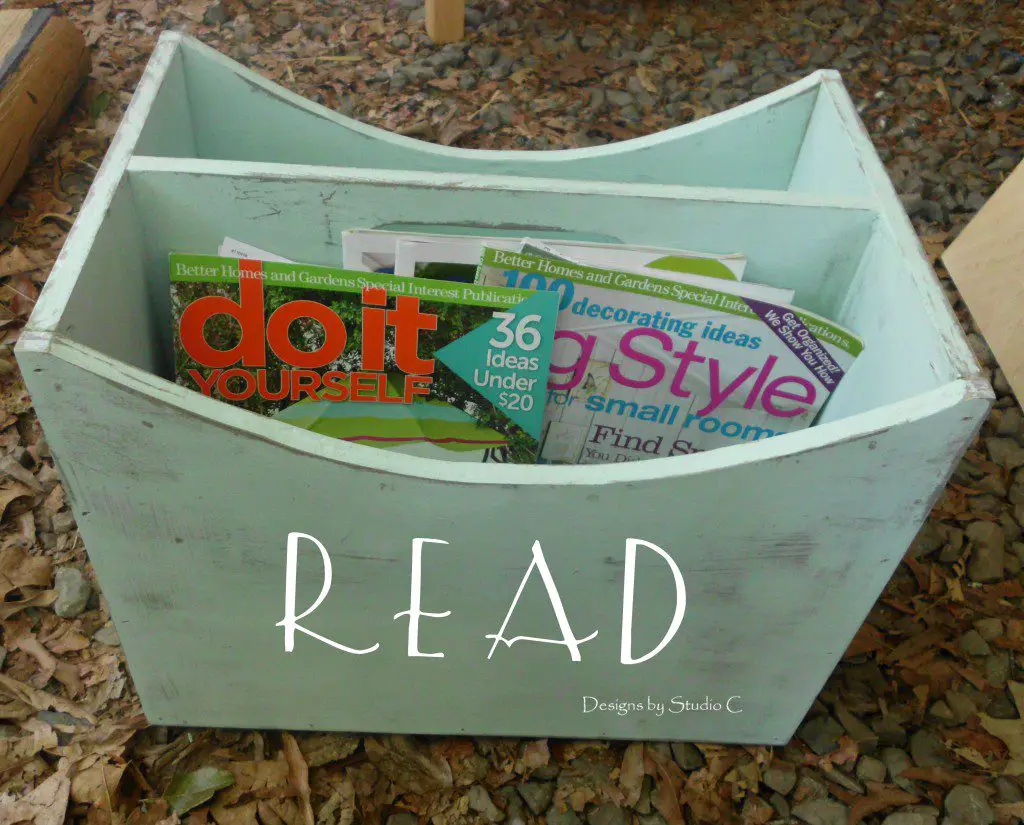
 An actual magazine holder…
 The possibilities are endless! I finished mine using my trusty chalk paint and Minwax Paste Wax.
Materials:
- 1-1/4″ brad nails {<– affiliate link!)
- Wood glue
- Finishing supplies
Lumber:
- Quarter sheet of 1/2″ plywood (I used Purebond plywood)
Tools:
- Brad nailer
- Drill
- 1-1/2″ Hole saw
- Saw – Miter, Circular, or Jig
Cut List:
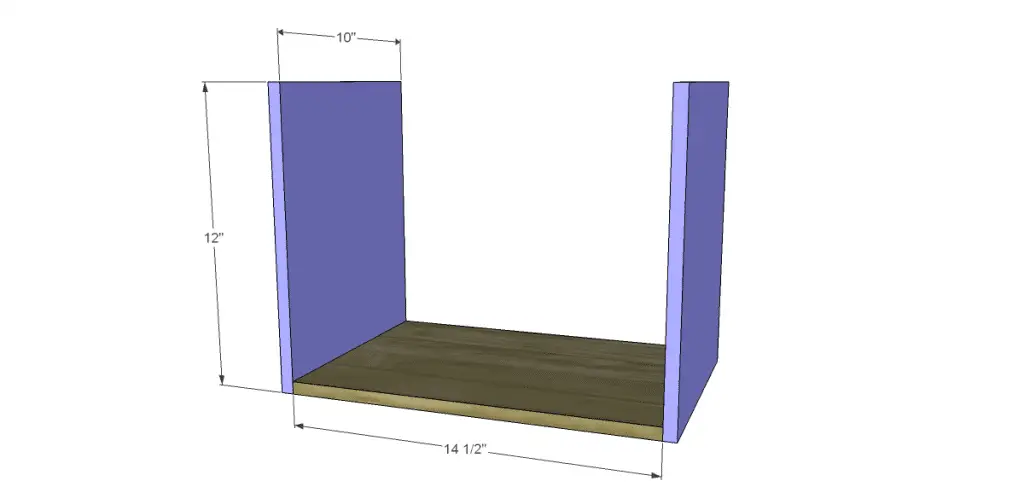
- One – 1/2″ plywood at 10″ x 14-1/2″ – Bottom
- Two – 1/2″ plywood at 10″ x 12″ – Sides
- One – 1/2″ plywood at 11-1/2″ x 14-1/2″ – Divider
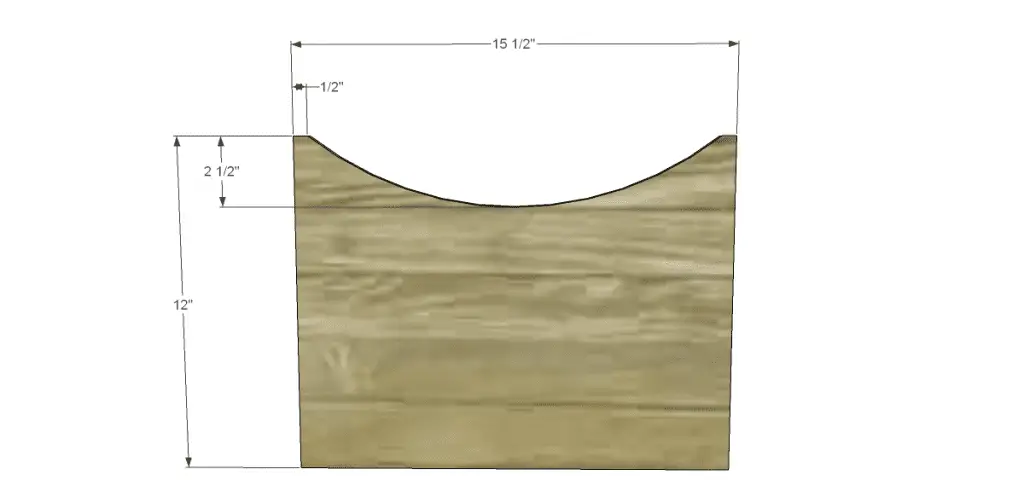
- Two – 1/2″ plywood at 12″ x 15-1/2″ – Ends
Step One
Cut the pieces for the bottom and the sides. Attach the sides to the ends of the bottom using glue and 1-1/4″ brad nails.
Step Two
Cut the piece for the divider. Mark the position of the handle. Cut the holes for the curves using the hole saw, then connect the holes using a jigsaw. Attach the divider to the center of the sides and bottom using glue and 1-1/4″ brad nails.

Step Three
Cut the pieces for the ends. Mark the curve in the top center of each piece starting 1/2″ in from each side. cut out the curve using a jigsaw. (I always cut the curve in one piece, clamp them together, then use the router with a patterning bit to cut the curve in the other piece!) Do not attach the ends yet!
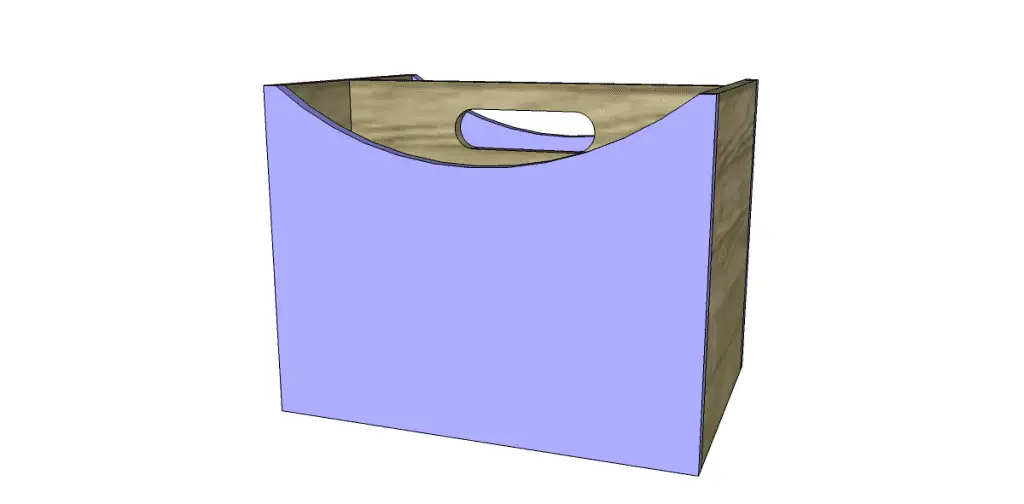
I found it is easier to finish the piece before the ends are attached. Sand thoroughly. Prime and paint or stain the assembled pieces as well as the ends. Once the paint or stain has dried, attach the ends using glue and 1-1/4″ brad nails. Attach felt or teflon feet to the bottom if desired.
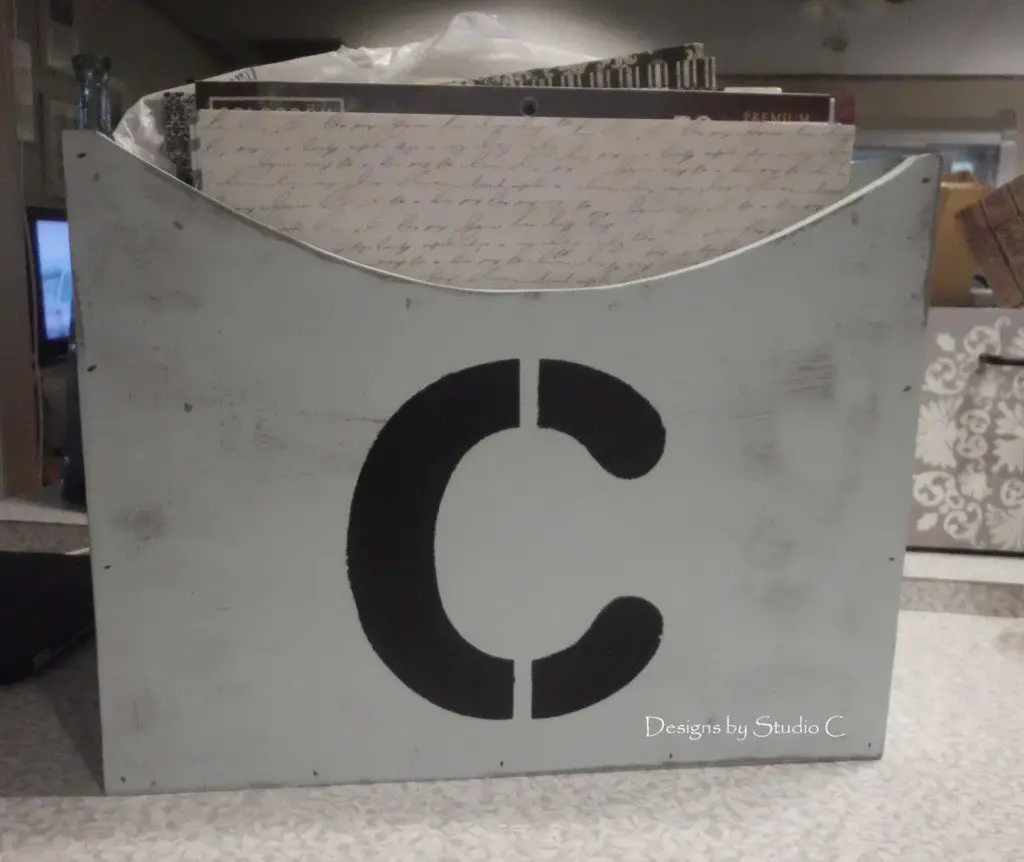
I painted a giant “C” on mine and use it to organize my scrapbooking paper…
I would love to see how you would use this magazine holder… But first you have to build it!! Have any questions about the plans to build a caddy inspired by a magazine holder? Give me a shout at cher {at} designsbystudioc {dot} com!
Originally posted 2014-05-09 08:00:05.
[…] C Magazine Caddy Free Woodworking PlanWhile this piece is inspired by a magazine rack it can also work as a caddy for many other household items as […]
[…] mentioned before that I L.O.V.E. Pier One (see the plans to Build a Caddy Inspired by a Magazine Holder). The only problem I find with the store is that most of the furniture is constructed of cheaper […]
[…] asked if he would allow me to share photos so today, Ryan’s Magazine Holder (built from these plans) is our first […]