
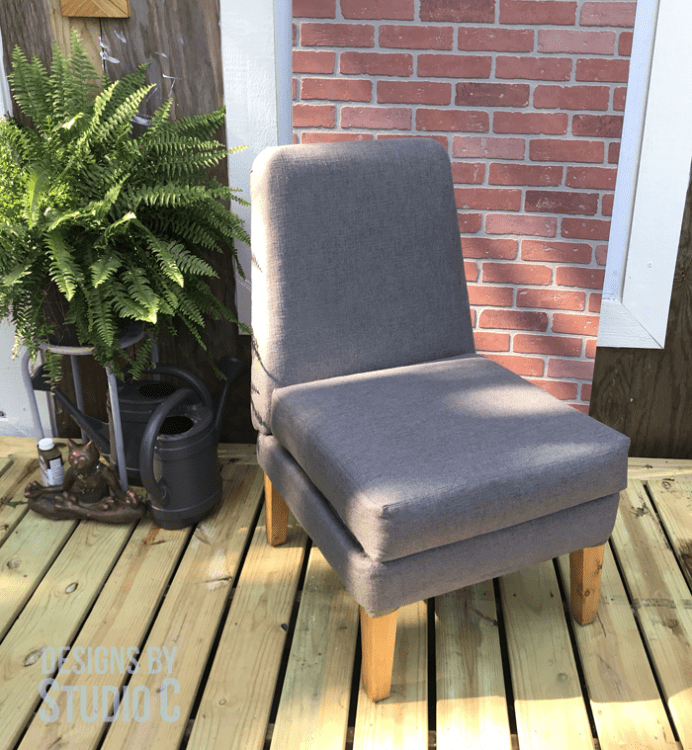
Build a DIY Upholstered Chair
Furniture Plans to Build the Frame for the Chair
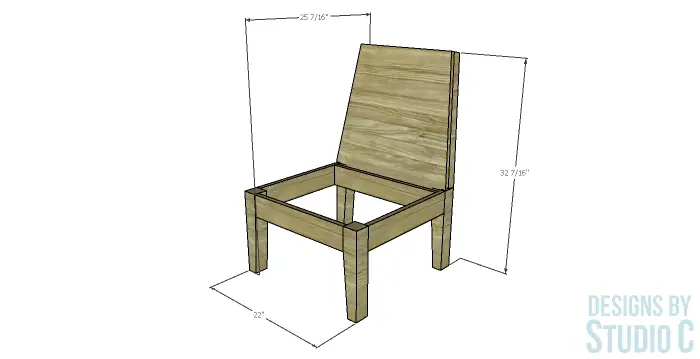
The DIY furniture plans to build an upholstered chair are to build the frame for the back and the seat. The back frame will have compound angles cut in the bottom portion of the frame. This is easily achieved using a miter saw, and I include directions for using a handsaw to cut the angles, as well. The frame is covered with a piece of plywood with a tail on it that will be inserted between an angled shim on the back of the seat frame and a support piece inside the seat frame. These pieces will be secured with lag screws (<– affiliate link!) through the front and back.
Before building this fabulous chair, please see Part One for the materials list including recommended tools and a list of items for the upholstery!
Let’s get started building the frame…
Step One
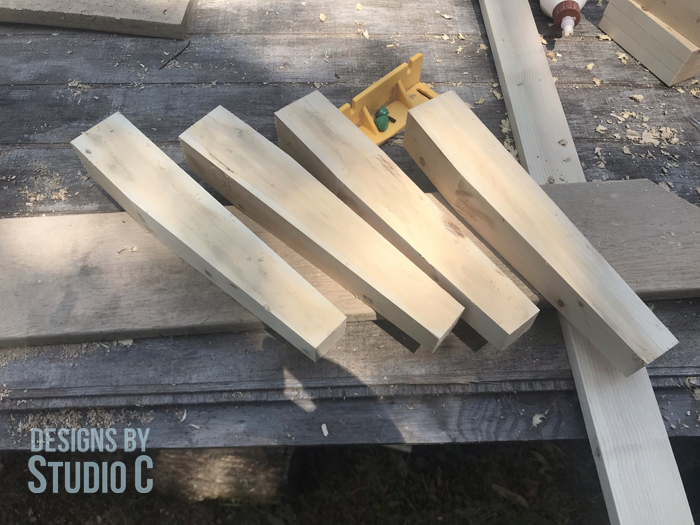
Cut the 1×6 into three equal pieces (approx. 31-15/16″ long). Glue the pieces together by spreading a coat of glue on the face of one piece, and layering another piece on top. Repeat for the third piece, clamp together and let it dry. This creates a 2-1/4″ thick piece for the legs.
Rip one of the edges off of one side using the table saw (and make sure ALL safety practices are in place!!), then cut the layered board into two 2-1/4″ pieces. Out of each 2-1/4″ square piece, cut two legs at 13″ long. To add the optional taper in each leg, see this post. Sand and finish the legs as desired. For an easy to follow tutorial on building furniture legs, click here!
Step Two
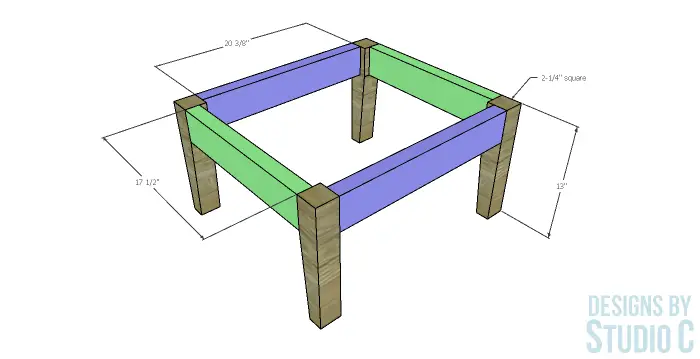
Cut the pieces for the front and back from the 2×4. With the pocket hole jig set for 1-1/2″ material, drill pocket holes in each end of each piece. Secure the front and back pieces to the legs using glue and 2-1/2″ pocket hole screws.
Cut the pieces for the sides from the 2×4 and drill pocket holes in each end. Secure the sides to the legs using glue and 2-1/2″ pocket hole screws.
Step Three
Cut the piece for the back support from the 2×4 and drill pocket holes in each end. Secure the support to the sides (as indicated in the drawing) using glue and 2-1/2″ pocket hole screws. Set the seat frame aside.
Step Four
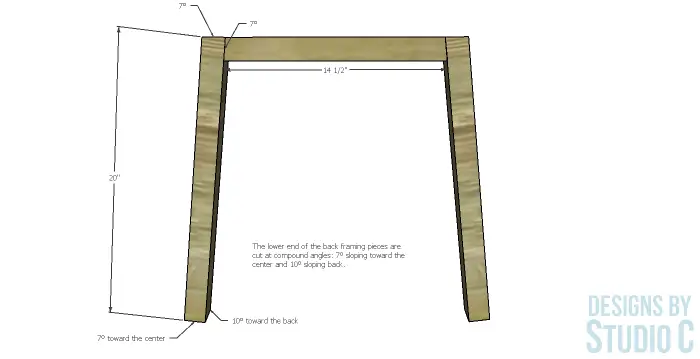
Cut two pieces for the back frame sides from the 2×2 at 25″ long. These pieces will have a compound angle cut in the bottom. The back frame will recline 10° and the sides will angle in 7°. To make the cuts on a compound miter saw, set the bed of the saw to cut a 10° miter and the blade to cut a 7° bevel in one end of one board. Make sure to label the angles on the board! The other board will be cut so that the compound angles are opposite: set the bed to cut a 7° miter and the blade to cut a 10° bevel.
** Some compound miter saw heads can tilt either way (left or right) and some can only tilt one way. if your saw tilts one way, use the above instructions to cut the side pieces for the back frame. If your saw tilts both ways, just mirror the cuts for the other piece. **
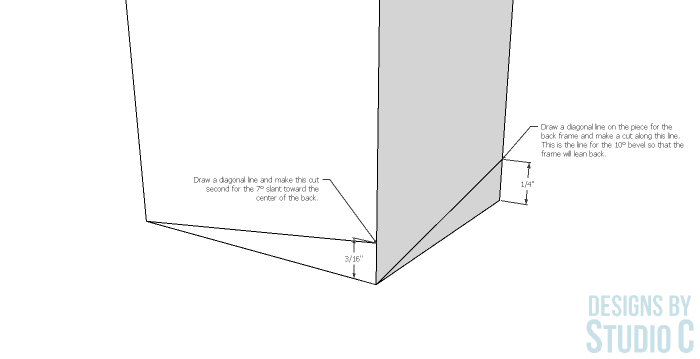
If the angles will be cut by hand, draw a diagonal line on the front face of one of the 1x2s for the back frame as shown in the drawing. Draw the other diagonal line on the inside face of the same board, as shown. Make the cut on the line drawn on the inside face first, then cut along the line on the front face. **DRAW BOTH LINES BEFORE MAKING THE CUTS**
Reverse the markings and cuts for the other framing piece.
Cut a 7° angle in the top of each piece (see drawing for detail).
Step Five
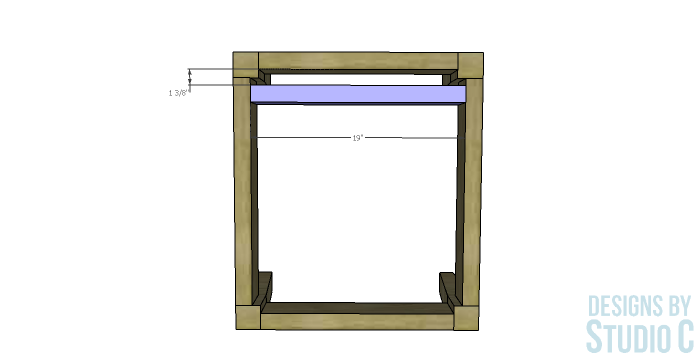
Cut the piece for the top of the back frame from the 2×2 at 14″ long with a 7° angle in each end. Secure the side pieces to the top piece using countersunk 2-1/2″ screws.
Step Six
Trace around the bare frame on a piece of kraft paper or newspaper to make a pattern and set it aside.
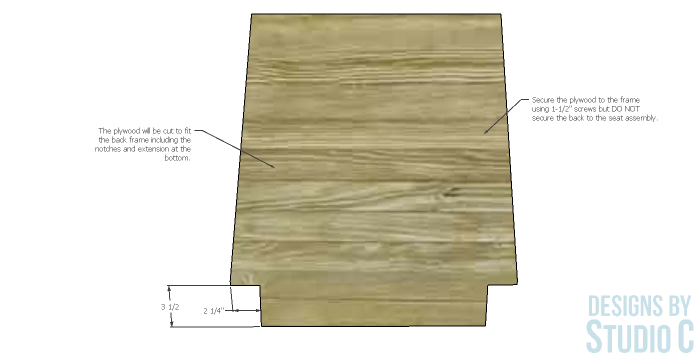
Place the back frame on the piece of 3/4″ plywood and trace around it with a pencil. Extend the bottom by 3-1/2″ with a 3/4″ notch cut at each end (see drawing for details). Cut the plywood with a jigsaw, and secure the plywood to the frame using countersunk 1-1/2″ screws.
Step Seven
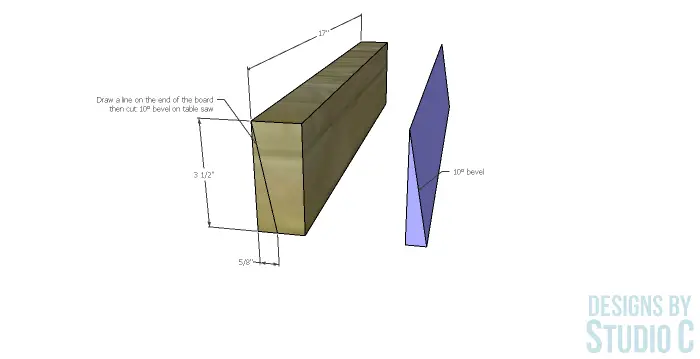
Cut the piece for the angled wedge. The wedge will be cut at a 10° angle along one long edge of the 2×4 piece. Save this piece to add to the seat frame once the back is upholstered.
Stay tuned for Part Three where I will show how the two pieces will be upholstered then secured together. Have questions about the DIY furniture plans to build an upholstered chair? Leave a comment below!
Originally posted 2019-07-07 08:00:39.
[…] Part Three – the upholstery. The Part One post outlines the supply and material list, and Part Two is the plan to build the wood frame for the chair. So for this part, an upholstery stapler (I use a […]
[…] be split into four parts: Part One (this post!) is the materials list and notes about the project. Part Two is about building the frame, Part Three will be about upholstering the back and the seat base, as […]