
How to Build a Room Divider
DIY Room Dividers – Build Your Own in 3 Steps
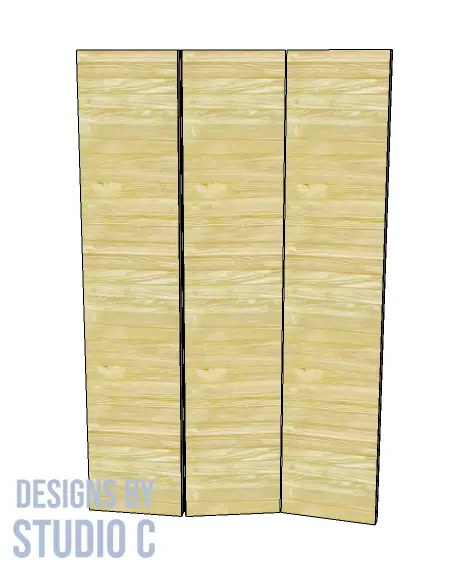
Have you ever wished for an elegant way to separate spaces without having to invest in a bulky wall? With this comprehensive guide, you can build your own stylish and functional room divider in no time -all with just a few simple materials!
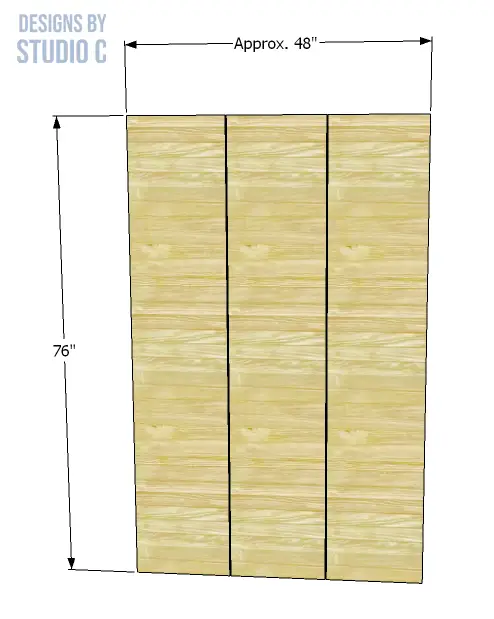
Constructing a room partition is achievable and straightforward with the included plan. Screws, glue and pocket holes enable you to quickly secure the frame for satisfaction in mere hours. Start your weekend off by making this amazing project designed for beginners – no experience necessary for success!
Gather Materials and Tools
- 2 sheets of 1/4″ lauan (also known as “Premium Underlayment”), plywood, or hardboard
- 7 – 1x2s at 8′
- 3 pairs of hinges (non-mortise)
- Optional knobs or drawer pulls
- Wallpaper, Scrapbooking paper, Paint, etc.
- Saw – Circular, jig or miter
- Drill
- Kreg Jig (for pocket holes) & 1-1/4″ pocket hole screws (<– affiliate link!)
- Screwdriver
- Air nailer and 1-1/4″ brad nails
- Square and pencil
- Tape measure
Notes About the Project:
- The materials listed make three panels, enough for one divider
- Sand all pieces before assembling the screen panels
- Finishing ideas will be listed below!
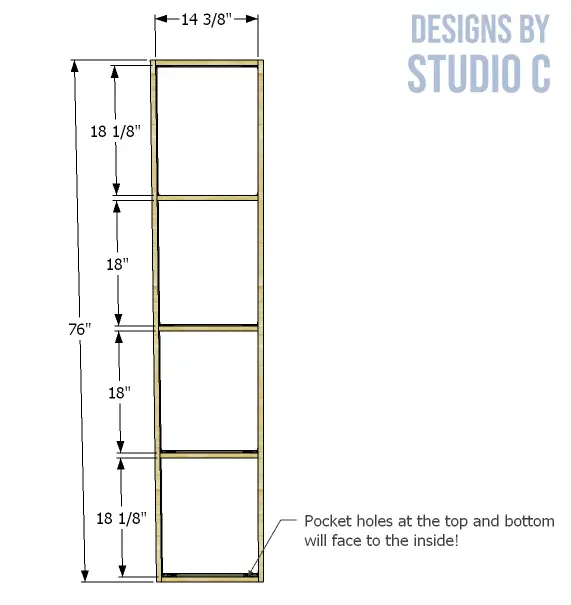
Cut the Wood to Size and Assemble the Frame
Cut the pieces for the frames (see the drawing below!). Set the pocket hole jig for 3/4″ material and drill pocket holes in each end of the shorter boards. Assemble as shown in the drawing using glue and 1-1/4″ pocket hole screws. Another option would be to use a brad nailer with 2″ brad nails or countersunk 1-1/2″ screws for assembly instead of the pocket hole jig.
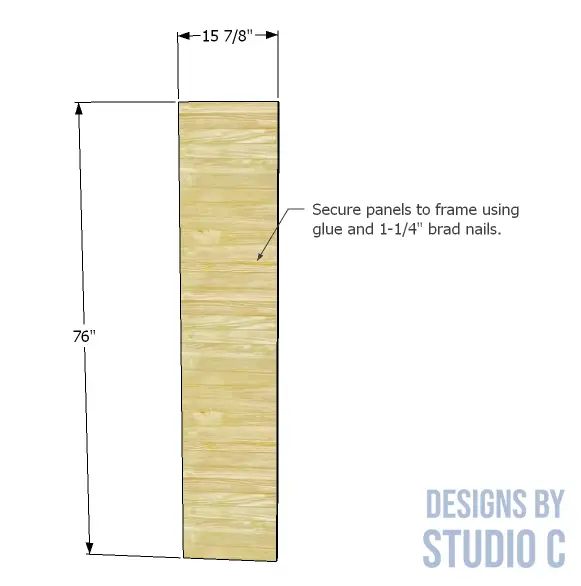
Cut the Pieces for the Panels and Secure to the Frame
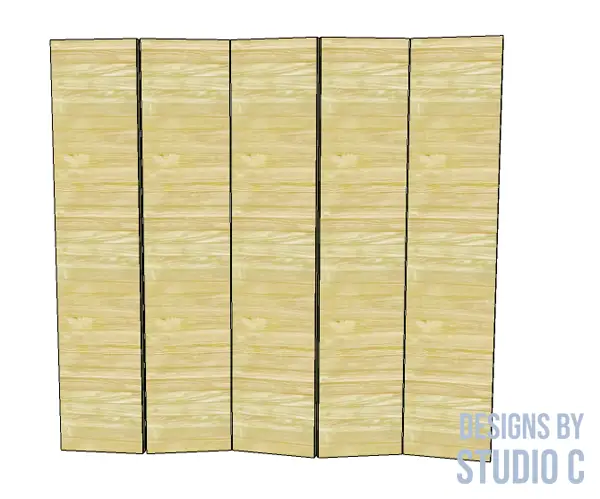
Cut the 1/4″ plywood pieces. Plywood sheets are sold in 4′ x 8′ sheets. If the sheets are ripped to approximately 15-7/8″ x 8′, you can get three panels per sheet. Using glue and the brad nailer, fasten the panels to the frames. Attach the hinges and voila – a quick and easy project!
Paint, Stain, and Finish the Divider
After the panels are installed, it’s time to give your divider the look you want. Begin by thoroughly sanding the panels and wipe off the dust. You can paint or stain the wood for a beautiful finish. If you decide to stain, apply a generous layer of wood stain with a brush and wipe off any excess with a lint-free cloth. Allow the stain to dry overnight, then apply the final clear coat. Finally, touch up any nail holes and other imperfections before fully enjoying your stylish divider!
Finishing ideas:
The divider can be treated like a large wall panel and can be painted, covered with wallpaper, covered with scrapbooking paper in a patchwork manner, covered with vintage posters (a Jimi Hendrix divider would be AWESOME!!) or just simply stained. Drawer knobs or handles could be used for jewelry or accessory storage.
More panels could be added to make it wider, as well!
Have questions about this DIY room divider? Leave a comment below!
Originally posted 2012-04-01 08:00:56.
Please do! Thank you very much! If you’re on Facebook, please “like” my fanpage – Designs by Studio C… Thanks again!!
Very interesting info!Perfect just what I was looking for!
Thanks so much, please visit again!
Wow, thank you! I appreciate it!
Hi, just discovered ur site & loving it – what an amazing woman u are! So many projects I’ve set myself! Just 1 thing, I can’t seem to get the 1st diagram on this divider project to ‘click’ so I can make it bigger to see the measurements more clearly. The other pics work fine (altho there isn’t a pic showing on the 1st page either), can u assist? Many thanks.
Hi, Jo! Thank you for the kind words – I really appreciate it! I resized the photos in the post and now they should be easier to view. Thanks for stopping by!
[…] are easy to follow instructions to build a room divider with a list of tools and […]