
Build a Sausalito Coffee Table
DIY Furniture Plans for an Easy to Build Coffee Table
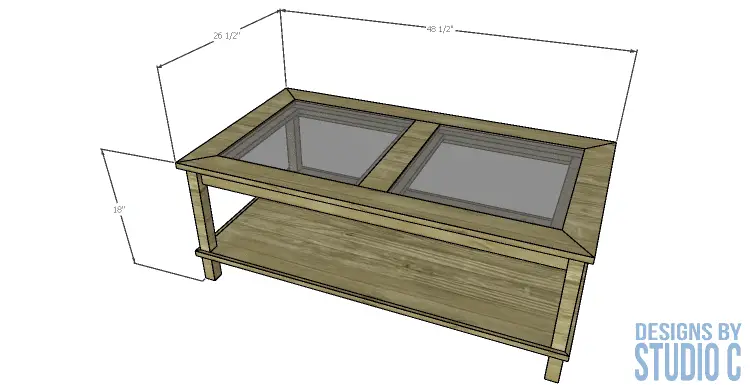
Hey there! You’re going to love this coffee table – it’s not only super cool, but it’s also really easy to build! The DIY furniture plans for the Sausalito Coffee Table, inspired by Pottery Barn, include acrylic or glass inserts on the top and a spacious shelf at the bottom. It’s the perfect project for a weekend and won’t break the bank!

Materials:
- 1-1/4″ pocket hole screws
- 1-1/2″ brad nails
- 2″ brad nails (<– affiliate link!)
- 1-1/4″ screws (<– affiliate link!)
- Wood glue
- Sandpaper (80, 120, 220 grits)
- Finishing supplies (primer and paint, or stain)
Lumber:
- 4 – 1×3 at 8′
- 3 – 1×4 at 8′
- 1 – scrap 1×6 at 17″
- 1 – 2×2 at 8′
- 1 – 4′ x 4′ sheet of 3/4″ plywood
Cut List:
- 4 – 2×2 at 17-1/4″ – Legs
- 1 – 3/4″ plywood at 47″ x 25″ – Shelf
- 2 – 1×3 at 22″ – Aprons
- 2 – 1×3 at 44″ – Aprons
- 2 – 3/4″ trim at 26″ – Lower Trim (shelf edges)
- 2 – 3/4″ trim at 48″ – Lower Trim (shelf edges)
- 2 – 1×4 at 26-1/2″ – Top Frame
- 2 – 1×4 at 48-1/2″ – Top Frame
- 1 – 1×4 at 19-1/2″ – Top Frame
- 2 – 1×3 at 17″ – Lower Top Frame
- 2 – 1×3 at 44″ – Lower Top Frame
- 1 – 1×6 at 17″ – Lower Top Frame
- 2 – 1/4″ glass or Plexiglas for the top inserts – Cut to fit
Other Related Projects:
Notes About the Project:
- Use caution when cutting and handling glass or Plexiglas – the edges can be sharp!
- The trim for the shelf edges can be cut from decorative patterned trim or strips cut from 1x lumber (use all safety precautions when using any type of power tool!)
Step One
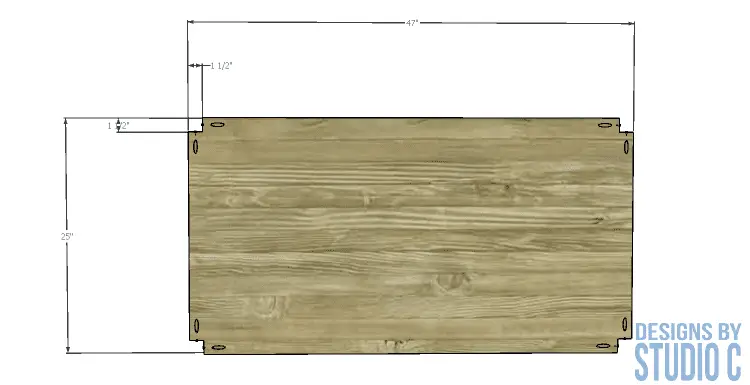
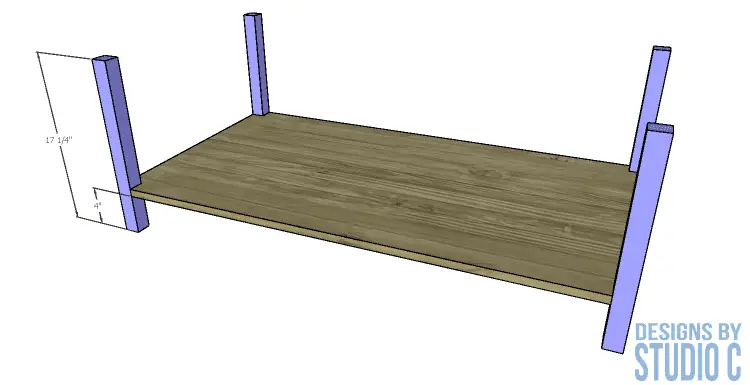
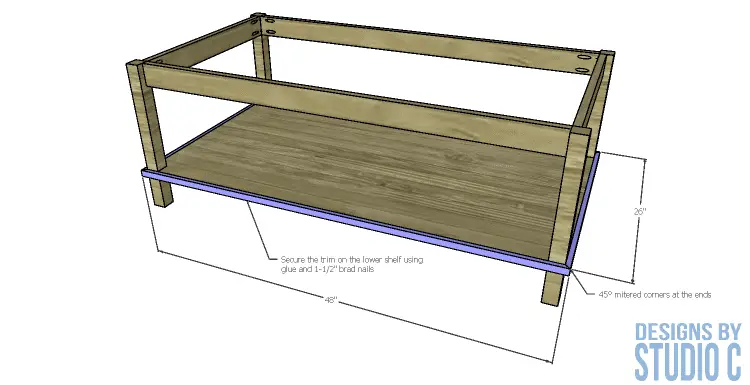
Cut the piece for the shelf, and the pieces for the legs. Cut the notches in each corner of the shelf piece using a jigsaw or a hand saw.
Set the pocket hole jig for 3/4″ material and drill pocket holes as shown in the drawing. Mark the position for the shelf on the legs and secure the shelf to the legs using glue and 1-1/4″ pocket hole screws.
Step Two
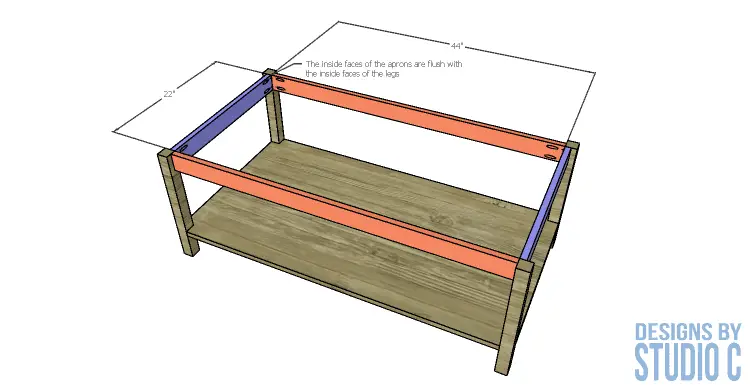
Cut the pieces for the aprons and drill pocket holes in each end. Secure the aprons to the legs, with the inside faces of the aprons flush with the inside faces of the legs, using glue and 1-1/4″ pocket hole screws.
Secure the lower trim to the edges of the shelf over the legs using glue and 1-1/2″ brad nails. The ends of the trim will be mitered.
Step Three
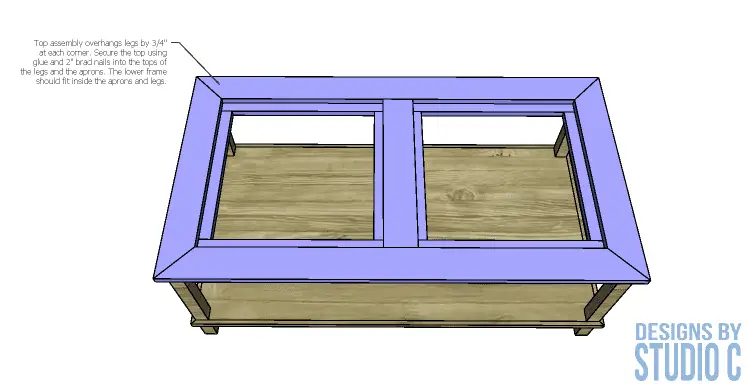
Cut the pieces for the top frame and the lower top frame. The ends of the top frame are mitered and the ends of the lower frame are not. Drill pocket holes in the frames as shown in the drawings, assembling the frames using glue and 1-1/4″ pocket hole screws.
Align the lower frame on the underside of the upper frame and secure in place using glue and 1-1/4″ screws. Flip the top over and position it on top of the legs with the lower frame fitting in between the aprons. Secure in place using 2″ brad nails.


Finish as desired.
Step Four
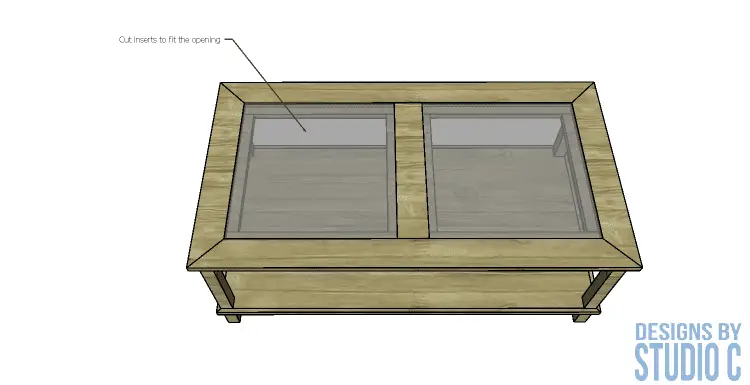
Cut the glass or Plexiglas to fit into the upper frame openings – they will rest on the lower frame. A frame shop or glass company can usually cut glass for projects and finish the edges for safety (for a fee, I’m sure!).
Have any questions about the DIY furniture plans to build a Pottery Barn inspired Sausalito Coffee Table? Leave a comment below!
Originally posted 2018-10-21 08:00:30.