
Vintage French Desk Plans
Create a Gorgeous Piece of Furniture Using These Vintage French Desk Plans!
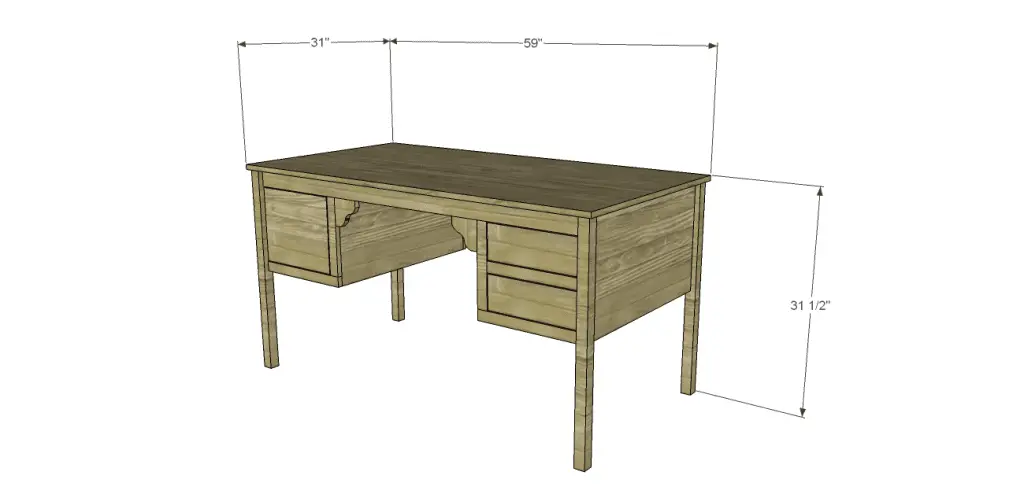
How could you not love this desk? The vintage French desk plans feature two narrow drawers and one deeper drawer, plus decorative brackets. With its vintage charm and functionality, it is sure to fit into any decor!
Materials:
- 1-1/4″ pocket hole screws
- 1-1/4″ brad nails
- 1-1/4″ screws
- Edge banding, optional
- 3 sets of 24″ Drawer slides
- 3 – Cabinet pulls
- Wood glue
- Sandpaper (100, 150, 220 grits)
- Finishing supplies (primer & paint, or stain, sealer)
Lumber:
- 3 – 1×2 at 8′
- 2 – 1×3 at 6′
- 2 – 2×2 at 6′
- 2 sheets of 3/4″ plywood
Cut List:
- 4 – 2×2 at 30-3/4″ – Legs
- 2 – 3/4″ plywood at 15-3/8″ x 27″ – Side Panels
- 2 – 1×3 at 55″ – Stretchers
- 2 – 1×2 at 11-3/8″ – Back Panel Frame
- 2 – 1×2 at 15″ – Back Panel Frame
- 2 – 3/4″ plywood at 11-3/8″ x 13-1/2″ – Back Panel
- 2 – 1×2 at 11-3/8″ – Drawer Frames
- 2 – 1×2 at 15″ – Drawer Frames
- 1 – 1×2 at 13-1/2″ – Drawer Frame
- 3 – 1×2 at 27″ – Drawer Spacers
- 2 – 3/4″ plywood at 15-3/8″ x 27″ – Dividers
- 4 – 3/4″ plywood at 4″ x 4″ – Brackets
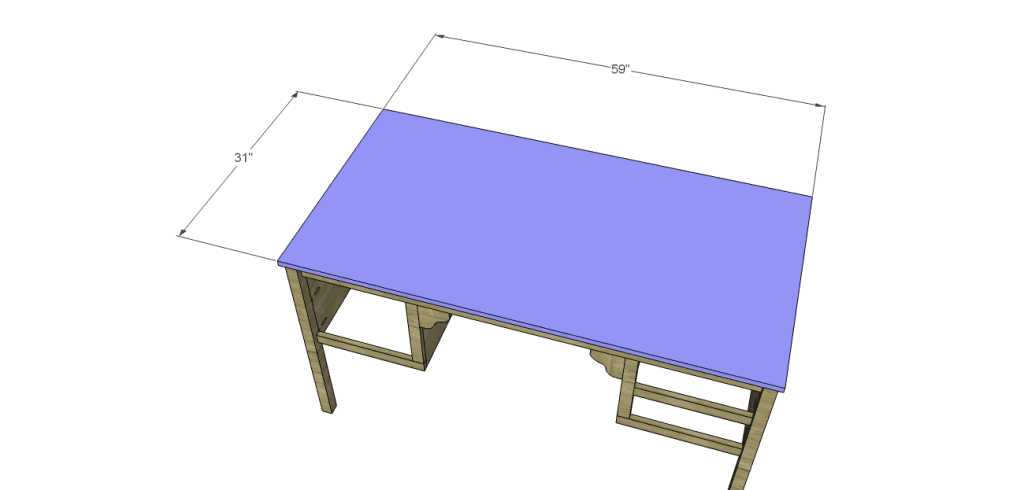
- 1 – 3/4″ plywood at 31″ x 59″ – Top
- 3 – 3/4″ plywood at 11″ x 22-1/2″ – Drawer Bottoms
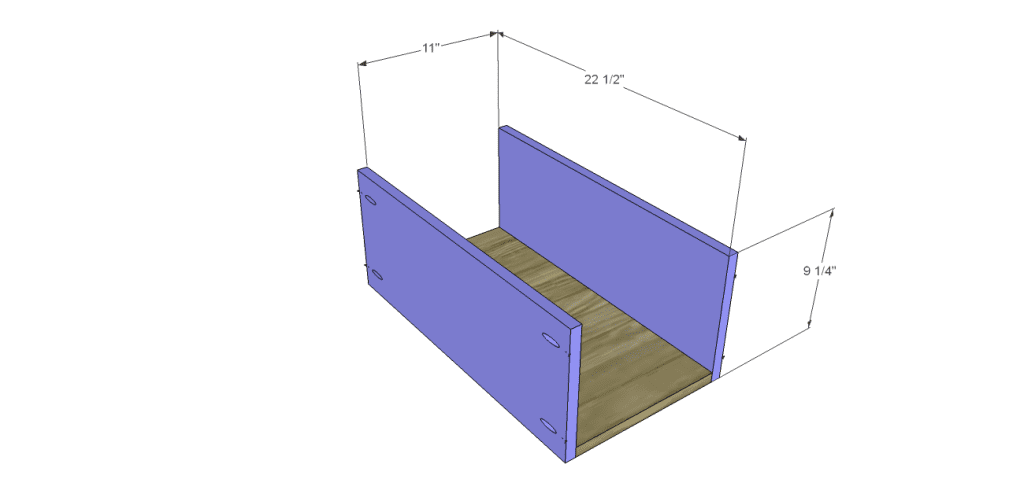
- 2 – 3/4″ plywood at 9-1/4″ x 22-1/2″ – Deep Drawer Sides
- 2 – 3/4″ plywood at 9-1/4″ x 12-1/2″ – Deep Drawer Front & Back
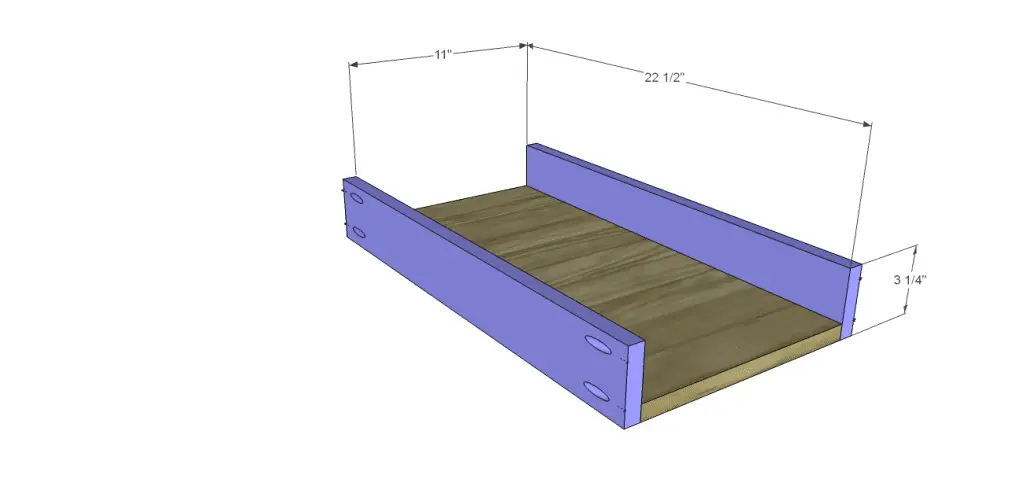
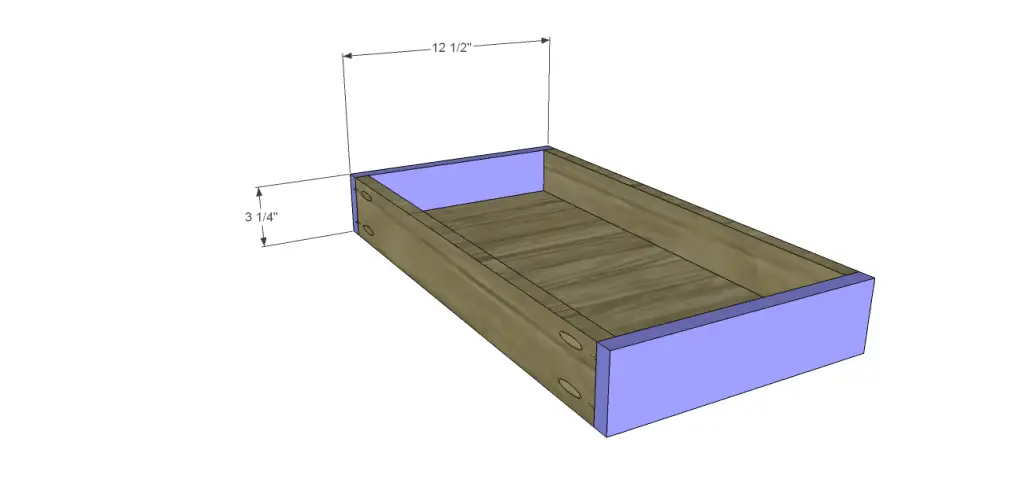
- 4 – 3/4″ plywood at 3-1/4″ x 22-1/2″ – Narrow Drawer Sides
- 4 – 3/4″ plywood at 3-1/4″ x 12-1/2″ – Narrow Drawer Front & Back
- 1 – 3/4″ plywood at 11-1/8″ x 13-1/4″ – Deep Drawer Front
- 2 – 3/4″ plywood at 4-11/16″ x 13-1/4″ – Narrow Drawer Fronts
Notes About the Project:
Edge banding will be applied to the exposed edges of the plywood before assembly.
Step One
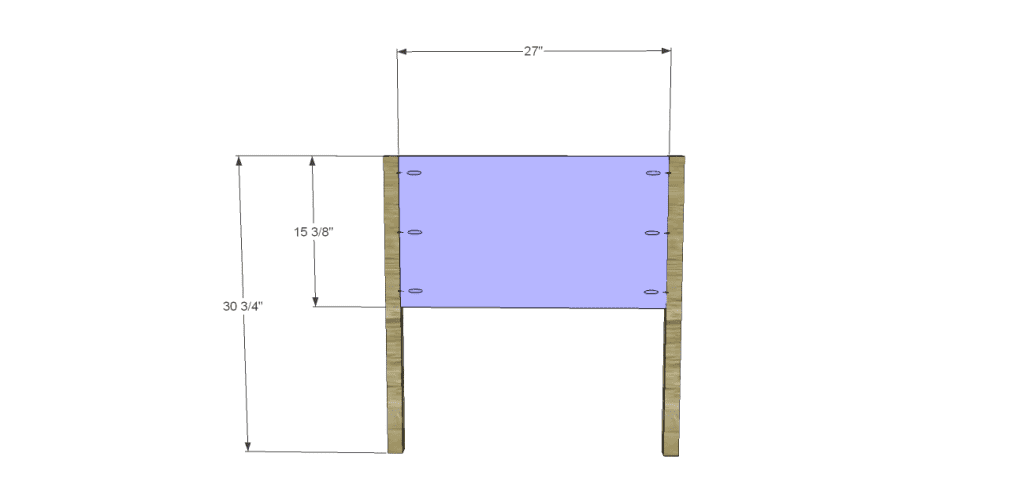
Cut the pieces for the legs and the side panels. With the pocket hole jig set for 3/4″ material, drill pocket holes in each shorter edge of the side panels. Secure to the legs using glue and 1-1/4″ pocket hole screws. The inside face of the panels will be flush with the inside face of the legs.
Step Two
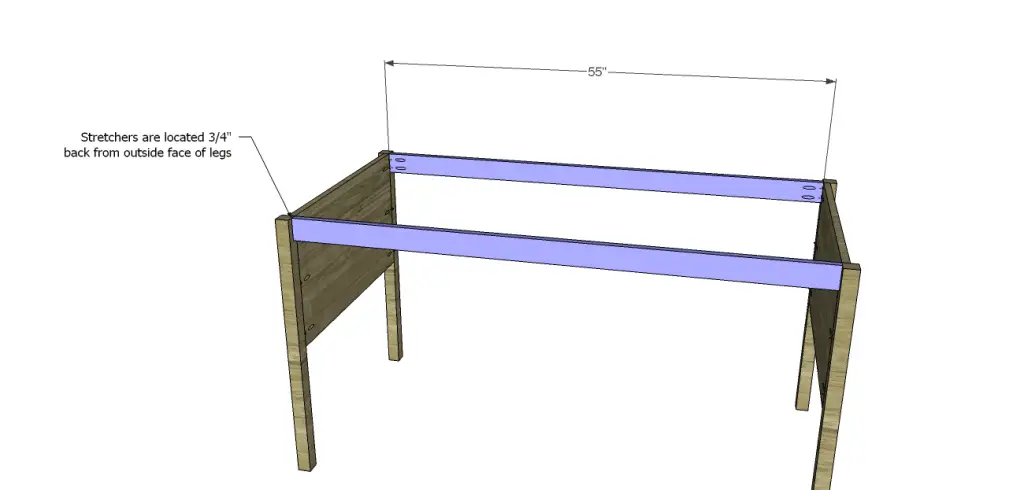
Cut the pieces for the stretchers and drill pocket holes in each edge. Secure to the legs using glue and 1-1/4″ pocket hole screws.
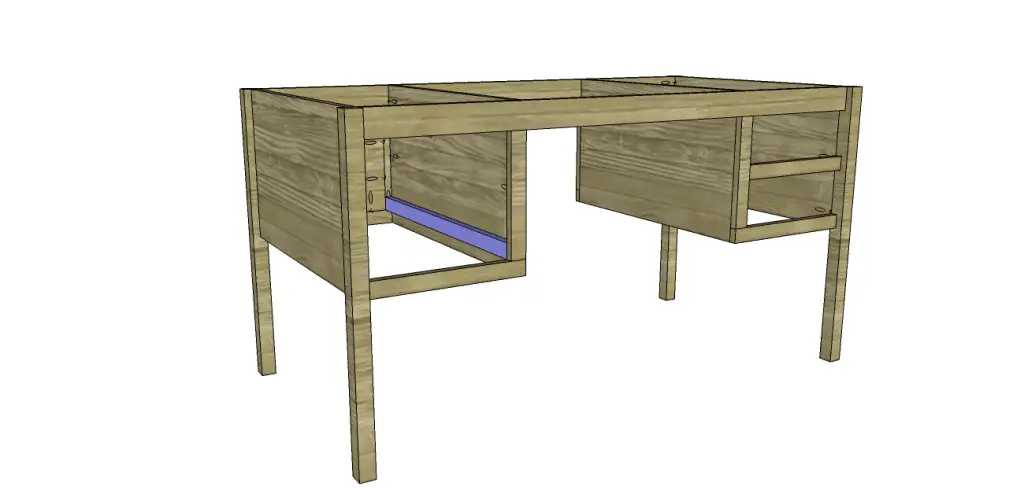
Step Three
Cut the pieces for the back frame and panels. Drill pocket holes in the pieces as shown, noting that there will be a left and a right piece. Assemble the pieces as shown, then secure to the legs as shown using glue and 1-1/4″ pocket hole screws. The back face of the panel assembly will be flush with the inside face of the legs.

Step Four
Cut the pieces for the front frames noting that the left side will differ from the right side. Assemble as shown, then secure tot he legs using glue and 1-1/4″ pocket hole screws.

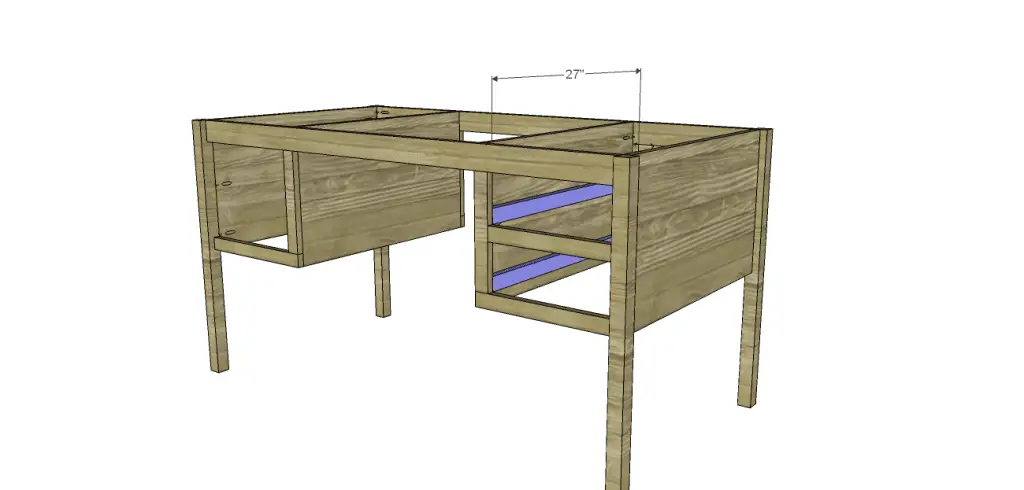
Step Five
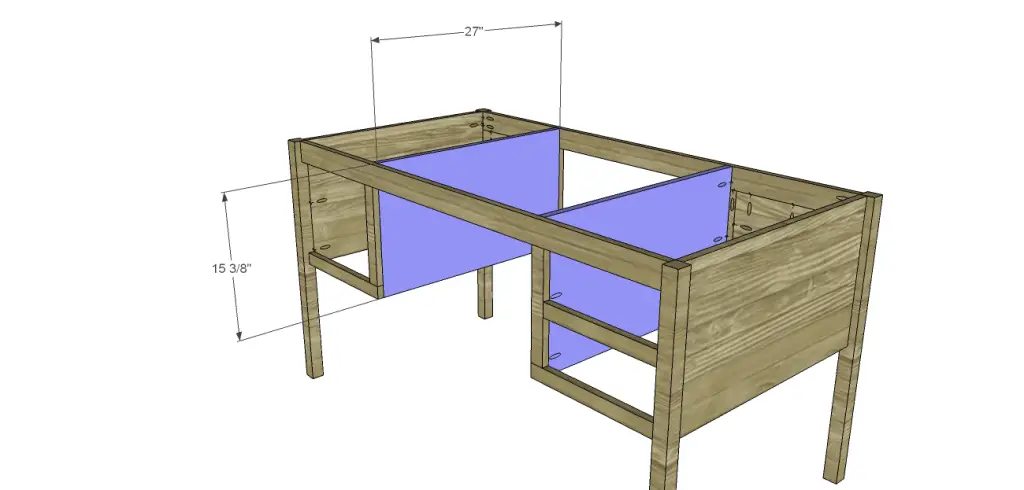
Cut the pieces for the dividers and drill pocket holes in each shorter edge. Secure to the front and back frames using glue and 1-1/4″ pocket hole screws. The outside face will be flush with the outside edge of the front and back frames.
Step Six
Cut the pieces for the drawer slide spacers. Secure to the dividers using glue and countersunk 1-1/4″ screws. The bottom edge of the spacers will be flush with the top edge of the front frame pieces.
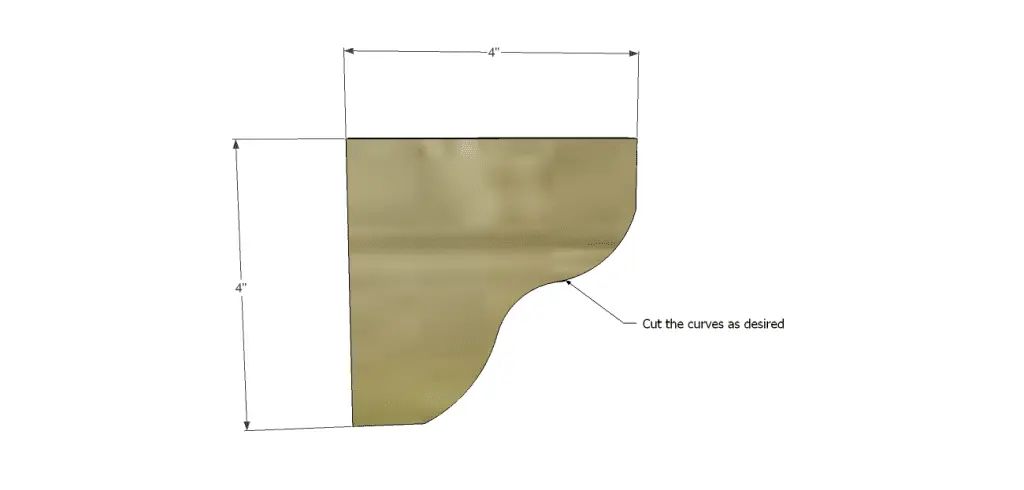
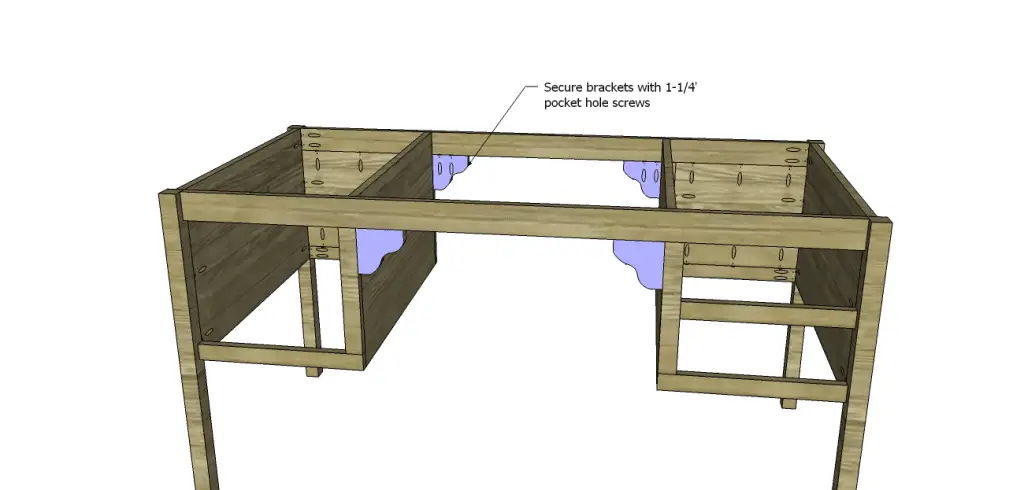
Step Seven
Cut the pieces for the brackets. Maintain the overall dimensions and cut the curves using a jigsaw. Drill pocket holes in the back of each bracket and secure to the stretchers and frames using glue and 1-1/4″ pocket hole screws.
Step Eight
Cut the piece for the top. Position the top so it overhangs the front and sides by 1/2″. Secure using glue and 1-1/4″ brad nails.
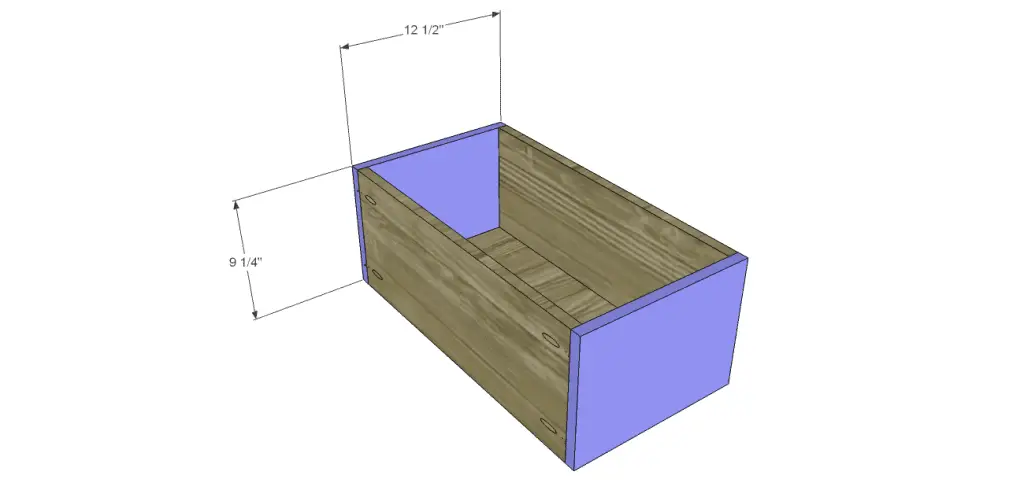
Step Nine
Cut the pieces for the drawer boxes. Drill pocket holes in all four edges of the bottom as well as each end of the sides. Assemble the drawer box as shown using glue and 1-1/4” pocket hole screws. Install the drawer slides according to the manufacturer’s installation instructions, locating them ¾” back from the front edge of the sides. . See my post on how to install drawer slides for an easy tutorial. Make any necessary adjustments.
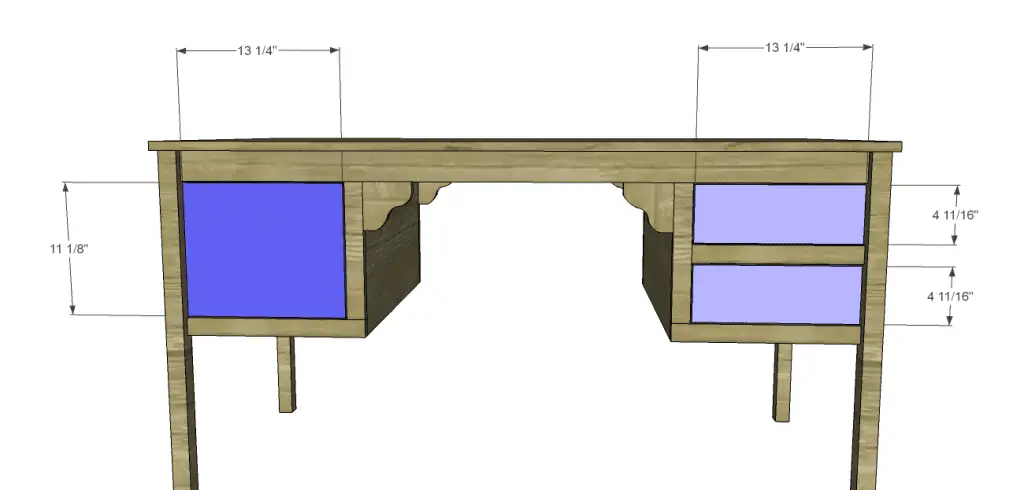
Step Ten
Cut the pieces for the drawer fronts. Mark the position for the drawer pulls and drill the holes. Shim the drawer front in the opening – there will be a 1/8” gap around all sides – then drive screws through the holes for the drawer pulls into the drawer box. Open the drawer, and secure the drawer front using countersunk 1-1/4” screws from the inside. Remove the screws from the holes for the drawer pull then finish drilling the holes. Install the drawer pull. For an easy tutorial, see my post on installing drawer fronts.
Finish as desired.
Don’t you think these vintage french desk plans will create a fabulous piece? These plans are excellent for beginners, and if you get stuck contact me at cher {at} designsbystudioc {dot} com! I’d be happy to help walk you through it!
Originally posted 2013-12-11 08:00:18.
I have seen French desks in our local ‘Bombay’ stores and have always swoon over it.. I love the style and elegance. Never occurred to me that you could make one for yourself if you want to 🙂 Great post Cher 🙂
Thank you so much, Vinma! I love the “Bombay” stores, too, and I love drooling over their furniture!
Why is it called the French desk Cher? As always, love the details of your plans, I so wish I had more time. Maybe when the kids are a little older, I can include them. My middle son is great with tools…..
It is called a “French Desk” because of the style… Maybe more so of the inspiration piece than the one I actually drew but with a shabby sort of finish, it will look very oo-la-la! Thanks, Rae!
Love these elegant pieces Cher.
Thank you, Elle! That is very kind of you to say!