
Shelby Dining Table Plans
Unlock Your DIY Skills: Build Your Own Dining Table with Step-by-Step Plans
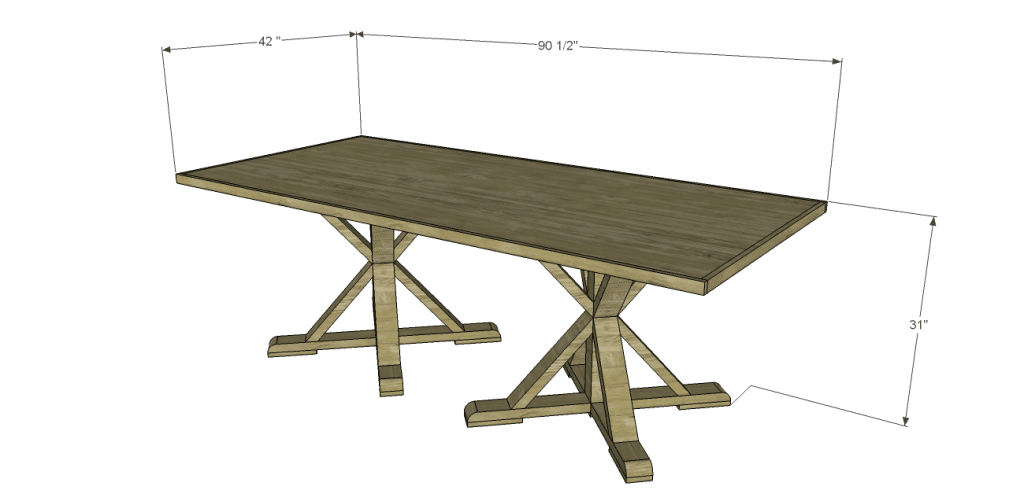
Wow, this table is absolutely stunning! With its charming rustic leg bases and spacious top, you can create a gorgeous table perfect for hosting a big family gathering or an unforgettable dinner party by following the Shelby Dining Table plans, suitable for all skill levels!

Materials:
- 2-1/2″ pocket hole screws (<– affiliate link!)
- 1-1/4″ brad nails
- 2″ screws
- Wood glue
- Sandpaper (100, 150, 220 grits)
- Finishing supplies (primer & paint, or stain, sealer)
Lumber:
- 3 – 1×2 at 8′
- 1 – 1×4 at 8′
- 7 – 2×4 at 8′
- 1 – 4×4 at 6′
- 1 sheet of 3/4″ plywood
Cut List:
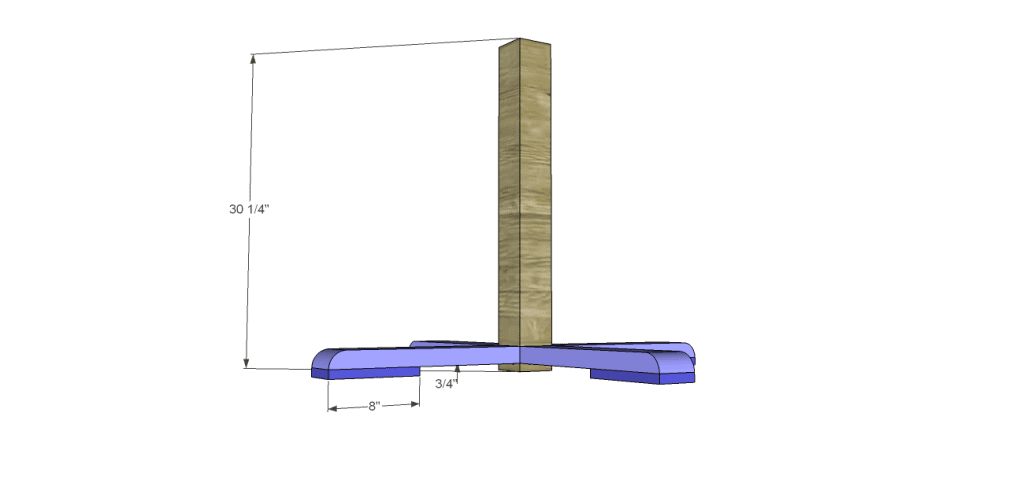
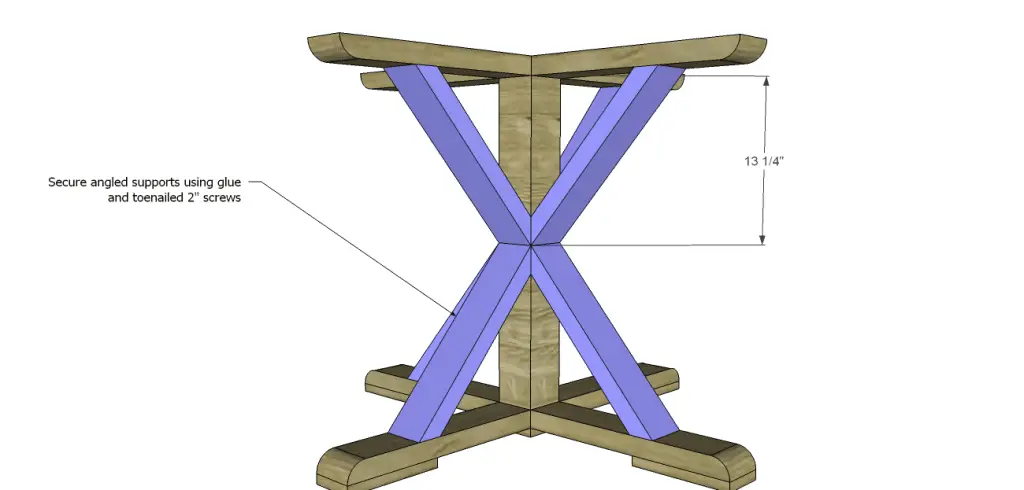
- 2 – 4×4 at 30-1/4″ – Base Post
- 16 – 2×4 at 18″ – Base Legs
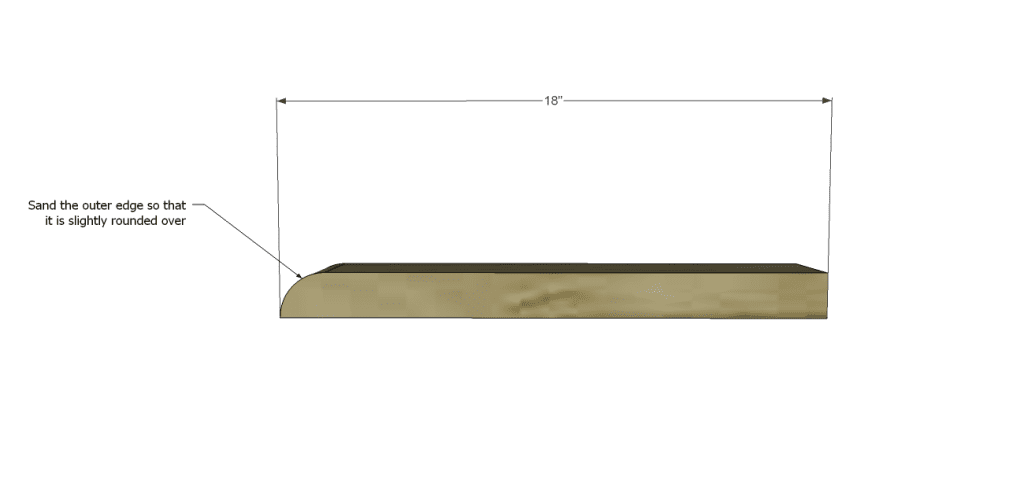
- 8 – 1×4 at 8″ – Base Leg Feet
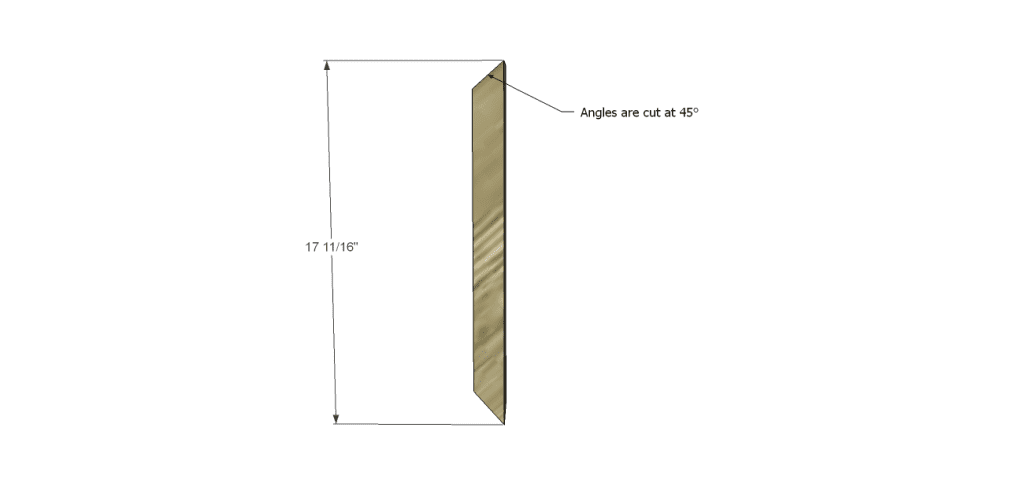
- 16 – 2×4 at 17-11/16″ – Angled Supports
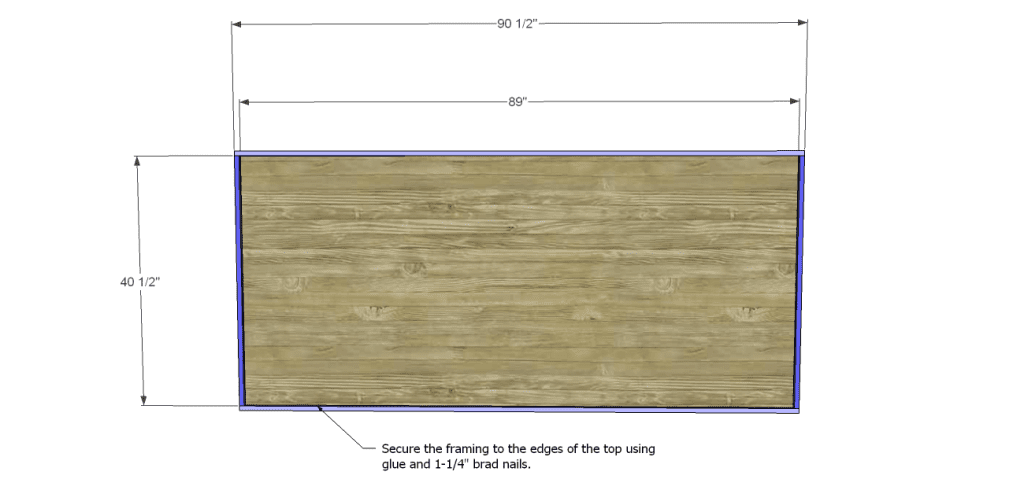
- 1 – 3/4″ plywood at 40-1/2″ x 89″ – Top
- 2 – 1×2 at 40-1/2″ – Top Trim
- 2 – 1×2 at 90-1/2″ – Top Trim
Click on the drawings for a larger view!
Step One
Cut the pieces for the base posts, the legs, and the feet. With the pocket hole jig set for 1-1/2″ material, drill pocket holes in one end of each leg piece. Use a sander and coarse sandpaper to sand a rounded edge on the opposite side at the opposite end of the pocket holes.
Secure the 1×4 feet on the bottom of eight of the legs using glue and 1-1/4″ brad nails. These will be the lower legs. Secure the lower legs to the posts locating them 3/4″ up from the bottom of the posts using glue and 2-1/2″ pocket hole screws.
Step Two
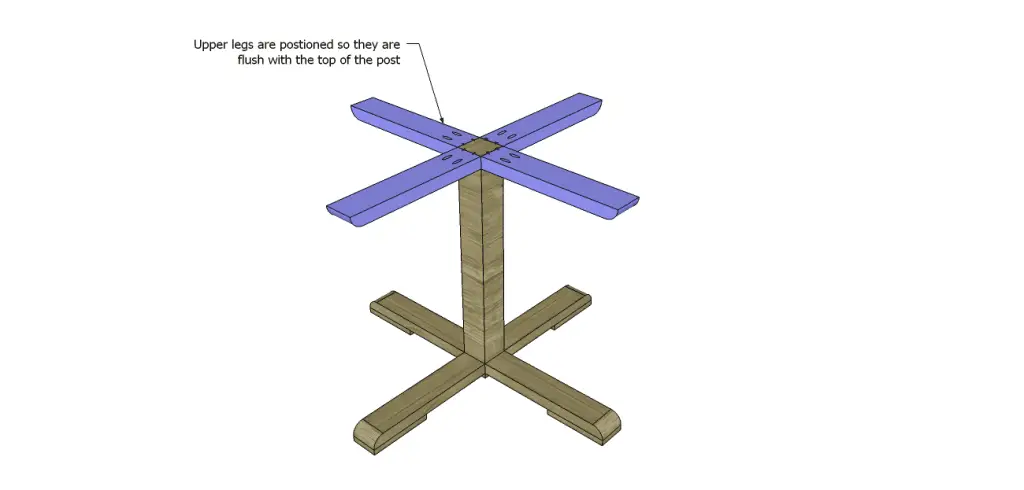
Secure the upper legs to the posts using glue and 2-1/2″ pocket hole screws. The back face of the legs will be flush with the top face of the posts.
Step Three
Cut the pieces for the angled supports and cut a 45 degree angle in each end. Secure to the posts and legs as shown using glue and toenailed 2″ screws.
Step Four
Cut the pieces for the top and the top trim. The trim will be secured to the edges of the top using glue and 1-1/4″ brad nails. One edge of the trim pieces will be flush with the top face of the table top.
Secure the top to the bases using countersunk 2″ screws. Do not use glue! This will make it easier to move the table as needed!

Finish as desired.
Awesome, huh? The table you can build from the Shelby Dining Table plans can be finished however you desire and if constructed using suitable materials, it would be an excellent addition for outdoor use! Contact me at cher {at} designsbystudioc {dot} com!
Originally posted 2014-03-05 08:00:58.
[…] to Build the Shelby Dining Table.Build this dining table using these free step-by-step instructions. Finished project measures 90.5 x 42 […]
[…] this dining table using these free step-by-step instructions. Finished project measures 90.5 x 42 […]
[…] and scale of your furniture and decor. Make sure there is enough space for comfortable seating, dining, and other activities you have in mind. Avoid overcrowding the space, as it can make the area feel […]