
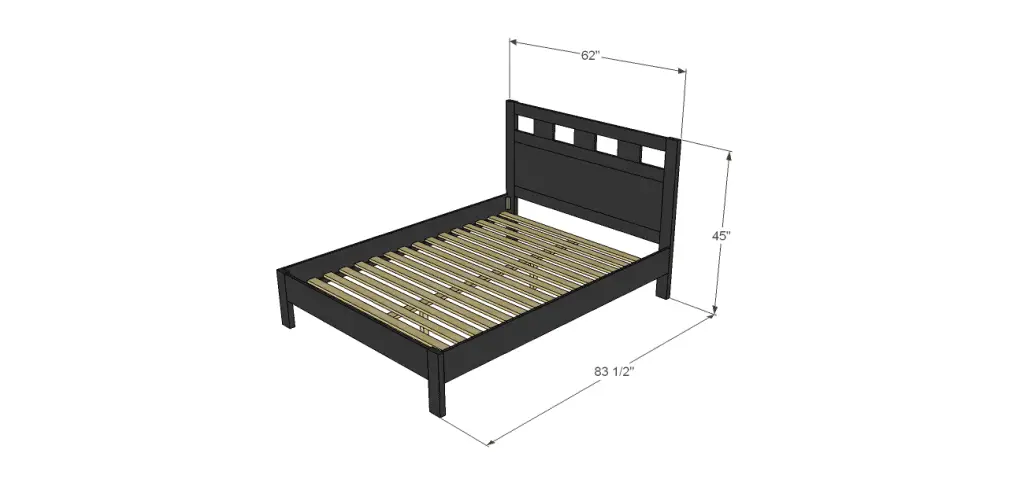
Build a Riva Queen Bed
DIY Plans to Build the Trendy Riva Bed Fit for a Queen!
In my quest to add more bed plans to the site, I stumbled upon the Riva Queen Bed. I like the look of this bed with the simple cutouts in the headboard and think it would be fabulous finished with a dark stain! These DIY bed plans can also be scaled down for a full size or scaled up for a king size by altering the dimensions of the slats, footboard, and vertical headboard pieces.

Materials:
- 1-1/4″ pocket hole screws
- 1-1/4″ screws
- 2-1/2″ screws
- Bed rail hardware
- Wood glue
- Sandpaper (100, 150, 220 grits)
- Finishing supplies (primer & paint, or stain, sealer)
Lumber:
- 2 – 1×2 at 8′
- 16 – 1×3 at 6′
- 1 – 1×3 at 8′
- 3 – 1×4 at 6′
- 3 – 1×8 at 8′
- 2 scraps of 2×2 measuring 8-3/4″ each
- 2 – 2×4 at 6′
- 1 sheet of 3/4″ plywood
Cut List:
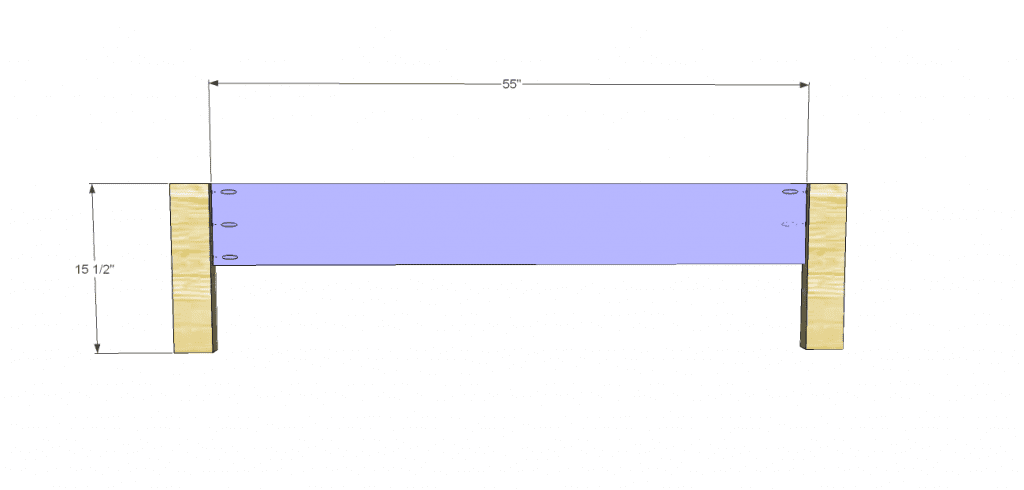
- 2 – 2×4 at 15-1/2″ – Footboard Legs
- 1 – 1×8 at 55″ – Footboard Panel
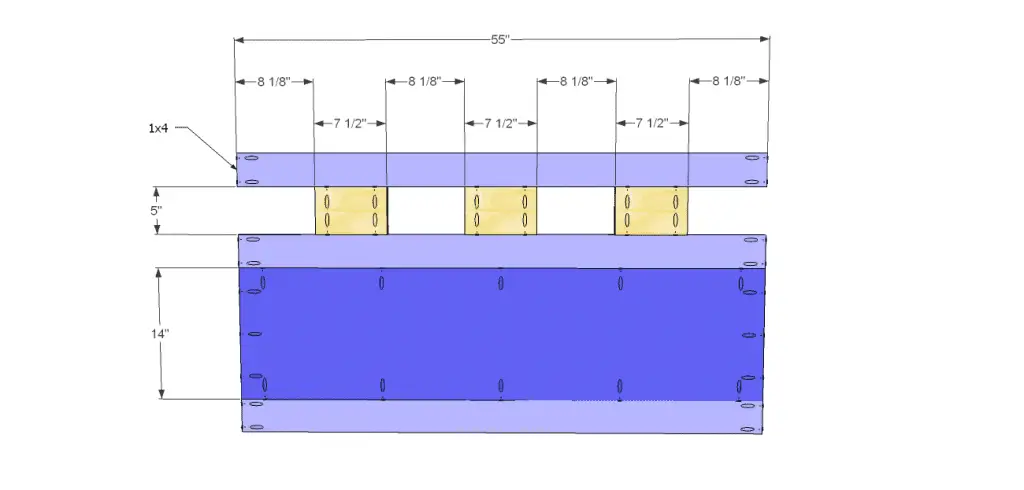
- 3 – 1×4 at 55″ – Headboard
- 1 – 3/4″ plywood at 14″ x 55″ – Headboard Panel
- 3 – 1×8 at 5″ – Headboard
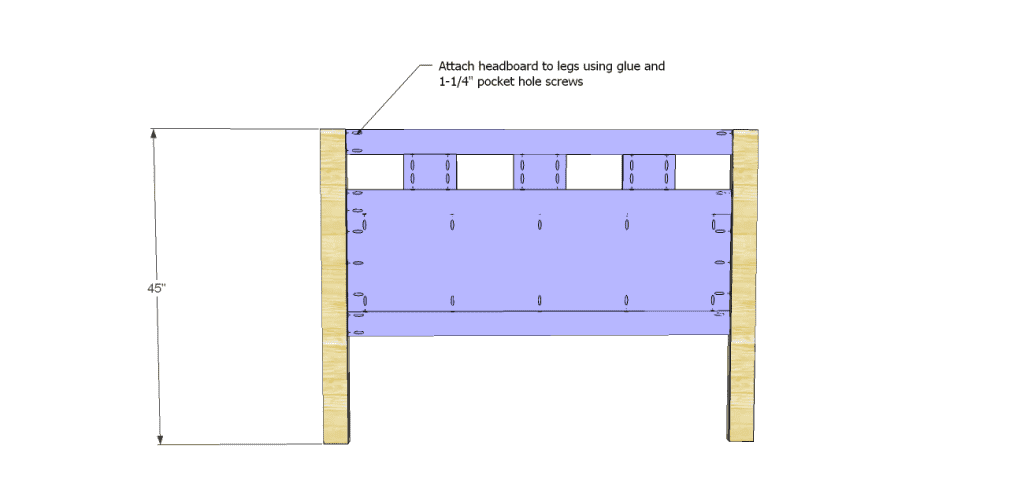
- 2 – 2×4 at 45″ – Headboard Legs
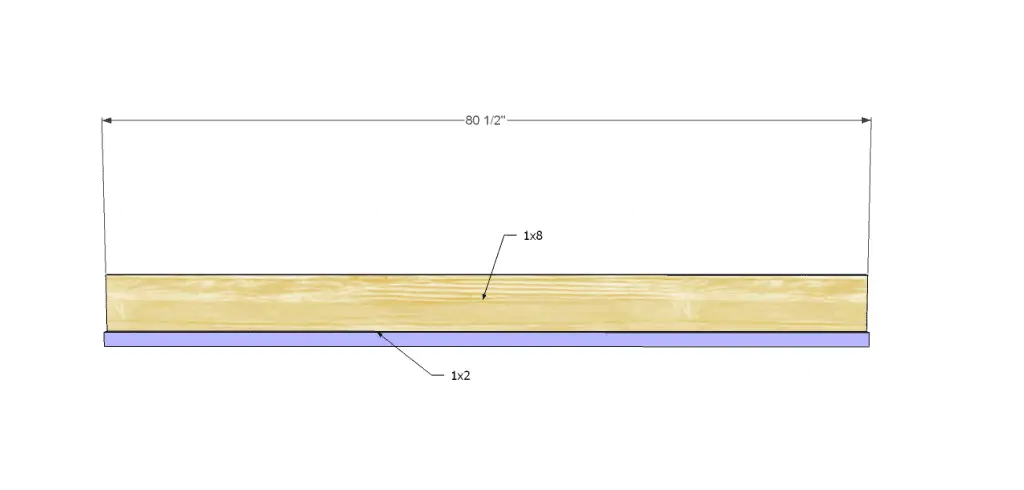
- 2 – 1×8 at 80-1/2″ – Side Rails
- 2 – 1×2 at 80-1/2″ – Slat Supports
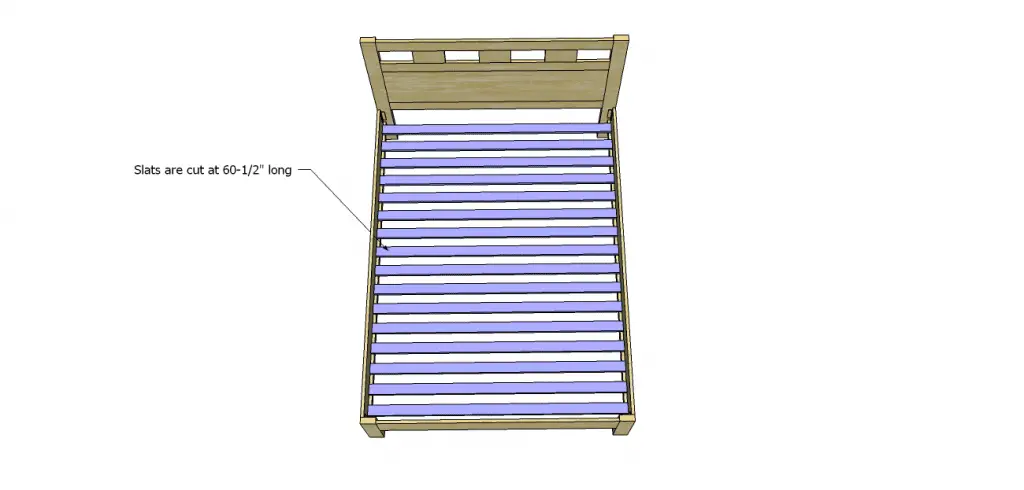
- 16 – 1×3 at 60-1/2″ – Slats
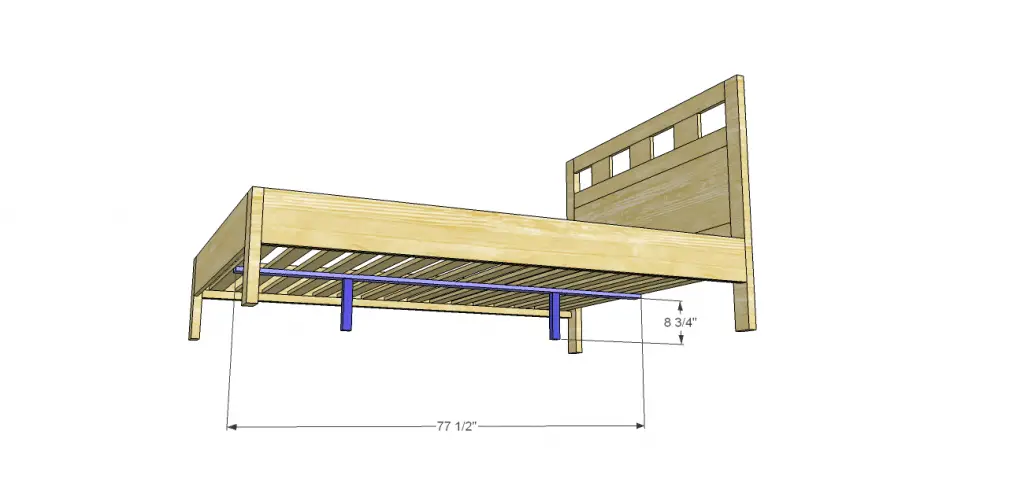
- 1 – 1×3 at 77-1/2″ – Center Slat Support
- 2 – 2×2 at 8-3/4″ – Center Support Legs
Click on the drawings for a larger view!
Step One
Cut the pieces for the footboard. With the pocket hole jig set for 3/4″ material, drill pocket holes in each end of the footboard panel. Attach to the legs using glue and 1-1/4″ pocket hole screws. The outside face of the panel will be flush with the outside face of the legs.
Step Two
Cut the pieces for the headboard. Drill pocket holes in the pieces as shown, then assemble using glue and 1-1/4″ pocket hole screws. Attach the headboard to the legs using glue and 1-1/4″ pocket hole screws. The front face of the headboard will be flush with the front face of the legs.
Step Three
Cut the pieces for the side rails and the side rail supports. Attach the supports to the rails using glue and countersunk 1-1/4″ screws.
Step Four
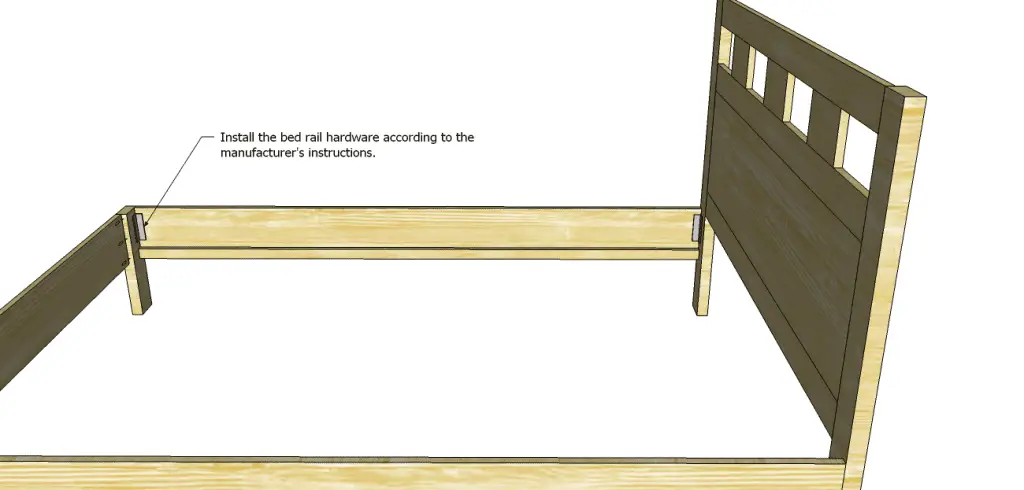
Install the bed hardware according to the manufacturer’s installation instructions. I recommend this hardware because I’ve used it before – it is easy to install and sturdy! Attach the rails to the headboard and footboard.
Step Five
Cut the pieces for the slats. Attach the slats to the slat supports using 1-1/4″ screws spacing them approximately 2-1/2″ apart. Do not use glue – the bed may have to be disassembled someday!
Step Six
Cut the pieces for the center slat support and the legs. Attach the legs to the support, then secure using glue and 2-1/2″ screws through the support into the legs. Attach the center supports to the slats using 1-1/4″ screws through the slats into the support.
Finish as desired!
One of the first projects I ever built was a bed. It was so simple and I still love it! I hope you will use these Riva queen bed plans to construct a bed for yourself – and love it!
Originally posted 2013-10-11 08:00:25.
I like this. I was wondering if you could tell me how much sanding should happen? Do I just sand the areas that have been cut, or the entire thing?
Hi, Joel!
For the best possible finish, I normally sand every inch of each piece with 80 grit, followed by 150 grit, and finishing with 220 grit sandpaper. This makes the lumber super-smooth! Good luck with the project! If you have any more questions, let me know!
What type of wood do you think would work best for this bed?
Hi, Colin! Any wood species would be perfect for this bed. It will depend mostly on your budget! Oak is the most expensive, poplar is about the mid-range, and pine is the cheapest. I hope this helps and if you have any further questions, please let me know!