
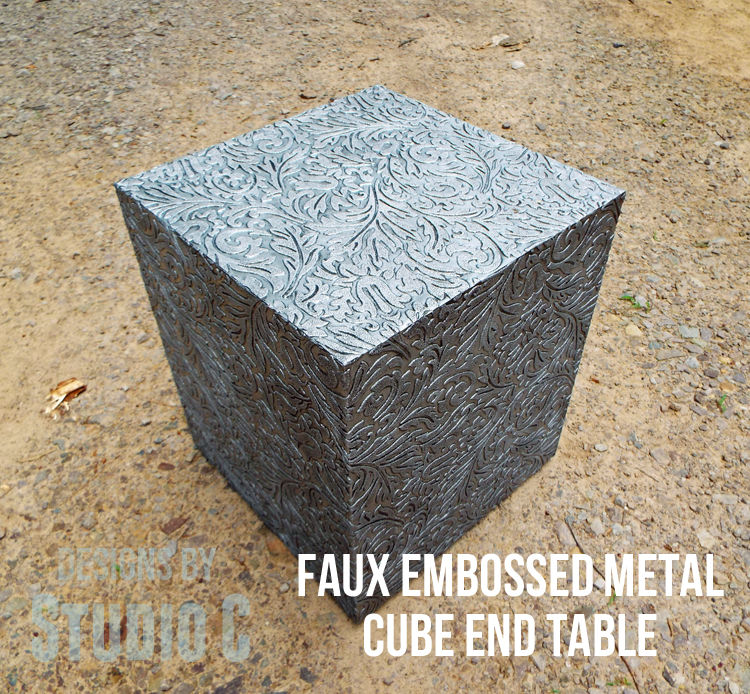
Plans to Make a Faux Metal End Table
An Easy How-to Project
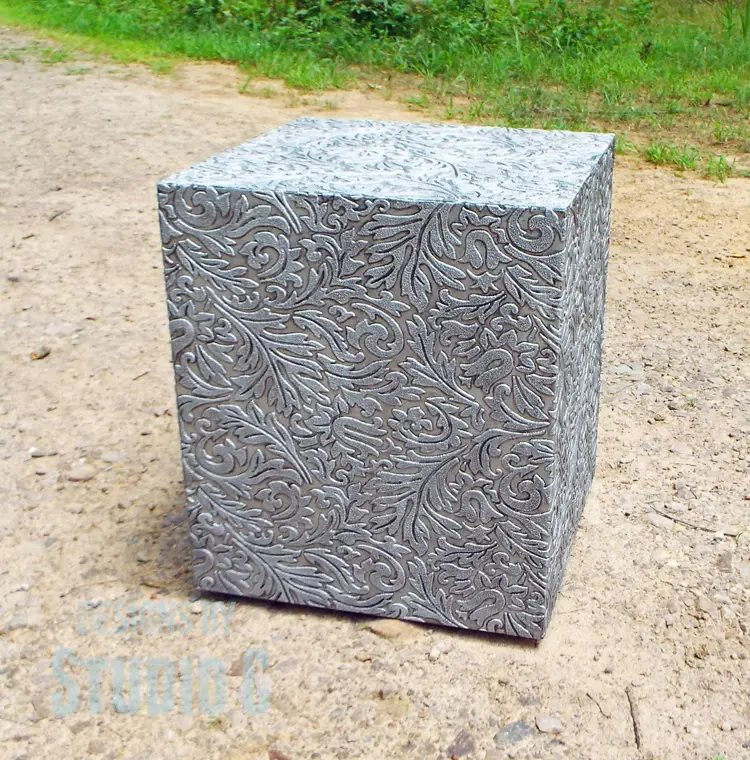
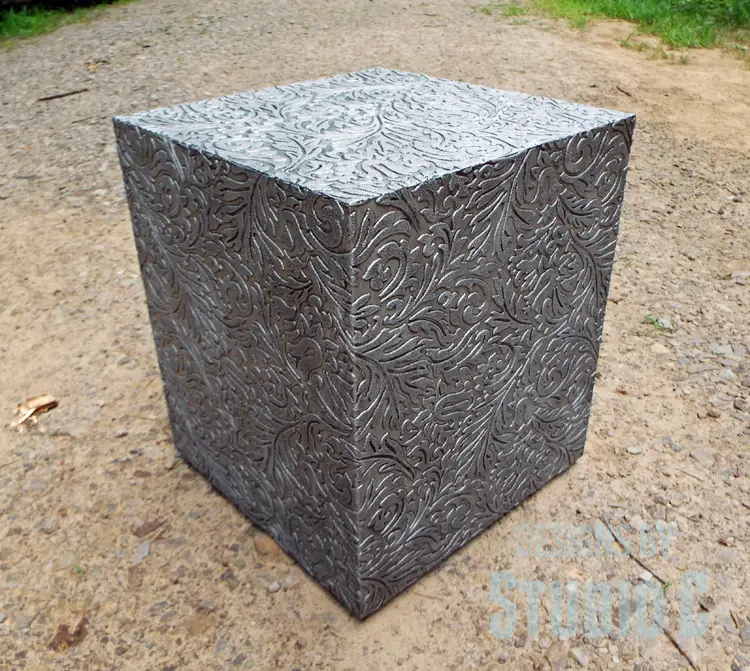
I saw a cube table similar to this at an online retailer… I thought it was really cool! The retail price on the table is $169.99 and I’m sure I’m not the only person to think it was awesome. I figured I could create plans to make a faux metal end table for a fraction of the cost! All it takes are scraps of plywood (which is in abundance at my house!), wall paper, and couple of other items to create a fabulous cube table that can be used as a footstool, end table, nightstand, plant stand, etc!
Materials:
- 1 – 4′ x 4′ sheet of 3/4″ plywood (or scraps – see Cut List!)
- 1-1/4″ brad nails
- Teflon Nail-On Furniture Feet
- Paintable Embossed Wall Paper (<– affiliate link)
- Mod Podge
- Metallic Paint
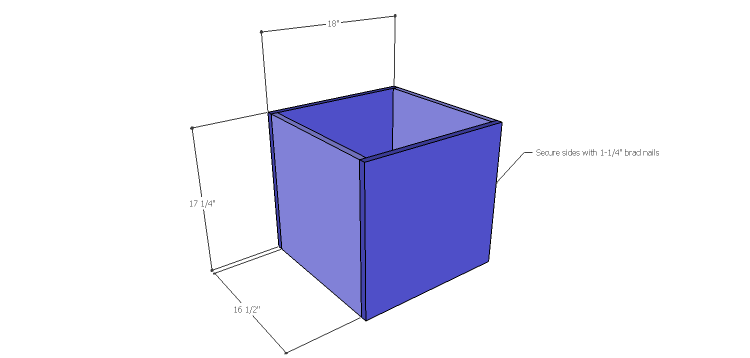
Cut List:
- 2 – 3/4″ plywood at 16-1/2″ x 17-1/4″ – Cube Sides
- 2 – 3/4″ plywood at 17-1/4 x 18″ – Cube Ends
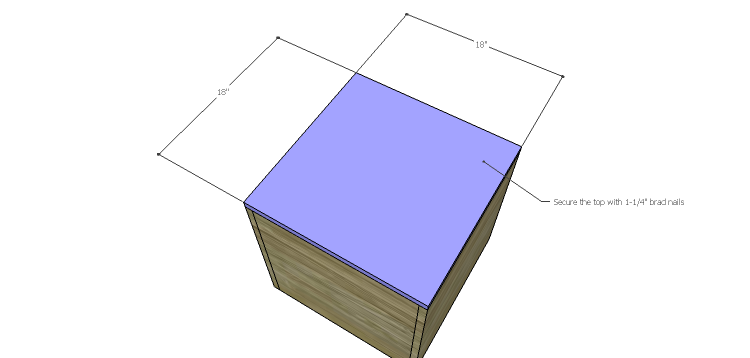
- 1 – 3/4″ plywood at 18″ x 18″ – Cube Top
Step One
Cut the pieces for the cube. Attach the sides to the ends using glue and 1-1/4″ brad nails. If you have a pneumatic brad nailer, it makes things super quick but if not, regular nails will work just fine!
 Step Two
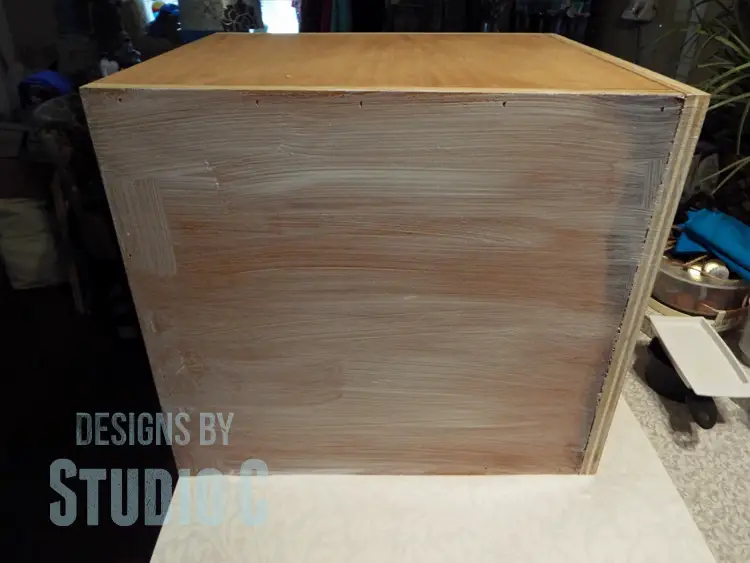
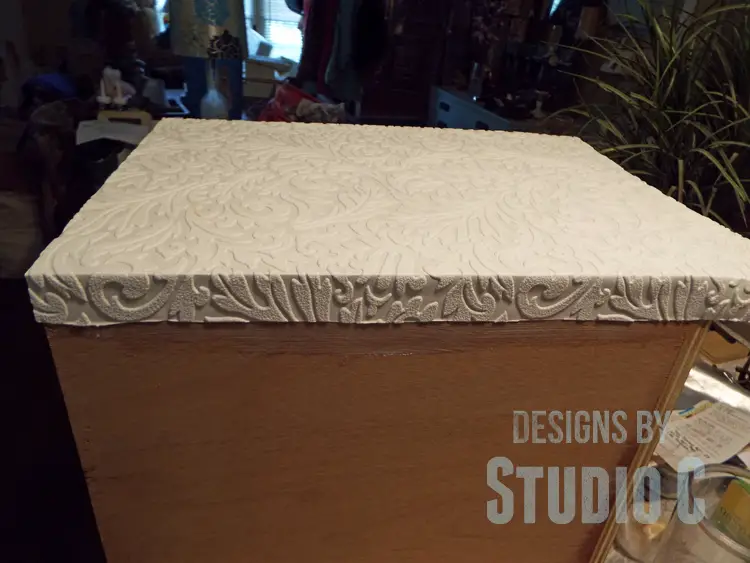
Position the top on the square and nail it in place. Give the cube a quick sanding and wipe away the dust. Sanding will smooth out the edges of the plywood while giving the Mod Podge a semi-smooth surface.
 Step Three
Lay the cube on its side and apply a generous coat of Mod Podge to the side facing you. Position the wall paper on the Mod Podge with one long edge flush with the bottom of the cube – the wall paper will wrap completely around the cube and will be trimmed at a side edge. Smooth out any bubbles and turn the cube to the adjoining side, and repeat the process. Let the cube dry thoroughly before trimming the paper.
Step Four
When trimming the paper from the sides, leave enough at the top so that about 1/2″ will fold over the top of the cube on all sides. Cut an 18″ x 18″ piece of the wall paper for the top. Apply the Mod Podge to the top and smooth the paper from the sides, then position the top piece. Flip the cube upside down so that it is resting on the top and let it dry. Make sure there is a piece of cardboard or a garbage bag underneath it so that Mod Podge doesn’t get all over the work surface! While it is upside down, apply the nail-on furniture feet to the bottom corners.
Step Five
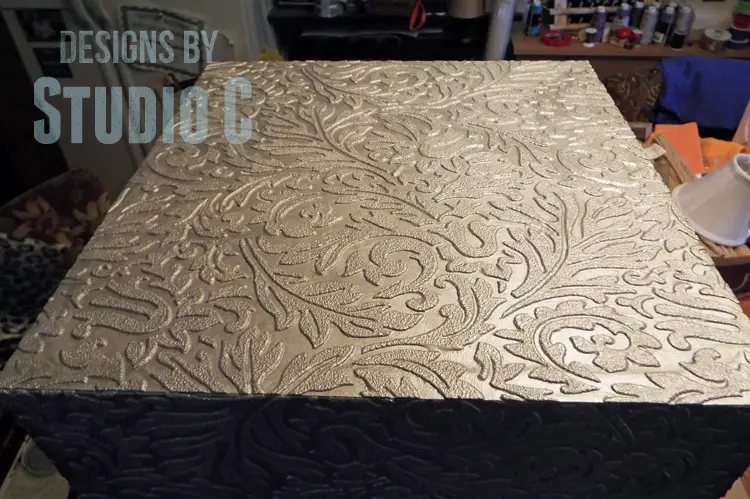
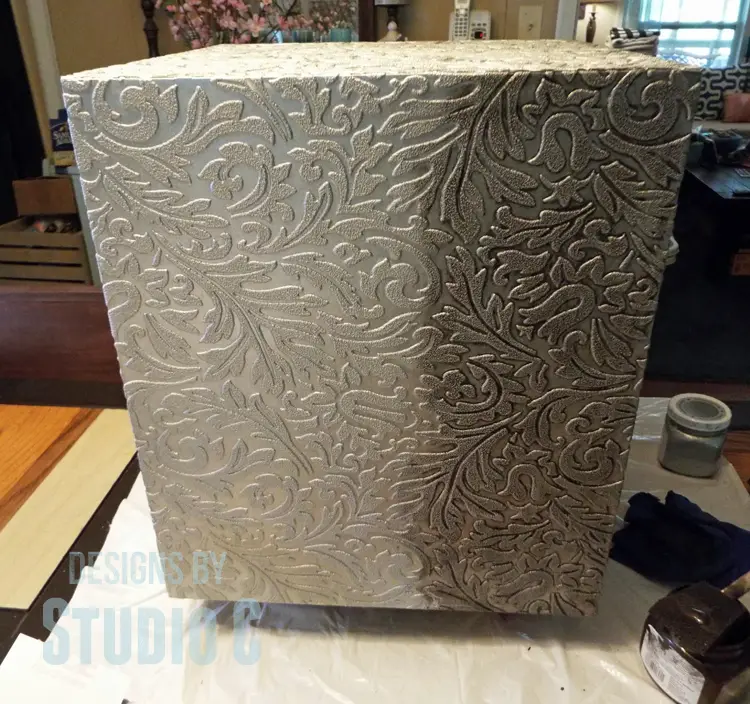
Apply a coat of the metallic paint. Make sure it gets into the crevices of the wall paper! I used Martha Stewart Living Metallic Paint in Polished Silver from Home Depot which has now been discontinued – boo!
Step Six
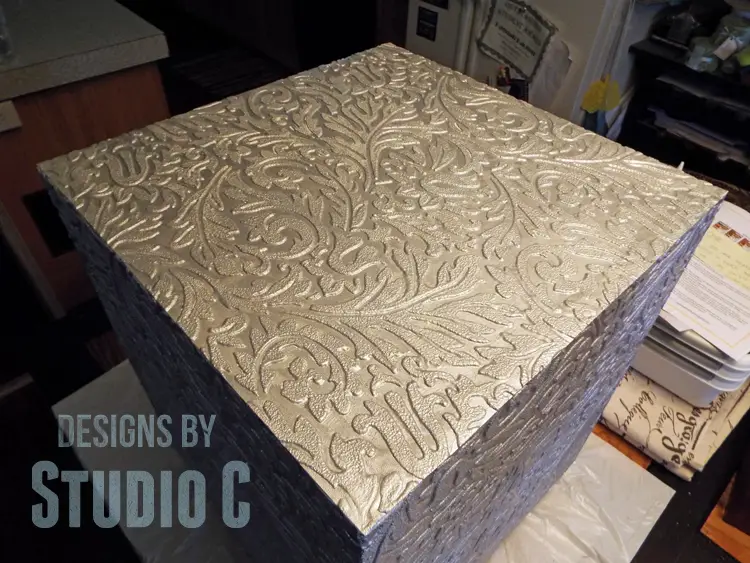
The cube can be left as is or you can apply a coat of glaze… I used Martha Stewart Living Metallic Glaze in Black Coffee which has also been discontinued. That is usually how my luck runs!
A coat of polyurethane can be applied to the cube after the glaze has dried. This will give extra protection especially to the top if it is being used as an end table or nightstand! Have any questions about the plans to make a faux metal end table? Let me know at cher {at} designsbystudioc {dot} com!
This post contains an affiliate link. What that means is that if the link is clicked and a purchase is made, I will receive a commission.
Originally posted 2014-06-17 08:00:41.
Love it! What a great idea.
Thank you, Linda!
This is really cool Cher.
Thank you, Elle!
[…] Faux Metal End Table […]