
How to Build a Headboard Using Old Cabinet Doors
An Easy to Build Headboard Using Unexpected Pieces
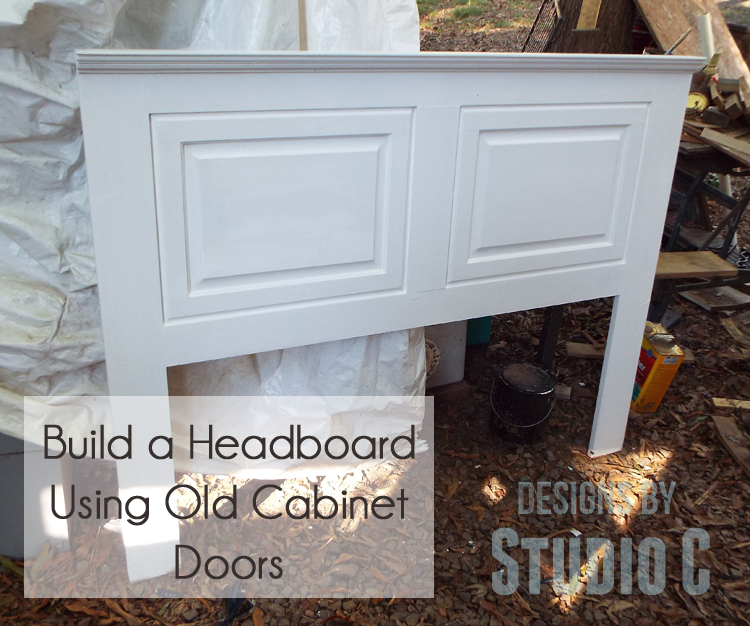
I scored a bunch of old cabinet doors at my local Habitat for Humanity ReStore for a dollar each. They are in really great condition and since I am in the process of updating my bedroom, I thought I’d use them for a nifty project… Let me show you how to build a headboard using old cabinet doors!
As a side note, this headboard could also be used as the back of a bench!
My headboard looks quite small for my bed – the bed is king-size and is on a wall with two windows so the headboard had to be made to fit between the windows. The headboard can be made for any size bed so there are no overall dimensions given. If I change my mind on the headboard down the road, it will actually be the perfect size for a full-size bed! The headboard is also made to be light and decorative, not thick and chunky. It does not project past the window sills in my room and it is attached to the wall. The bed is then butted up against the wall.
Materials:
- 2 or 3 – Old cabinet doors measuring the same size (a different style on each would be awesome as long as the overall size is the same!)
- 1×4 & 1×6 lumber (the number of boards will depend on the size of the headboard and the size of the cabinet doors)
- 1-1/4″ pocket hole screws
- 12 – 3/4″ x 3″ mending plates with screws (<– affiliate link!)
- Router with a decorative bit
- Wood glue
- Sandpaper
- Stain and sealer, or paint
Here are the standard widths of mattresses for quick reference:
- Twin – 39″
- Full – 54″
- Queen – 60″
- King – 76″
The cabinet doors I used measure 16-1/2″ x 21-1/2″. The overall height of my headboard is 45″ and the width is 56″ to fit between the two windows. From the bottom of the headboard legs to the bottom of the headboard panel is 20″. The upper framing piece for the headboard is wider than the lower framing piece by 3/4″ to allow for the trim I wanted to add and to keep the framing pieces balanced. I know that the headboard is narrower than the bed – if I made the headboard to fit the width of the bed, it would block the windows which is not a good thing in the event of an emergency!
Determine the overall height and width of the headboard. Measure the height of the bed from the floor to just below the top of the mattress. Measure the cabinet doors and subtract the height (because the doors will be positioned lengthwise) of both doors from the overall width of the headboard.

Measure the height of the doors. Subtract the width (the shorter measurement – remember, the doors will be laying on their sides!) of the doors plus 20-3/4″ from the overall height of the headboard. The remaining amount will be filled in by boards that will frame the doors. For example, I wanted my headboard to measure 45″ tall and my cabinet doors measured 16-1/2″ at the shorter edges. I subtracted 16-1/2″ plus 20-3/4″ from the height of the headboard which equaled 7-3/4″. I cut boards equal to 7-3/4″ wide (one at 3-1/2″ and one at 4-1/4″) for the frame.
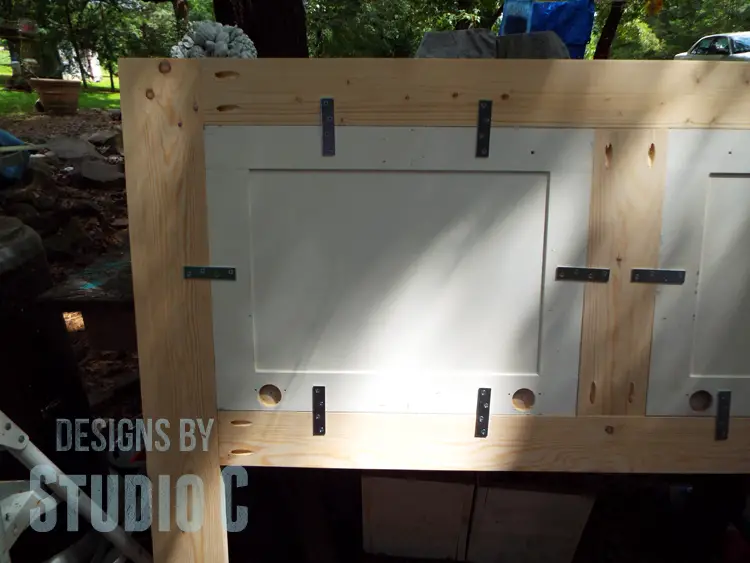
I used 1×6 boards for the legs and sides of the frame. I cut these pieces at 44-1/4″. The legs can also be cut from narrower lumber, if desired. The center piece is a 1×6 ripped to 4″ wide. I assembled the frame using glue and 1-1/4″ pocket hole screws.

The edges of the doors I used were relatively thin so I could not drill pocket holes in the edges of the doors to secure them in the frame. I used 3/4″ x 3″ metal mending brackets to secure the doors in place on the reverse side. the back faces of the doors will be flush with the back face of the frame.
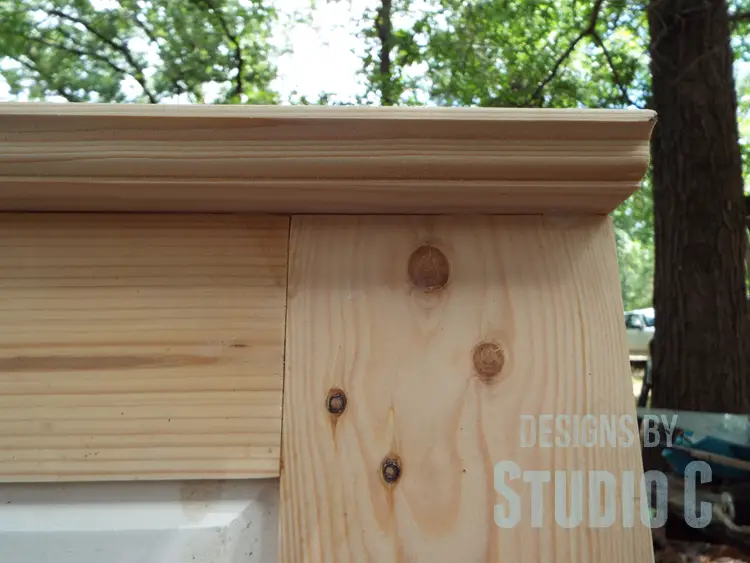
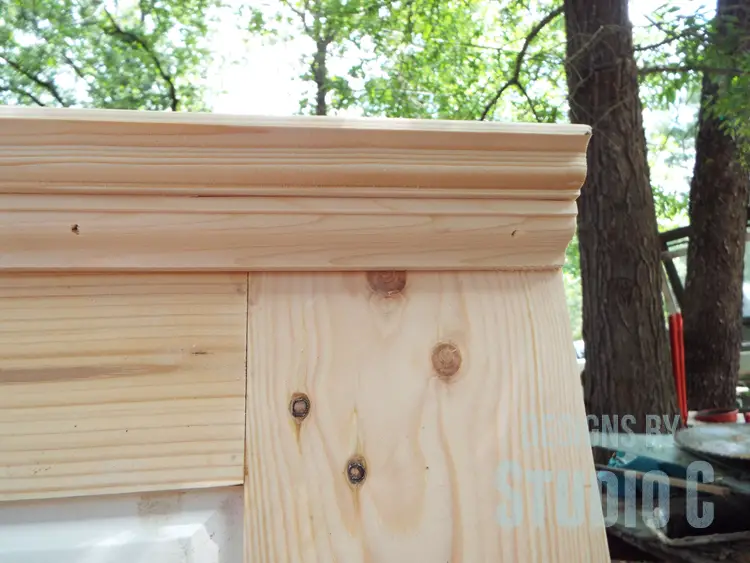
I made the trim for the top of the headboard by using a router with a decorative bit. I routed both edges of a 1×6 board that was cut to 56″ long. I used my table saw to cut one piece of the trim at 2-1/4″ wide and the other cut at 3/4″ wide. The wider trim piece was secured to the top of the frame with glue and 1-1/4″ brad nails. (The routed edge faces down). The narrower trim piece is secured under the top trim to the upper part of the headboard frame.
Since I decided to paint the headboard, I used paintable caulk to fill any gaps between the doors and the frame.
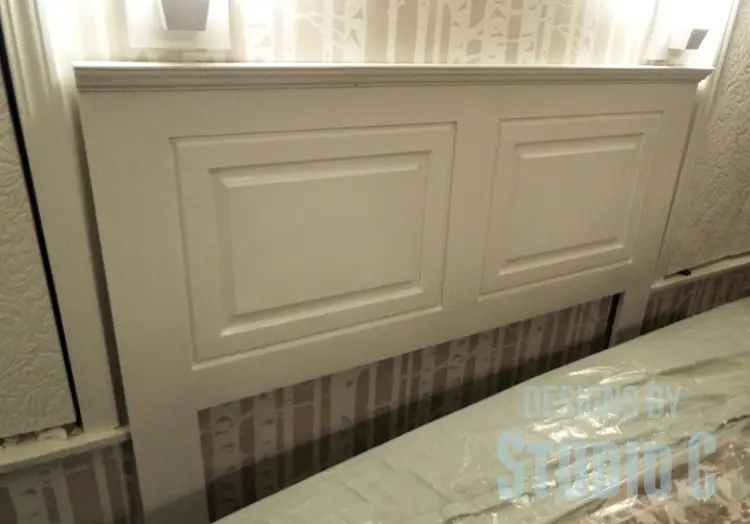
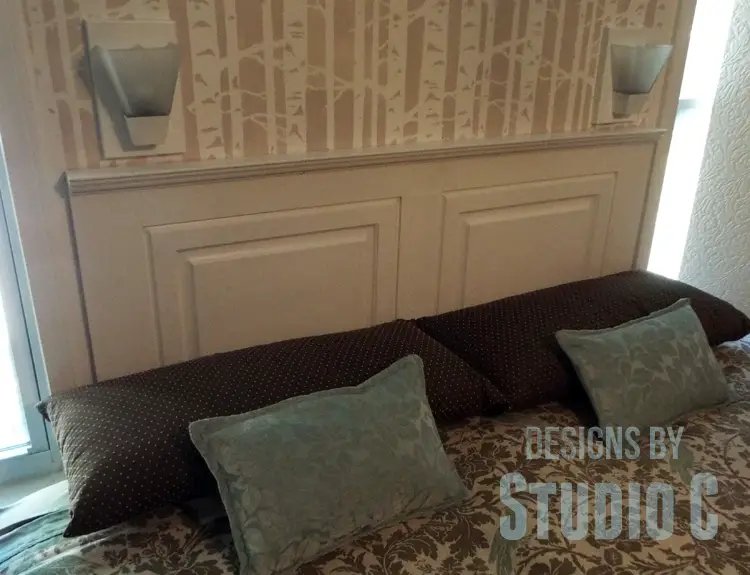
The headboard is secured to the wall studs with screws. (Sorry – it is so hard to photograph it indoors because of the windows!)
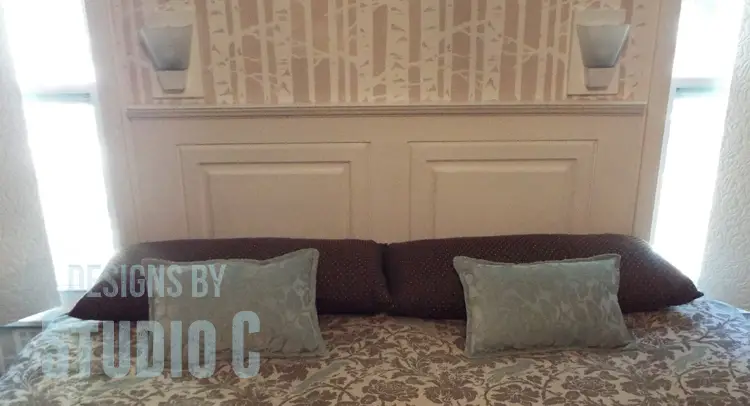
I love it! It fits the space perfectly and really looks nice between the windows. The headboard was very easy to construct and I had it assembled in a day. I think it would look fabulous with three doors in a row or maybe even four narrow doors so that it looks as if it has four panels! If there are any questions about how to build a headboard using old cabinet doors, leave a comment below or contact me at cher {at} designsbystudioc {dot} com! If you decide to build your own, I would love to see photos!
Sharing with: My Repurposed Life
Originally posted 2014-10-30 08:00:15.
I’ve always wanted to make one of these! Great job Cher! Catching you!
gail
Thank you, Gail! I’m really surprised you haven’t made one with all of the wonderful pieces you create! Thank you for stopping by!
Such a great idea! I may have to steal it! Pinned!
Thank you so much, Mindi! I really love how it came out and am hoping to make a couple more! Thank you for stopping by!
Great job. Looks wonderful.
[…] http://designsbystudioc.com/how-to-build-headboard-old-cabinet-doors/ […]
[…] by Studio C made a fabulous headboard out of cabinet doors. I’ve always wanted to do this. Great job […]